Maximalist Fabric + Yarn Wall Hanging
January 17, 2024
* Products linked below may be affiliate links. I may receive a small commission if you place an order through them (at no cost to you). For more, see our Affiliate Disclosure.
Out With the Old, In With the New
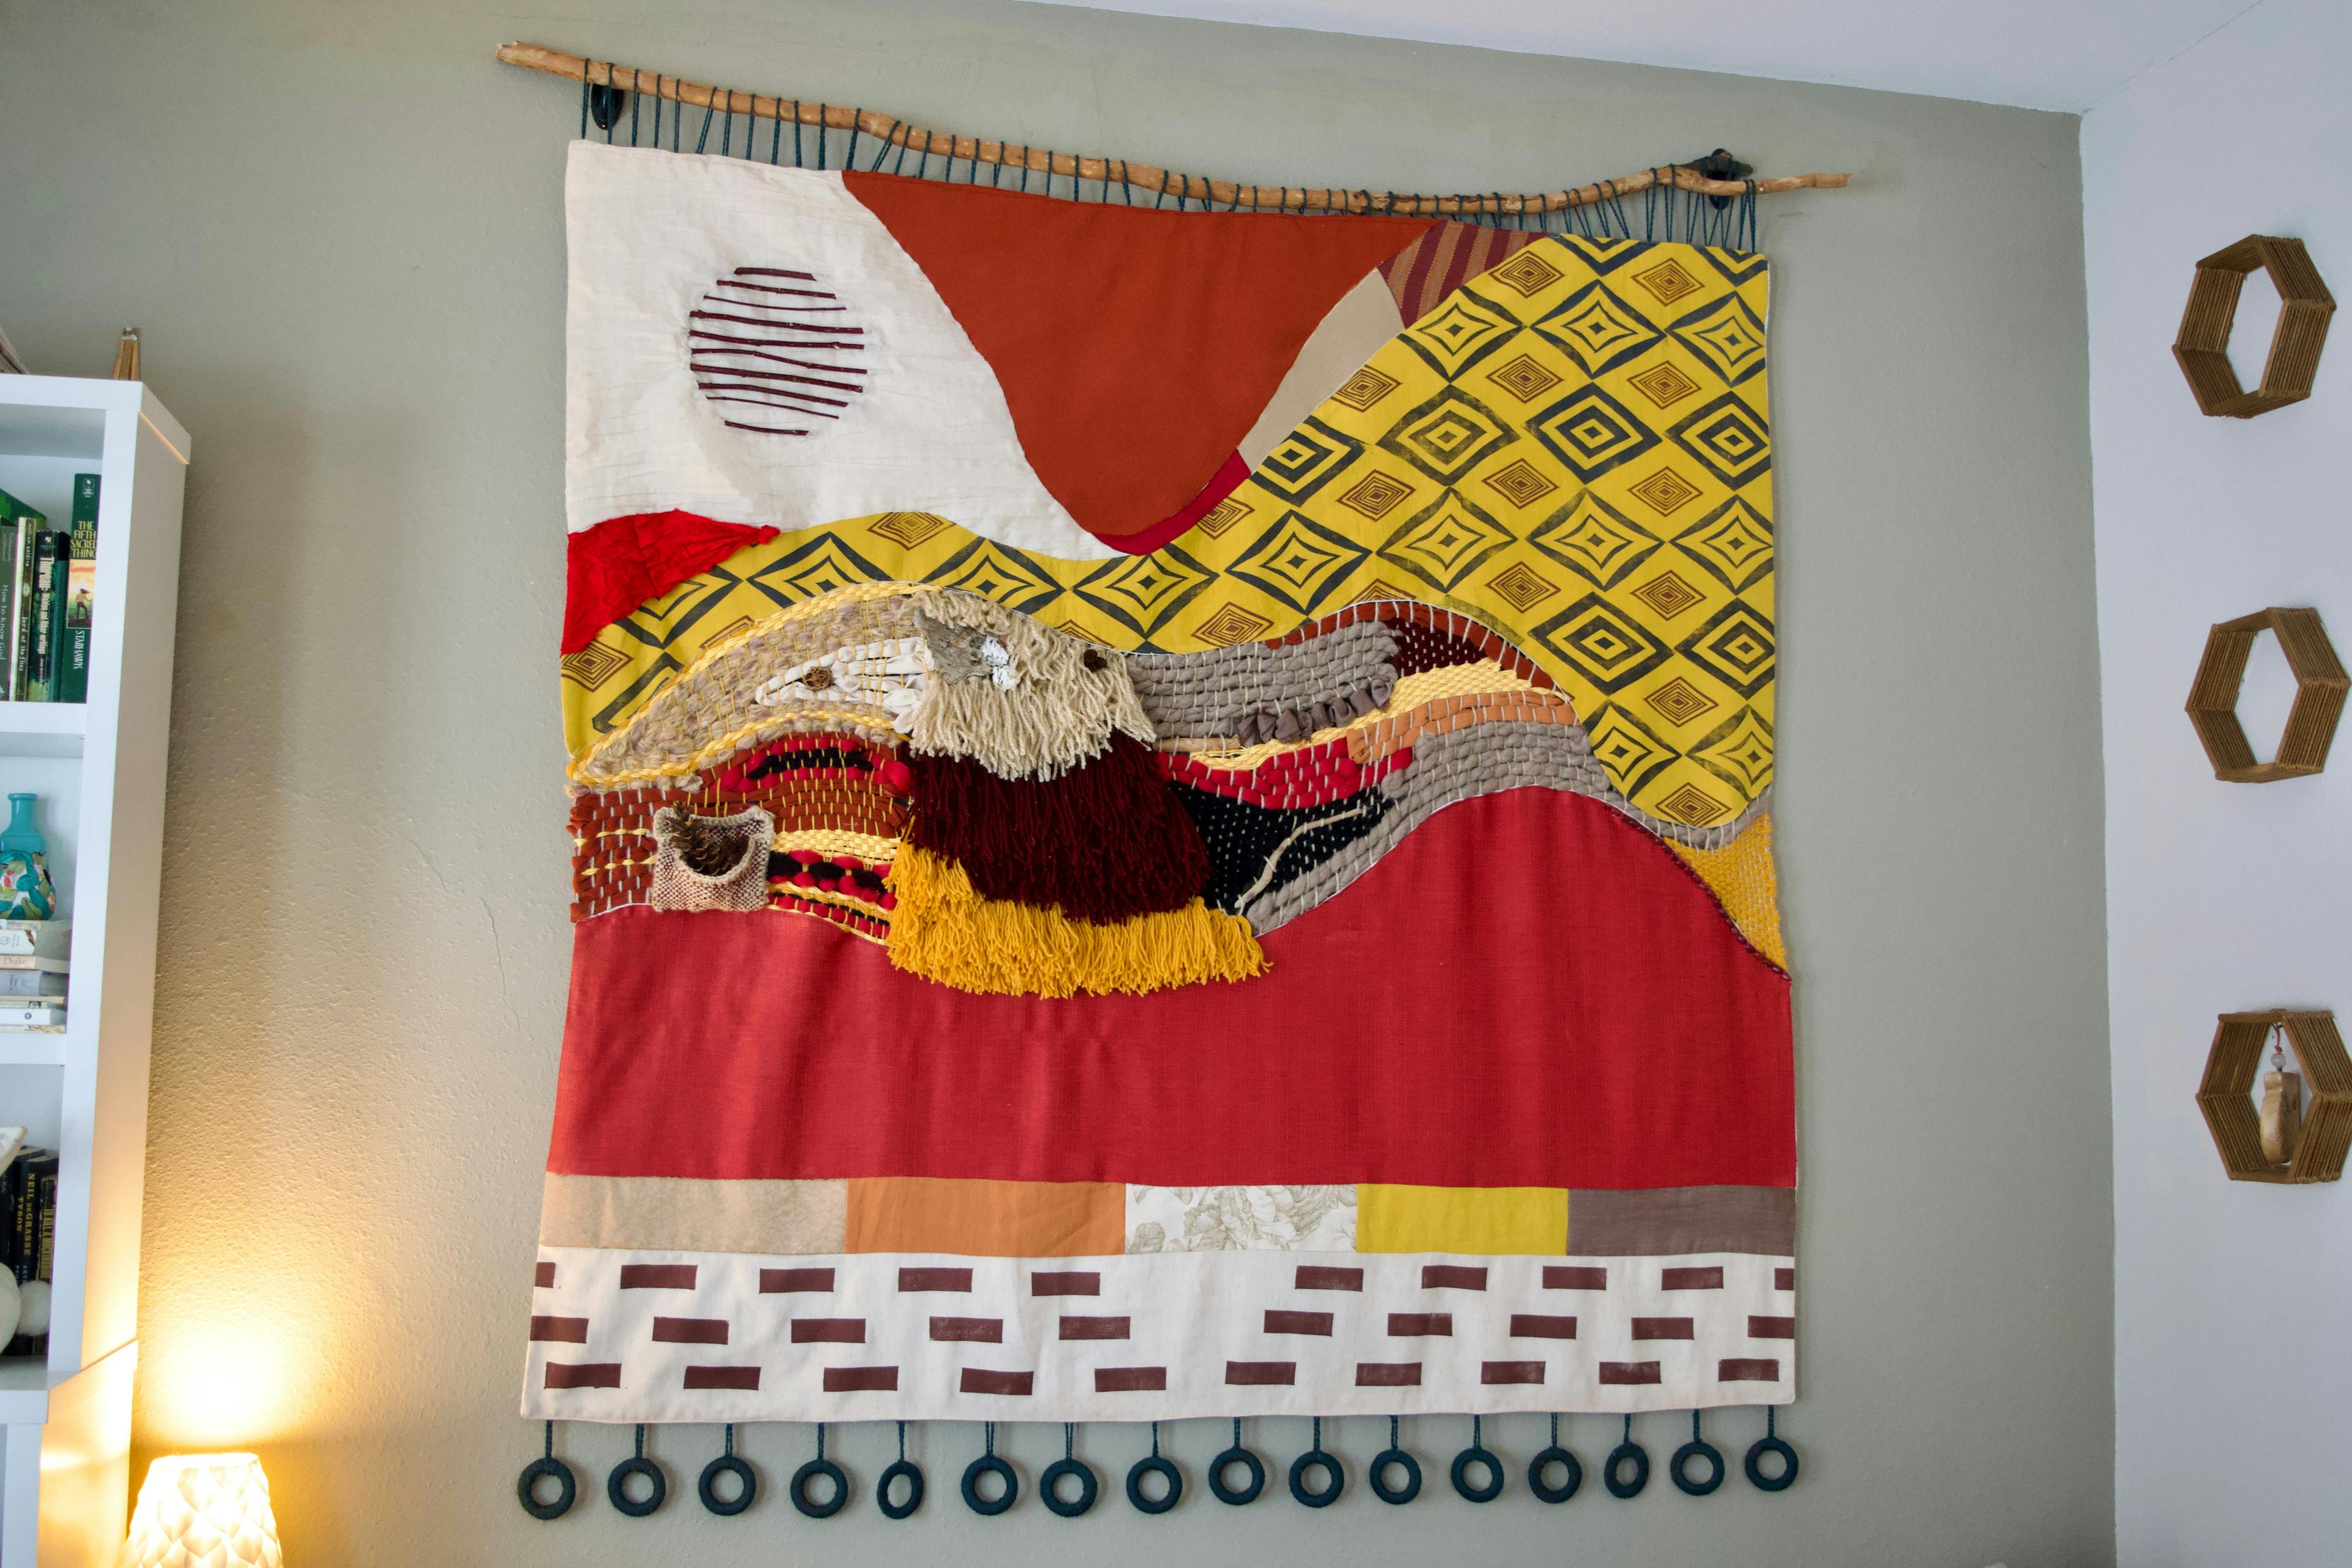
Anyone with cats (or young children, I presume!) knows how destructive little paws/hands/mouths can be. This project was brought about by a need for a new piece of large art for our living room, in no small part due to a little feline with presumed pica and general neediness. I went into this project without much of a plan, and I am so glad I trusted my gut as I went along because I am so thrilled with what I created!
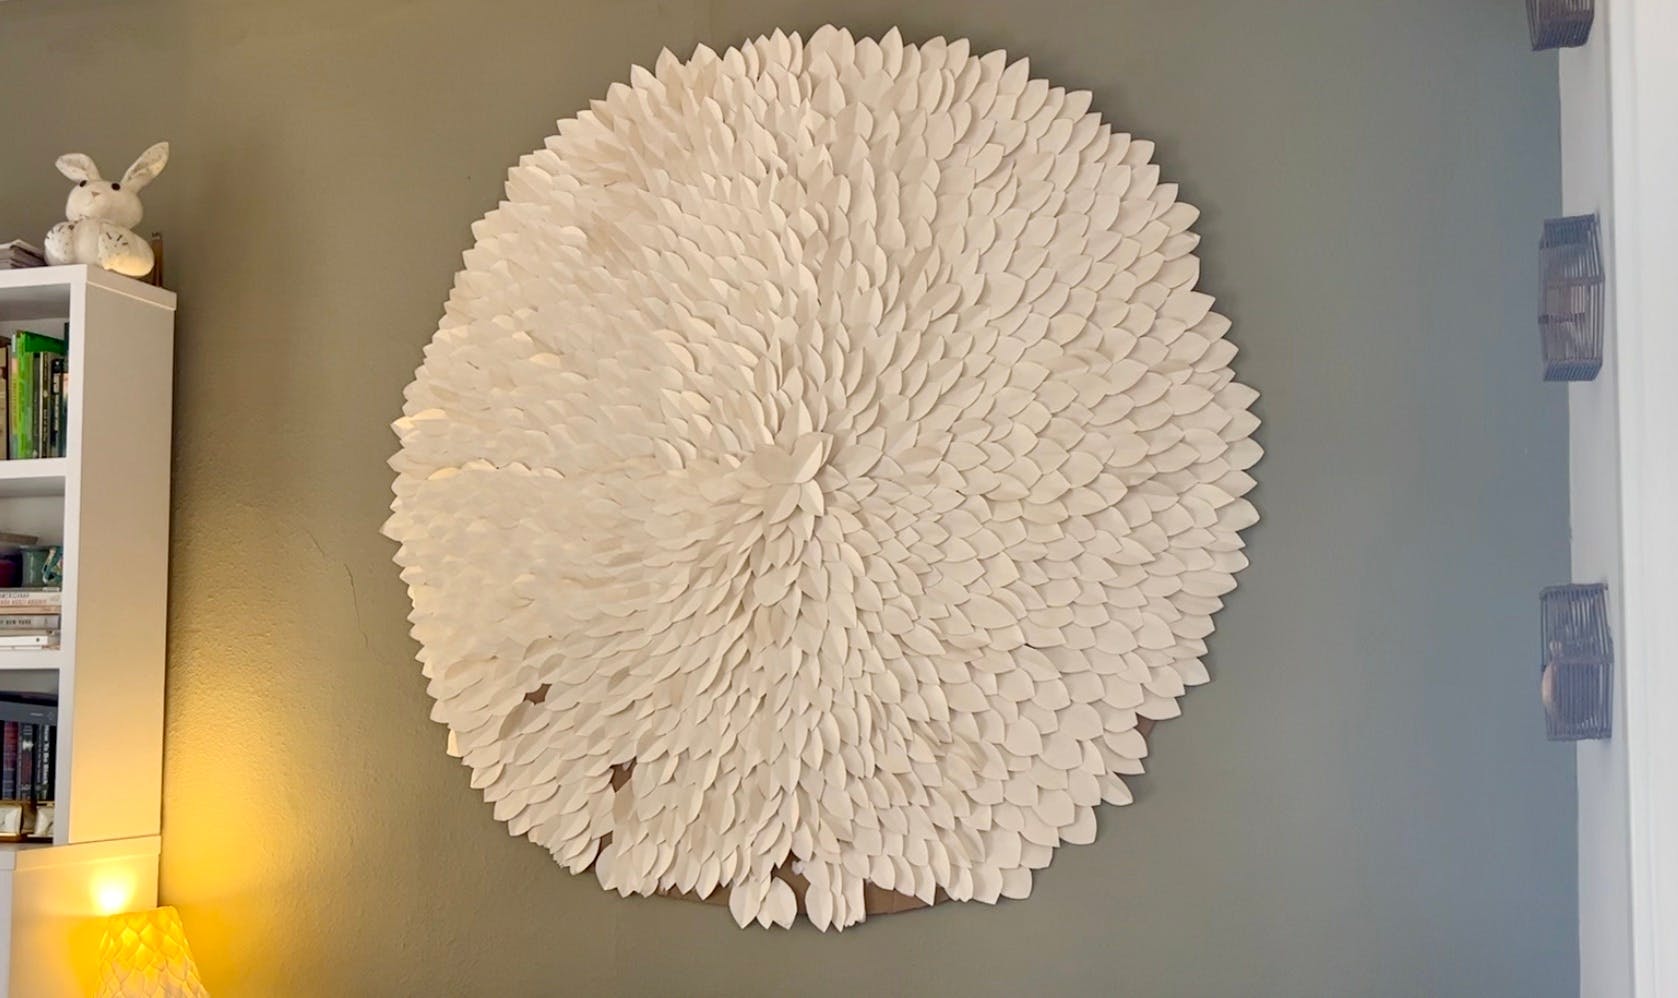
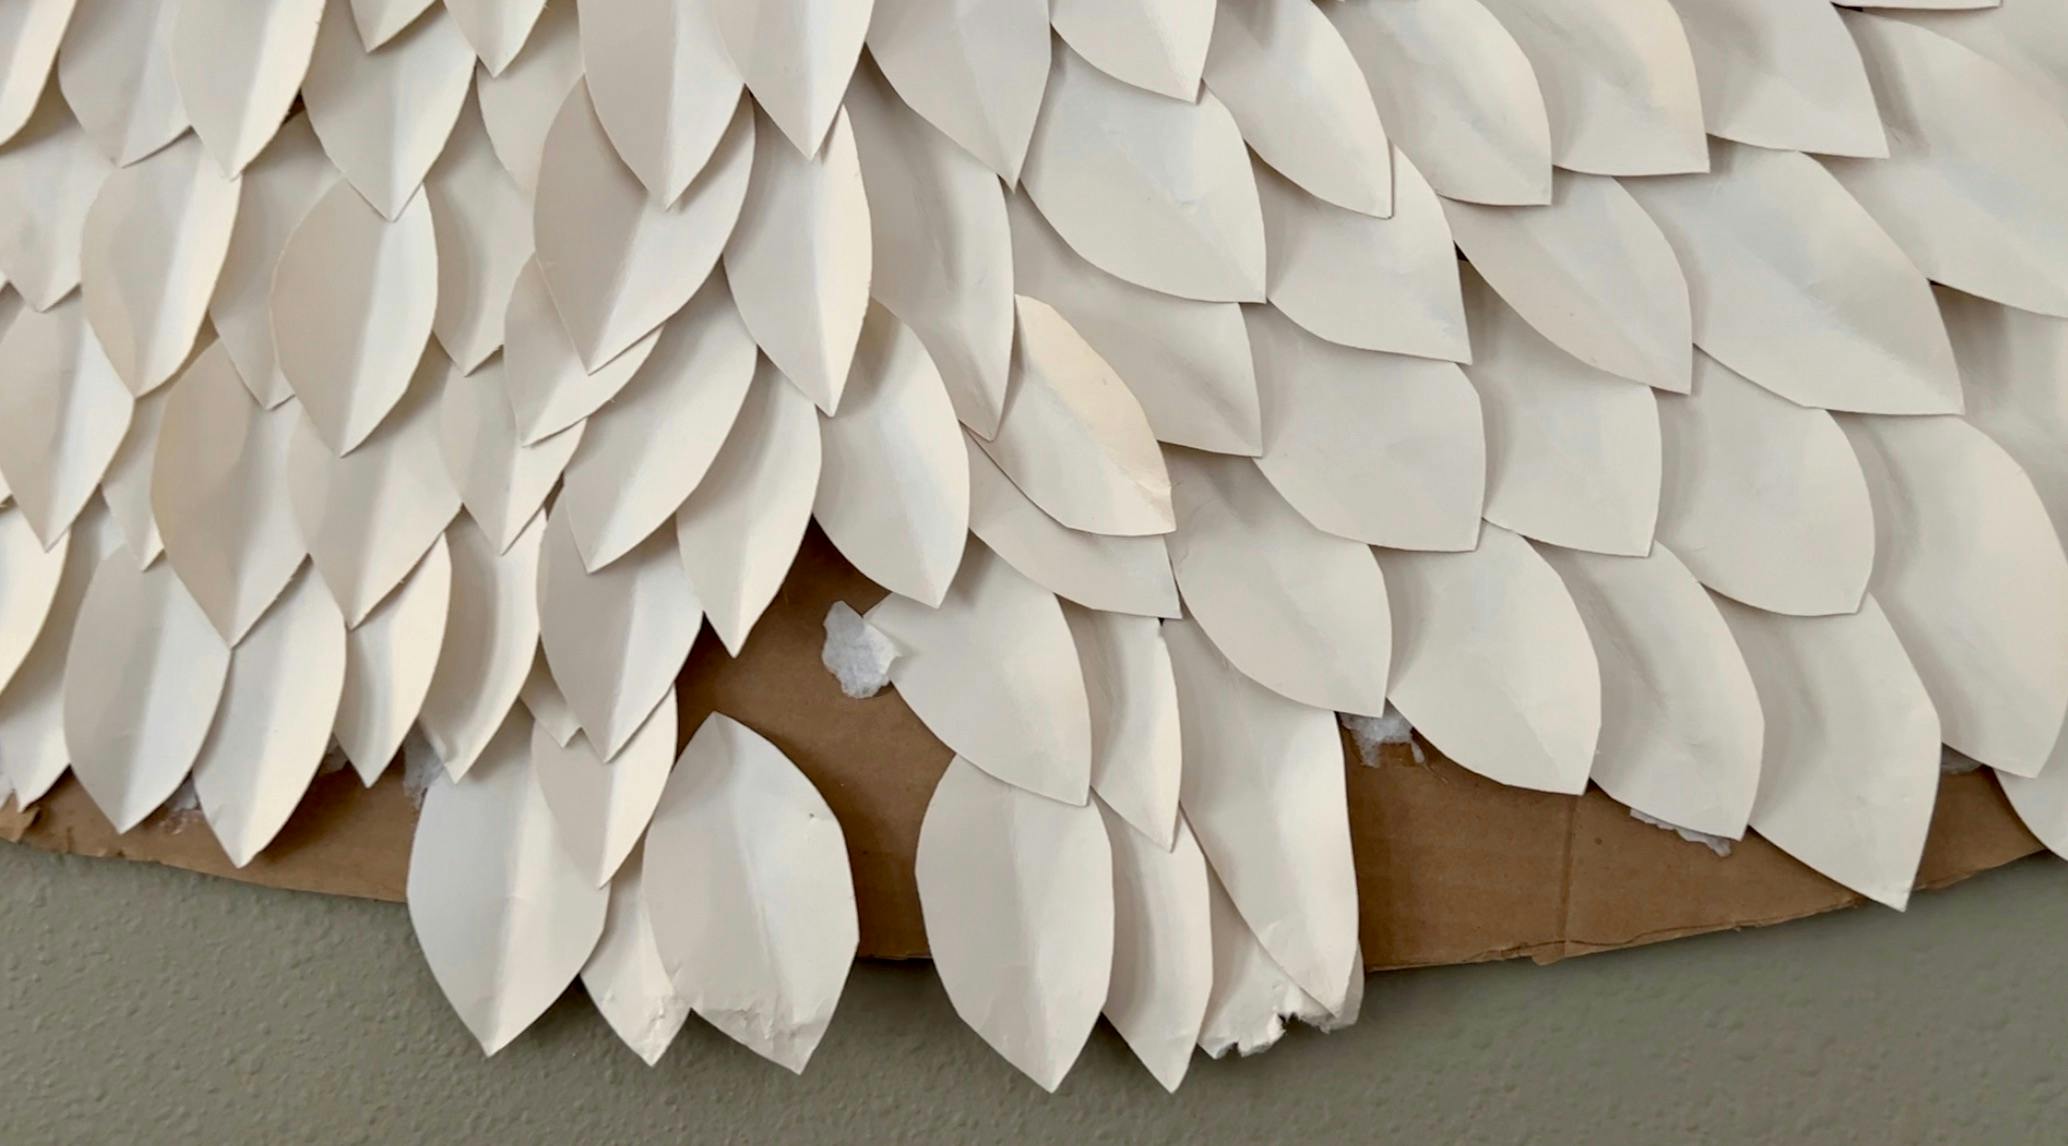
The art we previously had in this space was a large "flower" made of posterboard petals that were hot glued on some old UHaul boxes. I think I made this in 2014 or '15, and even without Pete chomping and ripping off leaves, the posterboard was yellowing, the whole thing was dusty, and it was just time for an overhaul.
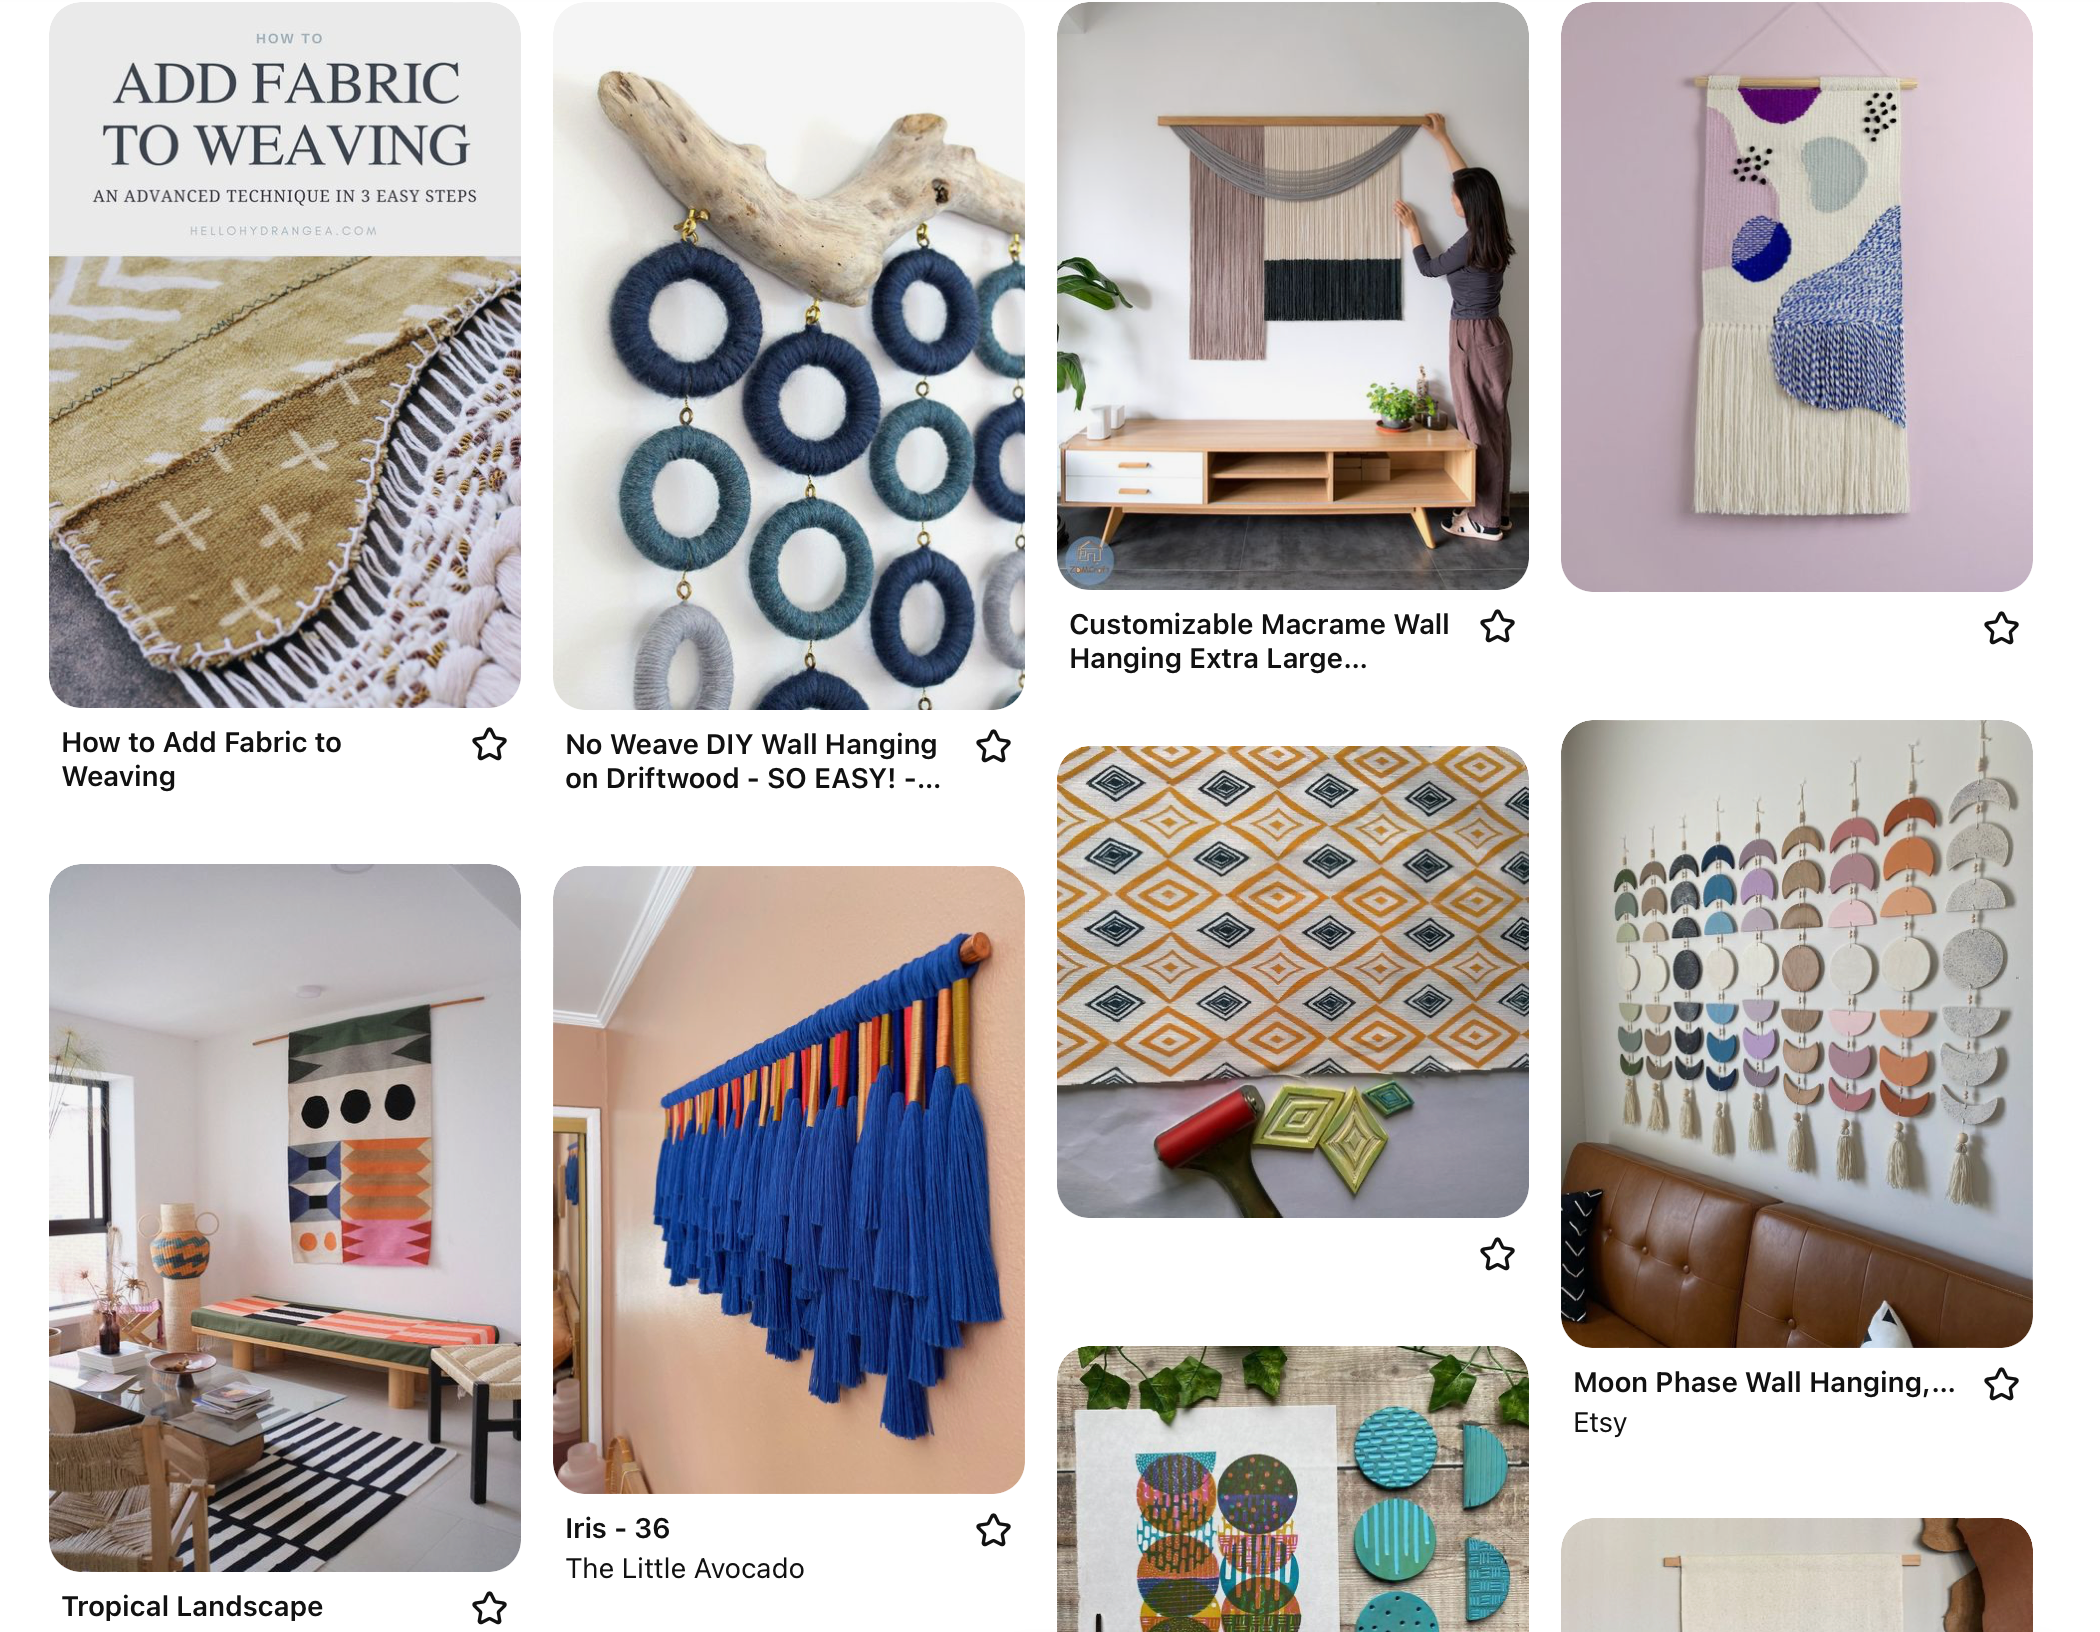
I built a Pinterest board and spent a long time figuring out what direction I wanted to go with this thing. I didn't have a huge inspiration except that I knew I wanted it to be big to replace the scale of the flower, and that I wanted to use yarn, fabric, and little found nature bits that I have been collecting (pinecones, bark, etc.).
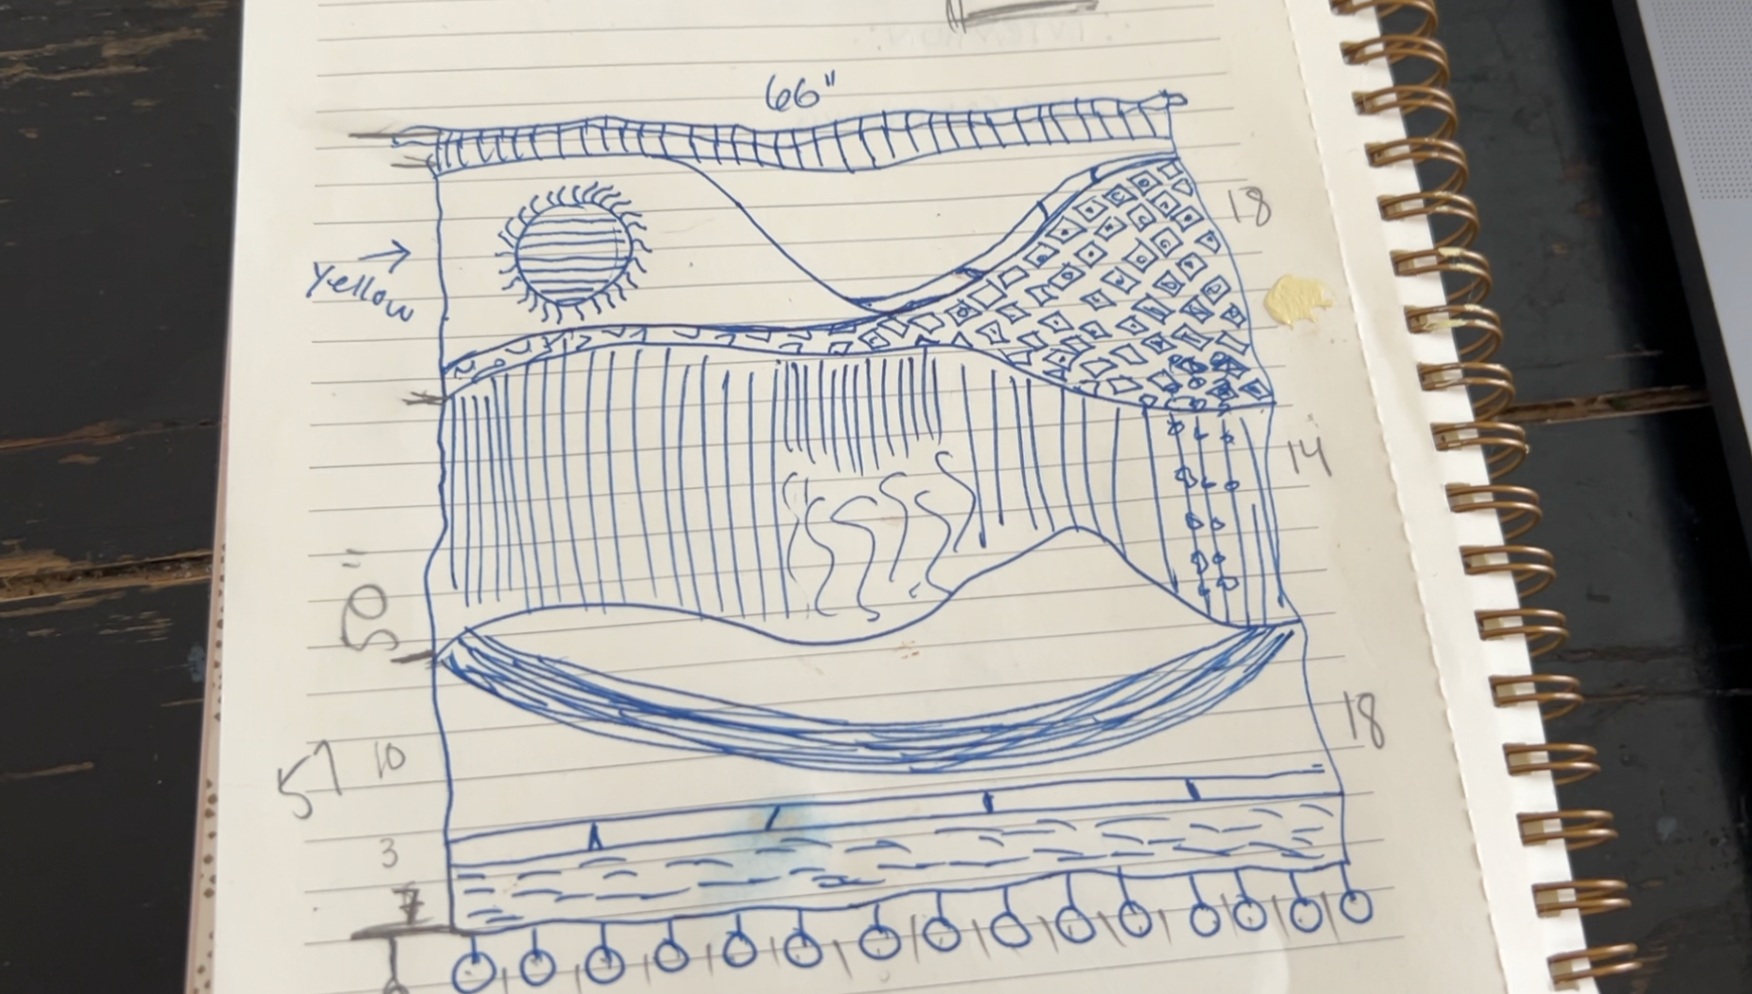
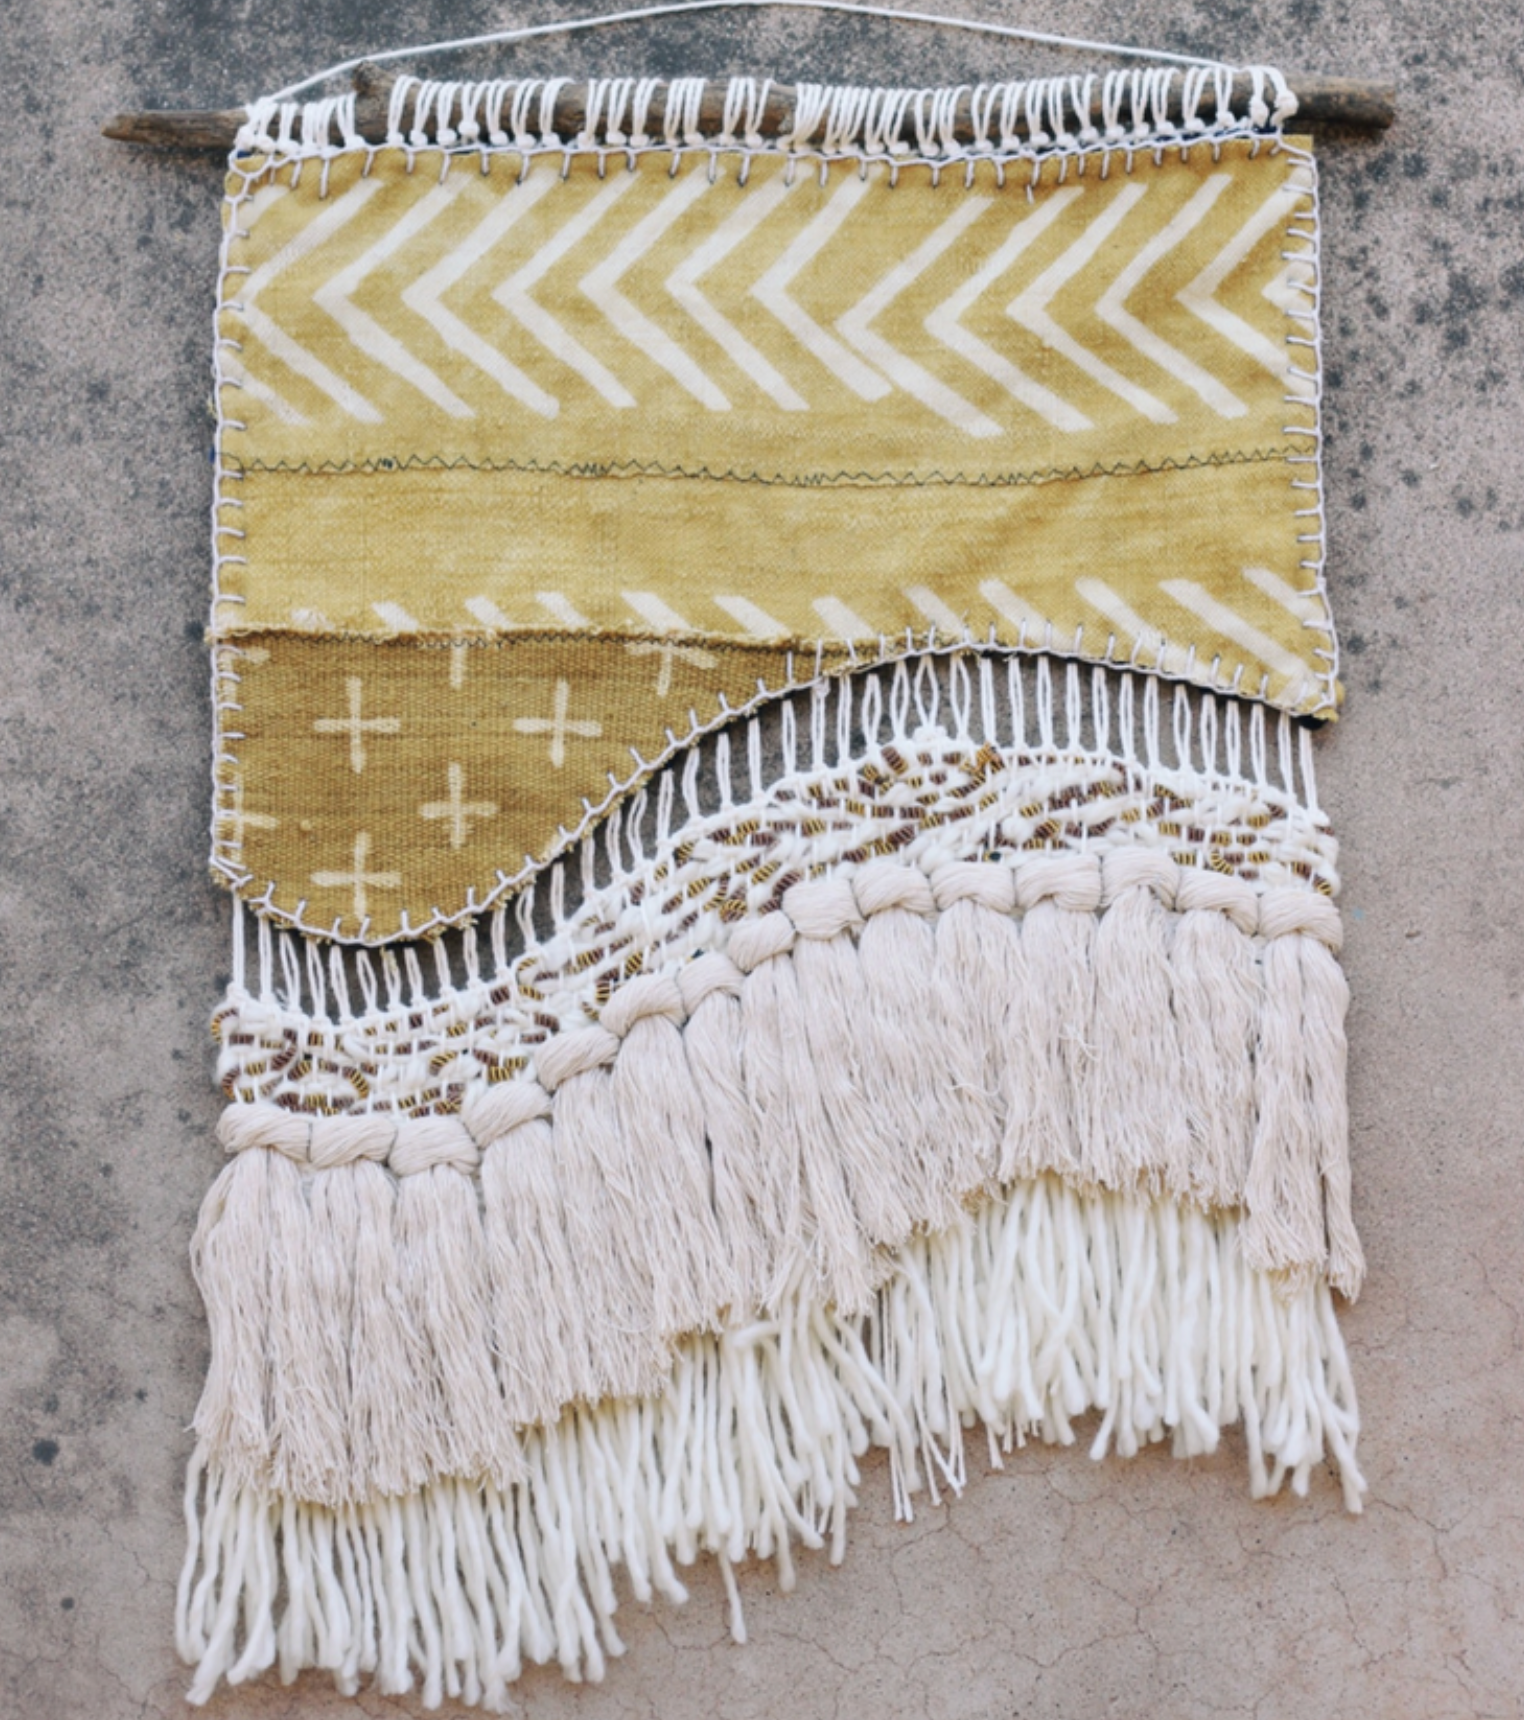
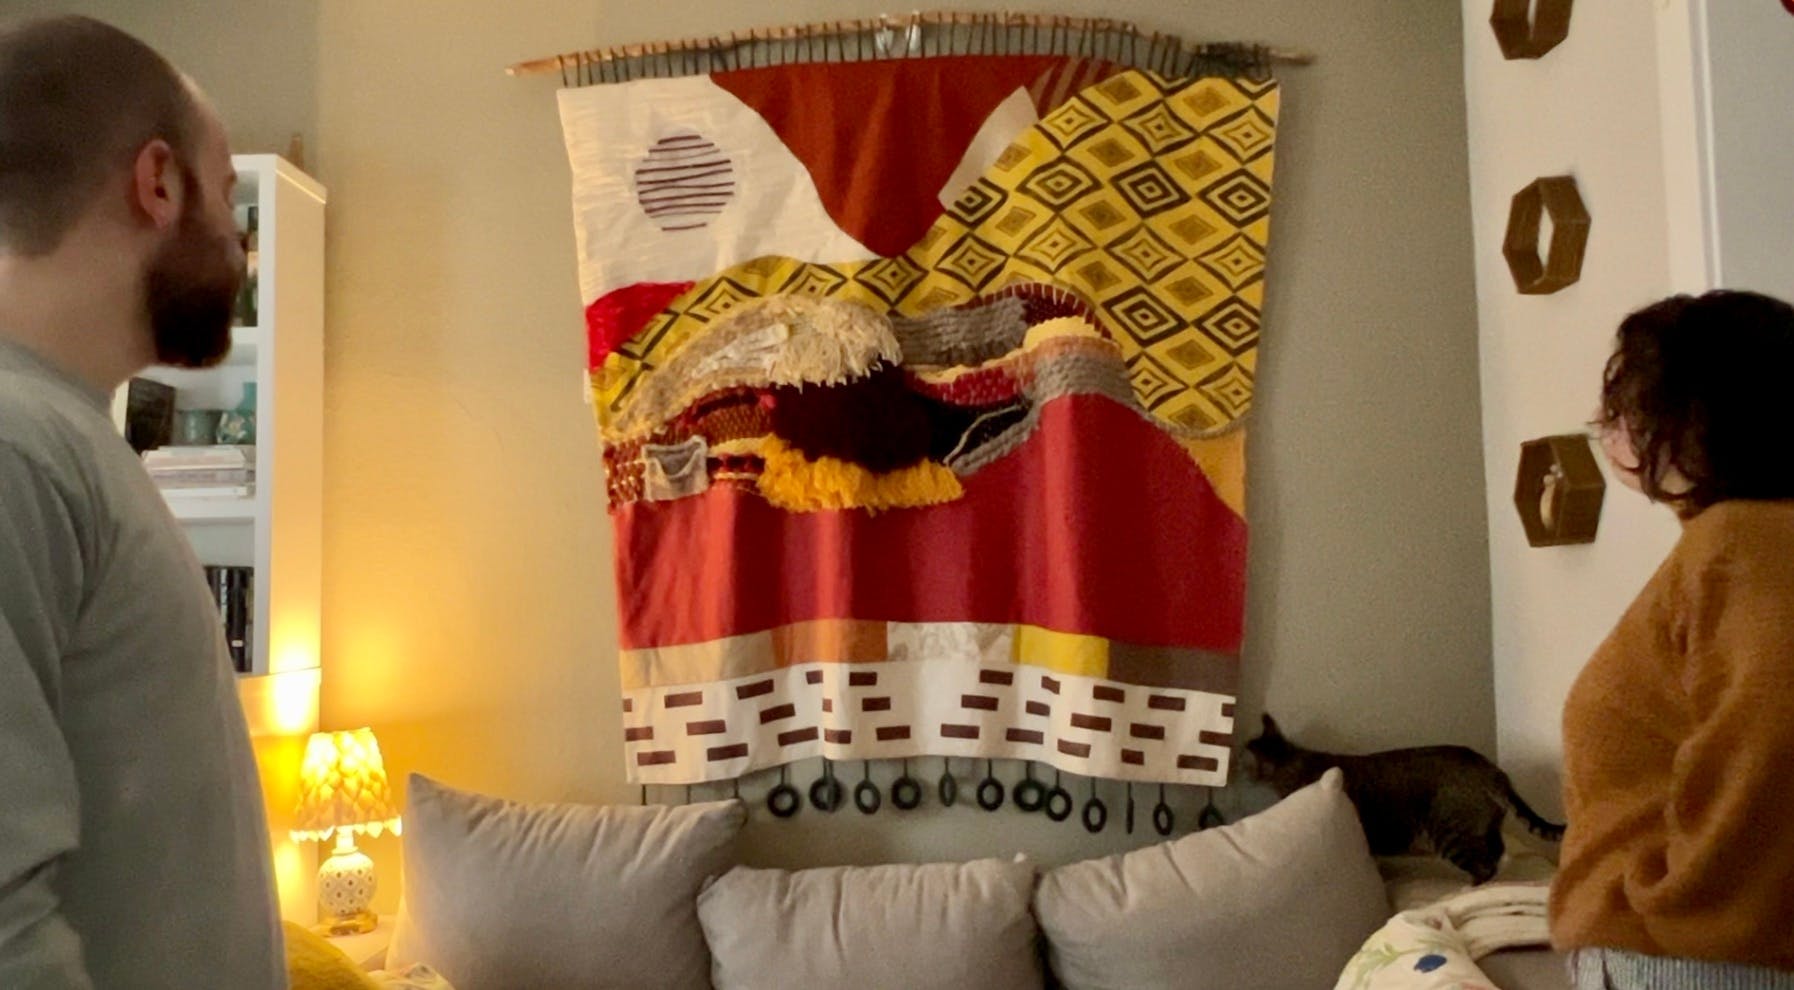
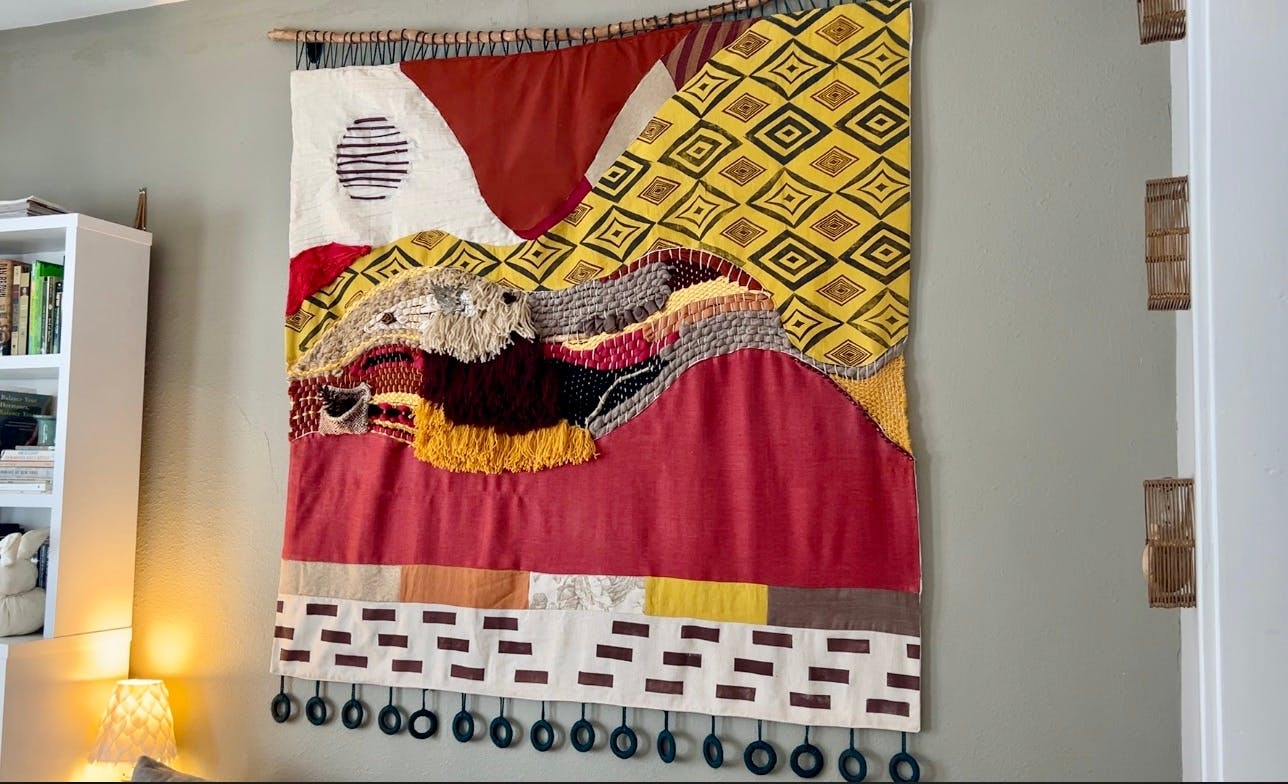
I drew one sketch and loved it so much that I just decided to go with it! Normally I would do a few iterations of sketching, but this just felt right, so I went with it! The top and bottom thirds represent fabric with a yarn section in the middle and yarn-covered rings hanging from the bottom.

Gathering Supplies
To The Woods
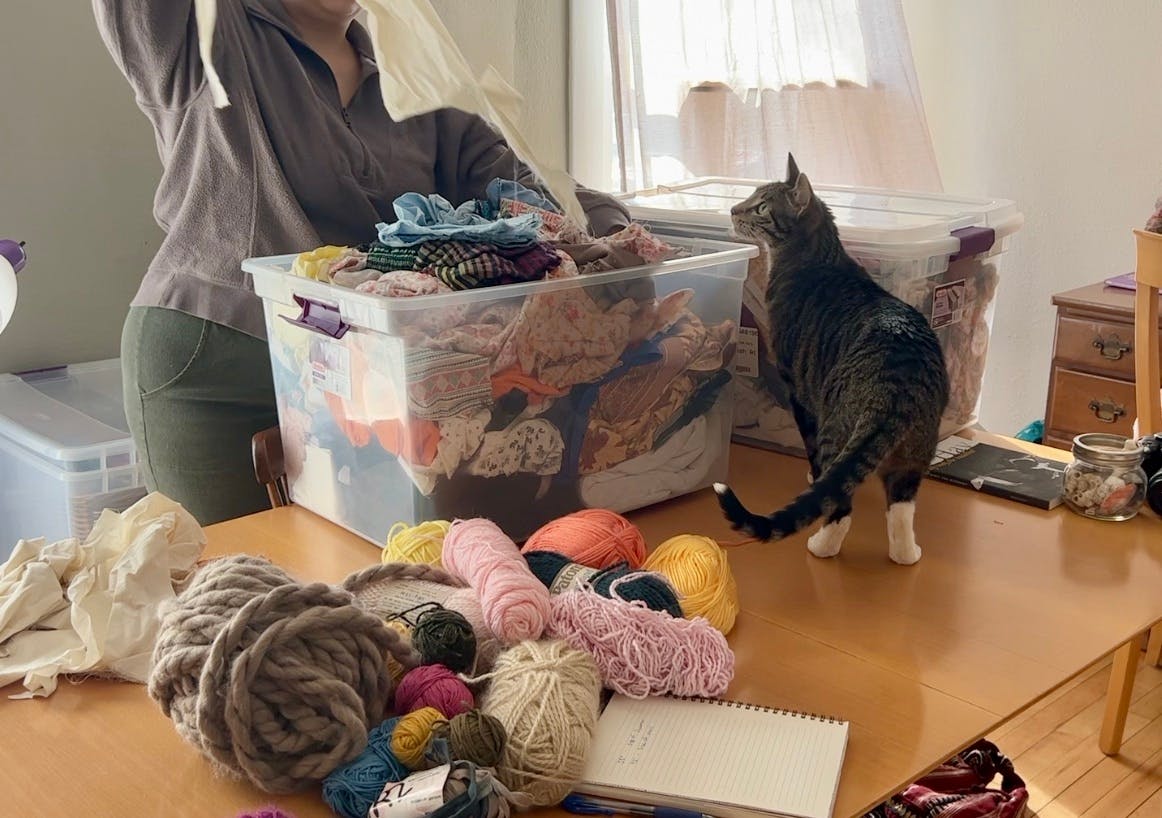
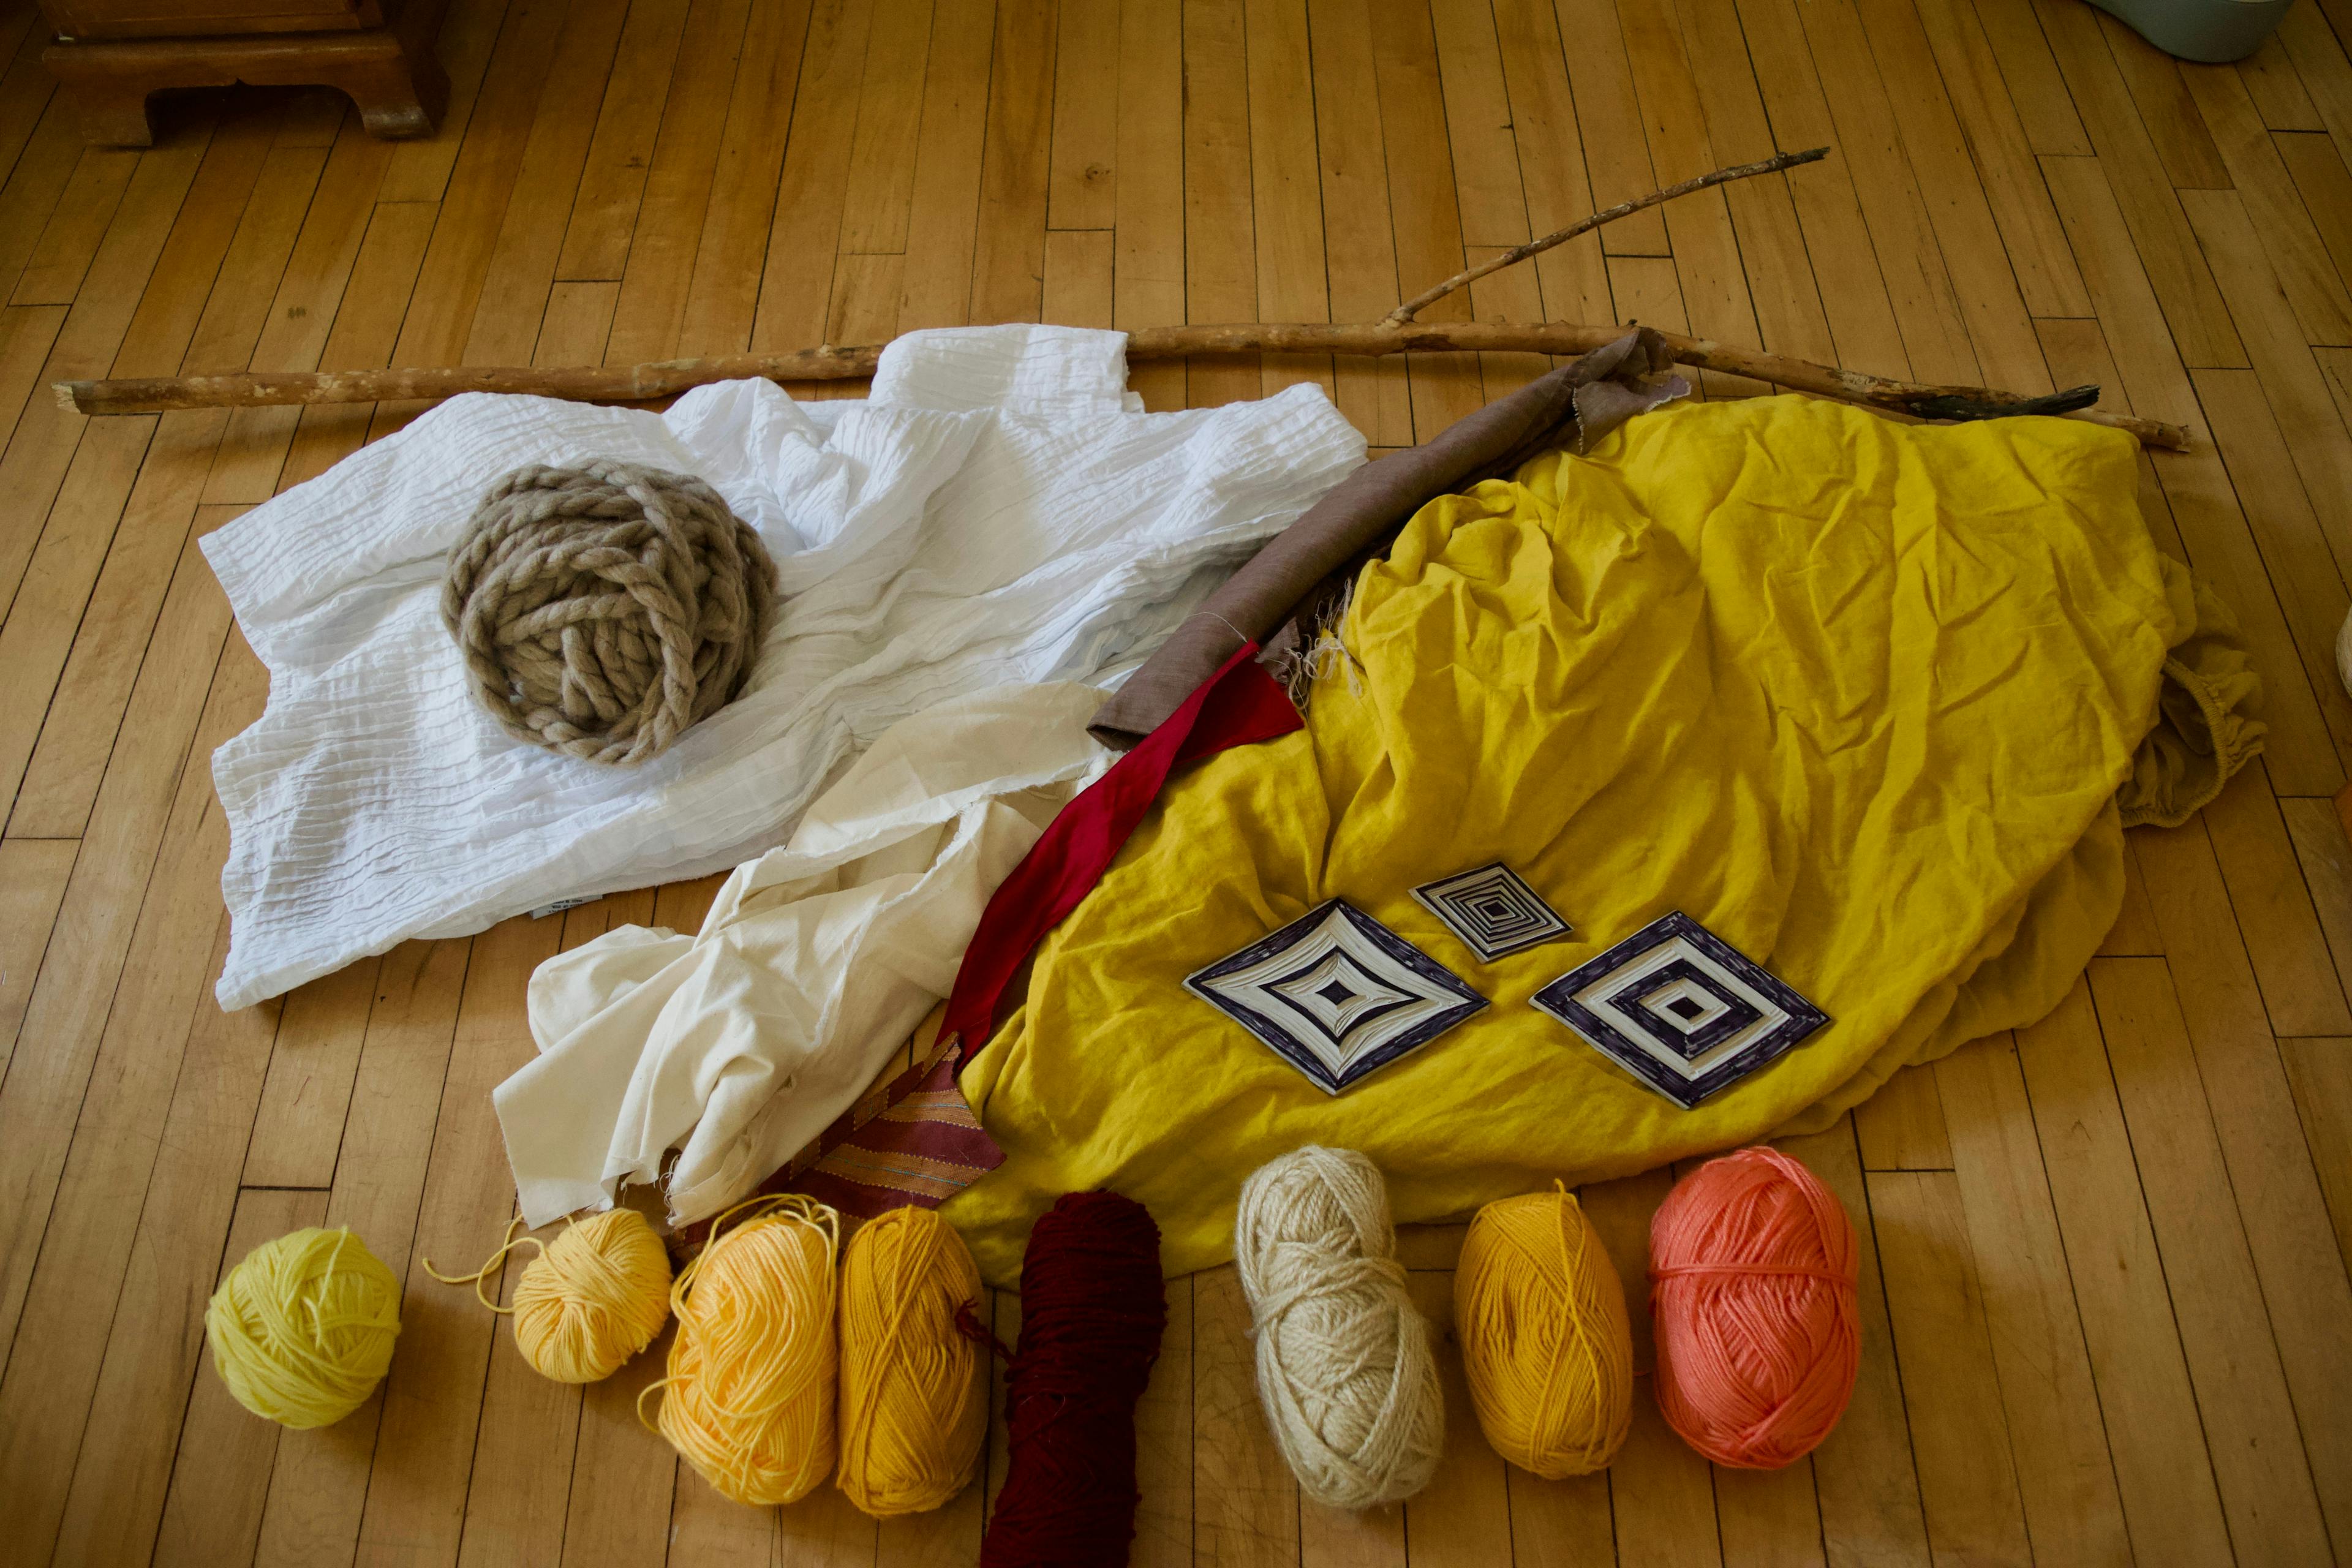
I went through my stash of fabrics and yarns and pulled things that reminded me of the colors we currently have in our living room - light grey, yellow, cornflower blue, rosy pink, white/cream, and black. I didn't love these colors, but I decided this was a good place to start. Our living room isn't super designed or composed, but I really want it to be so I hope that this piece is a good first step in a casual living room makeover.
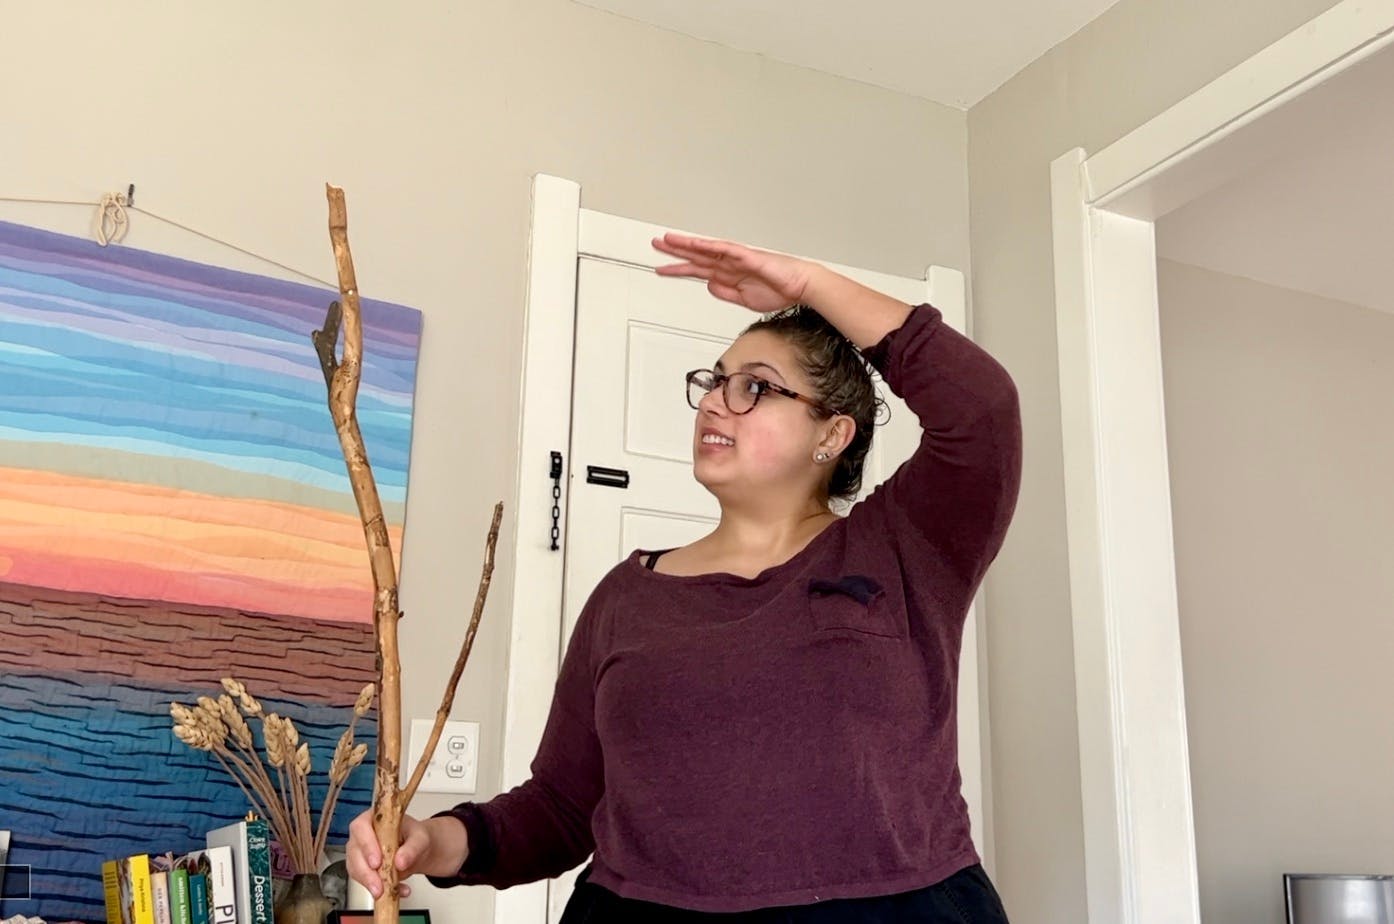
I wanted this whole thing to hang from a large branch, so I went to the UW Arboretum to "forage" for a fallen bough. I found a few options, and decided on one that was free of creepy fungus (I saw only one episode of The Last of Us, but it was enough!), relatively dry but not yet decomposing, and pretty straight.
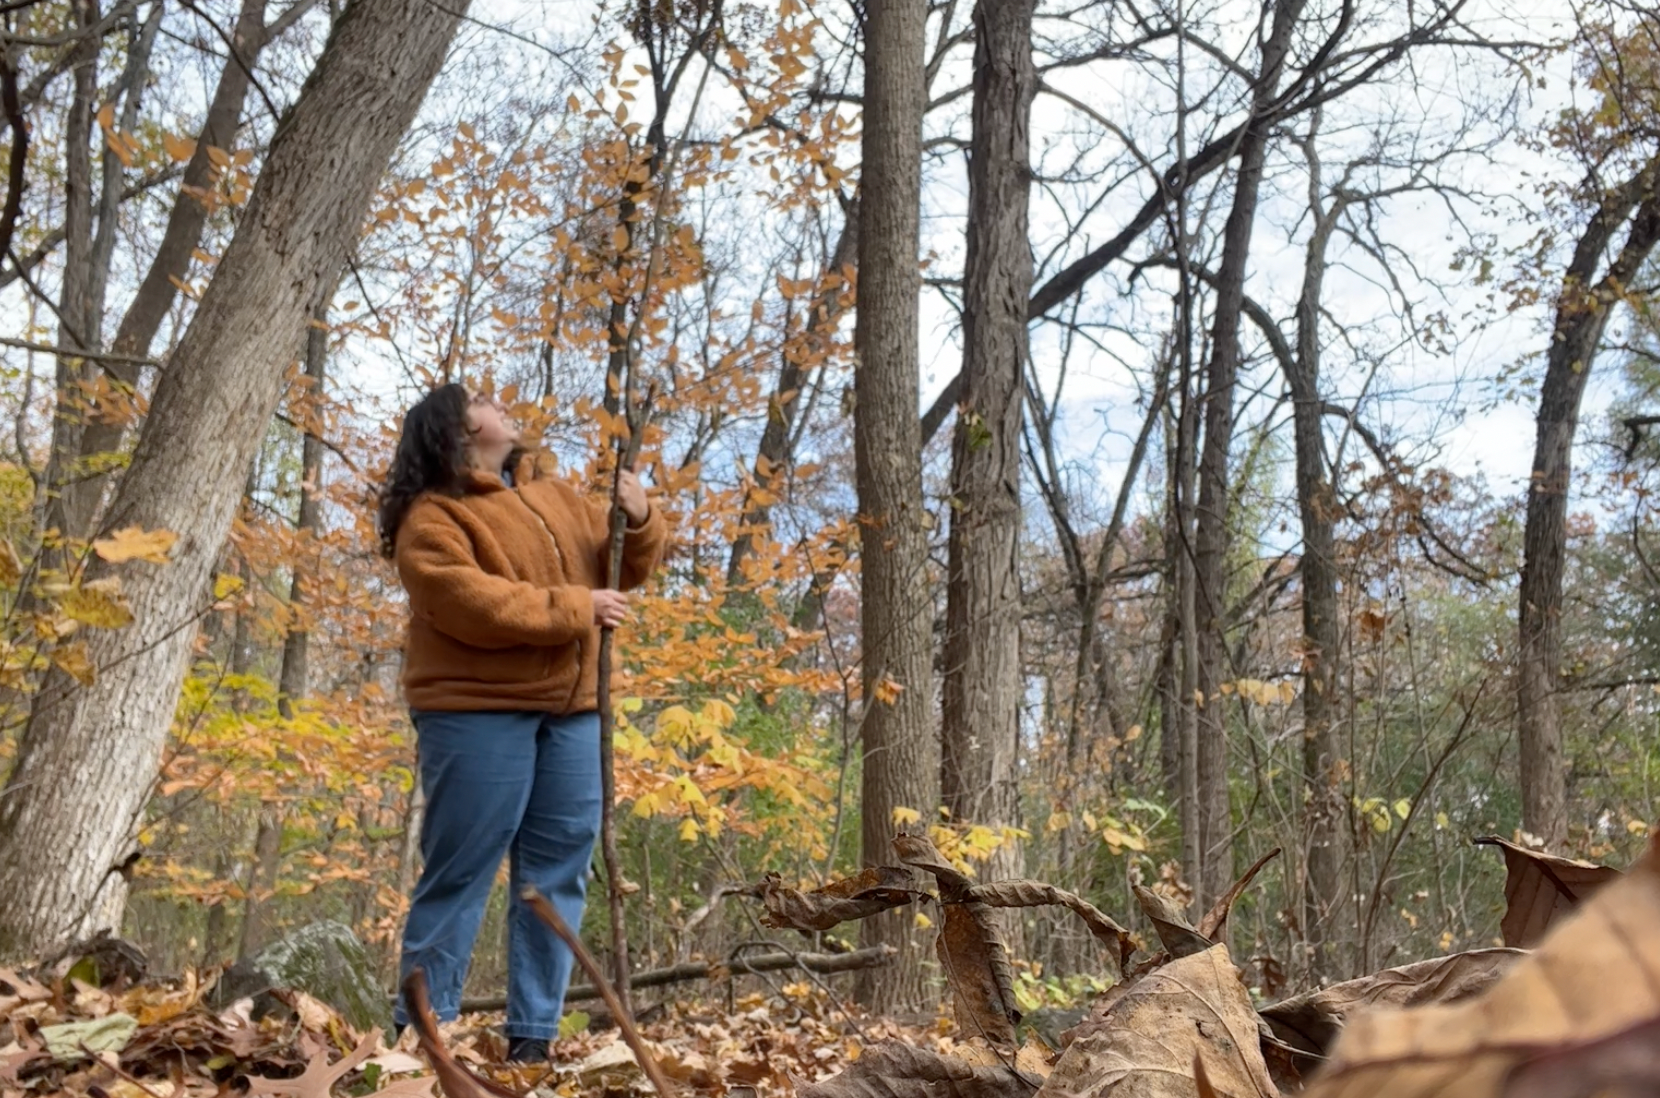
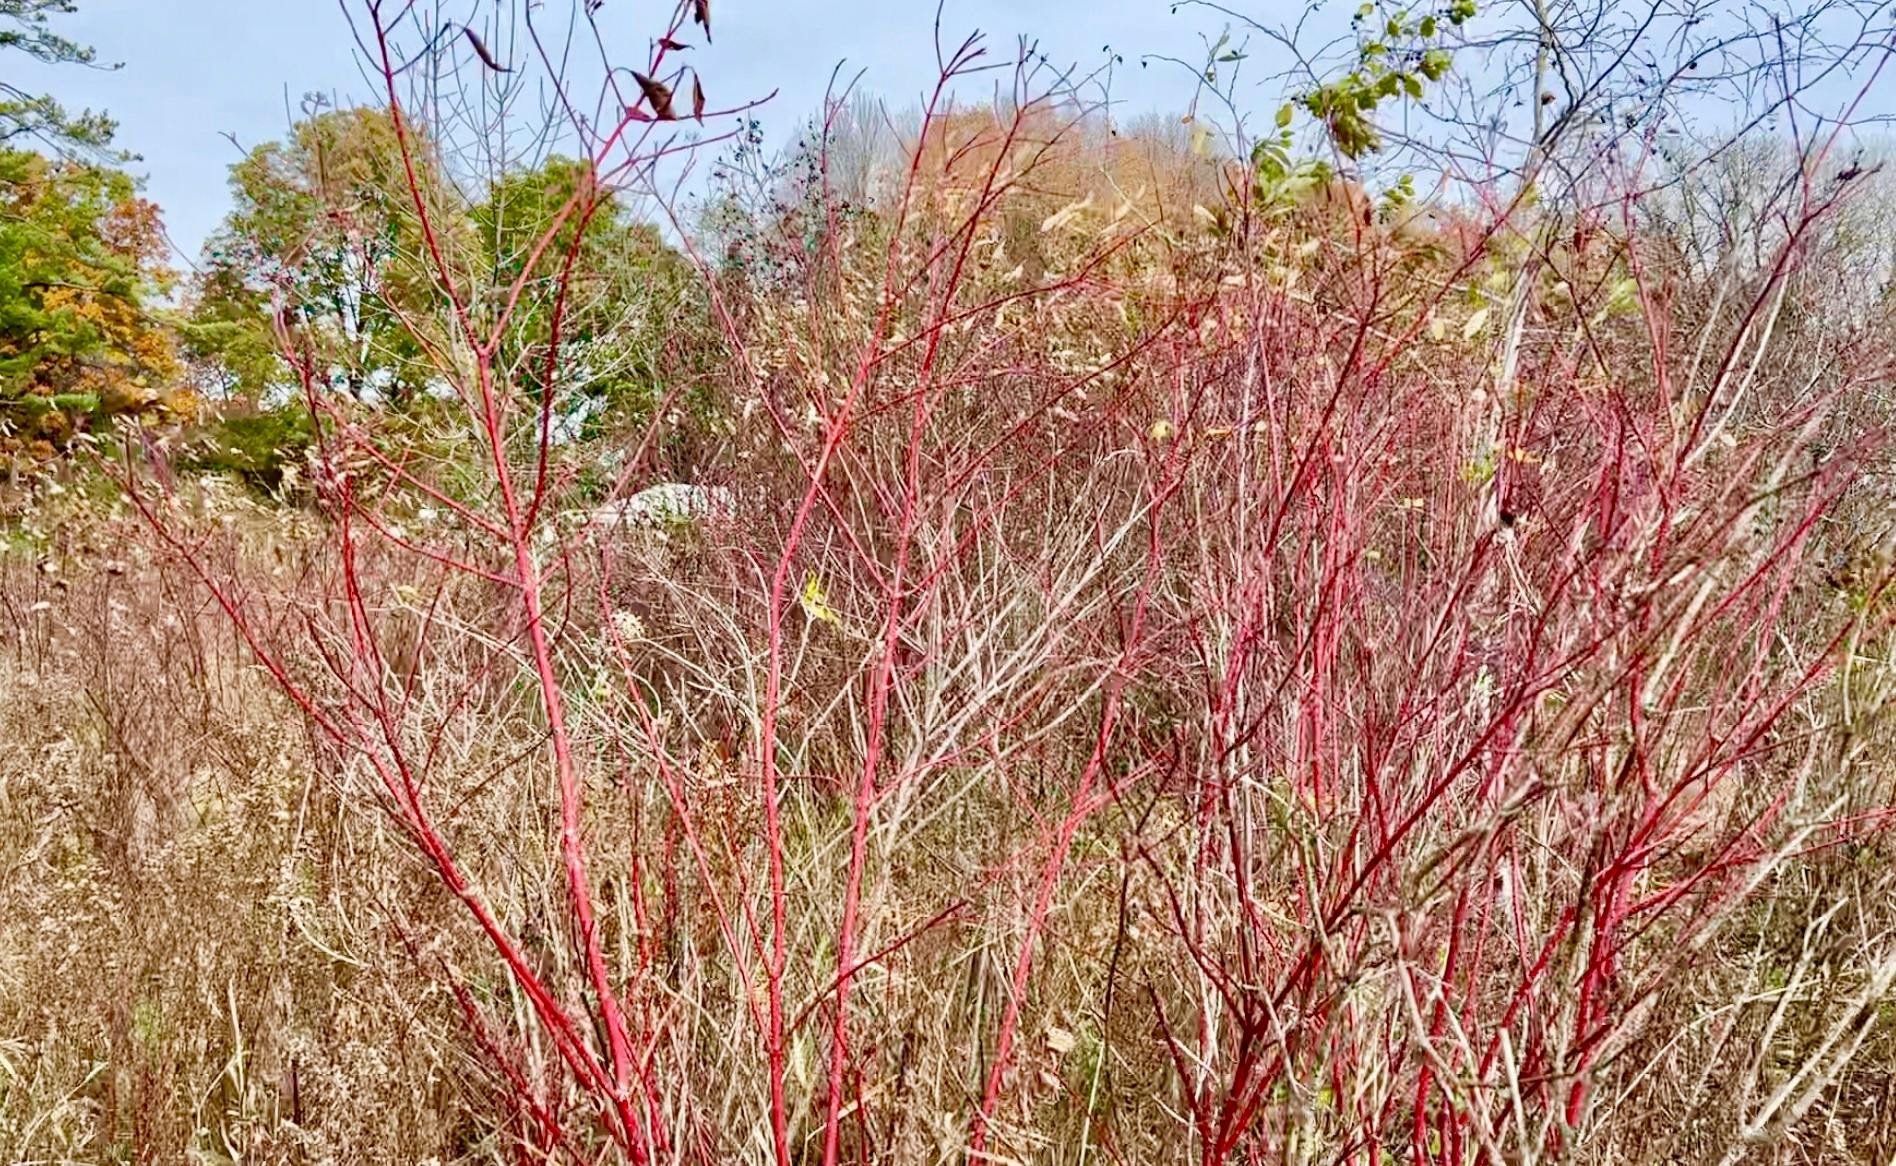
While I was at the Arboretum, I realized that the color direction I wanted to go was FALL INSPIRED! For the past few weeks, I had been geeking out about the color of the changing leaves so much that it felt like the only way to go. I also found these beautiful bright red branches from some Red Twig Dogwood bushes and decided not to grab them for fear they wouldn't maintain their red, but to hold them in memory as inspiration.
I felt super silly walking out of the Arboretum - like a dog that found a stick it wouldn't let go of - but luckily the branch just barely fit in my car, and we headed to the next stop.

To The Craft Store
Another thing I wanted to include was the use of block printing on fabric, which I had never done before. I went to the craft store to get a few colors of fabric ink (red, yellow, black, and white) and a few other things like more rubber blocks, two skeins of mustard-colored yarn, and some bright red wool roving.
Carving the Blocks
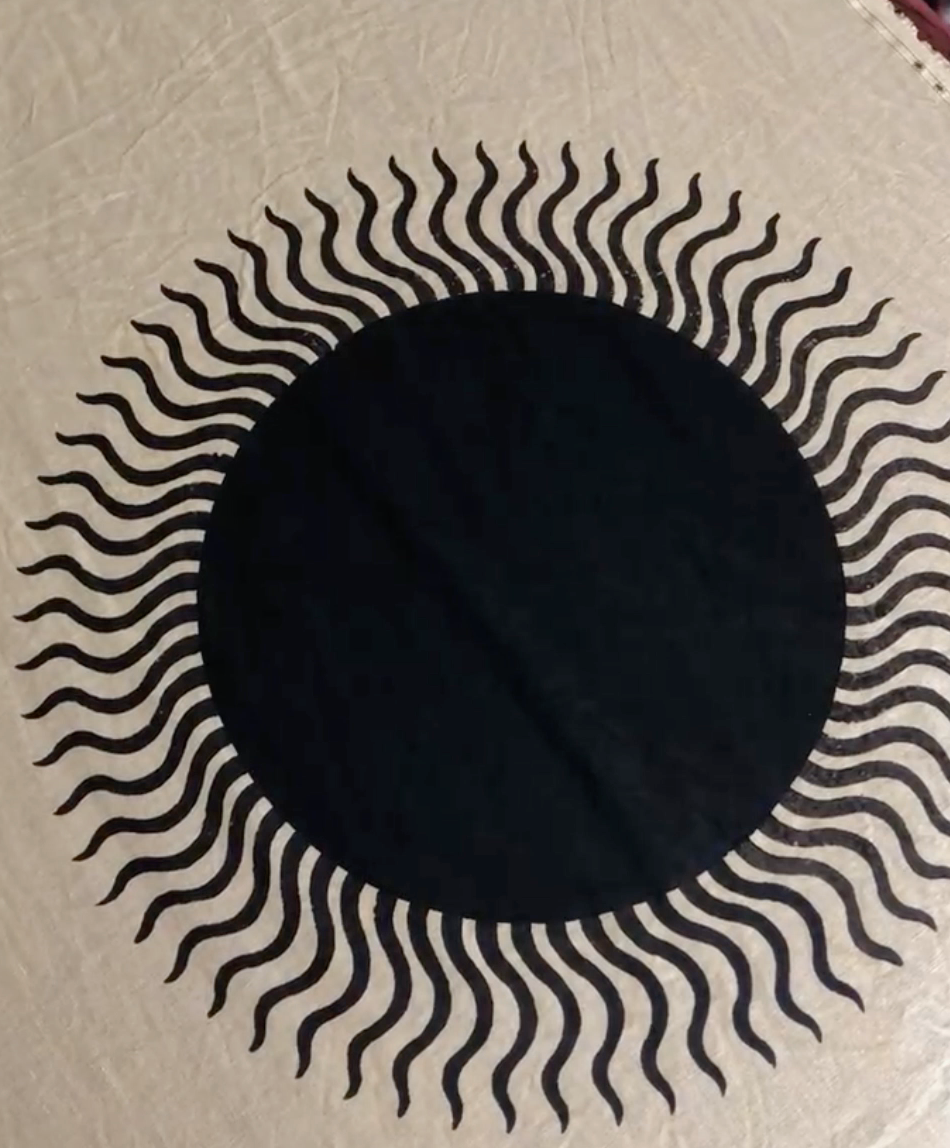
If we look back at my sketch, I had three places I wanted to include block printing, for designs for all of which came directly from the Pinterest board. I wanted a large sun or circle on the top left, a more medium-scale diamond pattern that was more on the right, and a small rectangular pattern for the bottom.
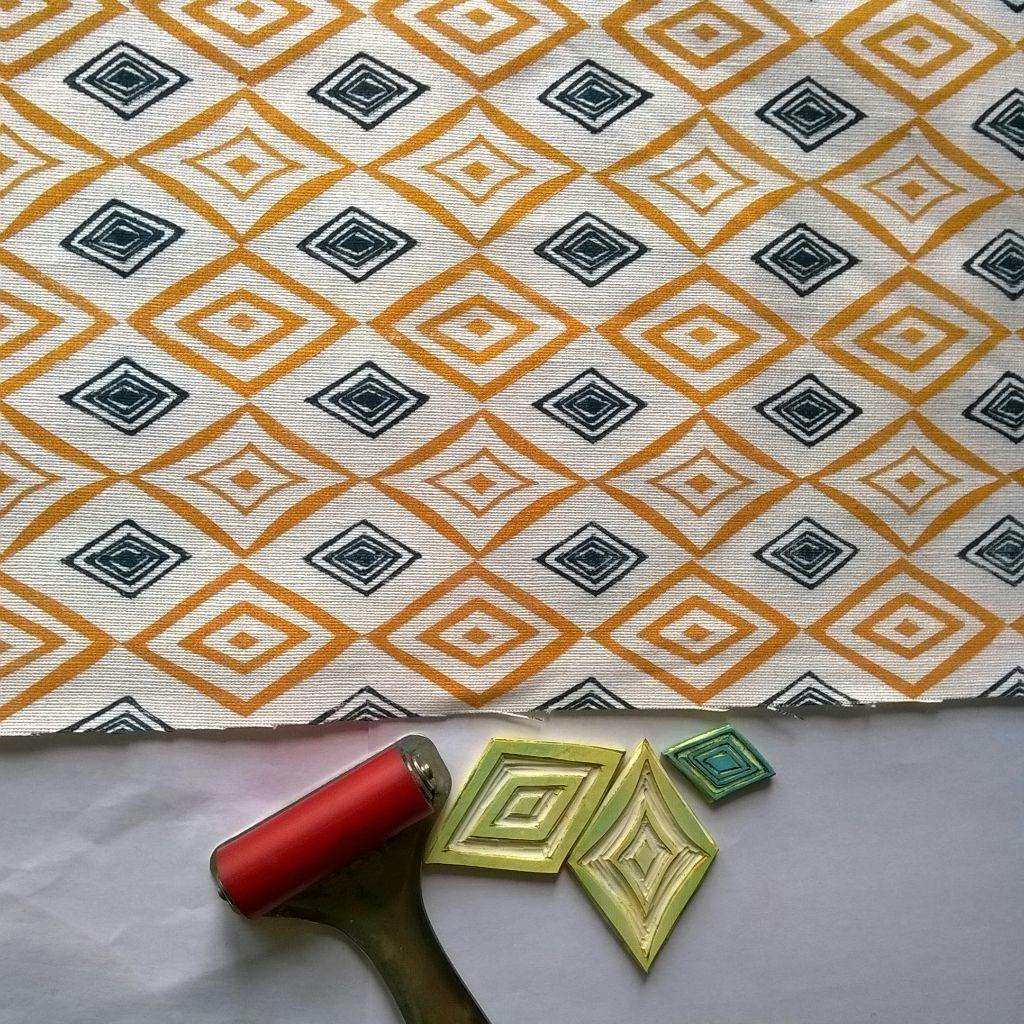
I started with the diamond pattern. Originally I thought that it was just a small and a large diamond, but it turns out that the large diamond actually came in two versions - one with thicker, straighter lines, and one with narrower, curved lines.
To see more details of this process, check out this post about block printing the thank you cards for our elopement!
The Big Picture
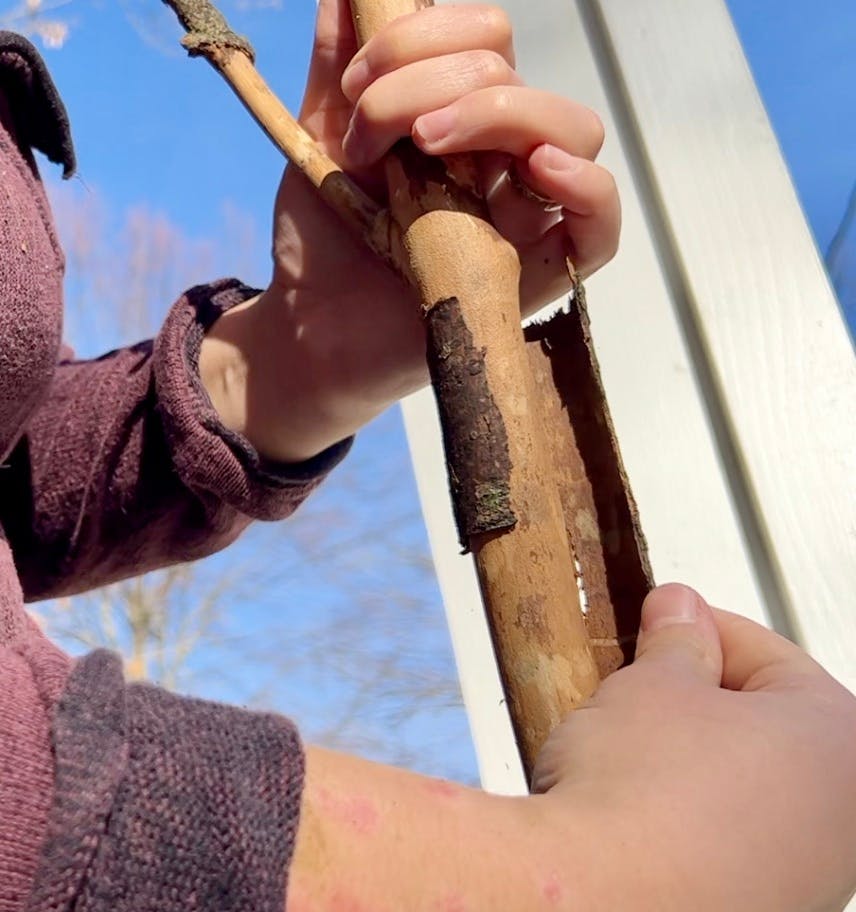
I had some more big-picture design decisions to make, such as which fabric went where. I started by peeling the bark off of the branch I had gotten in the woods so I could see the color and texture I was going to have on the completed piece. The bark was pretty loose in most places, and I used a box cutter to shave it off in the places where it didn't come off easily in my hands. It was absolutely too long, so I snapped off a piece at the end and it ended up being 66" - PERFECT.
I laid everything out on the floor to get a sense of where I wanted everything to go, and I learned a few things:
- I needed more fabric
- I didn't want to use bright white
- The coral yarn I had wanted to use looked awful
- I was going to LOVE this when it was done!
More Supplies
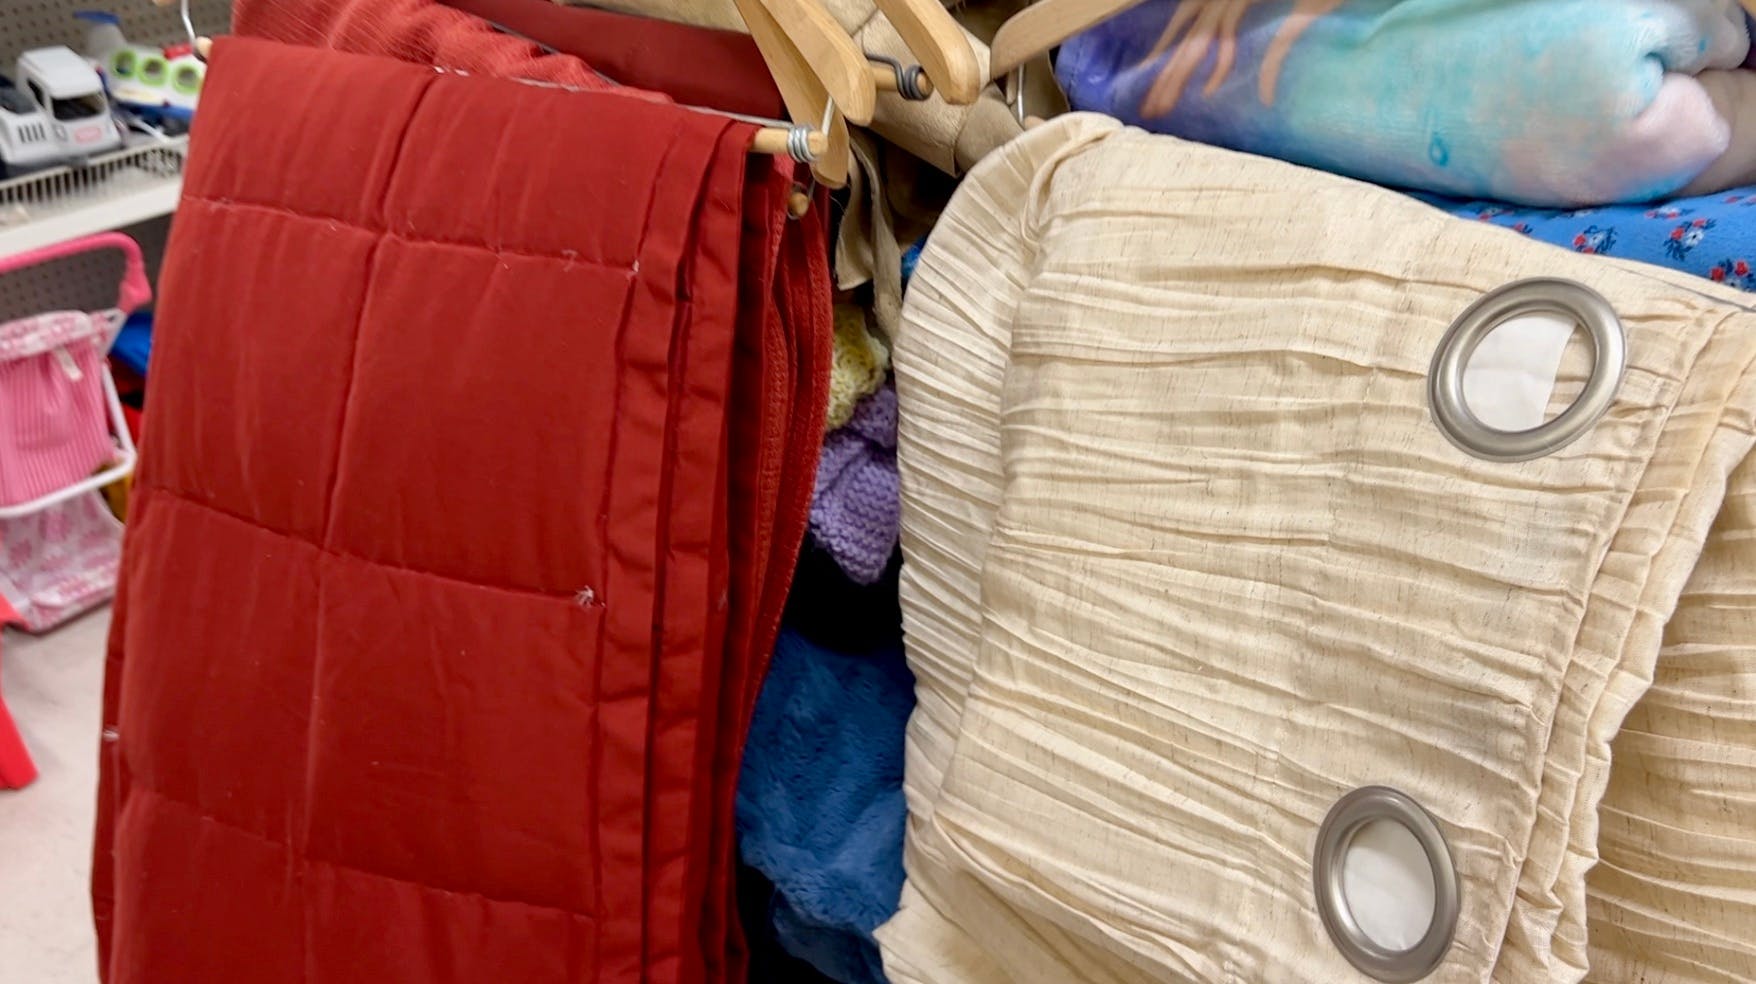
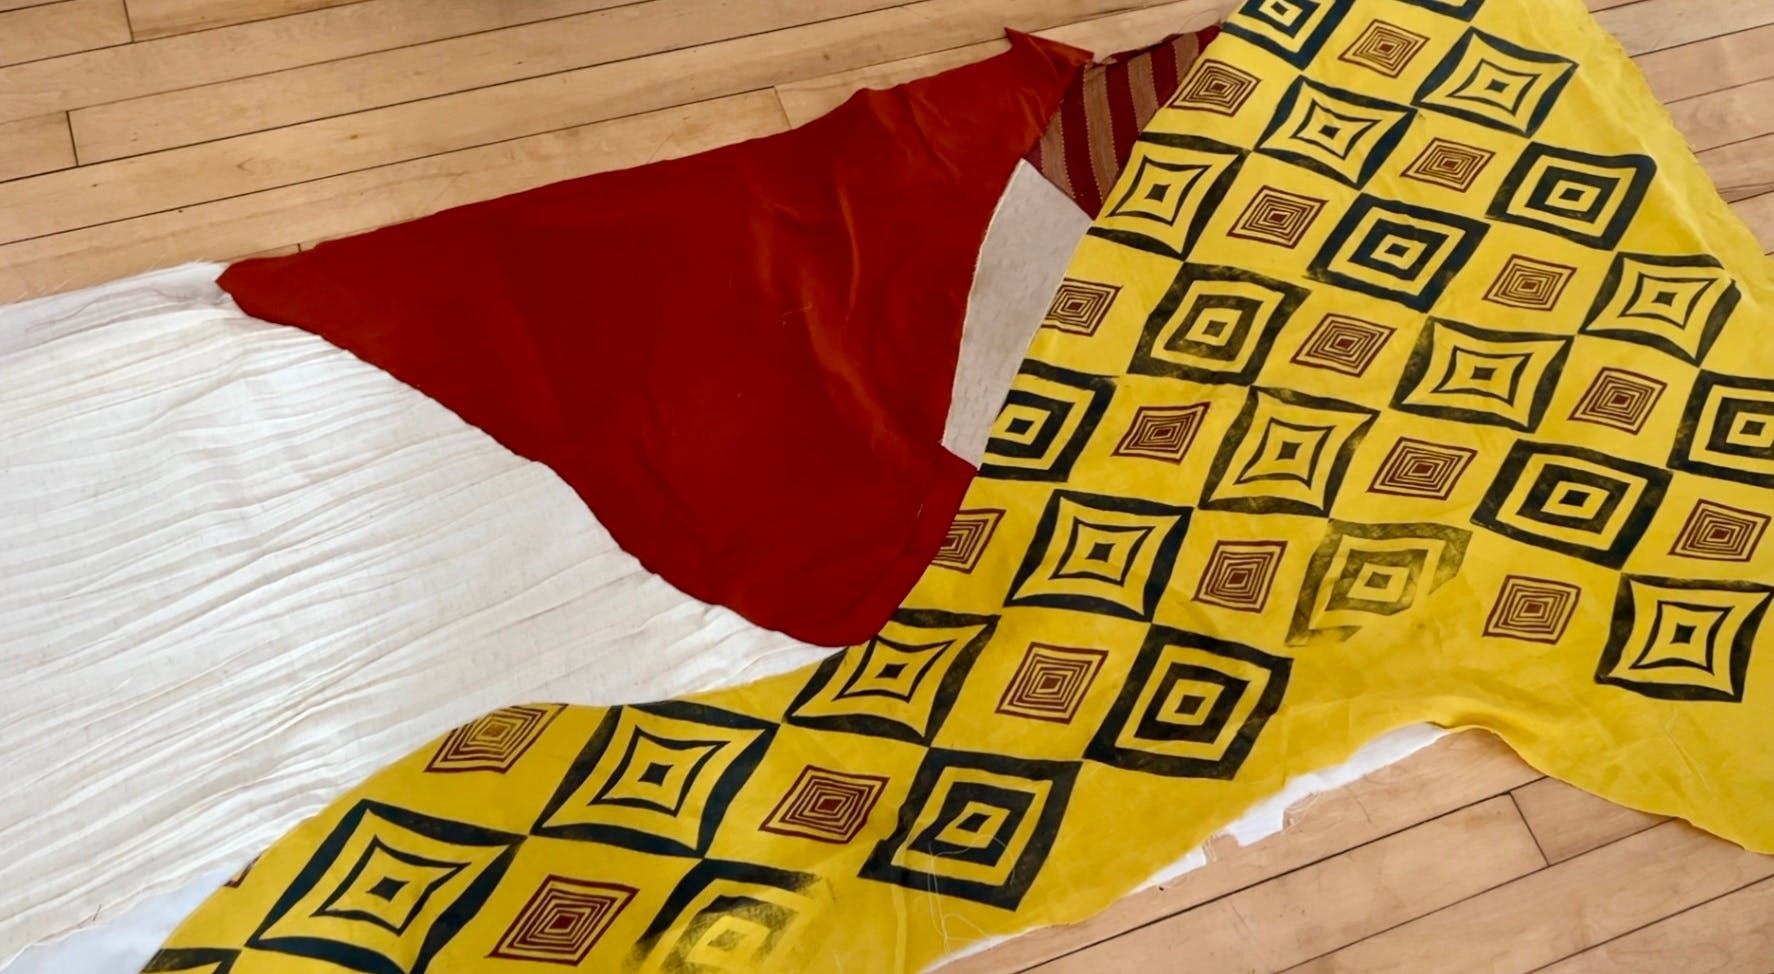
I went to the thrift store to grab a few more pieces of fabric. I went in with the idea that I wouldn't be able to find much, but I ended up finding a TON and basically decided to buy it all. I went looking for rust, burgundy, orange, and tan and I came back with: a burgundy colored tablecloth, a burgundy down comforter, a rusty orangey shirt, some gold fabric, and two huge tan curtains that had metal rings in the top that I was so excited about for the yarn rings I wanted to make. (And a really pretty floral on red fabric that I will use for something else - I am a sucker for floral on red!)
I laid everything out again and I finally felt that I had a solid idea of what I was doing, and what the completed piece was going to look like. It was stunning already!

Making the Top Third
Patterning
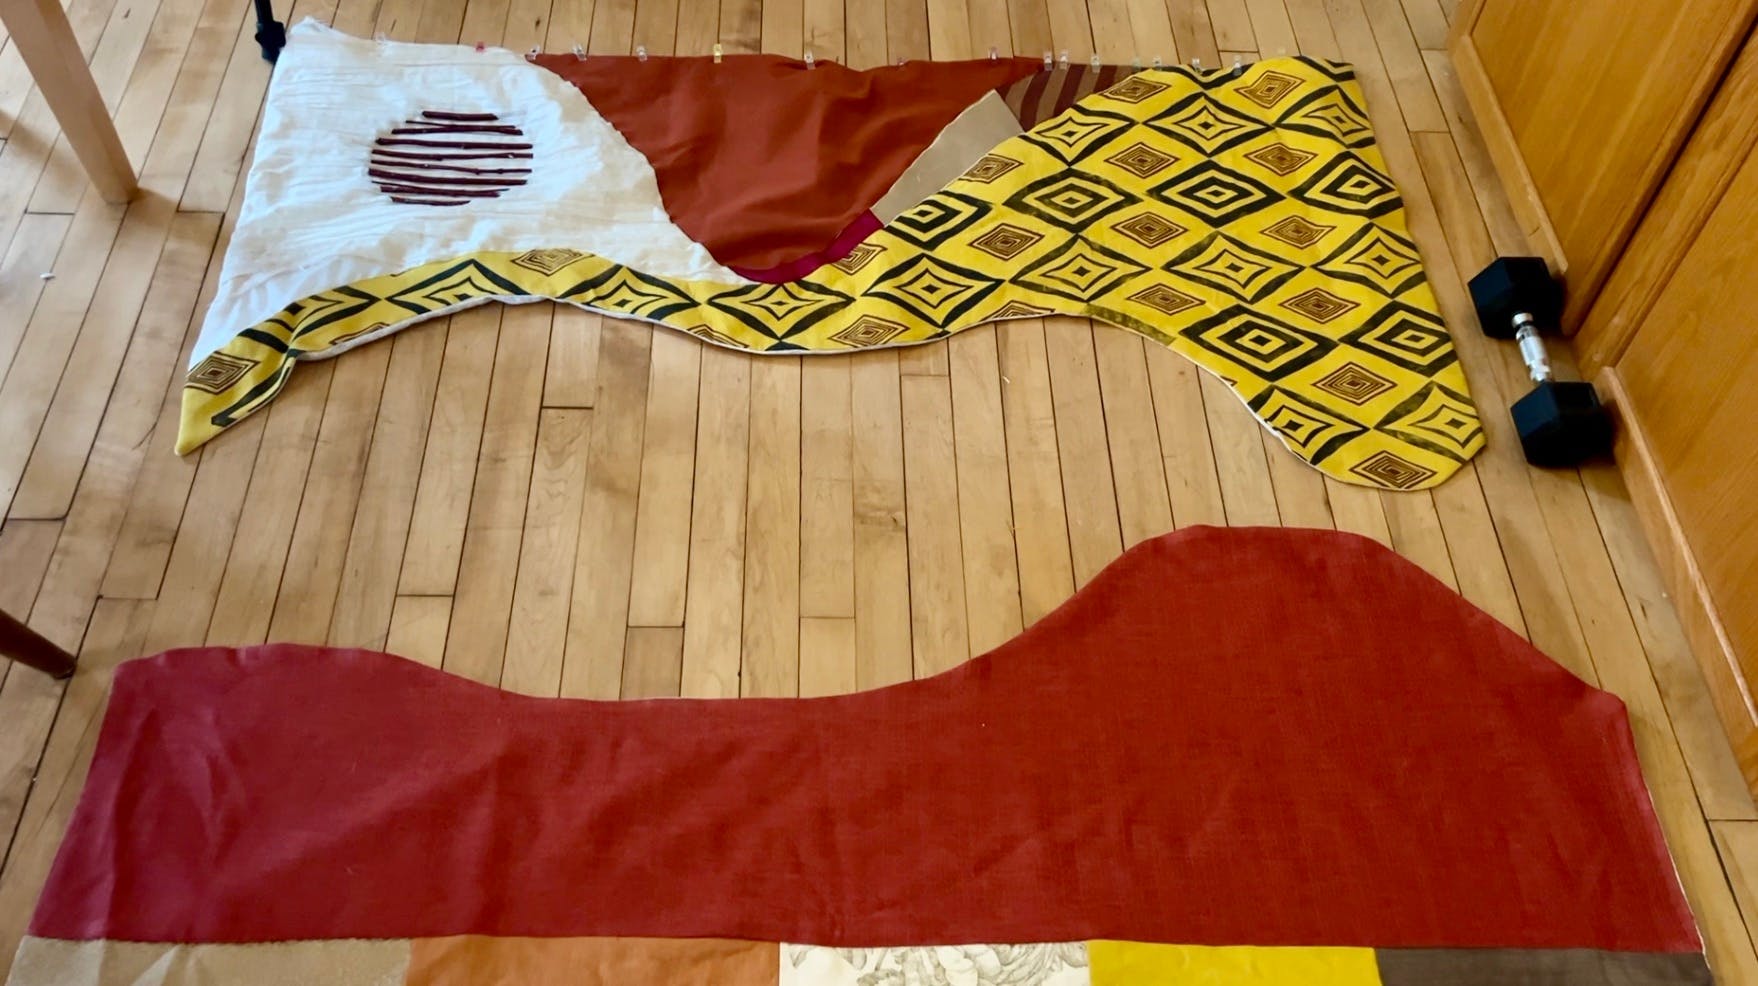
I did some math and determined that I wanted the top and bottom fabric thirds to be about 18" and the middle about 14". This was super give or take since there wouldn't be any straight lines, but it was good to have a guide.
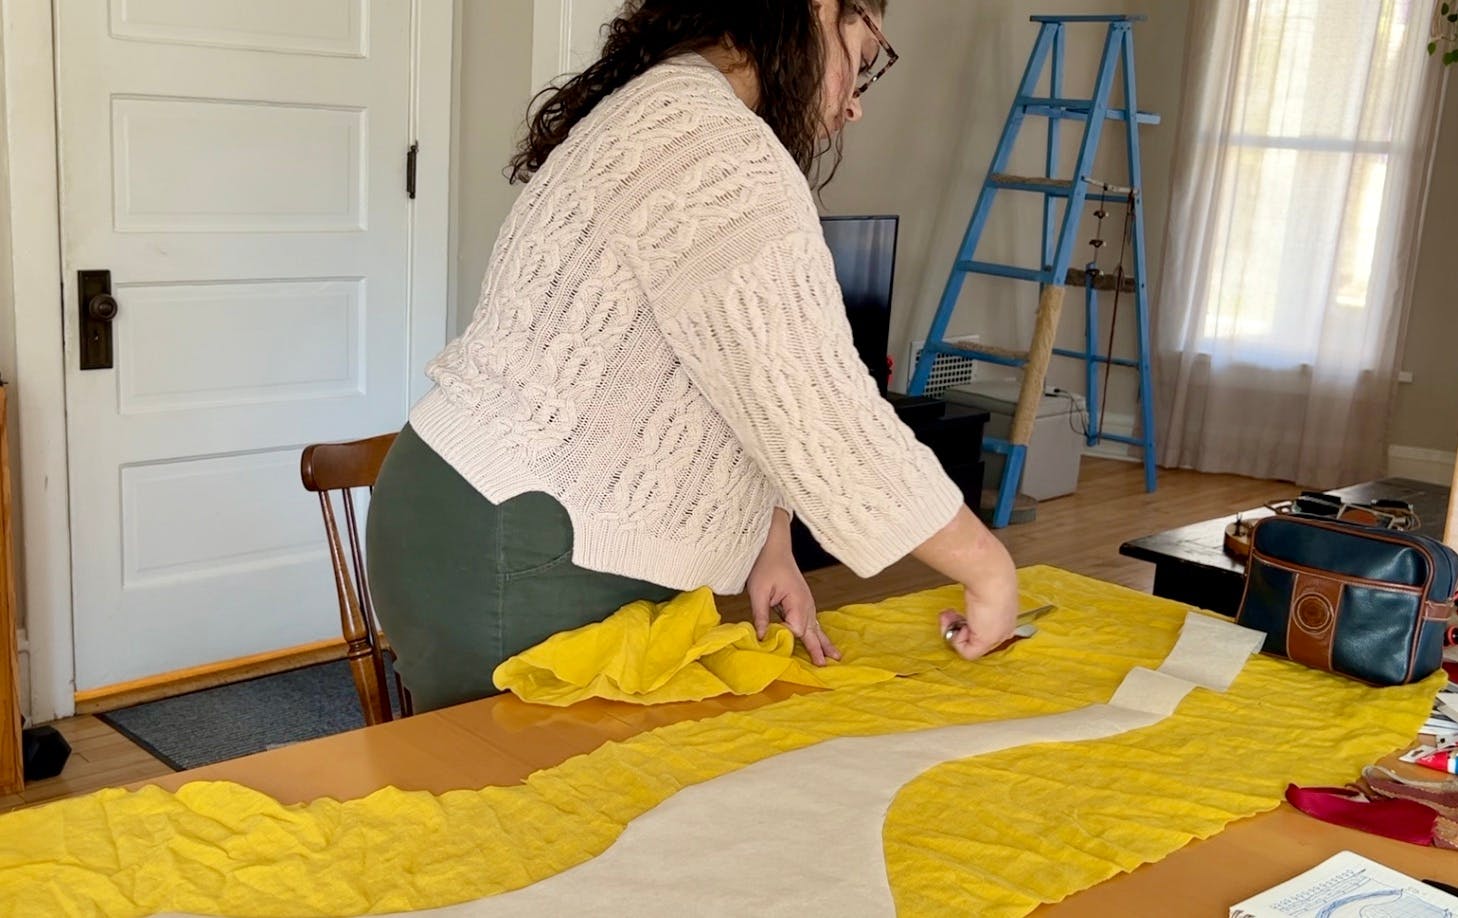
I ripped out the lining of one of the tan curtains to use as the backing for the top third, and then loosely sketched the shapes for the fabric pieces directly onto the fabric with a pencil. Then I copied the sketch onto some tracing paper so that I could cut out templates for the individual pieces and then used the templates to cut out the fabric.

Printing
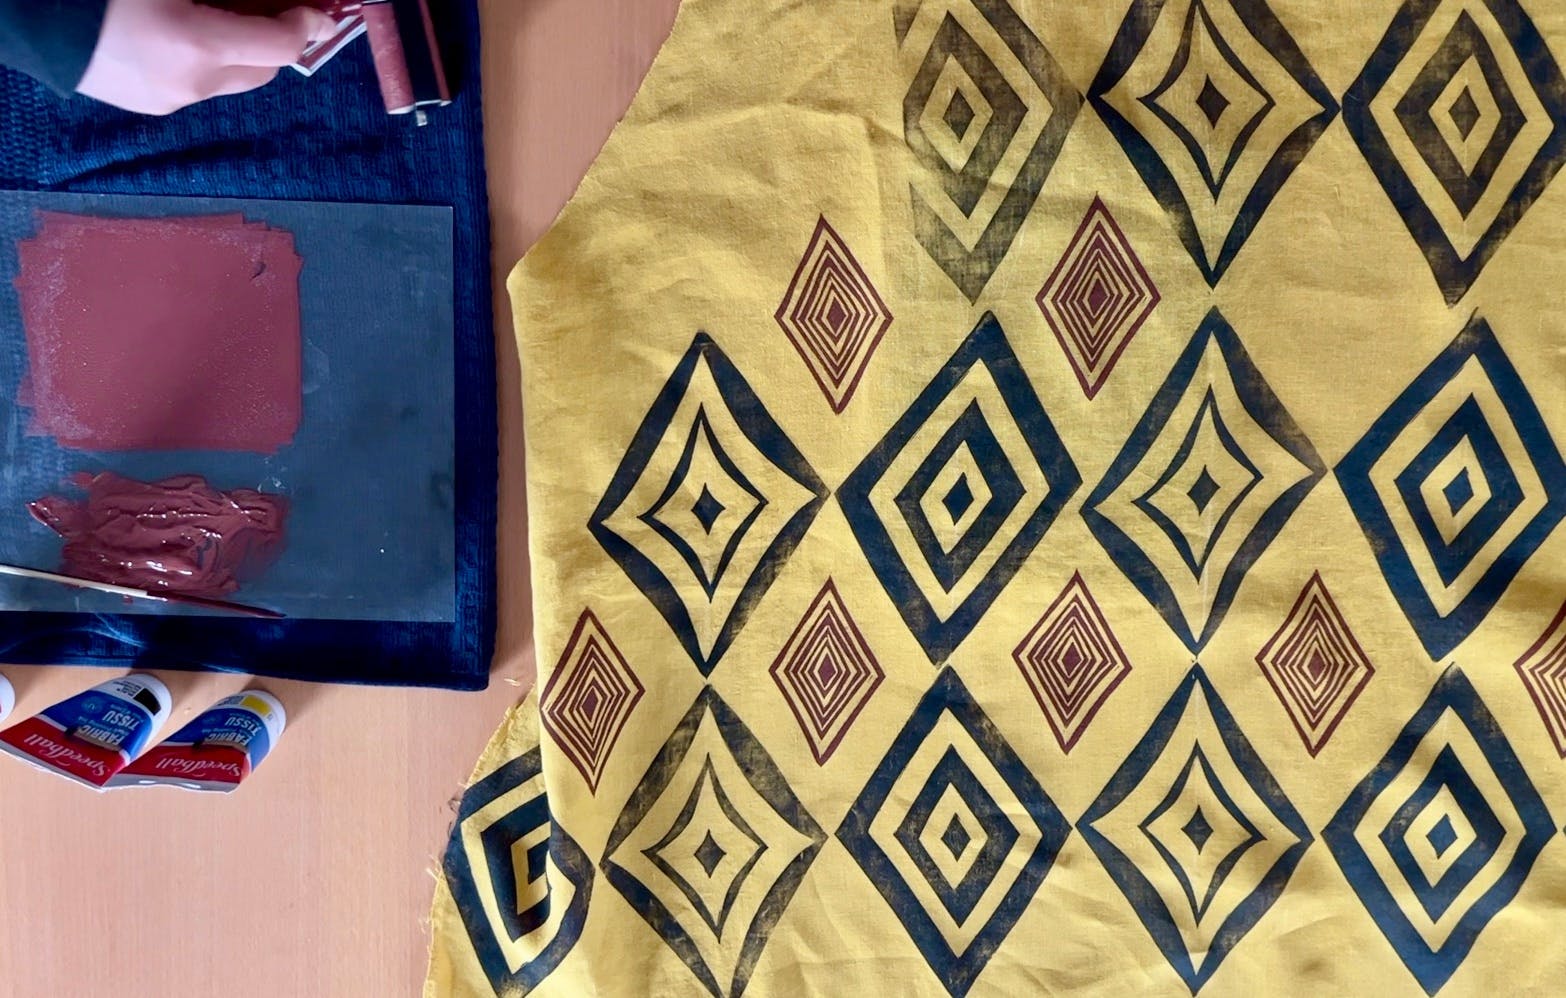
I needed to print before I stitched the fabrics together, and decided to put the diamond pattern on some yellow linen. Even though I had originally wanted to do it in white like the inspiration photo below, it barely showed up so I decided to go with a very dark grey instead.
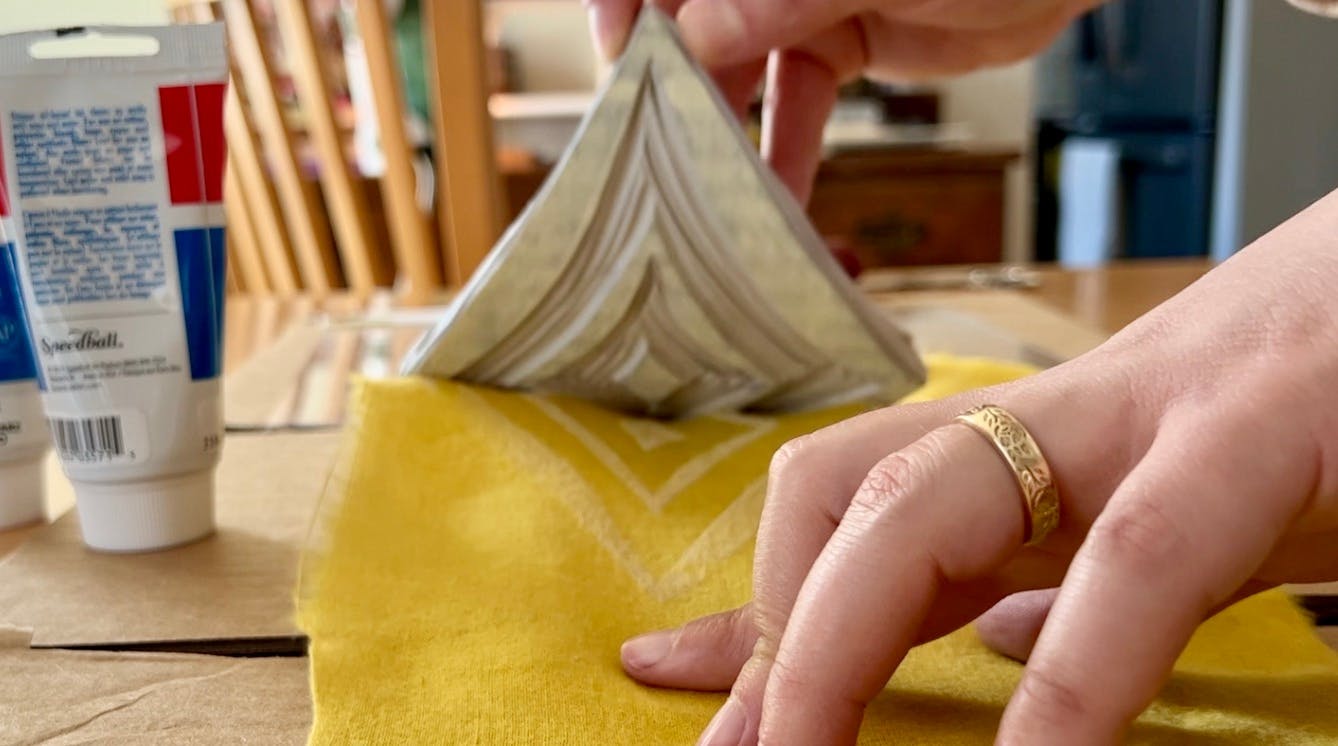
I drew chalk guidelines to keep everything lined up and then printed all of the big diamonds, alternating rows between the two types. I kept getting ink on my hands, so every two diamonds or so I rinsed off my hands so as not to leave inky fingerprints everywhere.
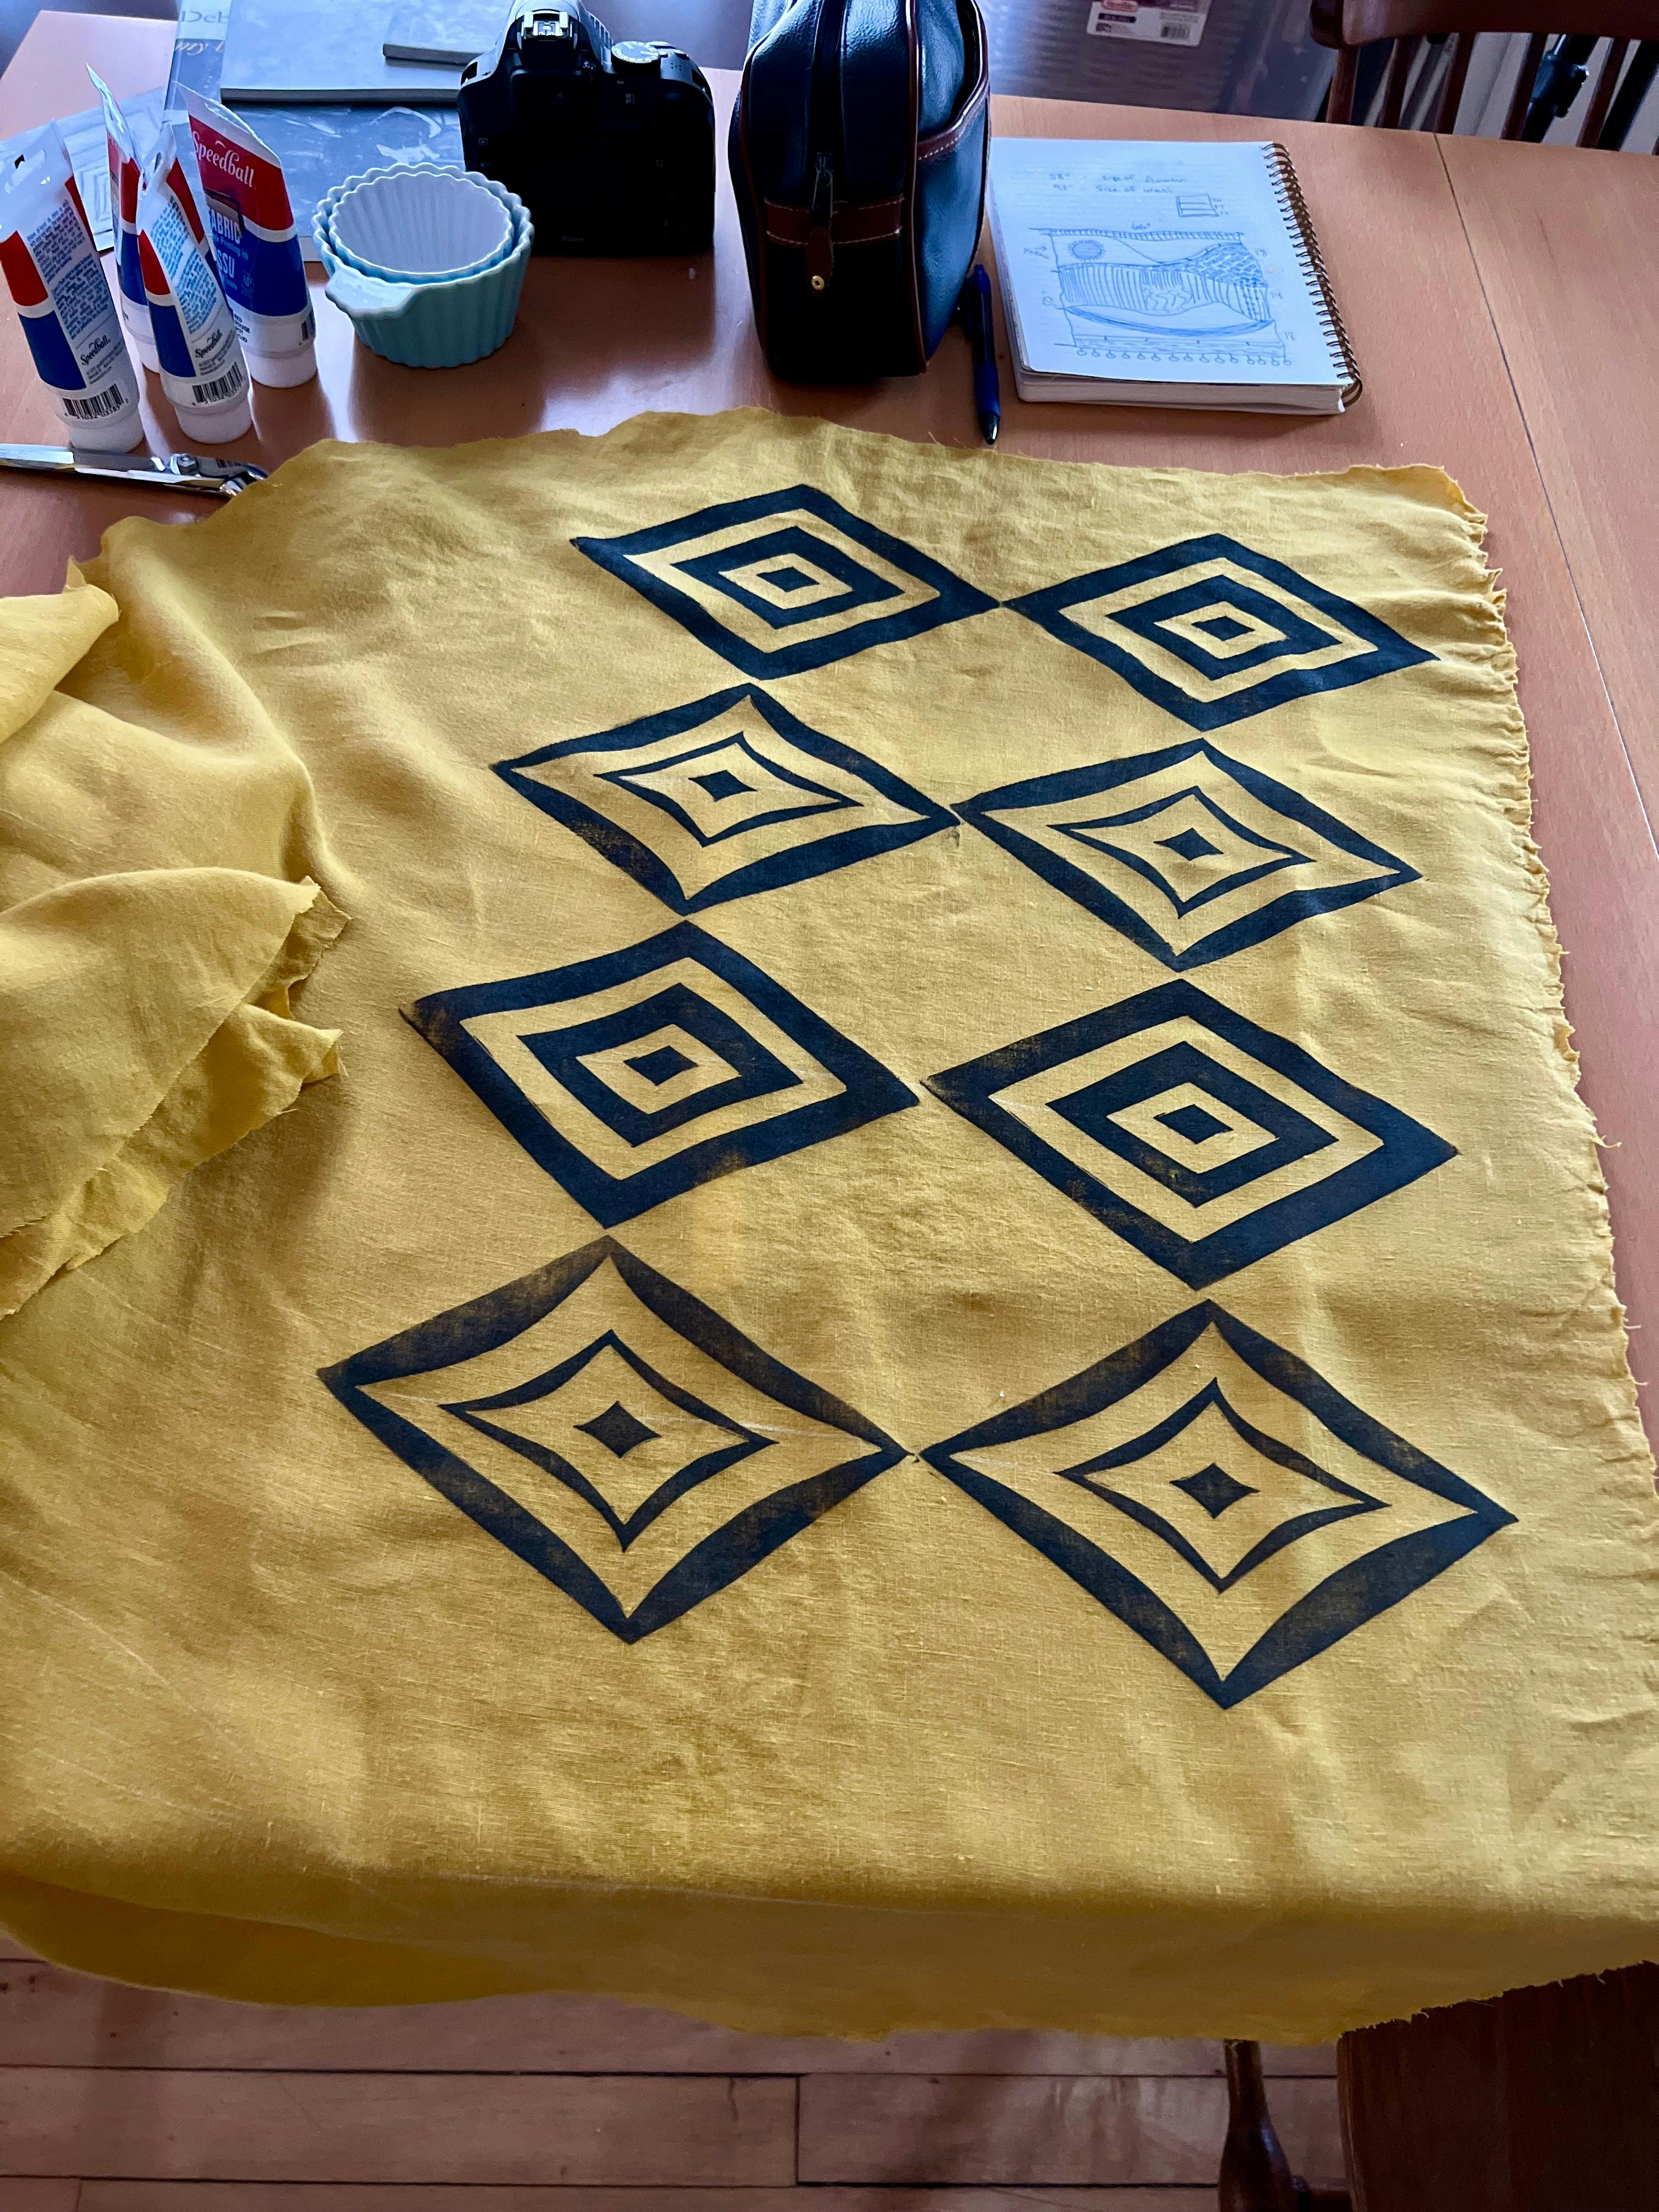
I let it dry overnight and then printed the small diamonds with a rust color that I made by mixing the red, yellow, and a touch of black ink.
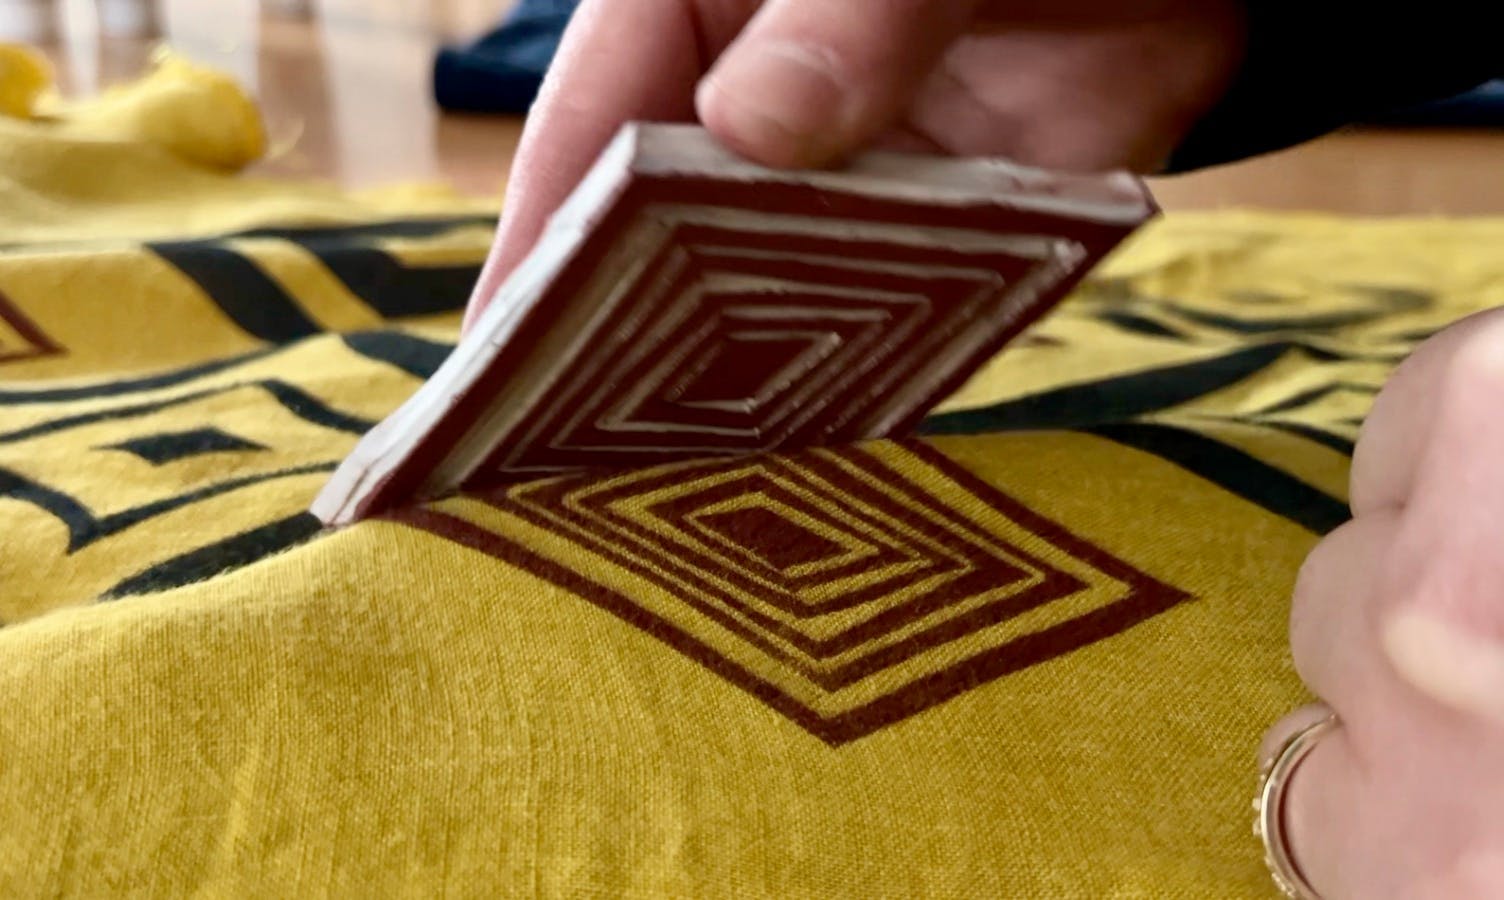
Even with my chalk guidelines, it didn't line up as perfectly as I would have liked, probably because the stamps weren't perfectly square. Nonetheless, I LOVE LOVE LOVE how this part came out! I declare here and now: I will be doing this for the rest of my life! I love fabric and I love block printing and I am so glad I finally merged these two things. I am in love.
Stitching
I pinned all of the pieces onto the backing and stitched them down and sadly, it looked horribly lumpy. I don’t know what possessed me to think I didn’t need to add interfacing. I ripped out the stitching, which took about an hour, and then added piecemeal interfacing to all of the pieces before stitching them down a second time. This time, it worked!
The Plague Strikes
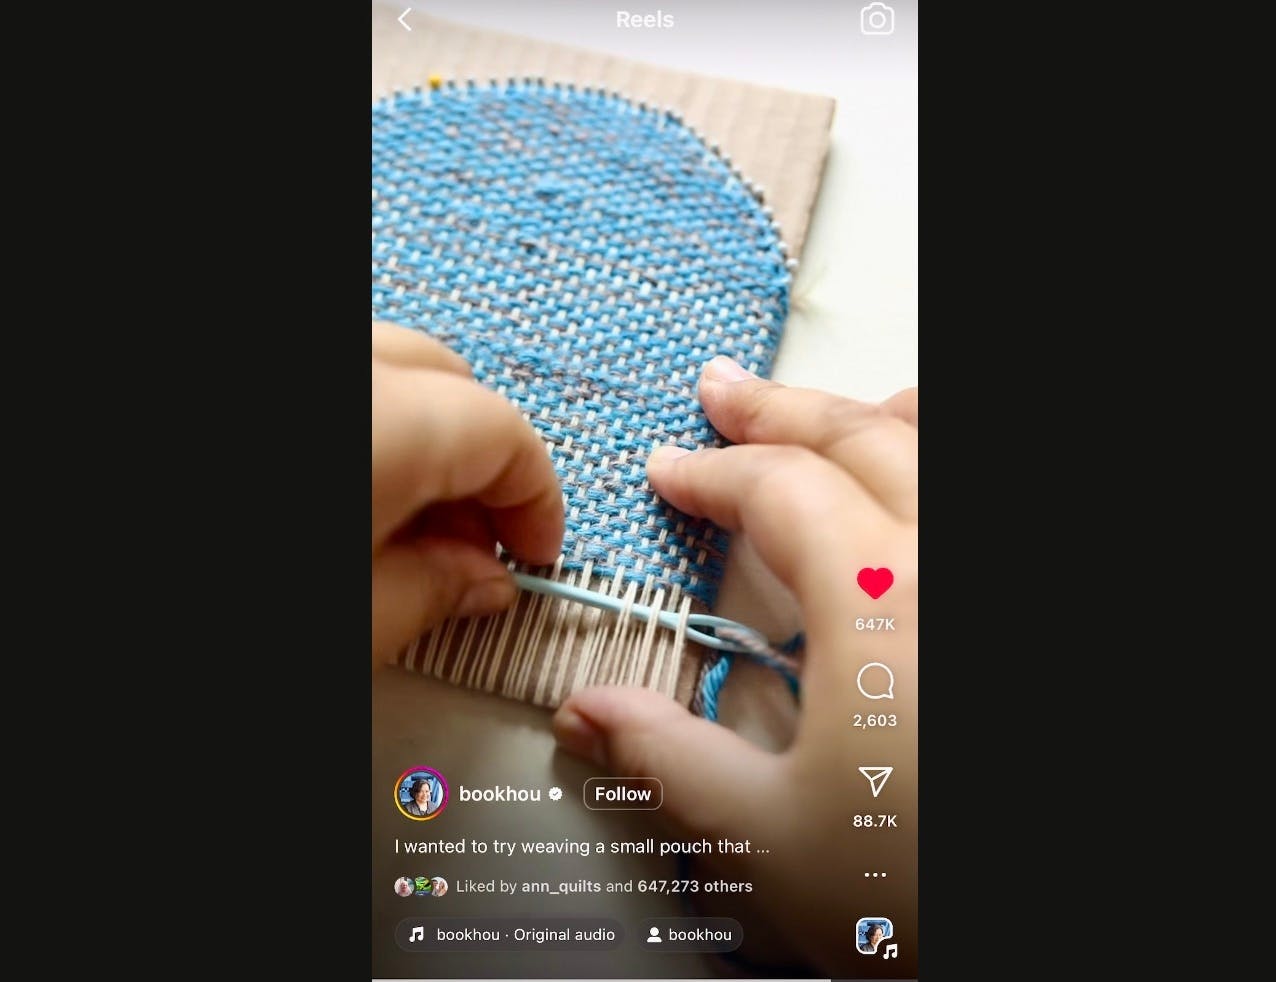
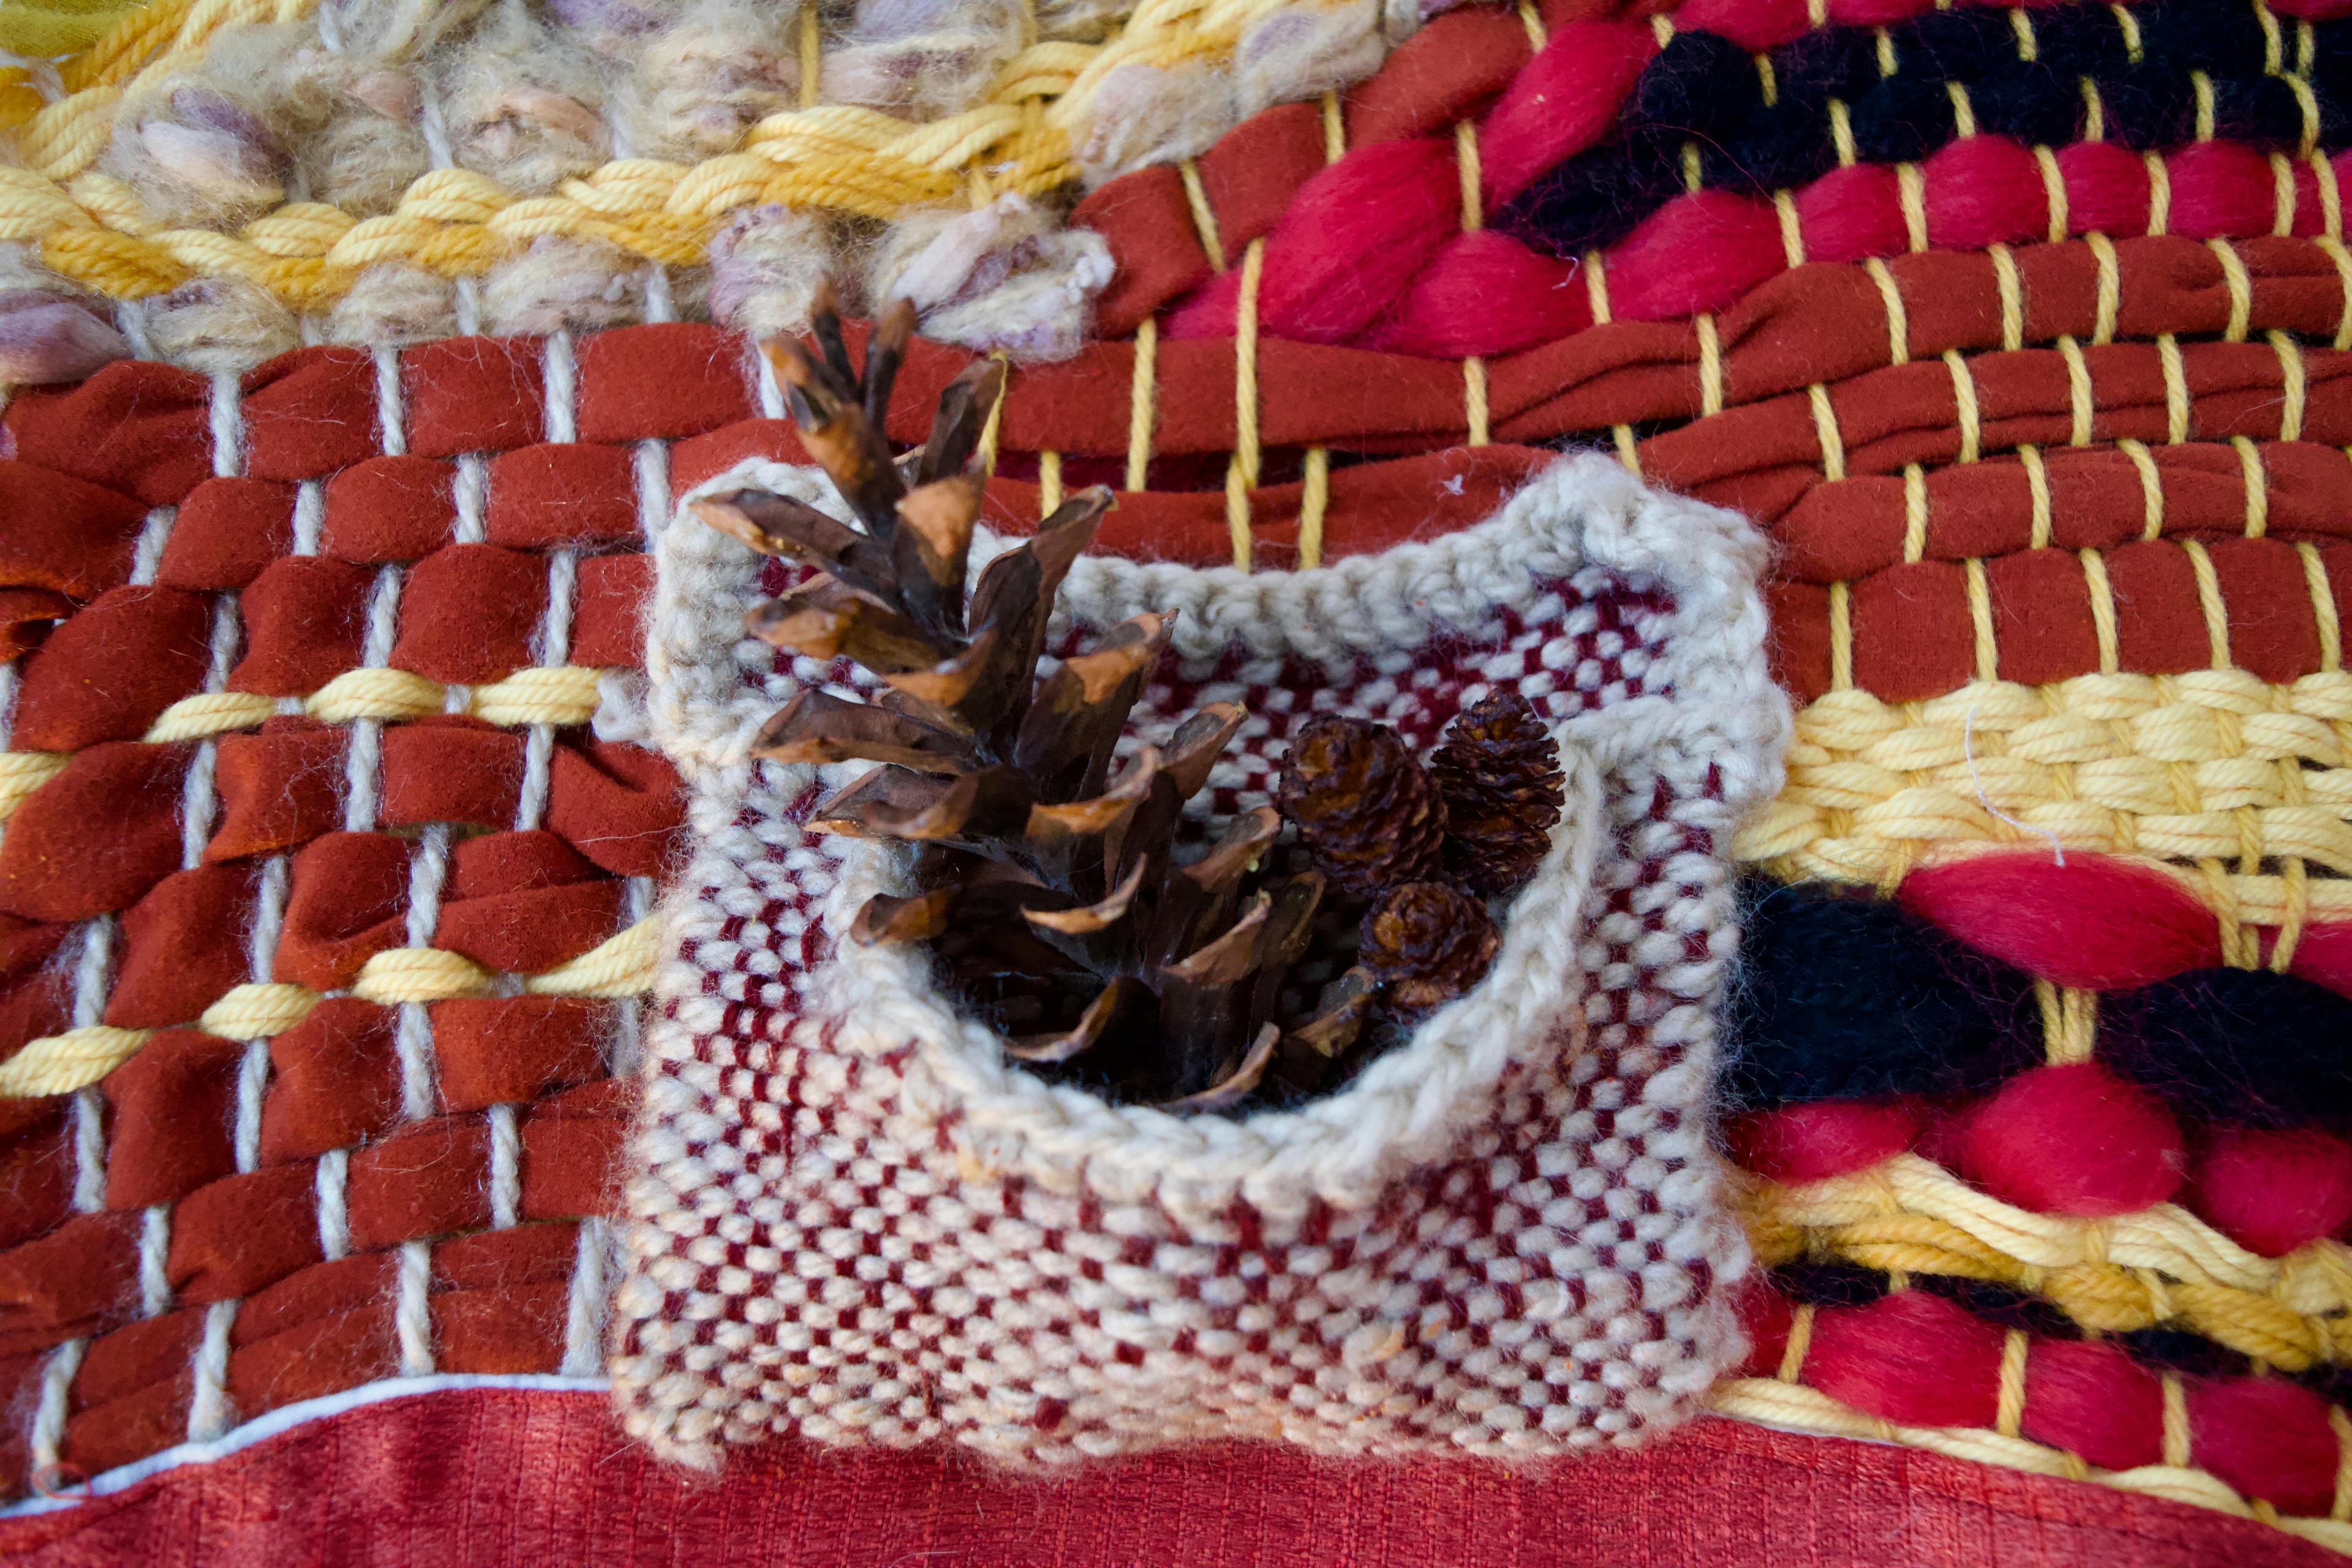
Josh and I got Covid the day before Thanksgiving and were pretty knocked out. I took a huge pause on this project except for making this tiny little pouch that I planned on putting a pinecone in somewhere in the yarn section.
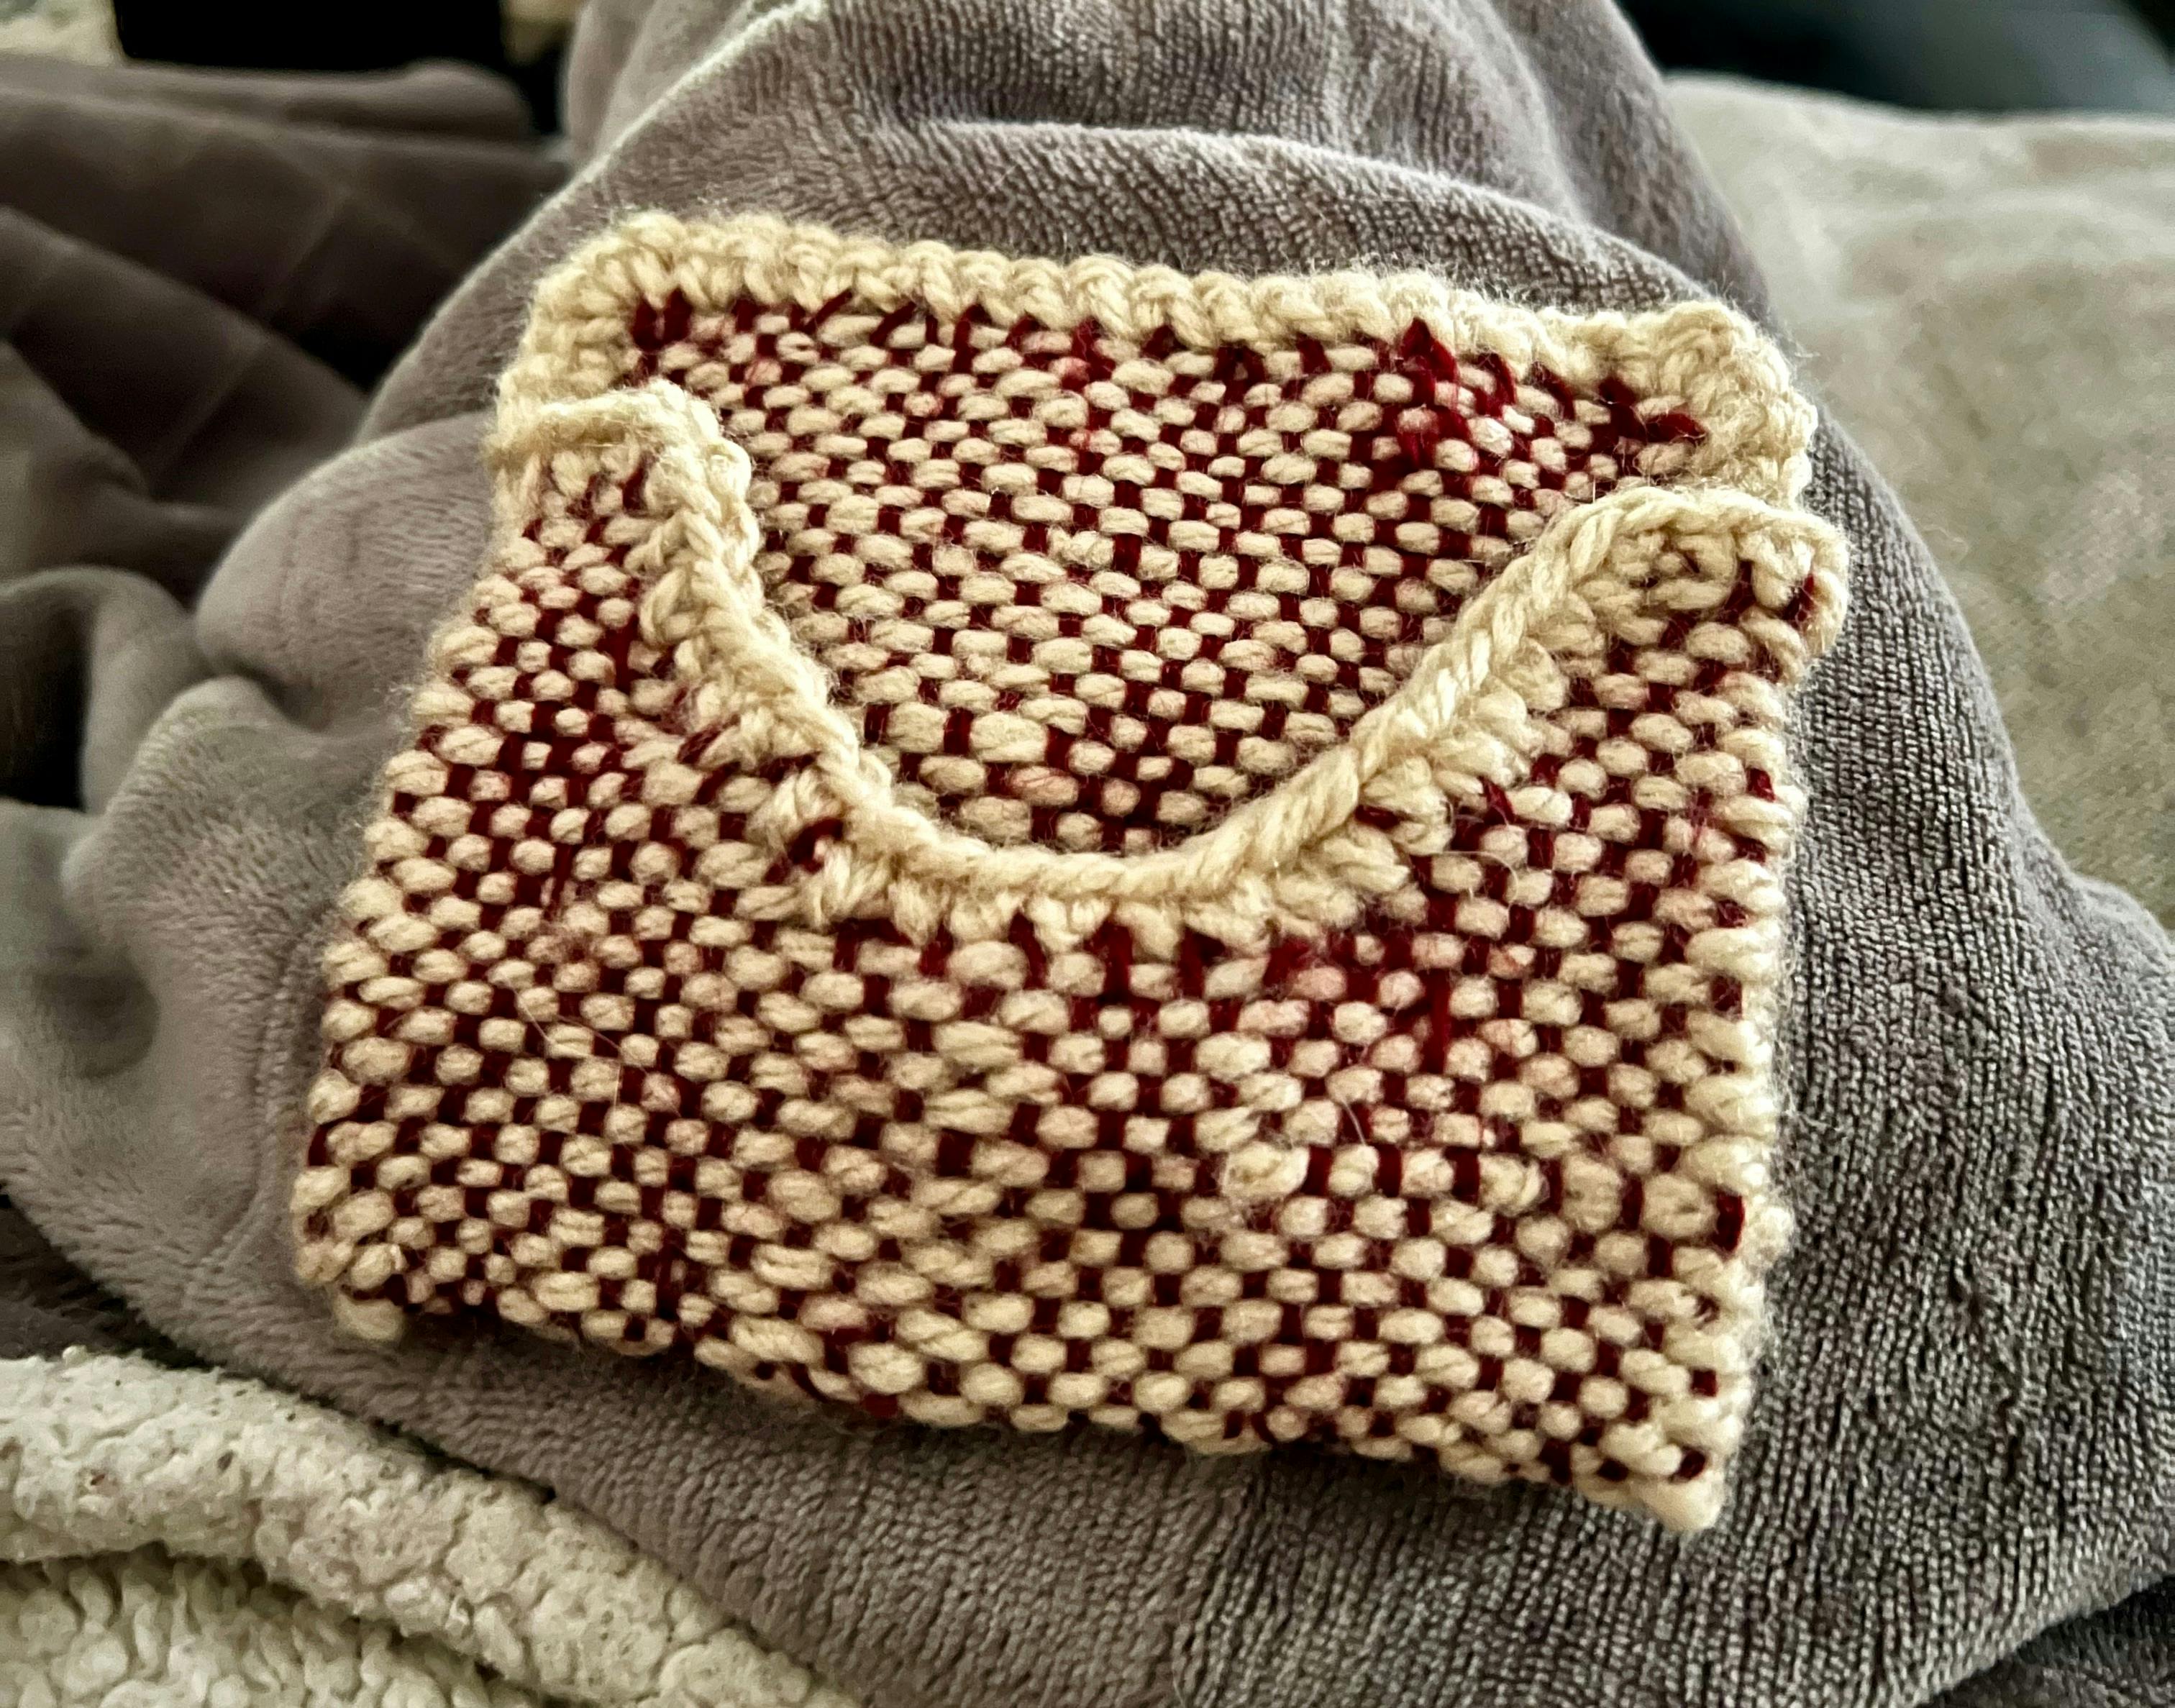
I followed a little video tutorial on Instagram by @bookhou. I highly recommend this for a sick project - it was pretty mindless, quick, and satisfying!
More Branches
Once I was feeling better, I went for a walk and came back with *drum roll please* Red Twig Dogwood branches! (I feel like the above sentence tells you everything you need to know about me as a person!)
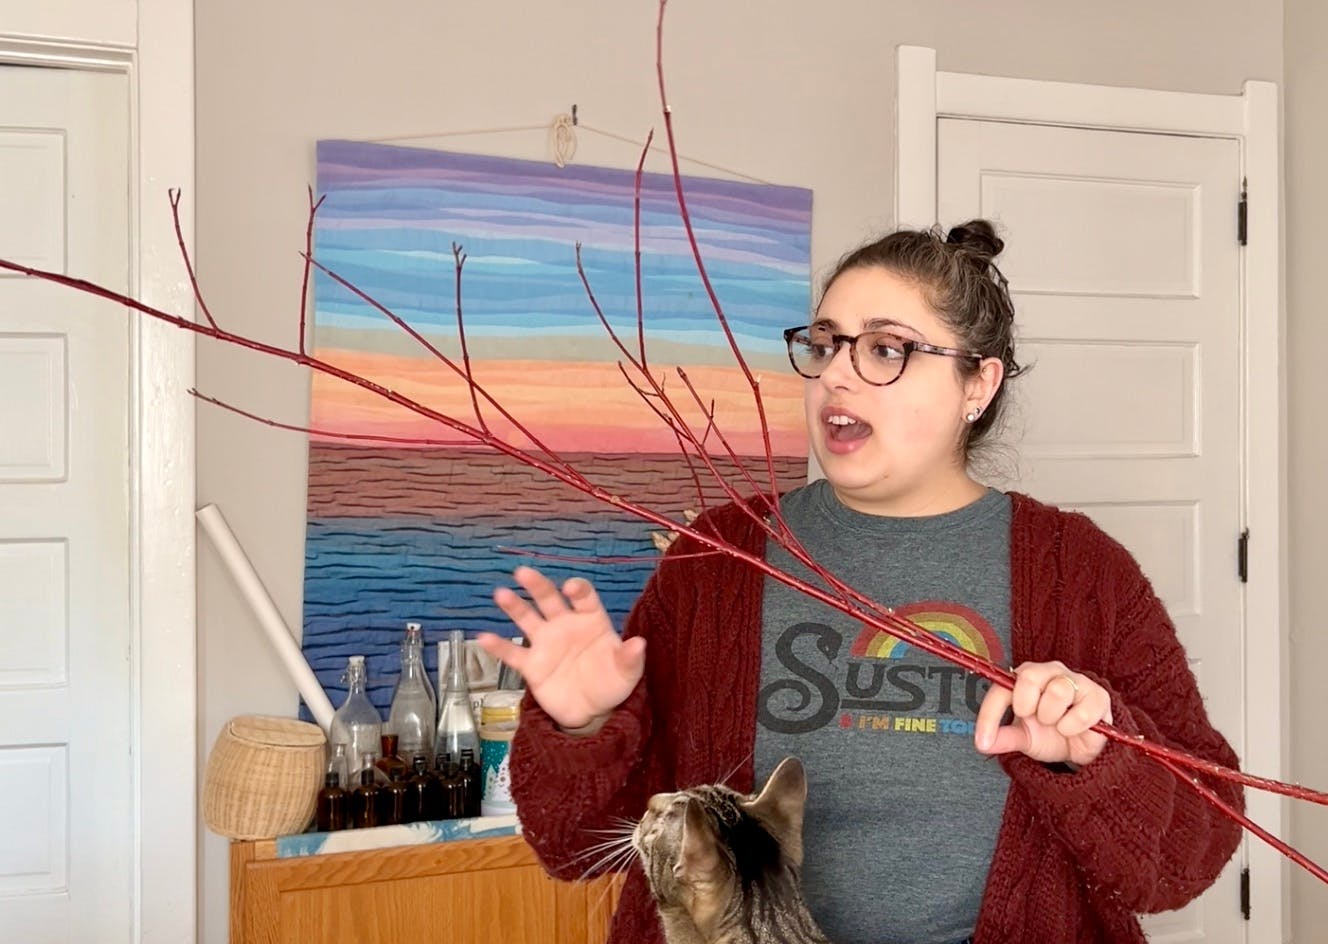
I had grabbed these because I realized that printing with a large stamp on the corrugated fabric of the tan curtain I had put in the upper left corner would probably not go very well, so I pivoted toward a new inspiration (below).
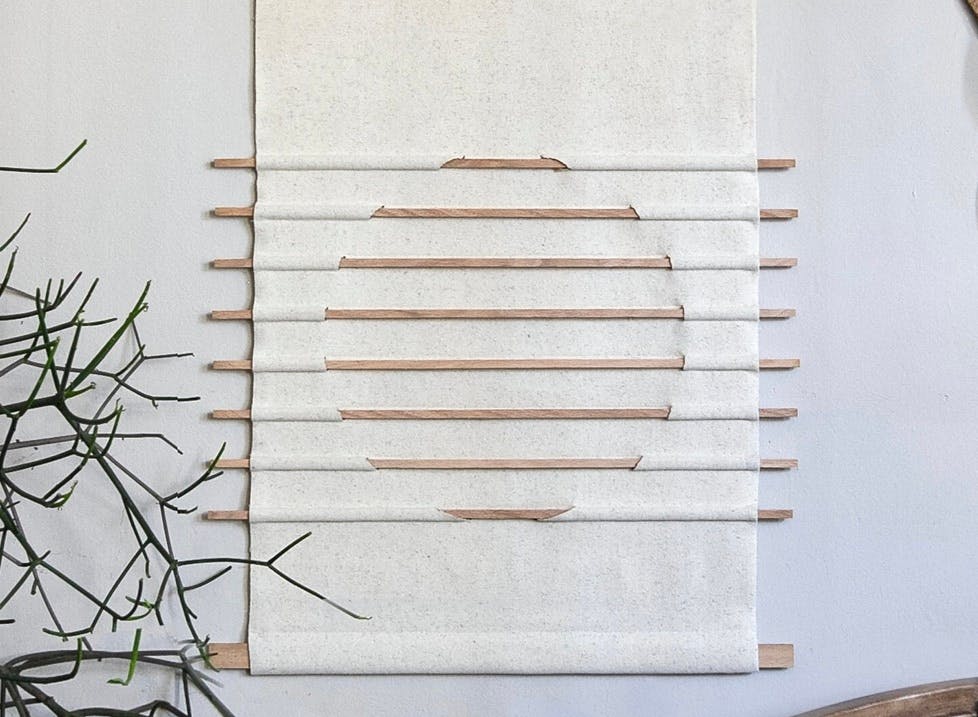
I cut tiny holes in the shape of a circle and added a little bit of Fray Check to each opening as I put the sticks in place. Oh, this result made me so happy! (Future me here: The sticks did in fact NOT keep their gorgeous red vibrancy. They are still cool, just way more brown which is FINE... I guesssss...)
The Bottom Third
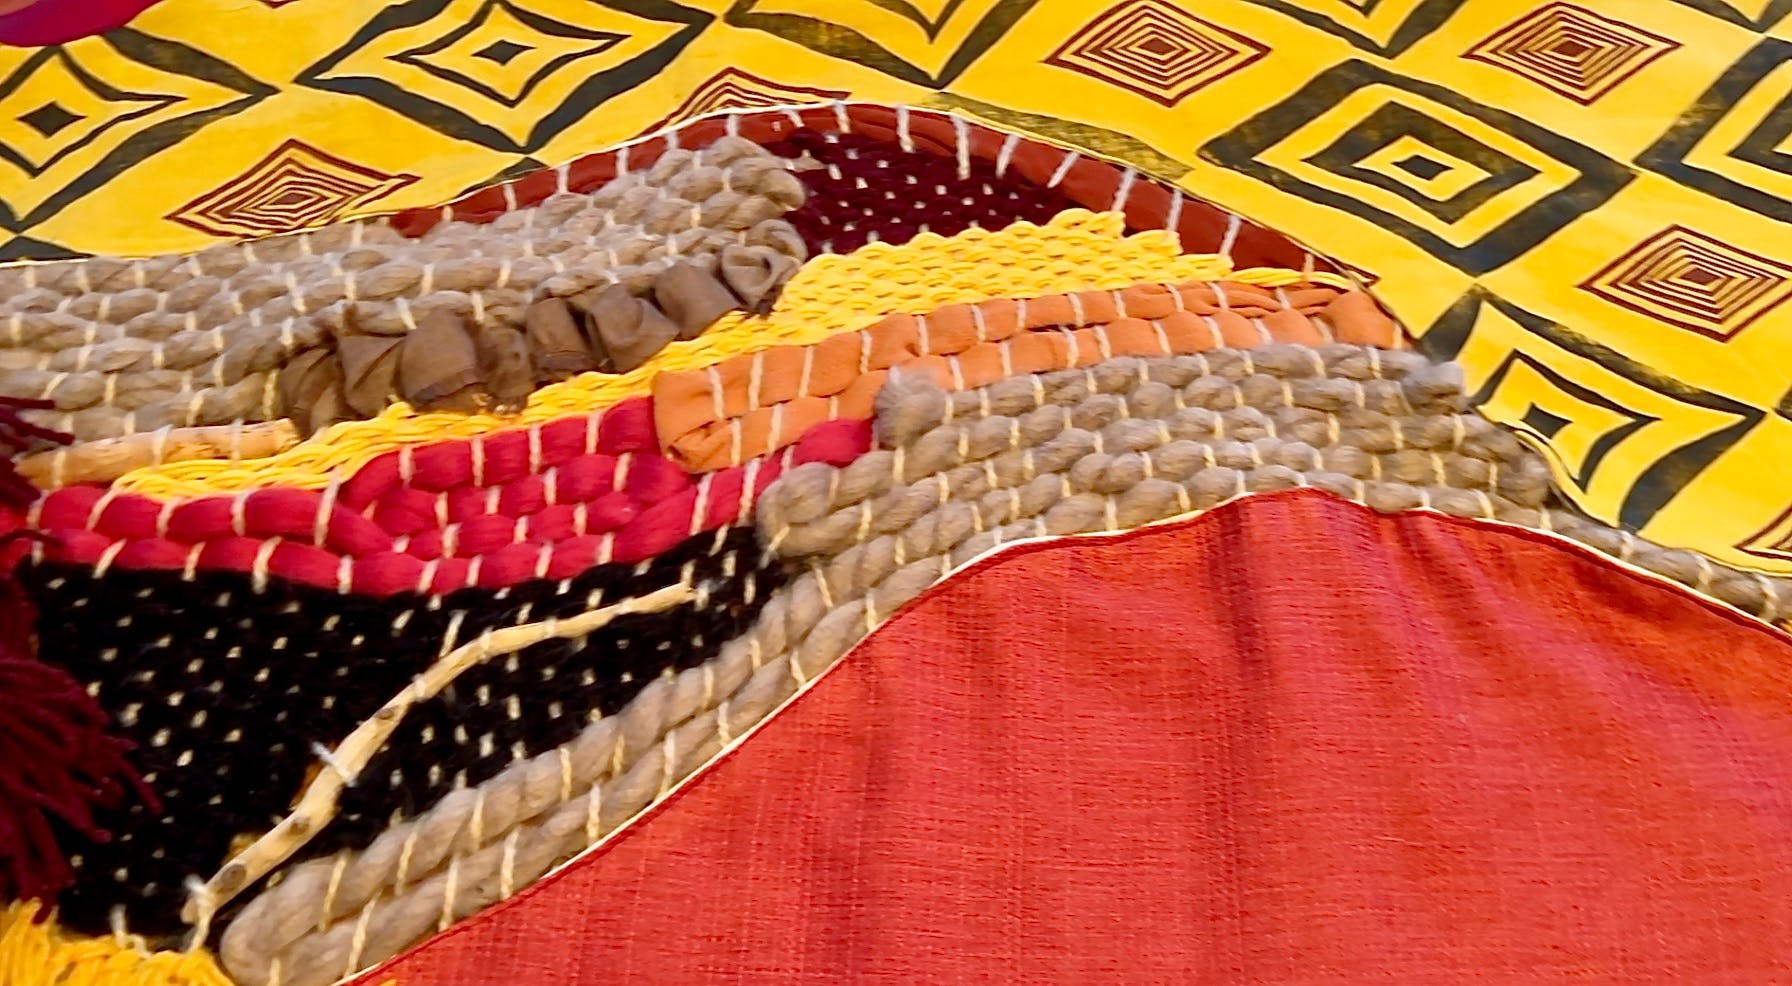
I wanted to do the bottom fabric next so that I could string the yarn between the fabric sections. This was super straightforward in comparison - a simple stamp placed in a simple pattern, with straight-line pieced fabric.
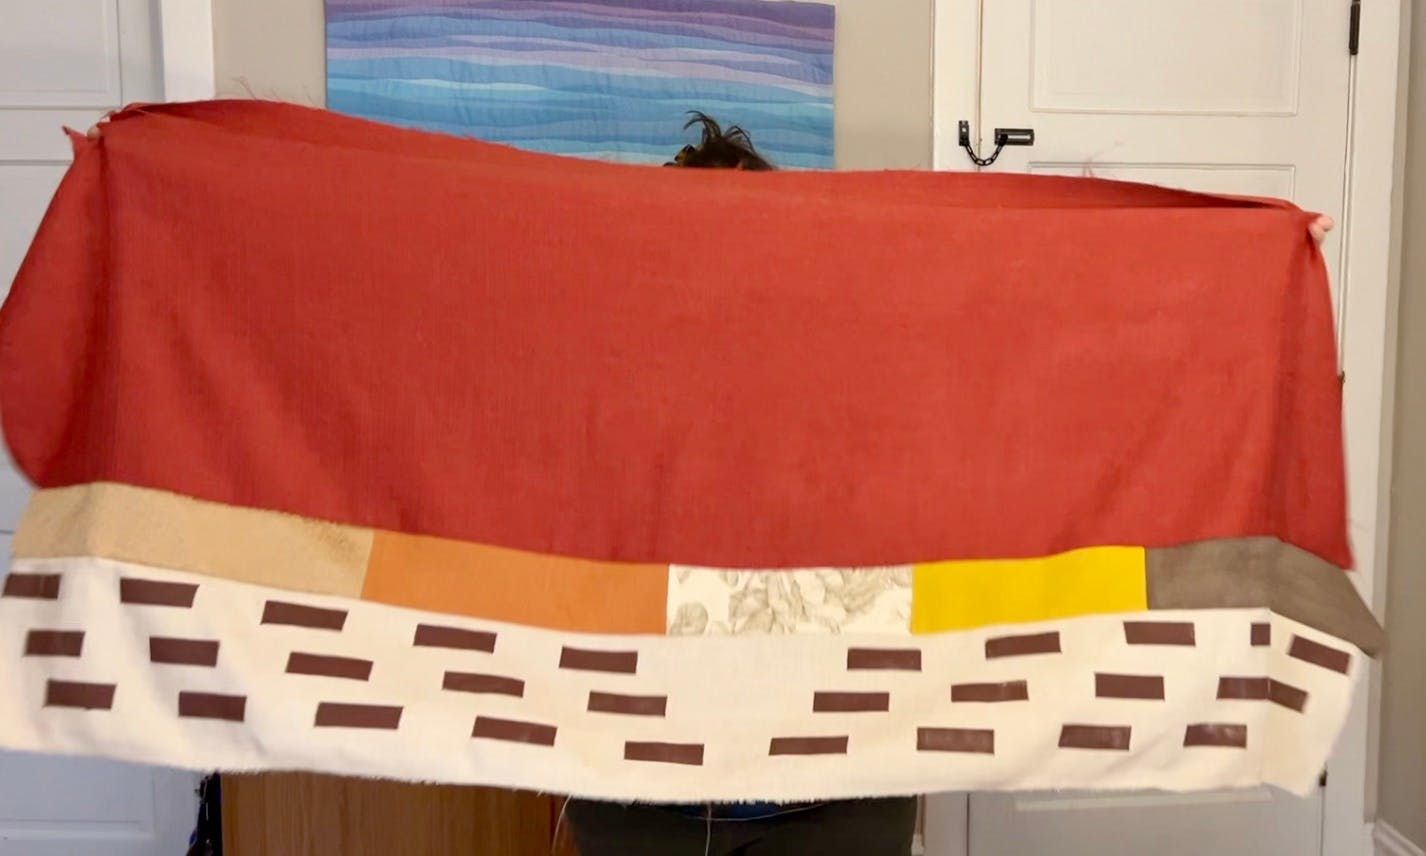
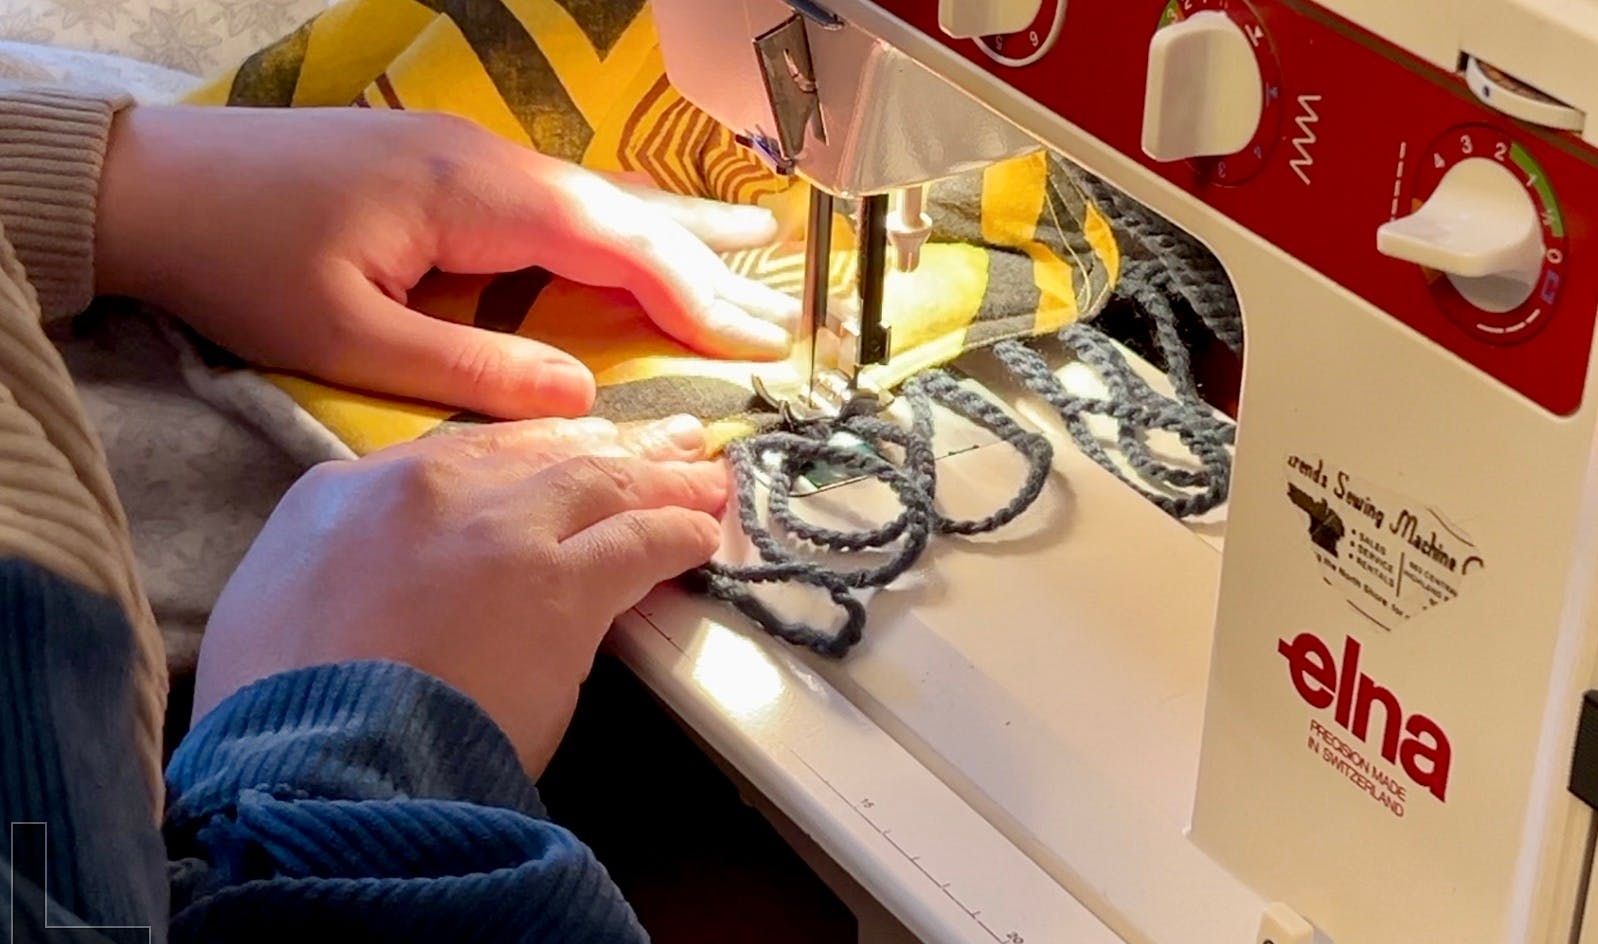
To add structure (this thing was going to be HEAVY), I sewed some thick flannel to both the top and the bottom sections. I sewed these right sides together so that I could turn them right sides out and have nice, clean edges.
The Middle Third
The Warp
I can never remember which is the warp and which is the weft, but luckily Google has my back. In weaving, there are two directions of the fibers. The warp is what typically goes on the loom and are the vertical fibers. The weft is what gets woven between the warp.

To add the warp, I laid both pieces down on the floor and weighed them down with some dumbbells. Then I pinned each piece of yarn to each end so that I could stitch them down.
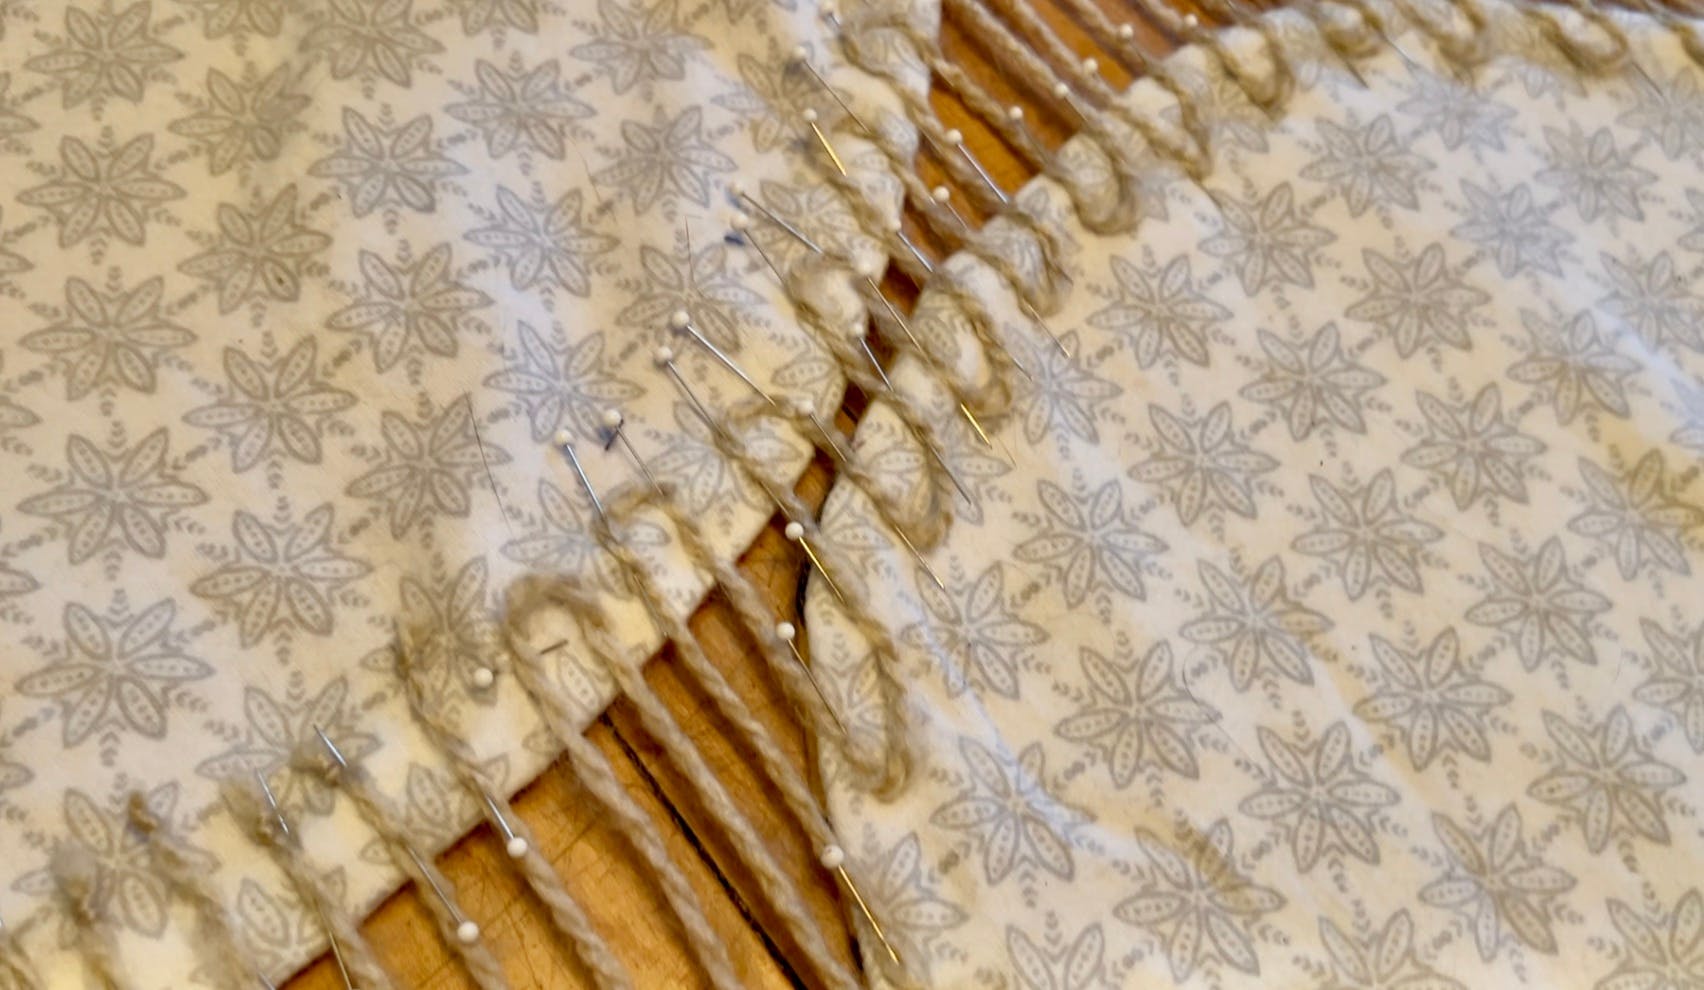
I started by cutting the yarn and tying knots on each end so it wouldn't pull through, but eventually switched to zig-zagging back and forth which was way quicker and less wasteful. Before you ask - my back and my knees were not thrilled. This took about 2.5 hours and due to Pete's boundless curiosity and lack of self-preservation instinct, I couldn't really walk away from it.
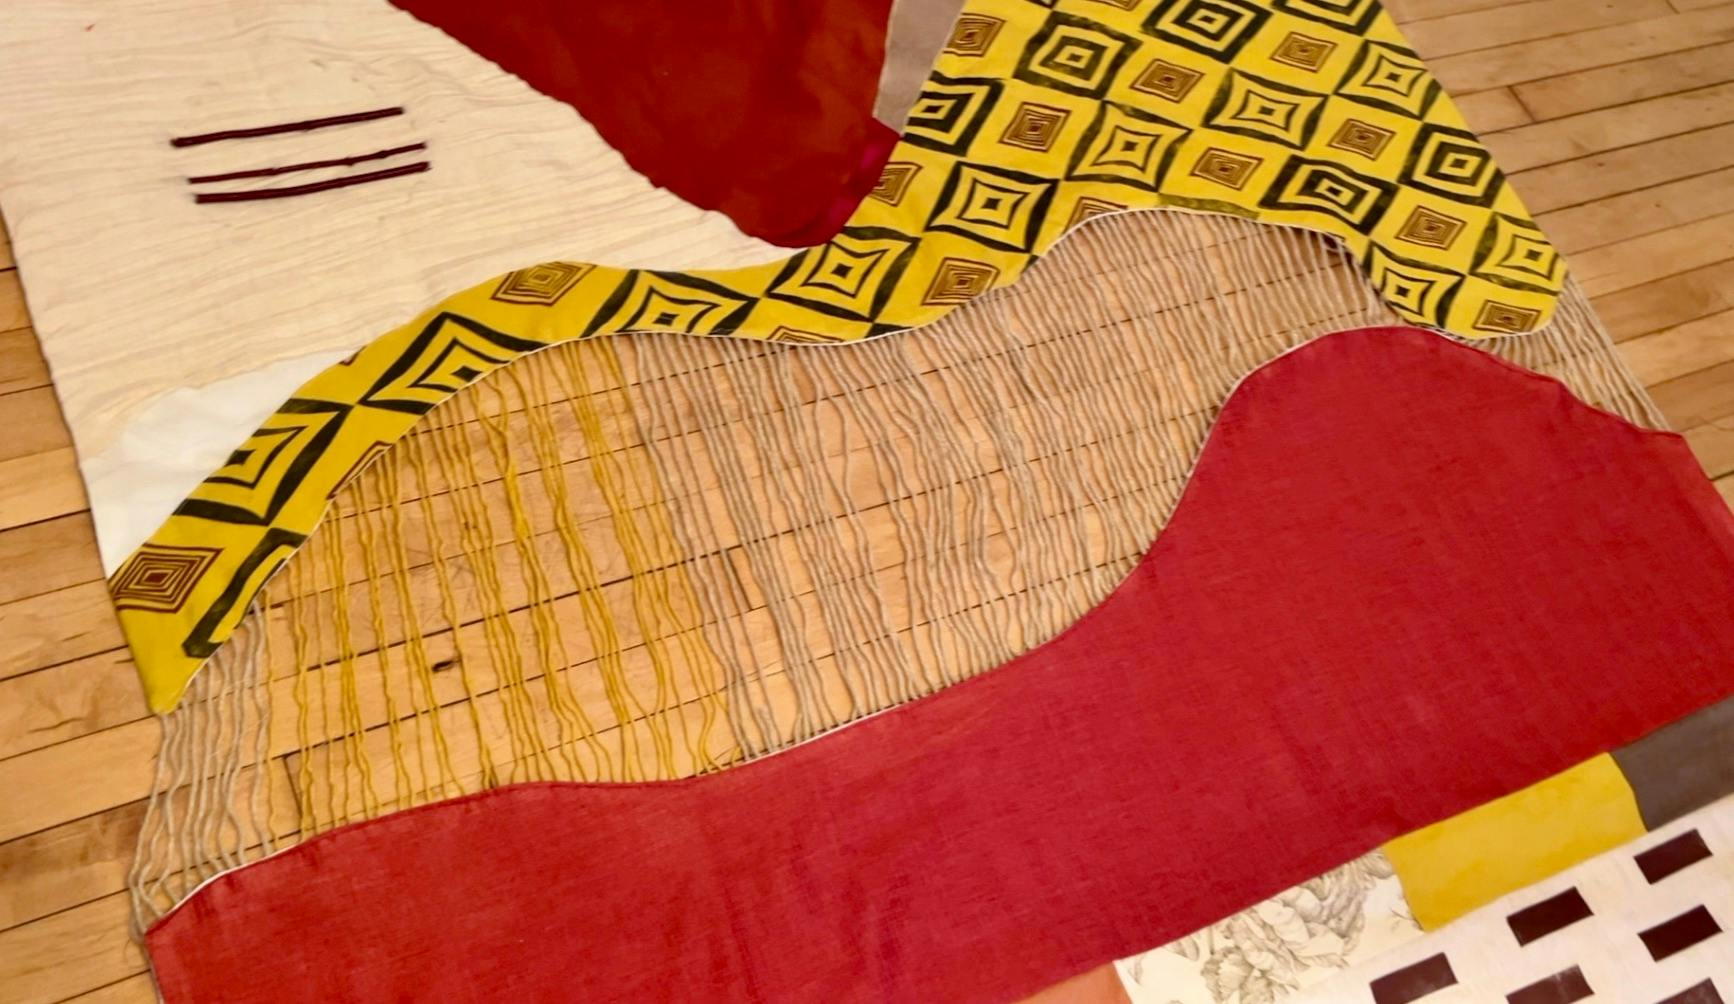
I stitched the yarn down and it looked like this! It's laying on the ground here but for the most part, when I held it up the yarns were all taught. There were a few that were loose, but it was an easy fix to re-pin and re-stitch. (Also yes, all of the sticks for the sun fell out - I glued them in right after this picture was taken!)
The Weft
The next day, I lay the piece down on my table, weighed it down with a bunch of heavy things, and put on Project Runway to entertain me while I weaved. Wove. While I wove. For the dangly section, I wove a grid first so that I could use a crochet hook to hook on lots and lots of tassels. I used masking tape and safety pins throughout this process to secture the ends of whatever was being woven so that it wouldn't pull in on itself.
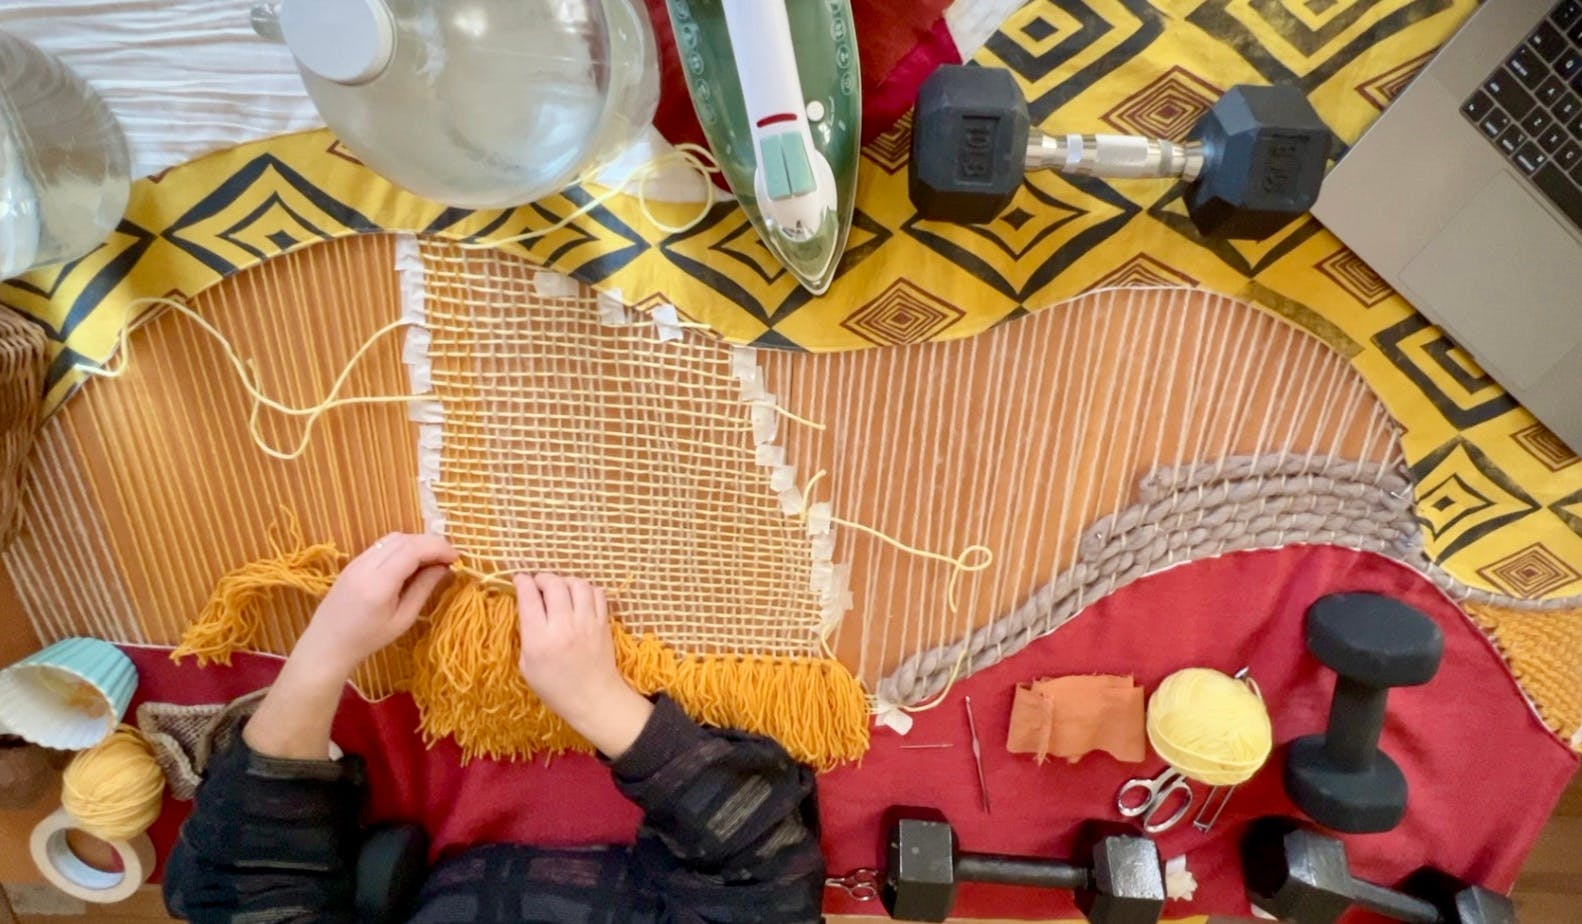
Overall, I wanted this section to have a variety of textures and scale, so I used yarn, fabric, the wool roving, and a few branches as well.
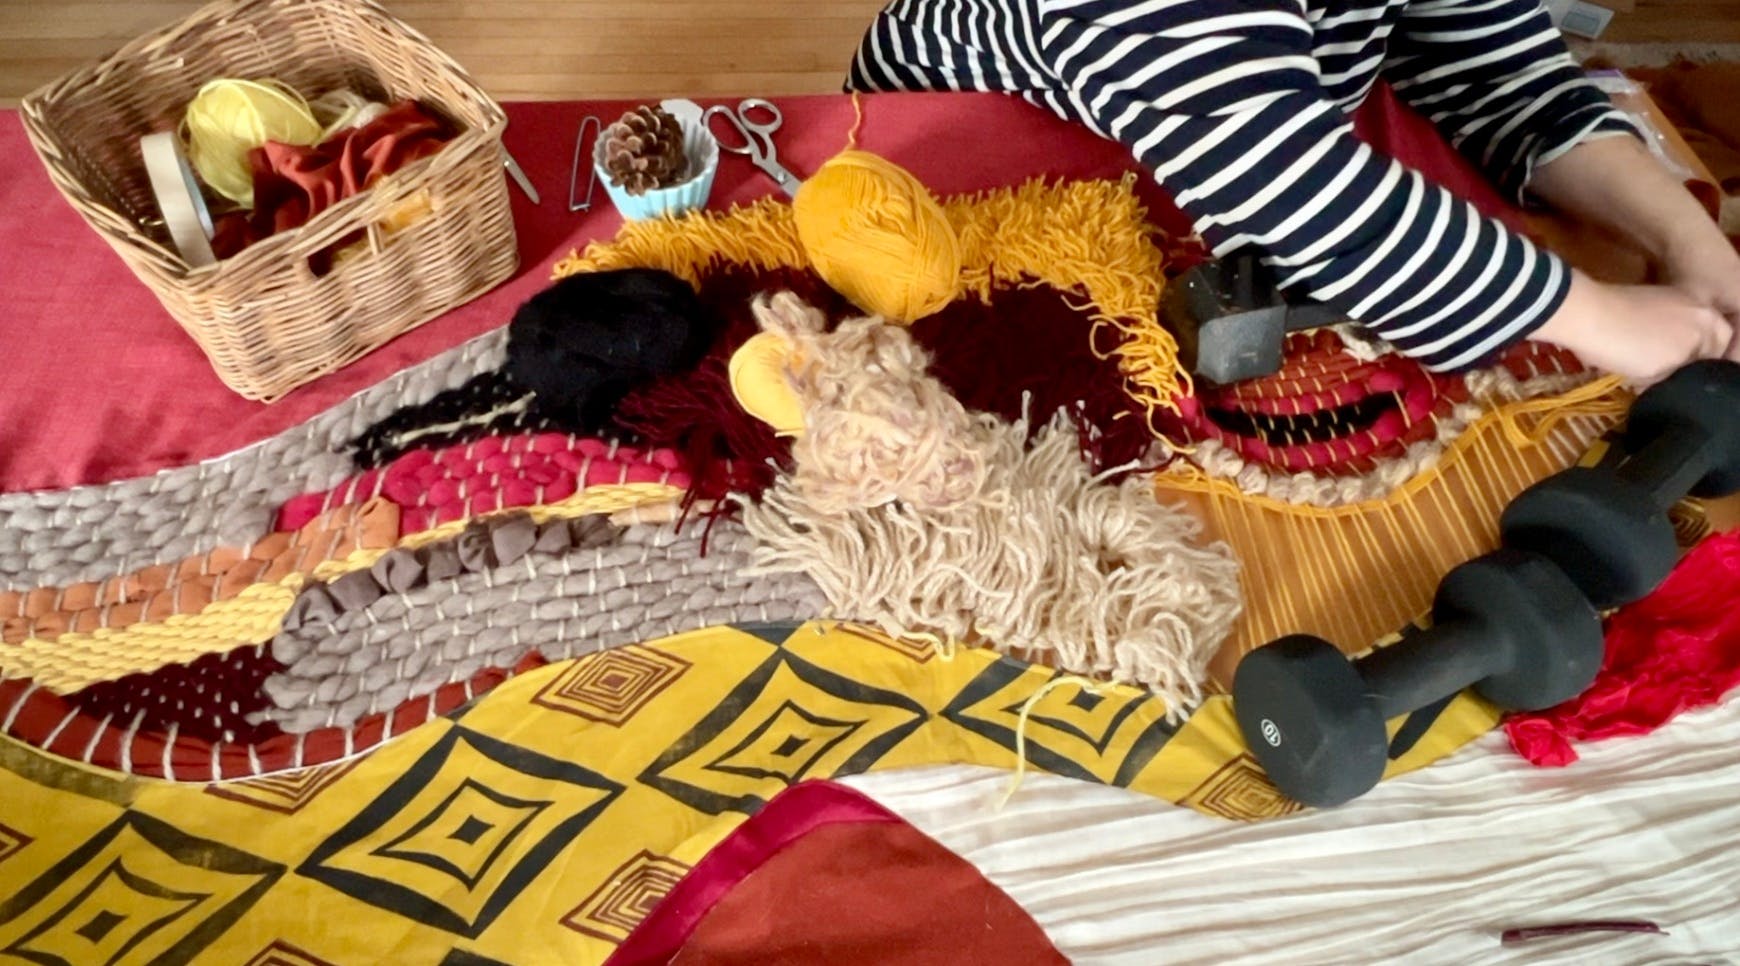
This process was spread out over several days, but eventually, it was all filled in.
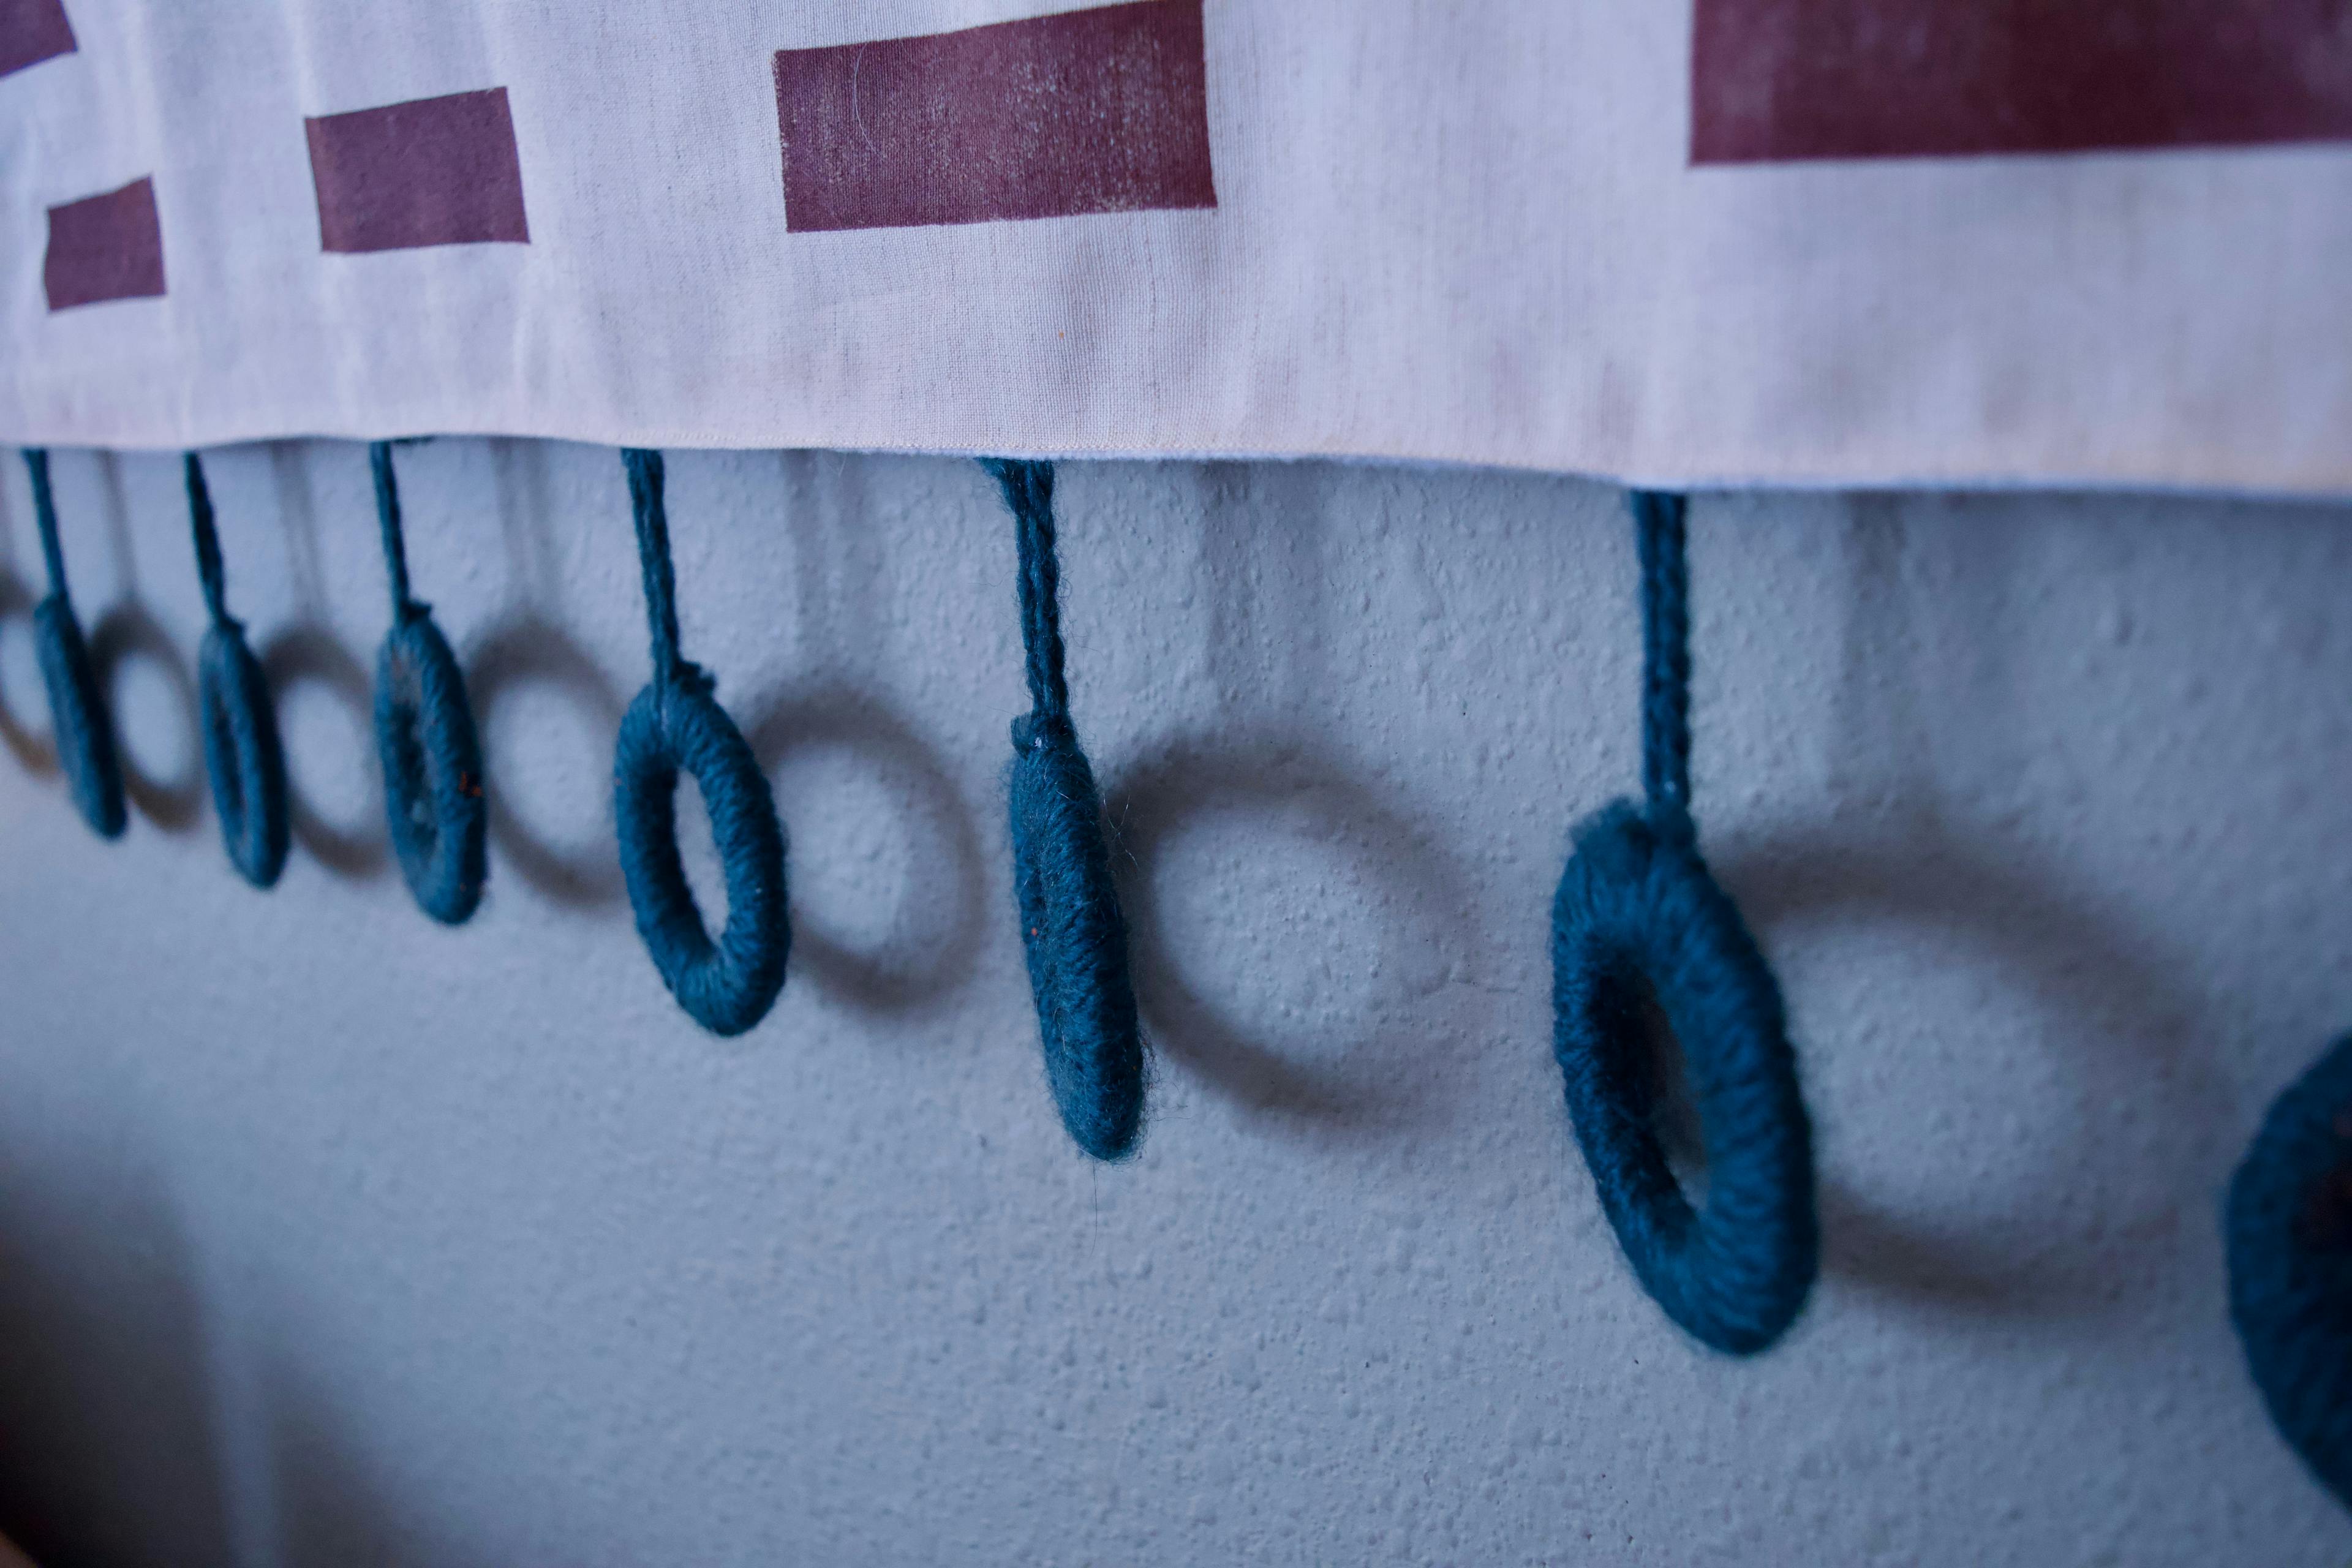
If You Liked It Then You Shoulda Put A Ring On It
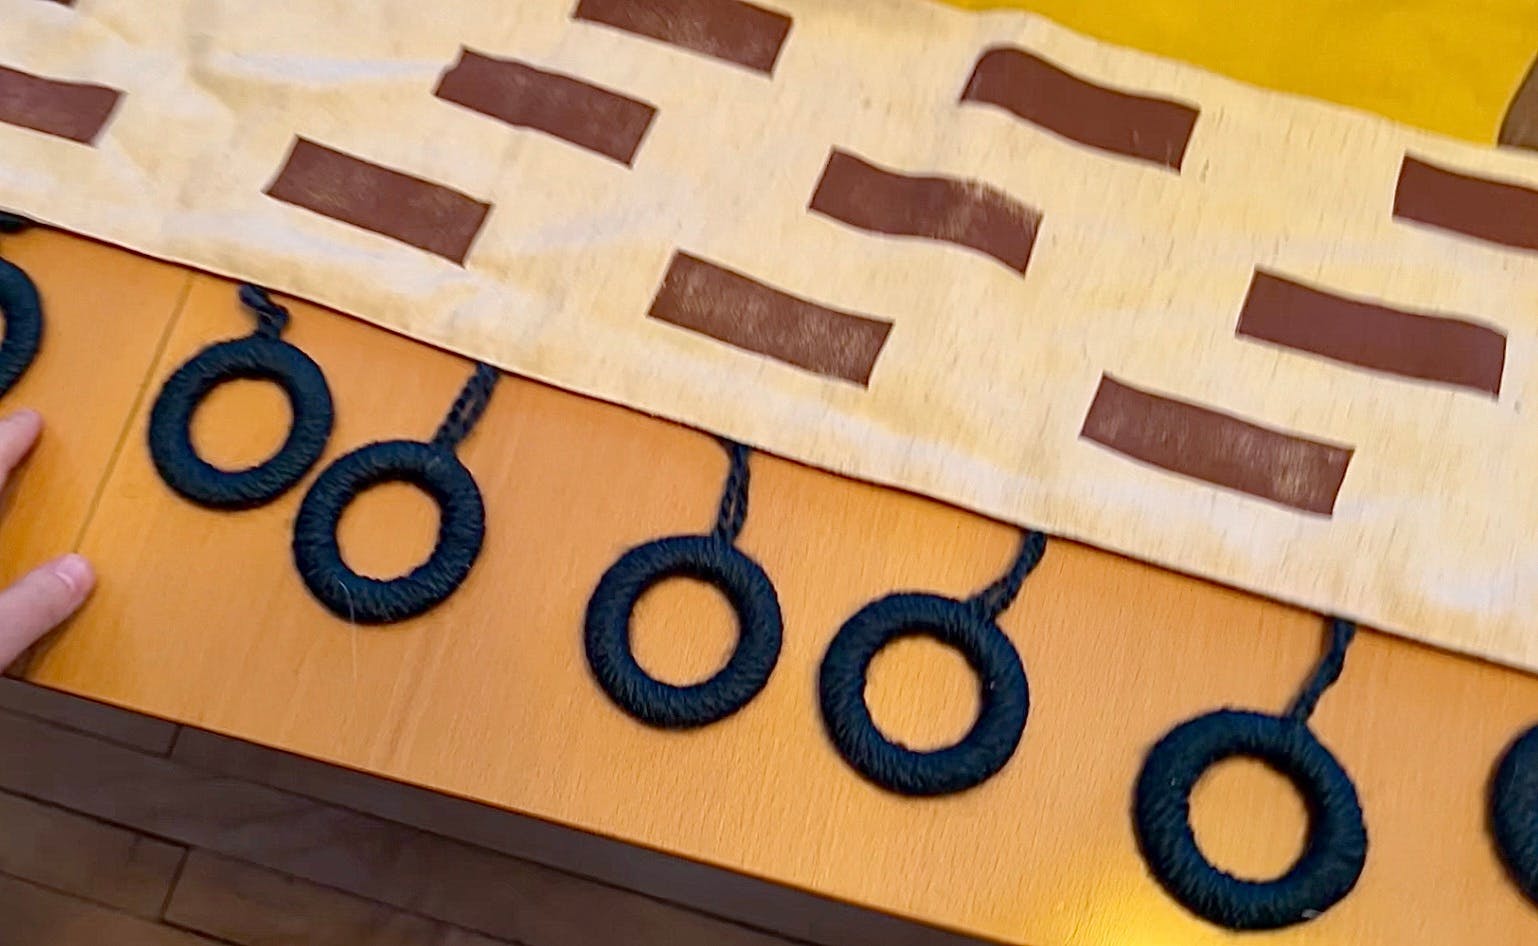
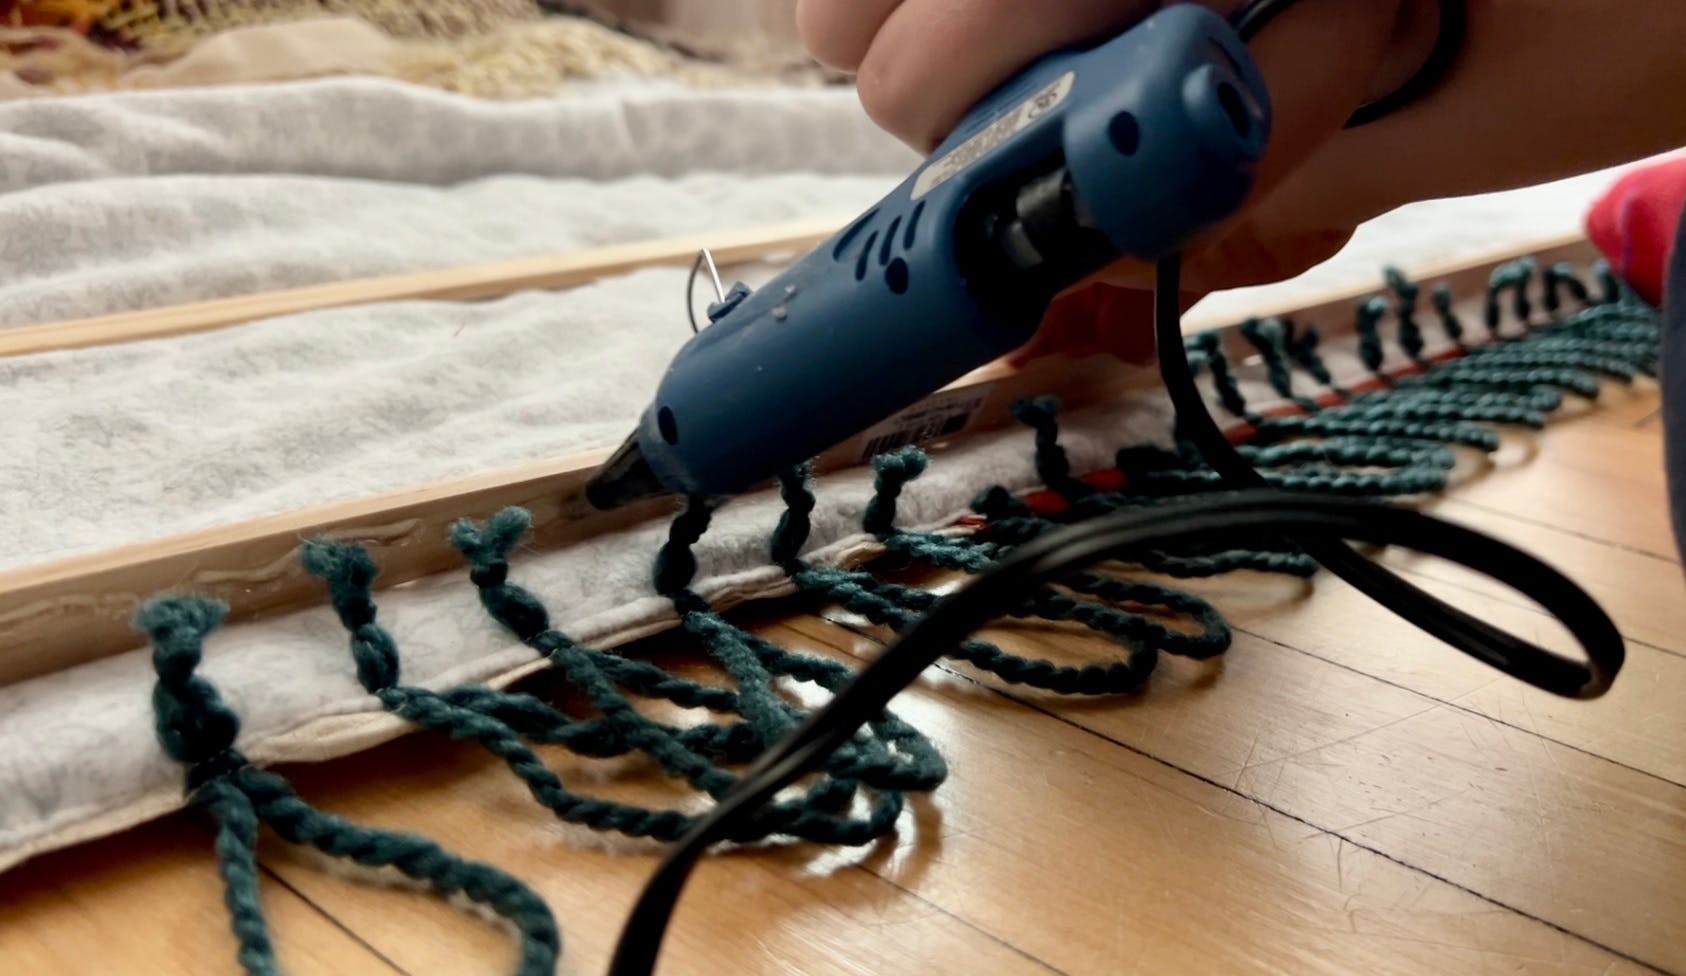
For the hanging rings at the bottom of the piece, I cut the rings out of the tan curtains, 16 total, and then wrapped them with a forest green yarn. I used hot glue to secure the yarn and left a little hanging loop at the top of each one.
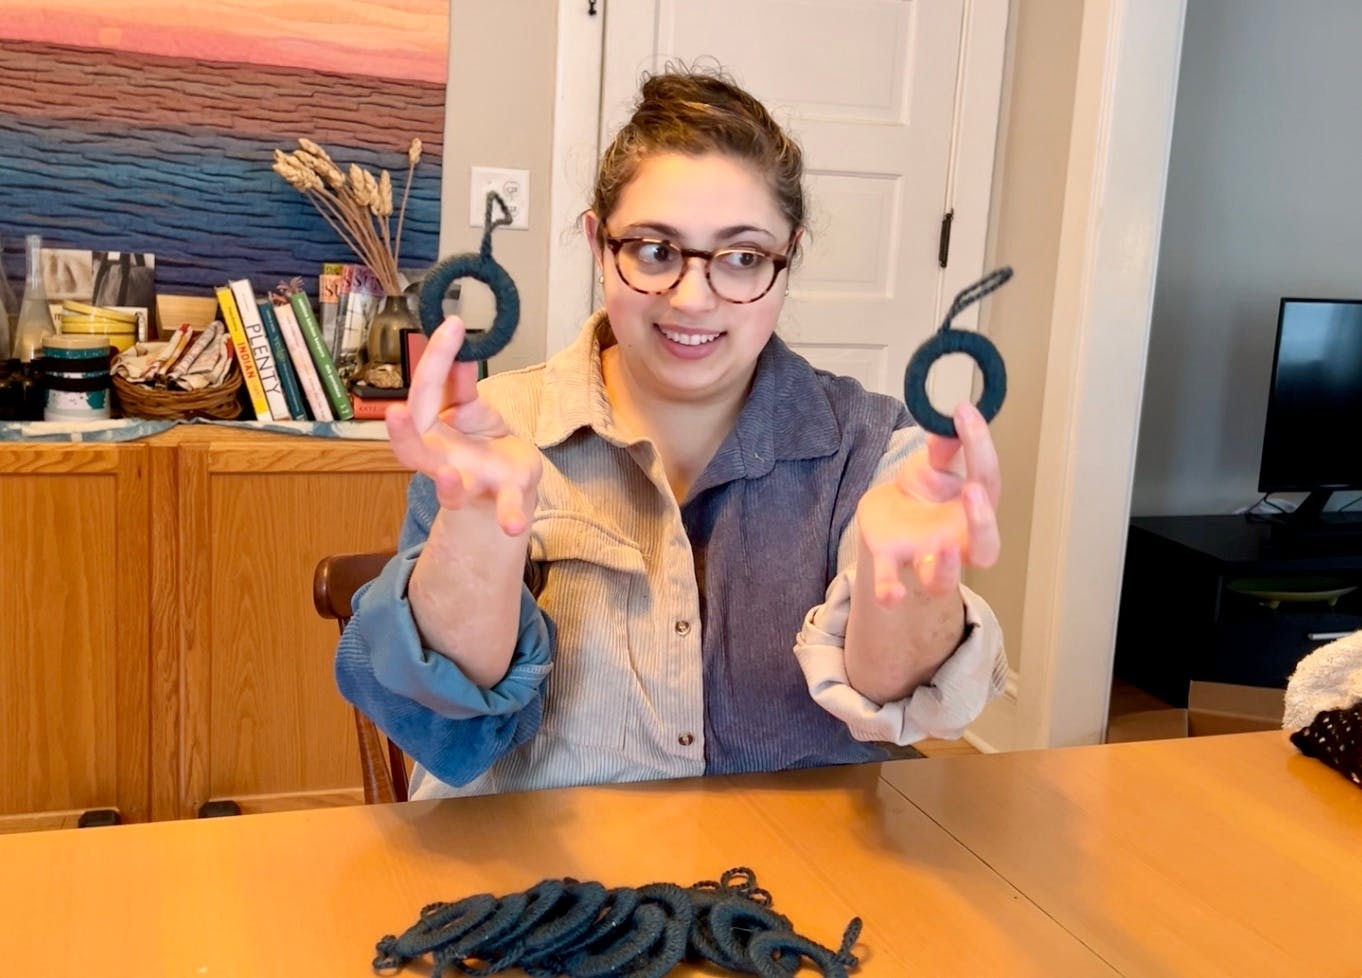
Then I measured *very carefully* both the height of the hanging loop and the distance apart from each other and stitched the loops down with my machine.
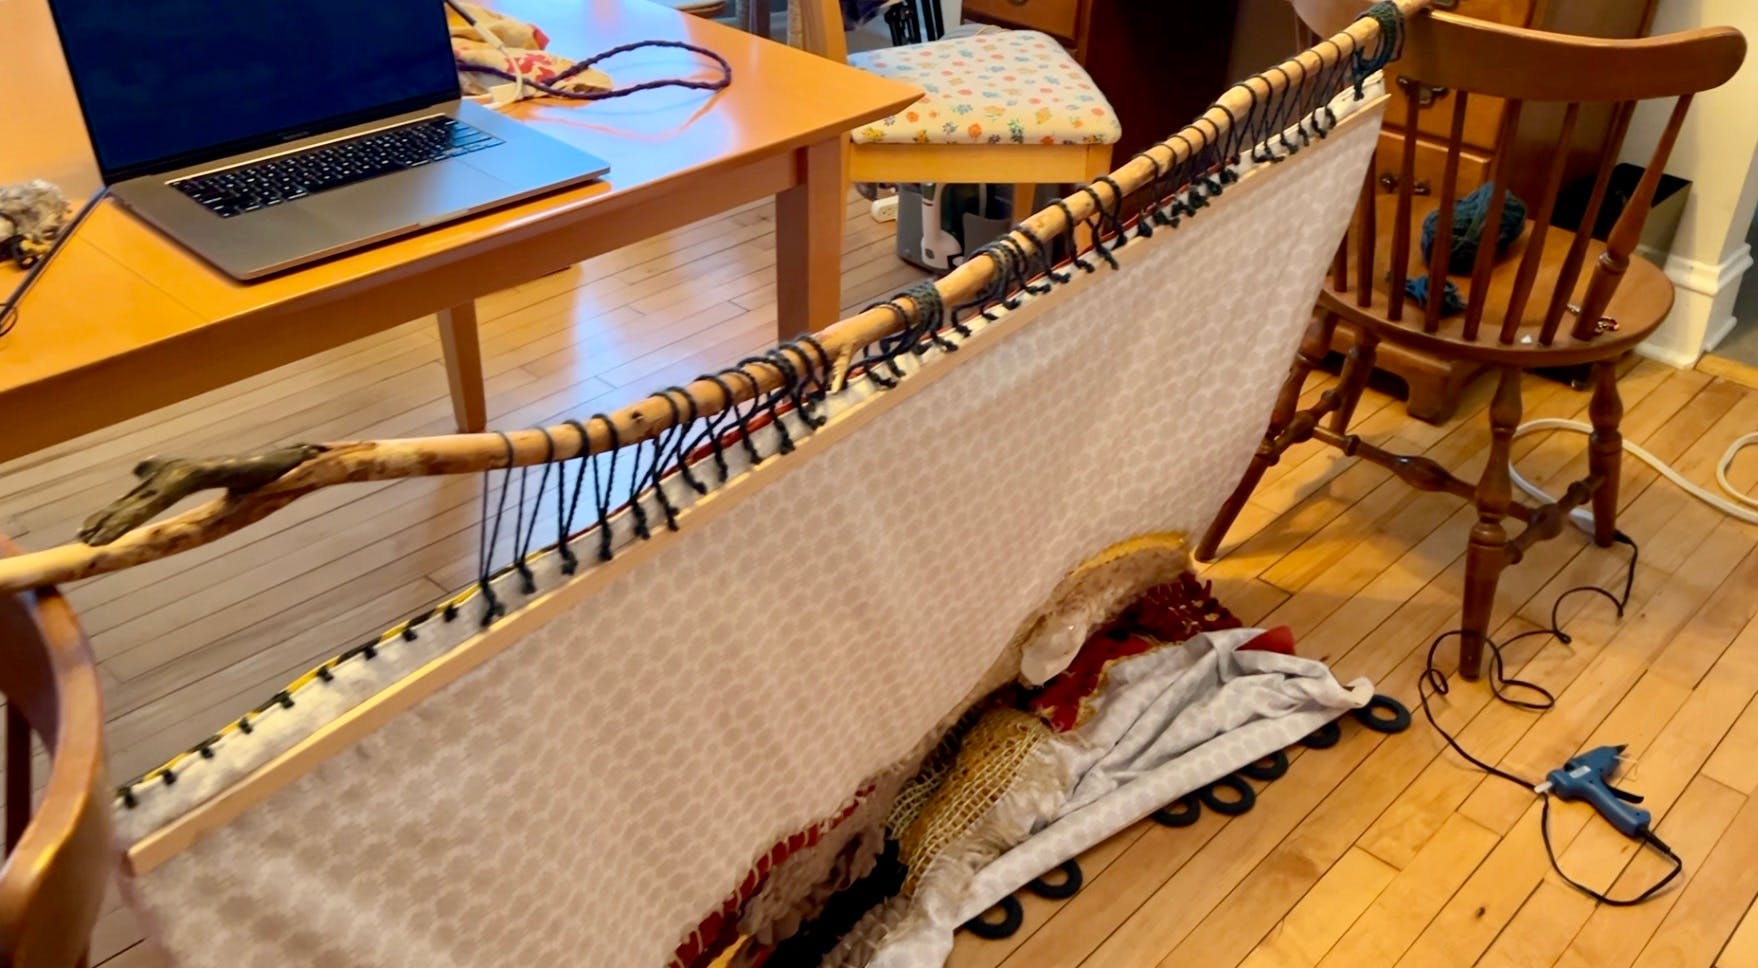
Branch Time
To hang the entire piece from the branch from the woods, I needed to have many yarn loops. I wanted to mirror the dark green of the bottom rings and while I considered using this very cool blueish fabric yarn, I stuck with the same yarn from the rings for symmetry.
This part was really tricky because the branch is not straight but the top of the fabric is, which means that the loops needed to be different sizes so that it would hang straight. I thought about stitching a lot of short pieces of yarn to the top of the fabric and then tying them over the branch, but I think that would have been really ugly with a bunch of visible bows or knots. Instead, I decided to make loops all the same size and see what happened.
And what happened wasn't great. I tried cutting a few and tying them shorter to make it more even, and even though it looked okay when I was holding it, when we hung it up as a trial run it was very ripply and bad.
As you can see, we hung this up on the hooks that had been there before from the flower, so it was hanging from the middle. This meant that the branch curved down on the ends. This made it very difficult to work with when trying to adjust the loops, (I had used masking tape to try and hold it upright on two chairs - not very successful) and since I wanted to move the hooks to the outside, I took it down and made some adjustments.
Ripples Begone
I did two things to remove the ripples - first, I went to the hardware store and got some 1/4" x 1" strips of wood, one for the top and one for the bottom. I glued these directly to the fabric right at the very edge.
Second, I hung the branch between two chairs again, this time letting the branch curve up on the ends. Then I went through and hot glued any loops that were too long.
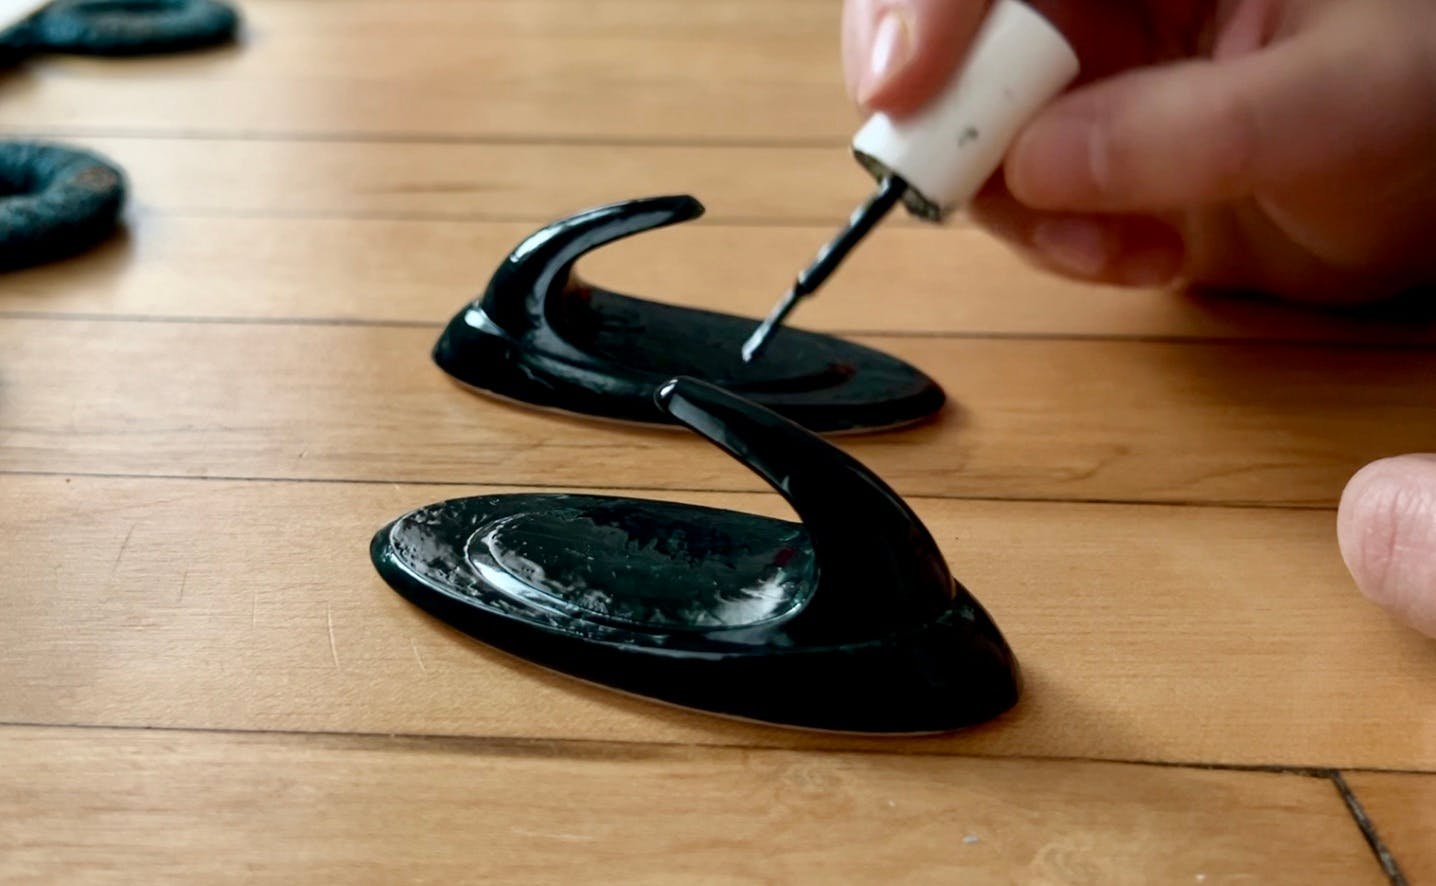
As a final touch, I used dark green nail polish I already had that matched the yarn pretty well (Stylenomics by Essie, if you must know) to paint the hooks so they wouldn't stand out so much.
Final Bits
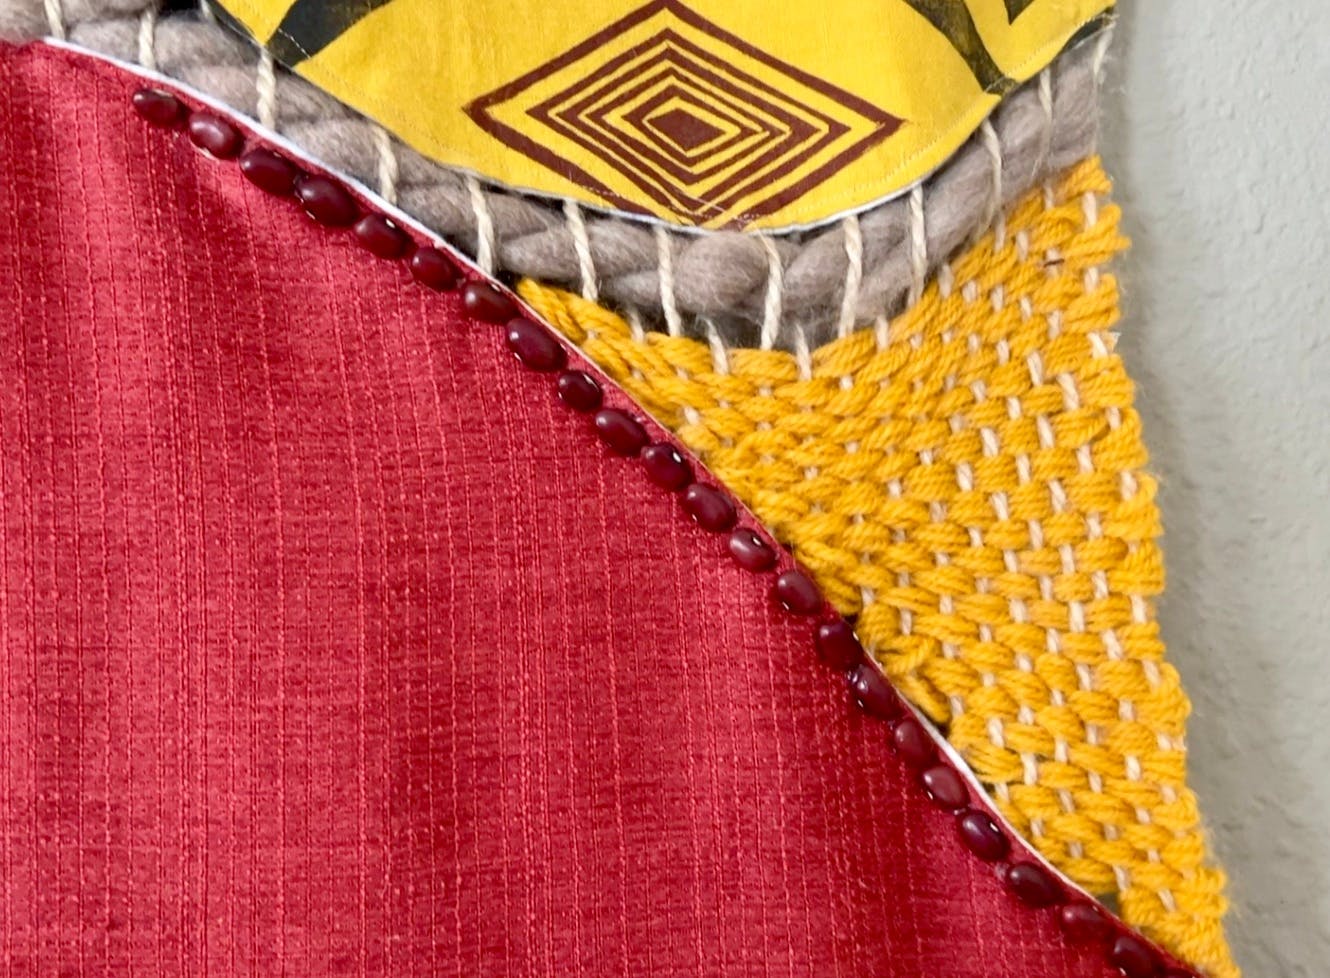
Once it was hanging, I glued down the nature bits like some red beans from the garden my landlord grows for us tenants, this walnut shell, and some adorable pinecones.

I did some final trimming of the yarn tassels and then dusted the whole thing in Kashmiri chili powder (the type doesn't matter, it's just what I have) as a Pete deterrent. I used some picture hanging strips to attach the bottom strip of wood to the wall so that the rings would lay a little flatter to the wall (they aren't perfect but it's way better than it was!).
To Sum Up
Let me start by saying WOW. I am OBSESSED! This whole piece was a practice of trusting myself, and I am so thrilled to say that I think it went really well! I usually like to have a very solid plan going into a project like this, but I feel more confident in my ability to go with the flow after the success of this project. Are there things that could have been done more cleanly? Sure! Does the back look like a messy piece of poo? Sure does! Do I love it for all its imperfections and the lessons I've learned? Absofreakingtootly.

This is what I mean when I talk about the healing powers of art and making. Take it from someone who is often debilitated by anxiety and fear of the unknown - diving headfirst into a project like this with very low stakes is a potent way to practice trust by gently challenging those fears.
I hope you have a beautiful rest of your day and thank you so much for being here!
💖, Katrina
Comments:
Ann
Brava! This came out beautifully and is a great vote for following your muse and making something that's just right!
January 17, 2024 at 10:35 PM