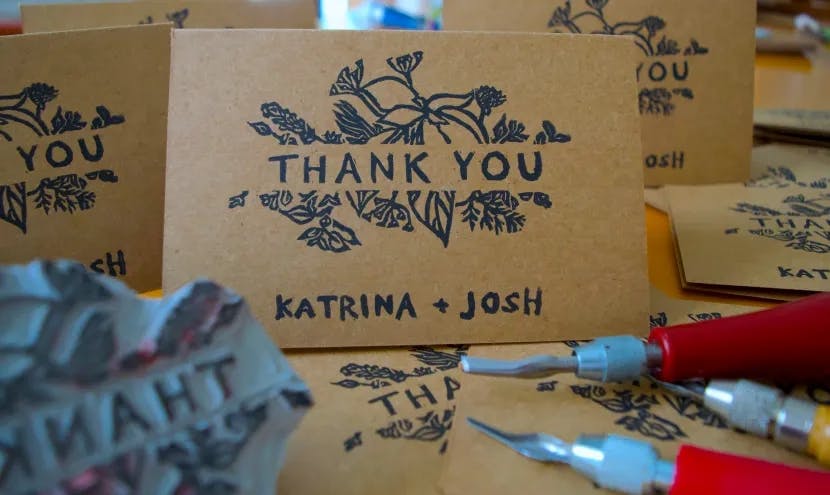
Block Printed Thank You Cards
March 10, 2023
* Products linked below may be affiliate links. I may receive a small commission if you place an order through them (at no cost to you). For more, see our Affiliate Disclosure.
First things first... I GOT MARRIED!
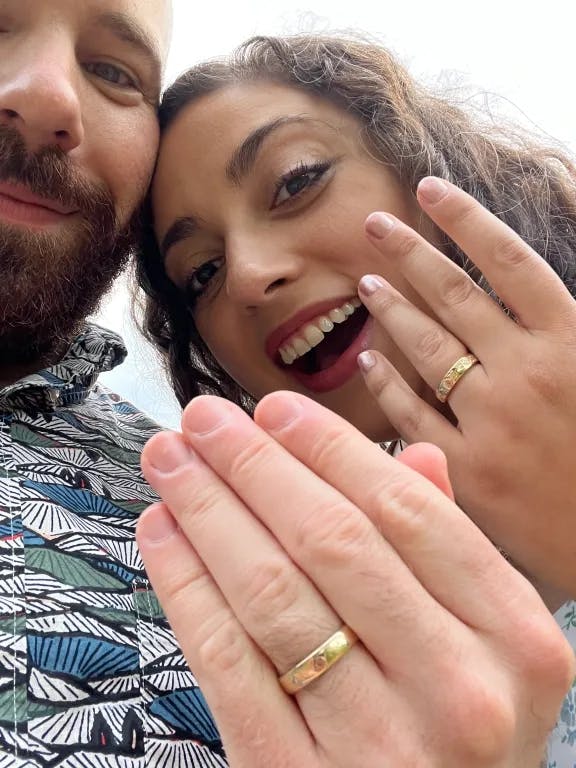
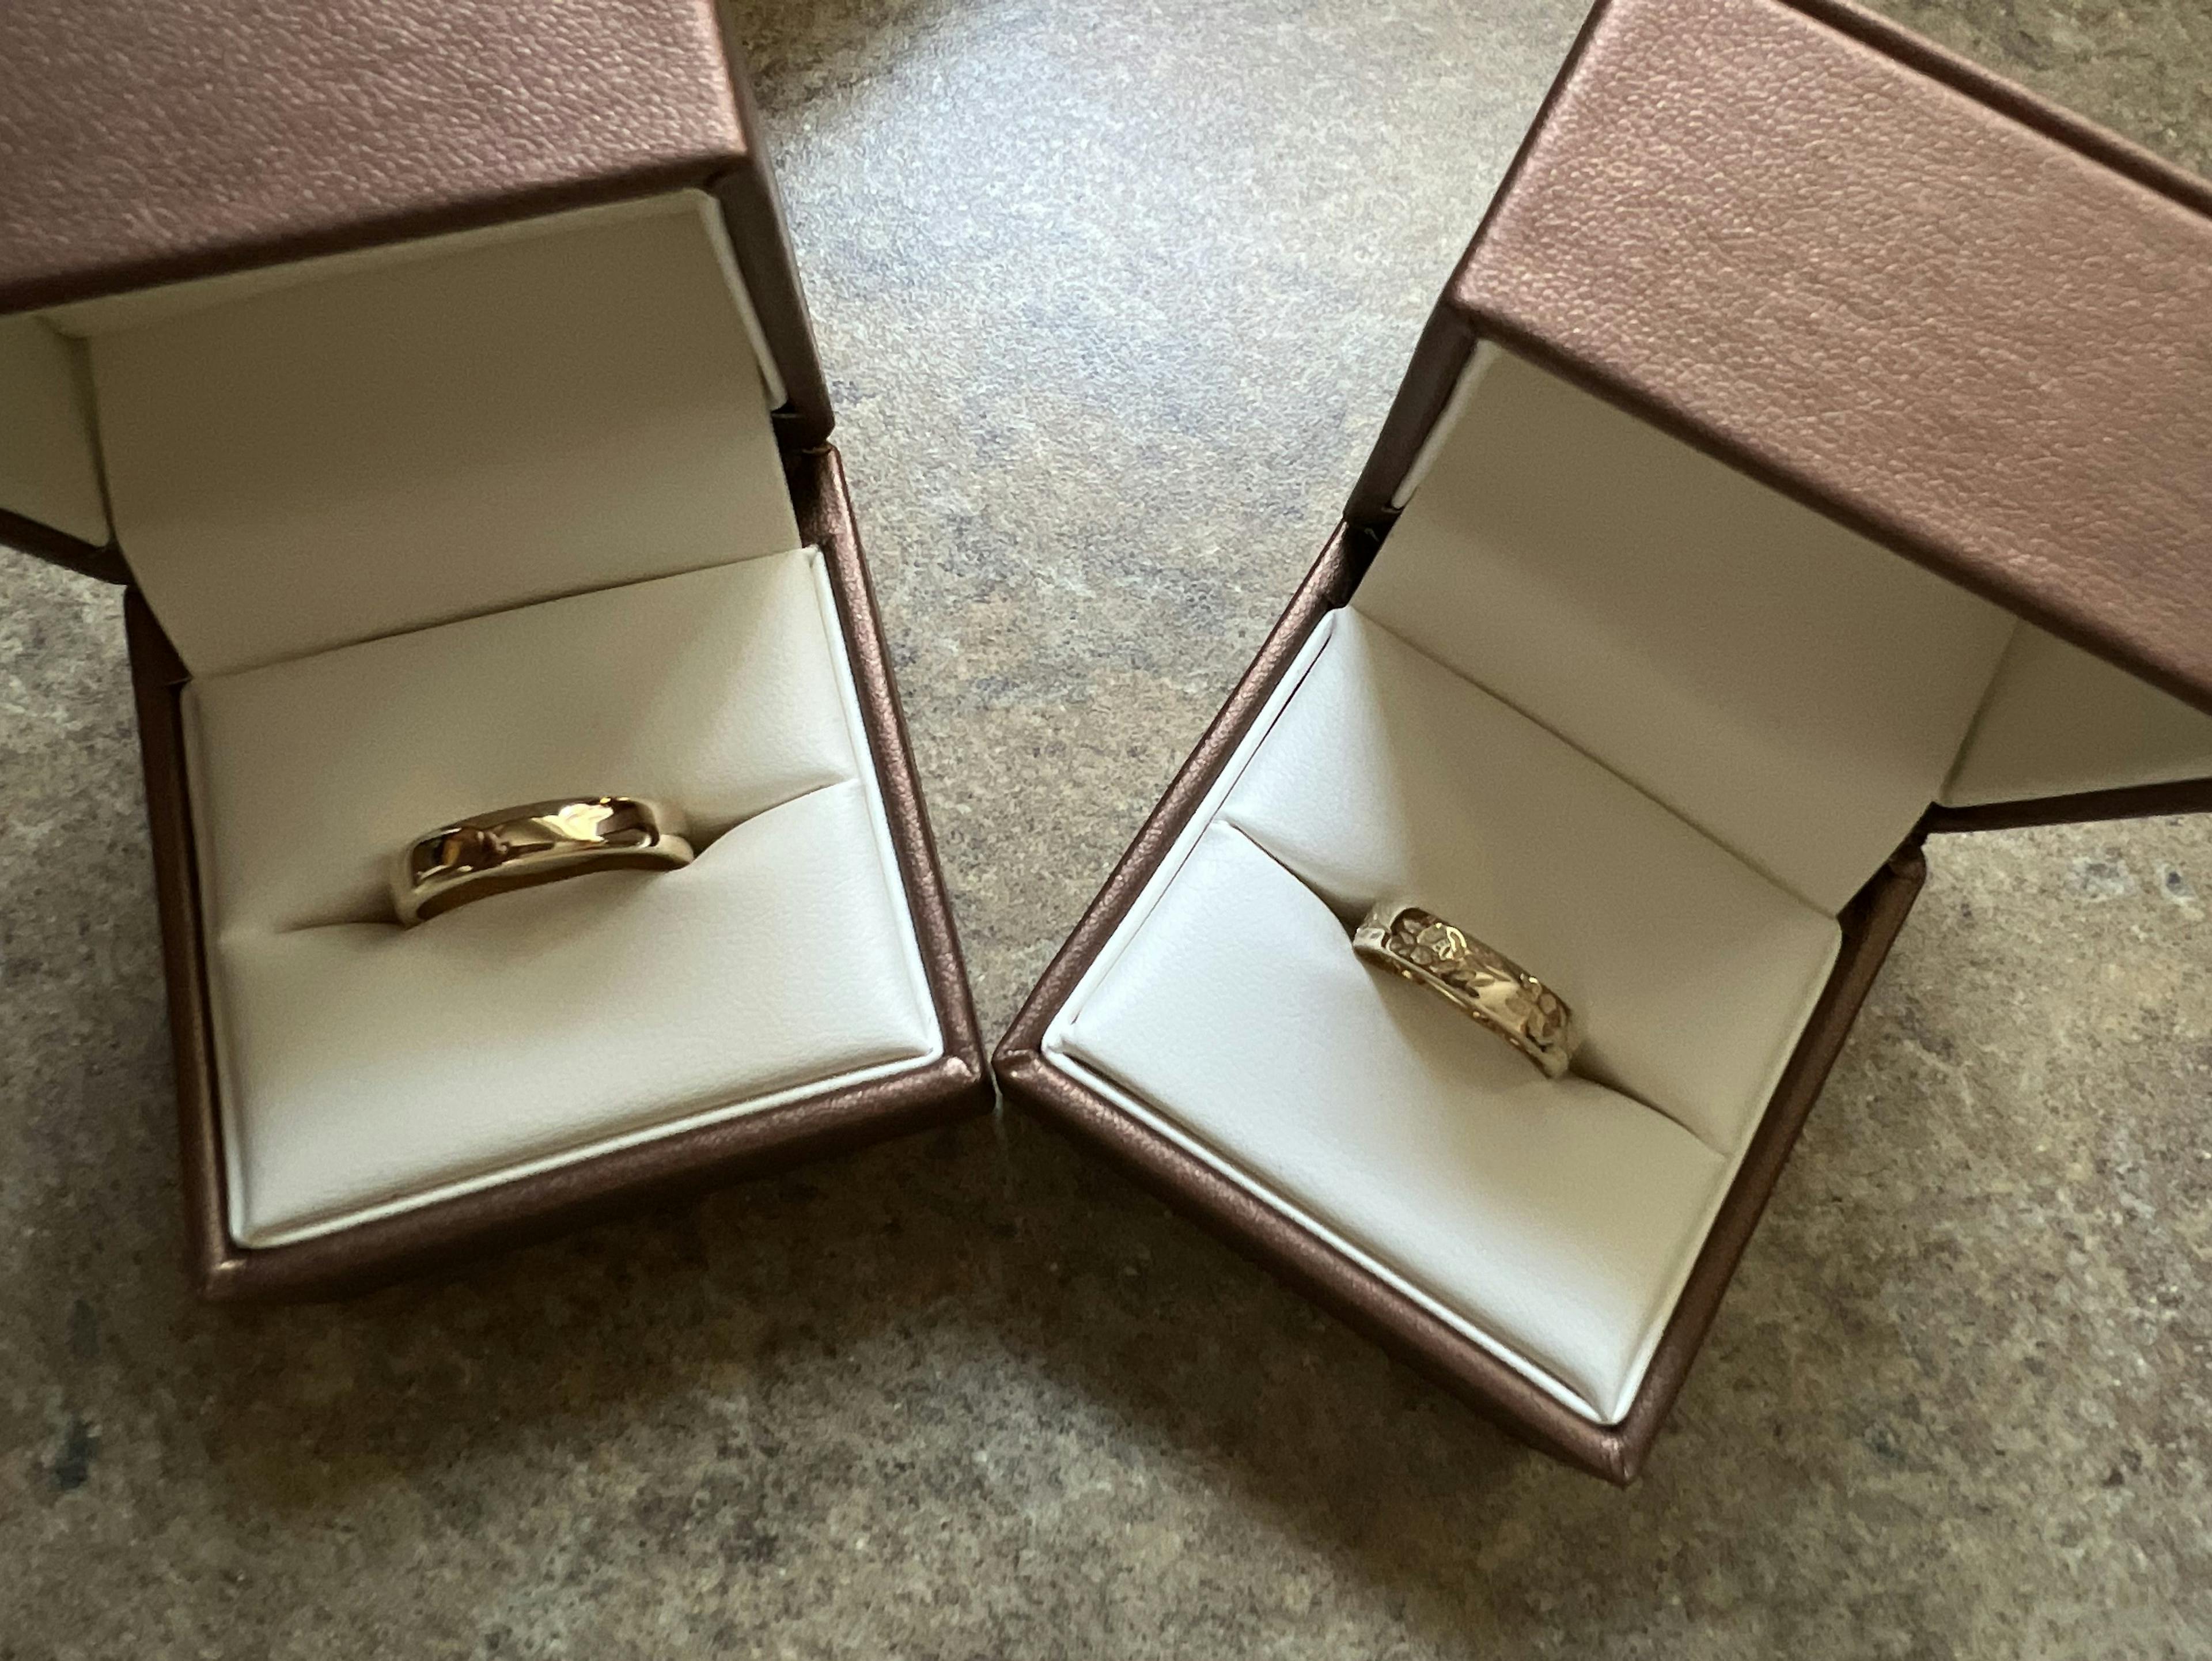
Josh and I had rings made out of family heirlooms, hired a lovely officiant, and had a private ceremony at a beautiful park near us. It was very low key, and absolutely perfect for us, at this time. We want to have a wedding at some point to include our amazing community, but for a variety of reasons it wasn't in the cards for us to do that right now. We decided to do the legal part for now and we will have the celebration with friends and family when it makes sense.
Because we do plan to have an actual wedding and a registry at some point in the future, we told people who asked that we weren't expecting gifts this time around. Even so, some lovely friends and family sent us gifts anyway! This obviously necessitated thank you cards, and of course, I wanted to make them.
A Project Begins
I have done a few carved stamps in the past for various projects, but I had never tackled text before so that part of this project was new. I learned a bunch of things that I will take into my next stamp carving project and of course I will also share those tips with you below!
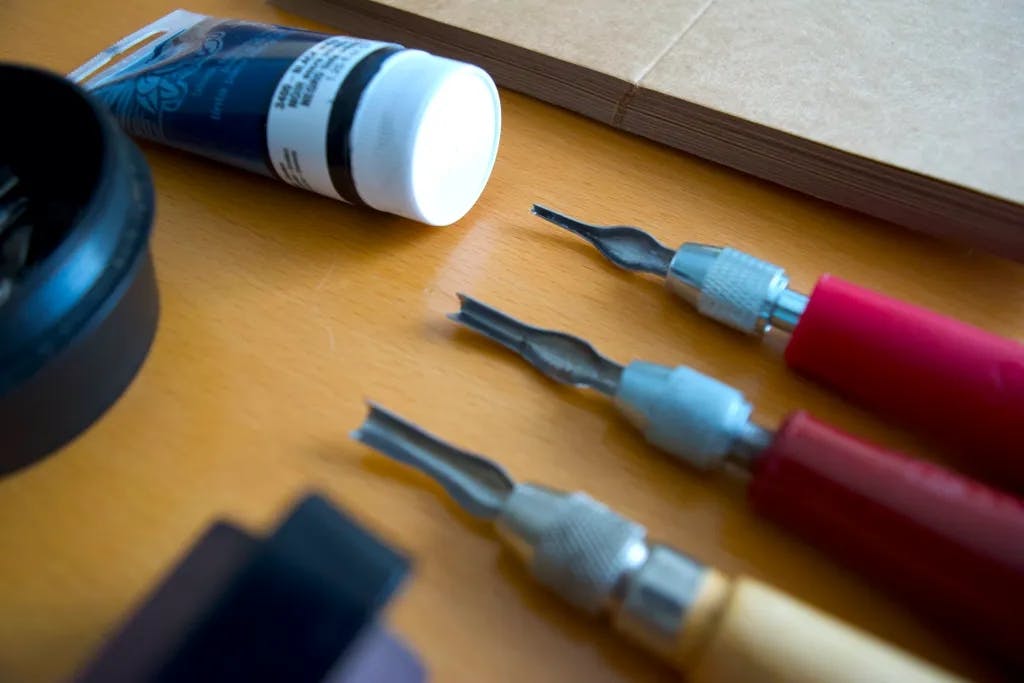
Gather Supplies
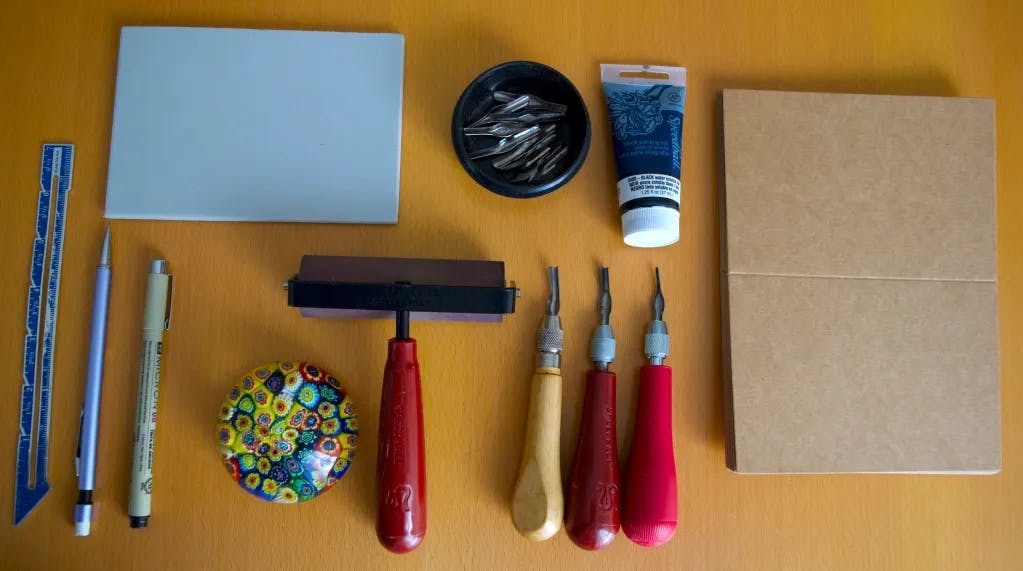
- Carving Knives - These carving sets come with one handle a selection of differently sized blades. I honestly don't know how I have 3 sets of these things, but I'm so glad that I do! It's really helpful to have each handle with a different sized tip so that I can switch between them easily.
- Printing Block - I have tried a few different kinds, including the harder linoleum blocks, but this soft-cut type is my favorite.
- Ink - I have the Speedball water-based block printing inks. I'm not sure where these fall in terms of quality as I am quite a novice, but this has worked well for all the projects I've done so far.
- Brayer - Like a paint roller, but instead of fluffy stuff on the outside, it is smooth and slightly squishy. (You can also get harder ones, I haven't used those though!)
- Plastic or plexiglass - I use the clear insert from an old frame (mine was from IKEA, but a thrifted frame would be great here!). This is used to evenly ink up the brayer. Note - you can use real glass too, and I have done so in the past, but it feels like playing with fire. Especially when washing up. Slippery, thin glass sheet... no thank you!
- Baren or press - I don't have a baren myself, which is a hand pressing tool. I just use a heavy glass paperweight, but you can use the back of a heavy duty spoon, too.
- Blank cards and envelopes - I got these natural brown cards and envelopes. Super straightforward and basic!
- Ruler, pen, and pencil - self explanatory, I think :)
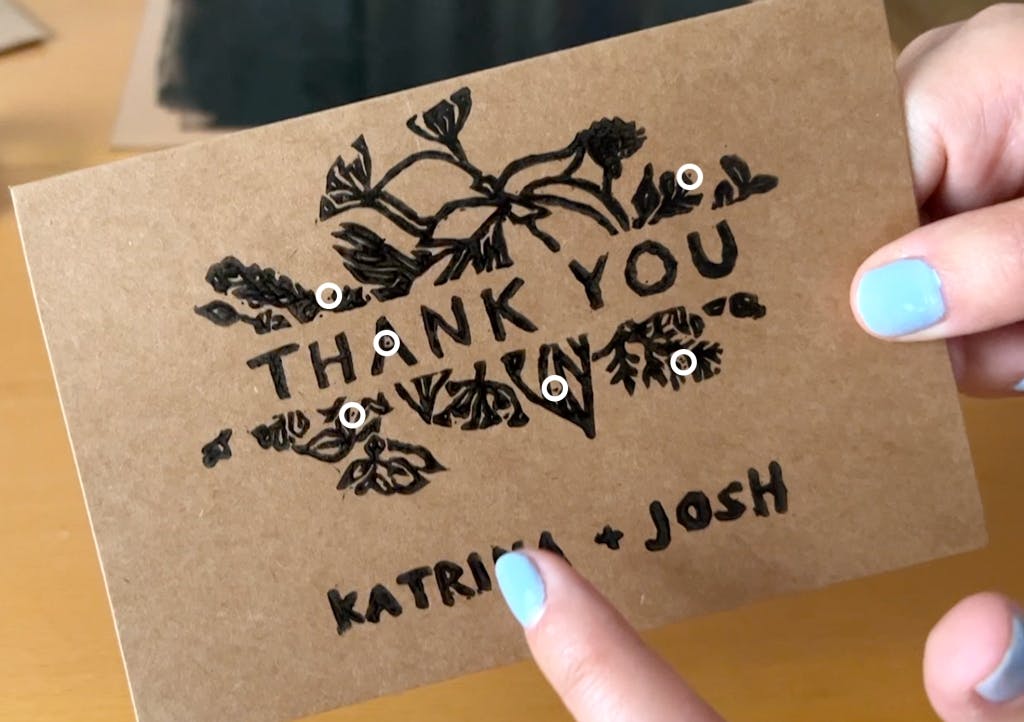
Design the Thing
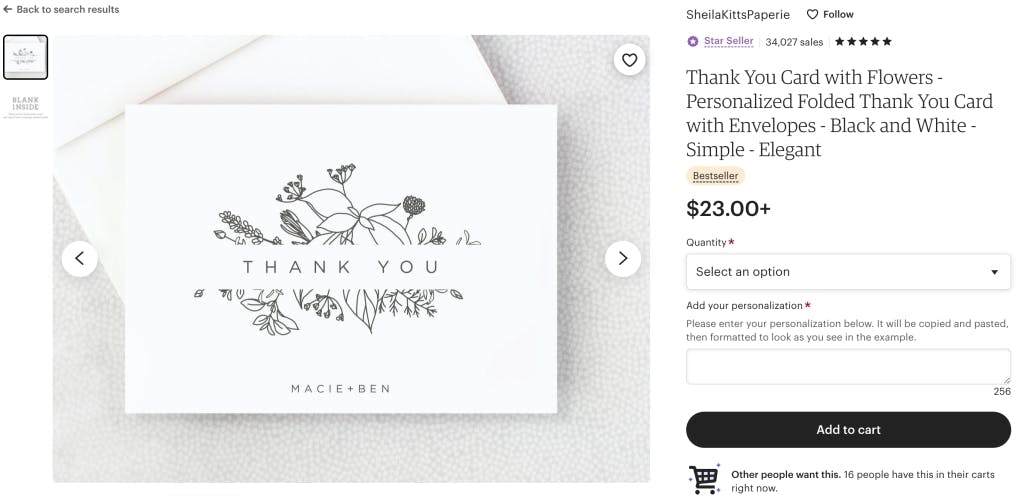
I cannot draw. At all. In years past, I have put energy into trying to get better at things like drawing and painting, but it turns out those are skills that I will leave to other, more talented people, probably forever. So instead of trying to draw my own card, I went to Etsy for design help. Josh and I picked out this card together and I got to work.
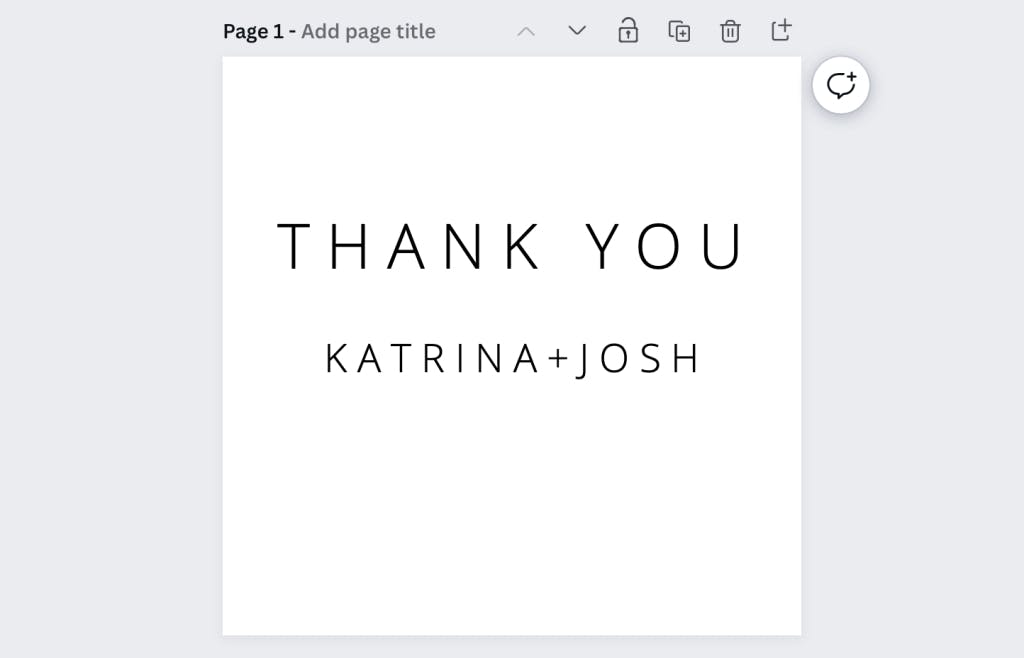
I then went to Canva to type out our names and the THANK YOU in the same font. We found a font that looked close to the one used on the card, and I adjusted the size to match the card.
Transfer the Design to the Block
Next, I did something I don't really recommend, even though I've done it plenty of times in the past without any issues. I started with a piece of tracing paper that had a rectangle marked out in the size of my card. I then taped the paper onto my laptop screen and lightly traced the image onto the paper. If you do choose to do this, please be SO so careful! I try to trace super duper lightly and I test my pen and paper to make sure there is no bleed through so that I don’t do any damage to the screen. I'm sure it's not great for my computer, but I've found that doing it lightly and infrequently hasn't caused any issues. At least, not yet...
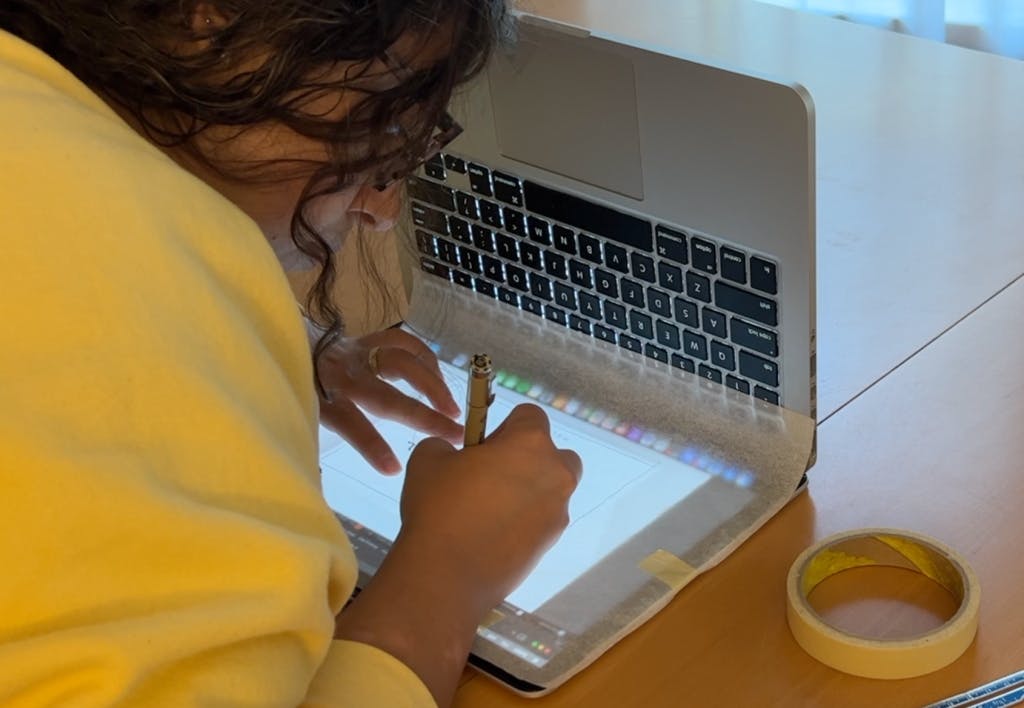
After tracing the florals from Etsy and the text from Canva, I removed the paper from the laptop and went over everything heavily with a soft pencil so that it will transfer nicely into the piece of rubber I will be carving the stamp out of.
*Disclaimer - never copy another artist's work for anything commercial. It is not okay to do what I am doing for anything you are going to sell, or use as a logo, etc.
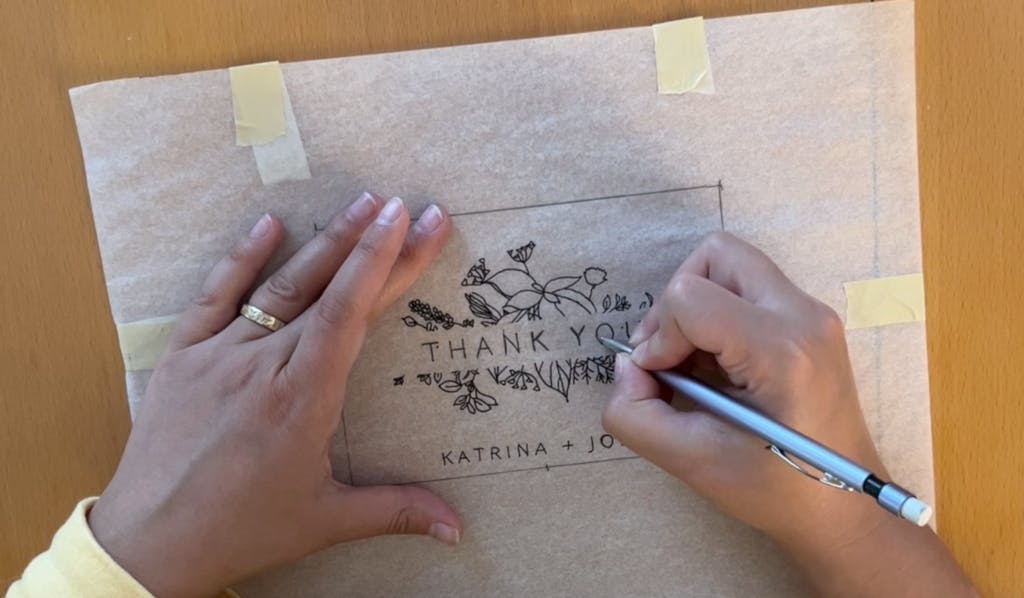
Then, I flipped the paper over onto the stamping block and rubbed the paper into the block to transfer the graphite. I used the butt end of a Sharpie, and the pros use a special tool, but you could use anything sturdy to do this.
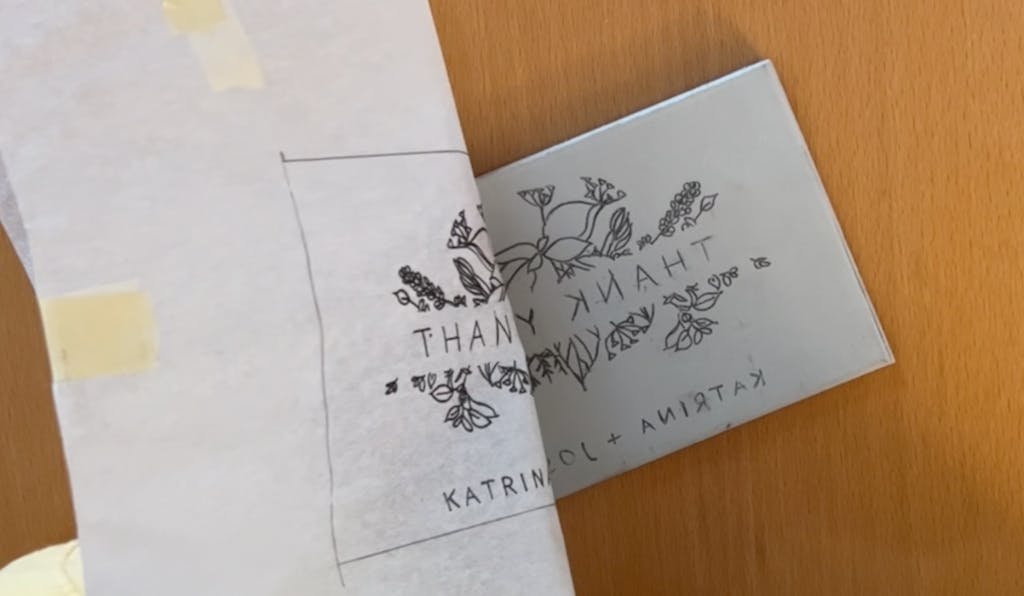
KEY MOMENT - Make sure your image is backwards on the stamp so that it prints the right way around. :)
You can then go over the pencil lines with a pen so they aren't smudge-able. Sometimes I do this and sometimes I don't.
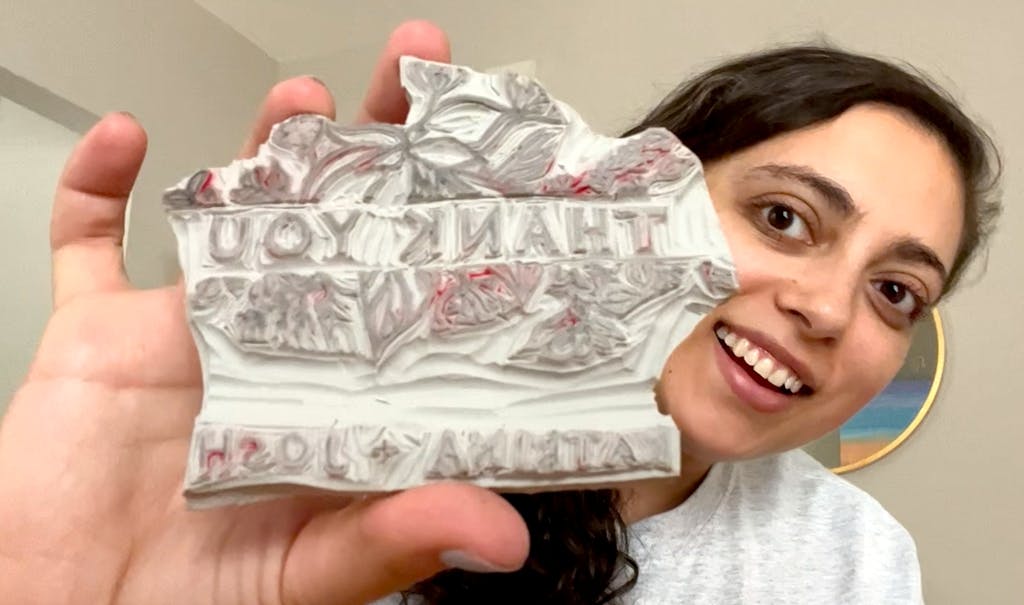
Then it's time to start carving!
Carving the Design
My friend Hester introduced me to block printing (we made her wedding invitations this same way!) and a few years ago I took this awesome class on Creative Bug, taught by Katherine Watson. Using the information from these two queens as well as my own experience from doing a few projects on my own, here are my top tips for carving your block print.

Carving Tips
- Start by deciding if you are going to carve your design out and leave the background (right side of the image above) or carve it in relief (left). To me, relief looks more professional when done well, but it is much harder to get clean lines.
- If you have multiple carving handles, set up each one with a different sized blade so you have to do less blade changing during your process.
- This tool is a KNIFE with a sharp BLADE so remember to never cut towards yourself or your opposite hand in case the blade slips. On the soft-cut rubber blocks like I use, slipping is less likely than on a harder lino block, but it still can happen. Be careful!
- Start with your smallest blade to go around the edges of your design, making sure to make shallow, gliding cuts. Once the design has been outlined, then you can go in with your bigger blades to carve out larger sections at a time.
- Go slow and be mindful! It is impossible to fix mistakes if you carve in the wrong place. Most designs can be adjusted to accommodate any mix-ups, but text is much less forgiving!
- If you are going the relief route, cut out your design with a straight blade so you don't have to carve away allllll the blank space.
- Hold your knife at a shallow angle. If you hold it too steep (like you would hold a pen), the tip of the knife can gouge into the rubber and get stuck, making it hard to get clean lines. This is true for all sizes, but it's the most true for the smallest size.
Dive Into Carving
I started with the small blade.
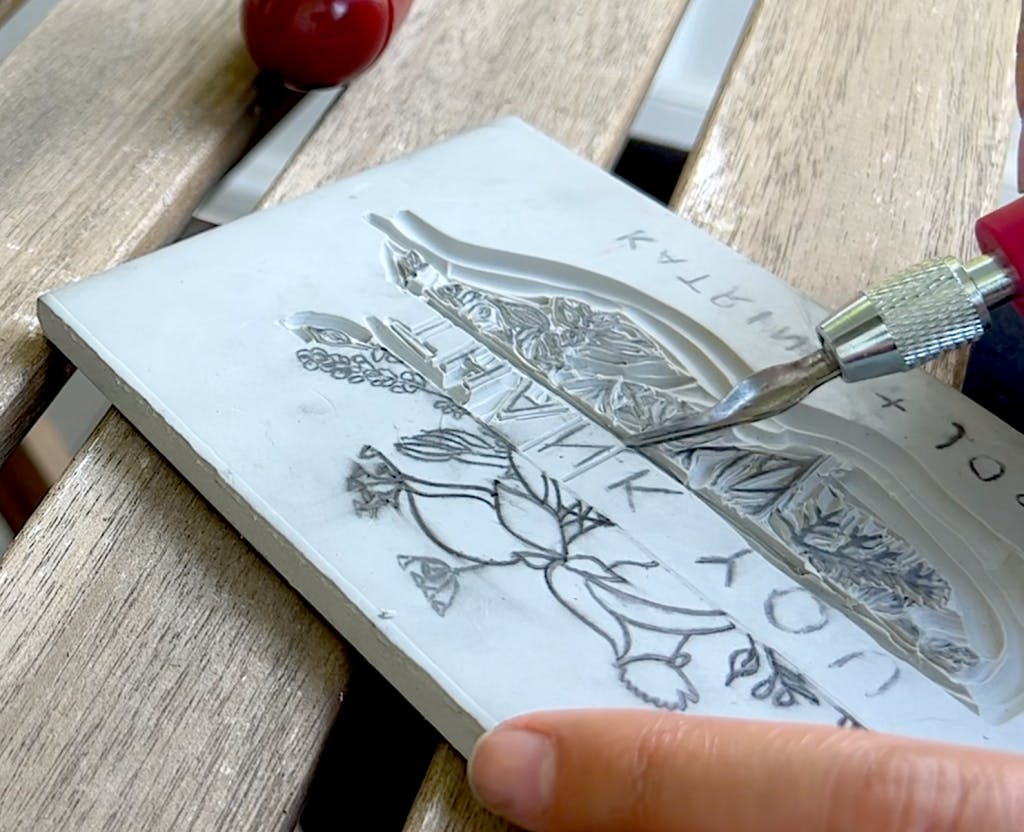
Then moved on to the bigger blades.
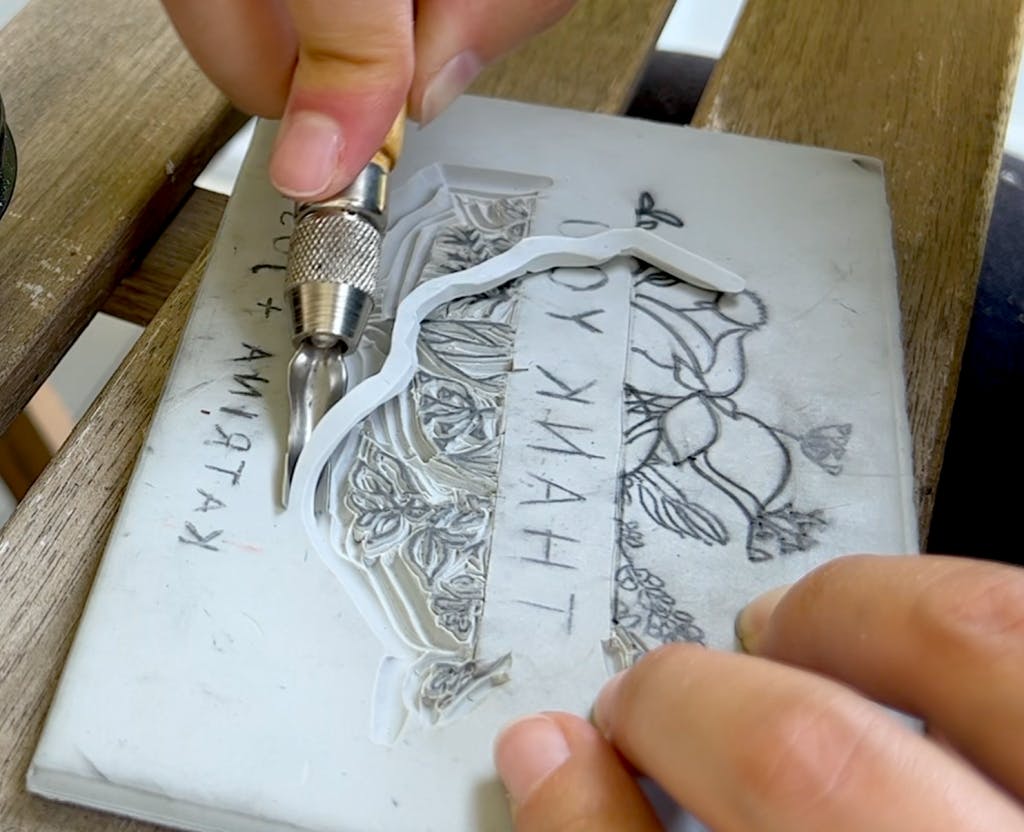
Once it was done, I cut out the design so I didn't have to carve away all that blank space.
Next, I did a print test to see what little areas still needed to be carved away. I circled a few of the tiny little places that needed further carving.
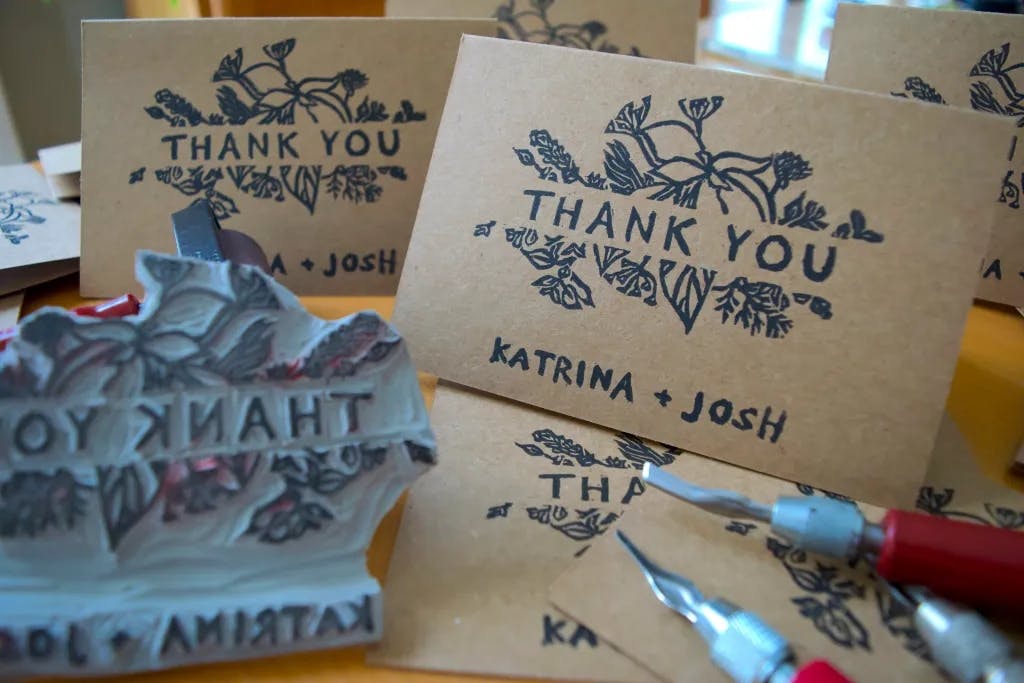
Printing the Cards
Making a Printing Guide
This was the part I was most nervous about! I was very concerned about getting the stamp perfectly centered and level on the card, and it took some trial and error but I finally got it where I wanted it. This is how I did it.
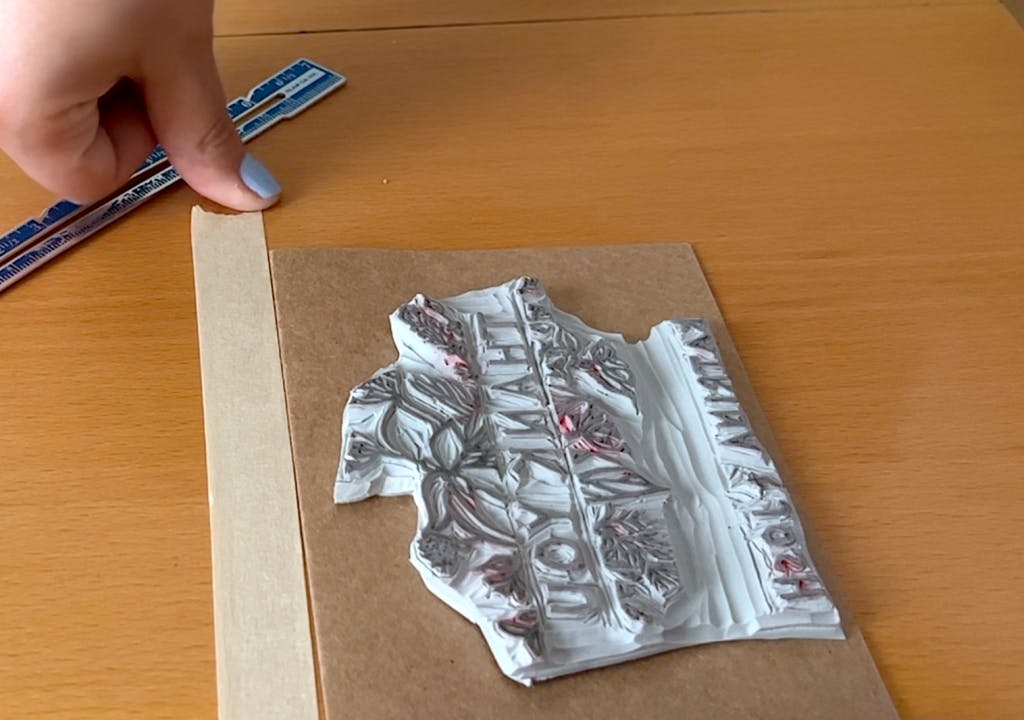
- Tape the stamp to the center of the card. Measure with a ruler to make sure it's truly centered and level.
- Use masking tape to make a guide the size of your card directly on your work surface.
- Transfer the stamp to the table, using the measurements from step 1.
- Print one card as a placement test, lining up the card with the tape on the table. Make any adjustments necessary.
Set Up The Ink
This part is deceivingly complex! Getting the right amount of ink on the plexiglass is a bit of a Goldilocks situation - too much and you will have ink blowout (see below!), too little and your design will be too light. Another wonderful tidbit from the class with Katherine is to use your ears to tell if you have the right amount of ink on the plexiglass. She said to listen for a characteristic, sticky sounding "hiss" that indicates the perfect amount of ink. (Check out my video of this project to hear the correct sound!)
I used way too much ink on my first go 'round here. The brayer was sliding on the plexiglass and was missing the "hiss", making more of a... "glurp" sound (ew). When there is too much ink on the plexiglass, the brayer picks up too much ink and overloads the stamp. This causes extra ink to seep to the edges of our design when you go to print it. You can see in this picture above, especially around the J in "Josh" how there is a thick border of ink that muddies the whole look.

Once you have the right amount of ink on the plexiglass, (pictured above! See that leathery texture in the ink? That's what you want!) roll the brayer over the surface vertically and horizontally numerous times, picking up the brayer every so often to make sure the whole roller is evenly coated with ink.
Assembly Line Time
After I had my guide set up, my stamp anchored, and the ink ready, it was time to print the actual cards!
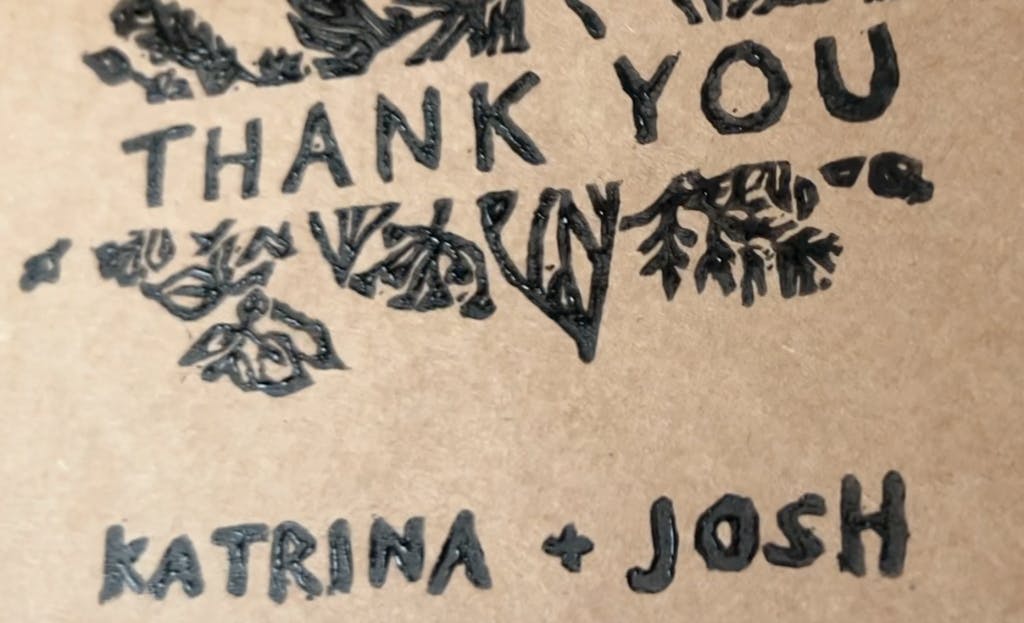
To ink the stamp properly, the goal is to have multiple thin layers of ink, one on top of another. This means rolling the brayer over the stamp multiple times, in multiple directions, making sure to lift it up a few times so that the stamp is inked evenly. It was easy to see where the ink landed on the stamp the first time, but after the first one, the stamp was stained which made it harder to see where the ink was. I decided err on the side of a little too much rather than too little, and that worked out for me.
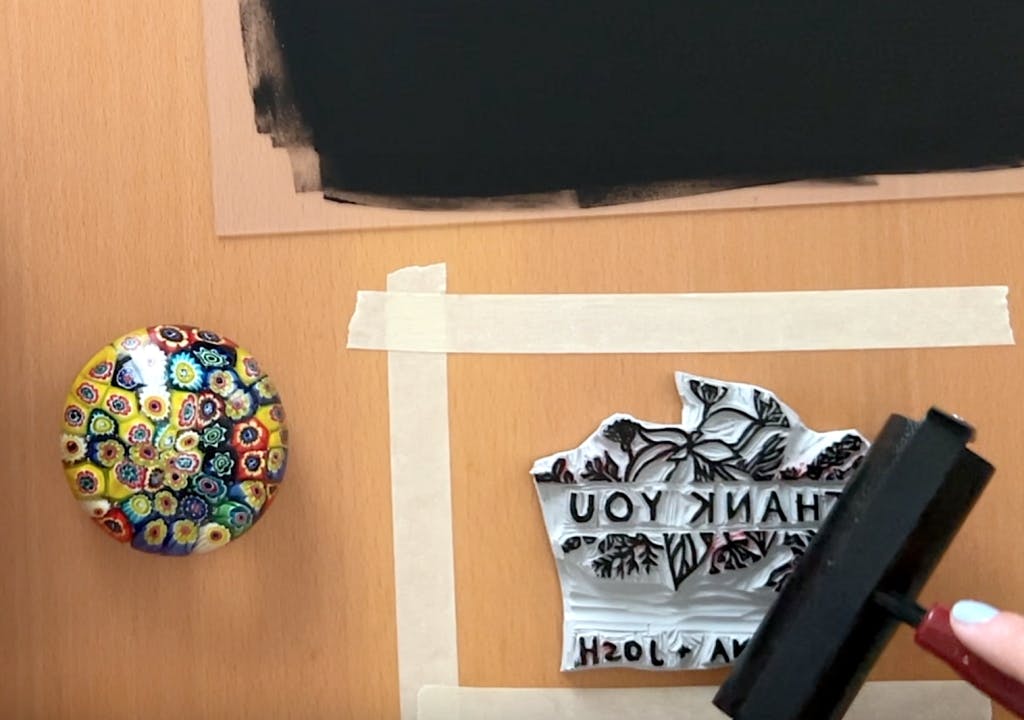
After the stamp was properly inked, I laid down the card on the stamp following the taped guide lines as best as I could. I then pressed across the whole surface with my hands to make sure it stuck. Then, I used the paperweight (my stand-in baren) to make overlapping heavy circles all over. I wanted to transfer ALL of the ink! Then, I carefully peeled it back and the first card was done. Then it was time to repeat repeat repeat until they were all done. The ink doesn't dry immediately, so I laid out all of the cards for a few hours before stacking them together.

A Hypothetical for People Who Live with Curious Cats
Just as a hypothetical - Imagine, if you will, leaving the plexiglass with ink on it out on the table, just for a second. Imagine it getting walked on and then the cards getting walked on, and imagine you are left with a number of cards with *the most adorable* paw prints on them, and some that are totally ruined. And then imagine shouting to your partner (who happens at this very moment to be on a business call) to come hold the cat while you wash their paws so they don't get ink all over the house and furniture, or worse, lick the ink off in an attempt to clean themselves. Just a little thought experiment. Not sure why I thought of it. ;)

The Envelopes
When I saw the envelopes, I realized I wanted to also make a stamp for the return address. With this decision, I feel I more than doubled the level of difficulty for this project because carving the text this small was SUPER challenging. Many of the tips I listed at the beginning came from lessons learned on the return address stamp, and I did get much better as I went along!

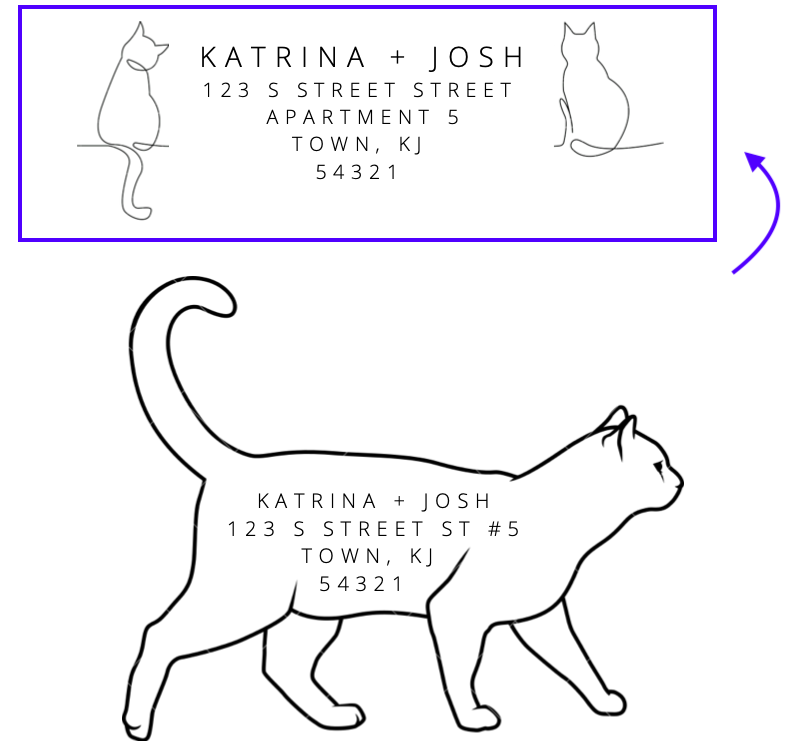
The process was much the same, except I skipped Etsy and went straight to Canva and designed a few options. Josh and I picked the one the two cats that were slightly different and therefore showed individual personality to represent our cats, Jack and Pete.
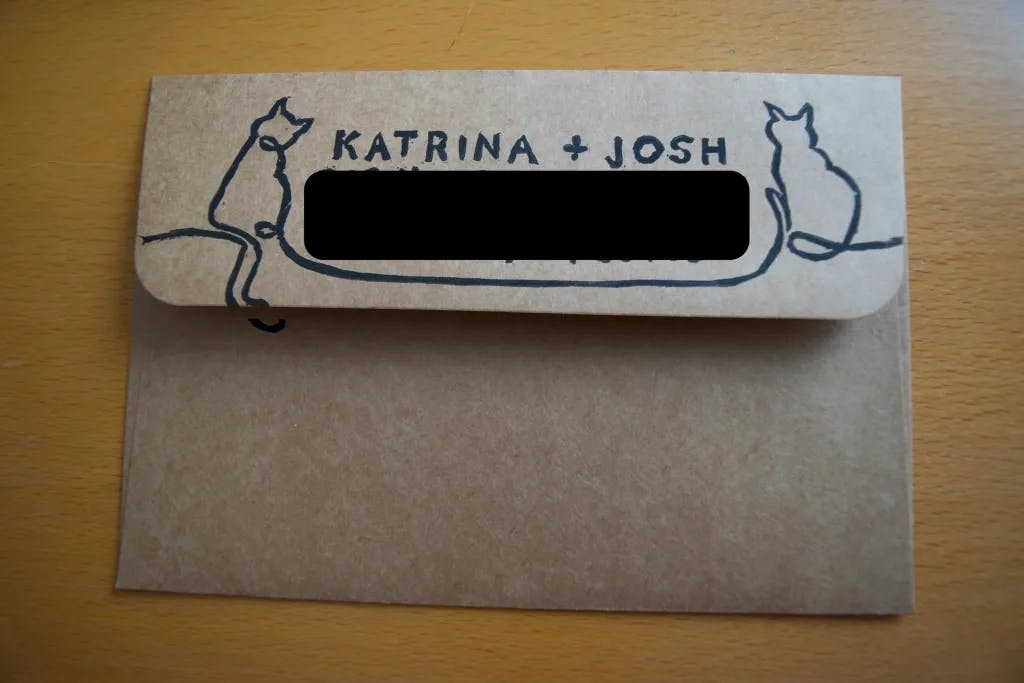
After stamping the envelopes the same way, the rest of the process was normal thank you card stuff- address the envelopes, write the cards, affix stamps, put 'em in the mail. And then the project was 100% done!
To Sum Up
10/10 would recommend and would do again! I love making my own block prints and am always amazed at how straightforward and rewarding the process is. In a world of digital experiences, I find that having a physical experience with real feedback and textures (ink on my hands!) is so grounding and exciting. I love these specific cards so much for this moment in our lives, and who knows, maybe they will make a come back when we have our actual wedding. You'll have to stay tuned to find out!

I hope you have a beautiful rest of your day and thank you so much for being here!
💖, Katrina
Comments: