Yan's Illusion "Ramen" Cake
March 15, 2023
* Products linked below may be affiliate links. I may receive a small commission if you place an order through them (at no cost to you). For more, see our Affiliate Disclosure.
Welcome to Katrina's Great British Baking Project, aka Bake Along with Bake Off! If you haven't checked out my post about the hows and whys of this project, please head over there and give it a quick peruse. (TL, DR: I am baking the recipes from Bake Off that sound the best to me for fun, deliciousness, and learning!)
After making the Signature (bonfire apple cake!) and the Technical (chocolate mini-rolls!), this was my first Showstopper bake of this project, and I was nervous/excited/hungry and couldn't wait to dive in.
The Challenge
I am starting with the oldest episode I have access to here in the US, which is Collection 5, Episode 1: Cake Week. I don't have a ton of cake experience, so I learned a whole bunch this week! This bake was the Showstopper, which in this episode was for an "Illusion Cake - A cake designed to trick the eye into thinking it's anything but a cake."
The Rules
The Bake Off rules stipulate that the cakes must have the same flavor of cake throughout, and the size and shape must be to scale. Also, all of the decoration needs to be edible. The contestants have 4 hours to complete their cakes.
Pitfalls To Beware Of
Prue and Paul mentioned that there are a few dangers of making an illusion cake:
- Beware of style over substance. Prue said the cake has to look good, but taste fantastic.
- Paul said the bakers will need to be artists AND engineers for this to turn out well.
My Favorite Bakes
There wasn't a single bake that sounded bad, but I narrowed it down to three:
- Kate's "Terrarium" Cake, chocolate and star anise sponge with chocolate and coffee buttercream
- Tom's "Stack of Books" Cake, lemon poppyseed sponge with an unspecified flavor buttercream
- Yan's "Ramen" Cake, banana sponge with an unspecified flavor buttercream
The Ramen Cake Is Chosen
I initially chose to make Kate's terrarium cake because the flavors sounded so good, but she made windows out of SUGAR and had these special molds to do so, which just sounded like too crazy for me right out of the gate. So I ended up choosing Yan's ramen cake for a few reasons. First, I have been collecting a literal armful of bananas in my freezer for banana breads and muffins that have not yet come to be, so this cake felt like a perfect use for them. And second, ramen is one of my favorite foods/eating experiences, so to pay homage to that via this cake felt like the a lovely choice. Also, I knew I would get to try some baking techniques that I’ve been watching folks do on TV for years but have never done myself!
The cake had multiple components. After studying the cake and listening to the judges comments, I did a bit of research and found a separate recipe for each.
- The Best Banana Cake from Sally's Baking Addiction because it looked like an actual cake and not just banana bread baked in a cake pan.
- The frosting was the cream cheese frosting that accompanied Sally's banana cake recipe.
- I used Flo & Grace's Fruit Juice Caviar recipe for the mango "salmon roe".
- The rice crispy "chicken katsu" was made using the ratios from Smitten Kitchen's Salted Brown Butter Crispy Treats (I didn't brown the butter, but I have made it that way a billion times in the past and it is SO GOOD!)
- I used the Marshmallow Fondant recipe from The Spruce Eats.
How I Did It
The Cake
As per usual, I started with the cake itself so that it would have time to cool while I made the other components. I picked out a few of the many bananas available to me, did some figuring that concluded that one recipe’s worth of the cake would be enough. I got my bananas thawing under some cool water while I turned my attention to mixing the dry ingredients. The recipe called for flour, baking powder, baking soda, salt, and cinnamon, but I added some cardamom too, because I love cardamon and it goes really well with bananas.
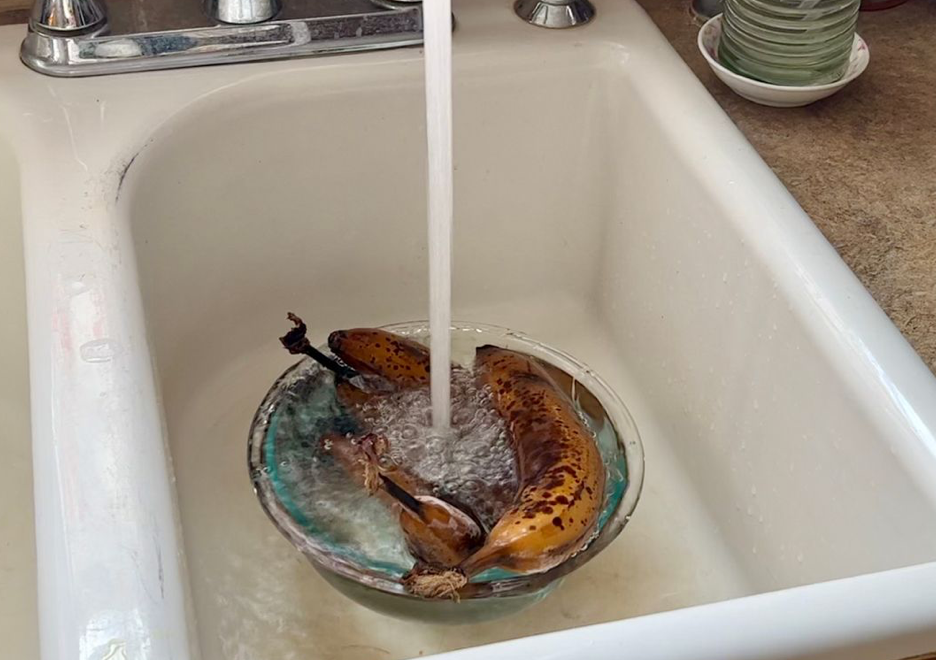
Thawed bananas are really slimy and gross, but I got them all into a bowl and drained off some of the excess liquid. Then it was time to welcome Art Vandelay, my beautiful blue stand mixer, to the stage, and get going on the wet ingredients. I mashed up the bananas first and then put them to the side while I creamed softened butter together with both white and light brown sugars. Once it was super fluffy, in went the eggs and vanilla, then the bananas. I let it go for a few minutes on medium and when I stopped it, I noticed it was super lumpy.
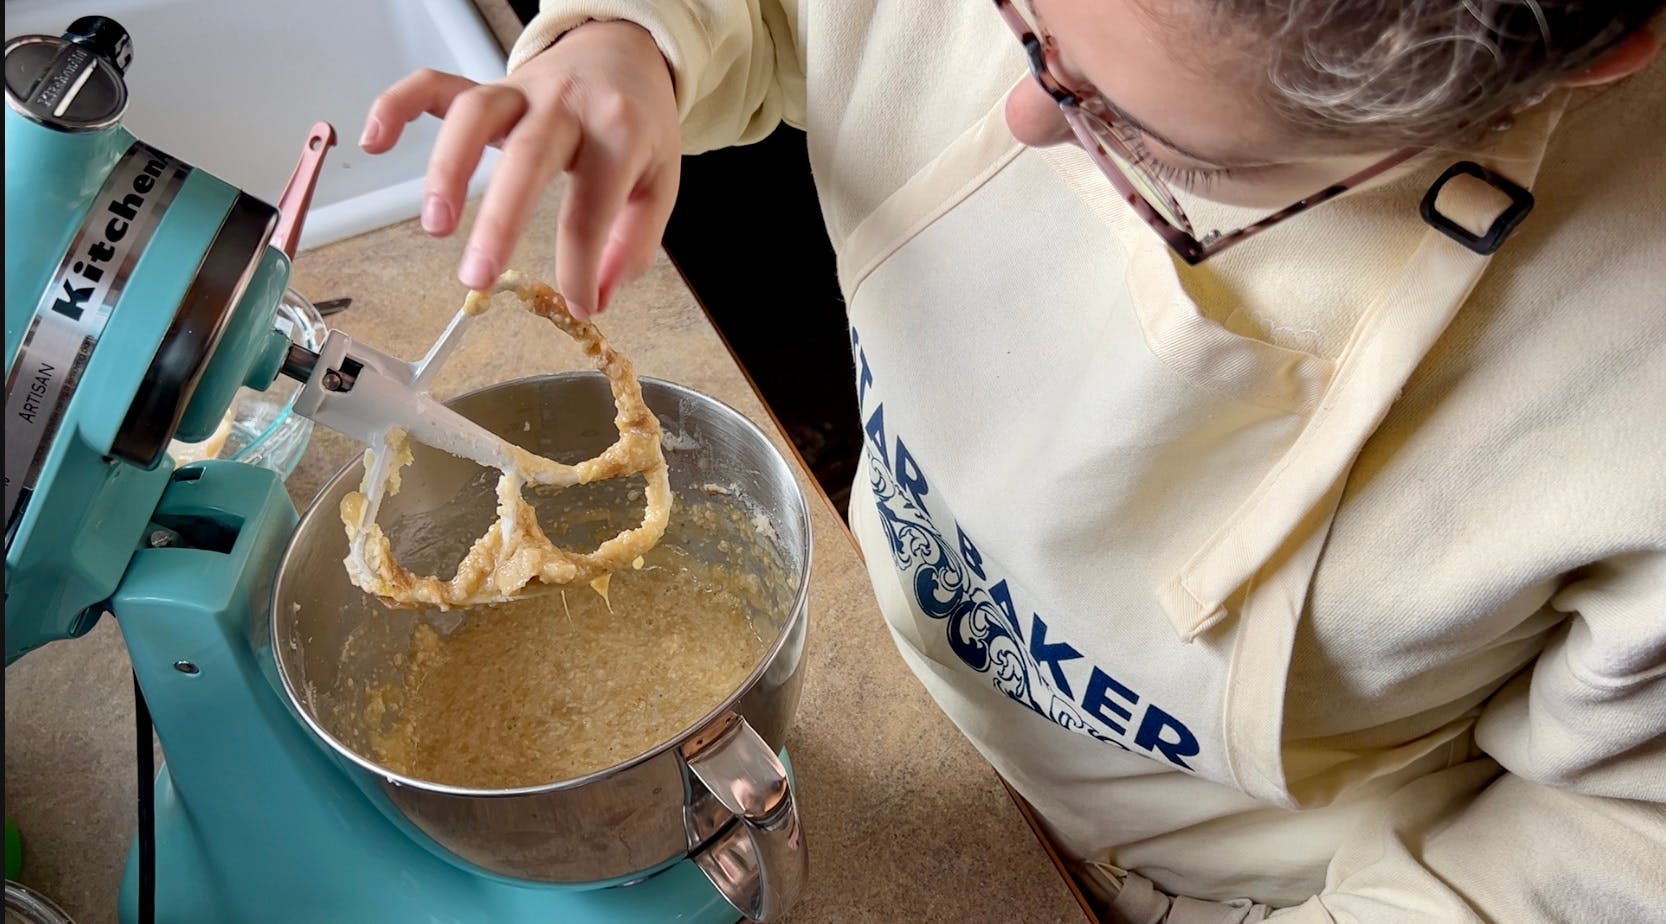
I realized even though they weren't frozen anymore, my bananas were still really cold. When the cold bananas mixed in the room temp batter, the butter in the batter got too cold and lumped up. I put the bowl of batter on top of the oven while it was was preheating and mixed it a TON to try and warm it up enough that the butter would smooth, but not warm enough to cook the eggs. Finally, after about 15 minutes, the consistency wasn't perfect, but it was better enough that I felt able to keep going.
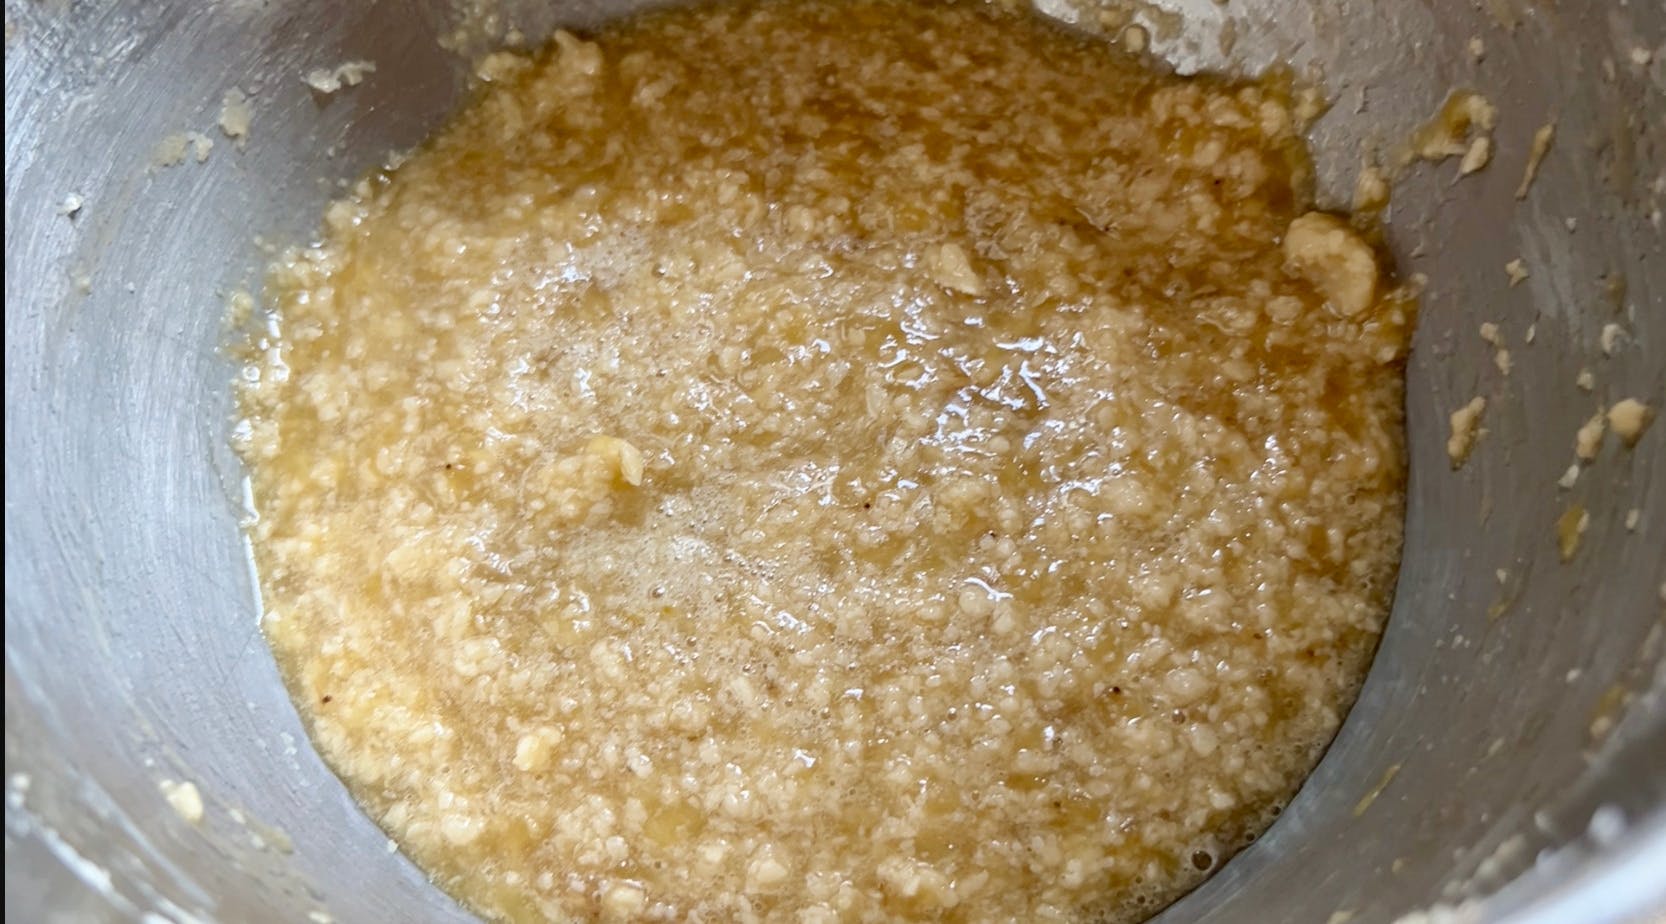

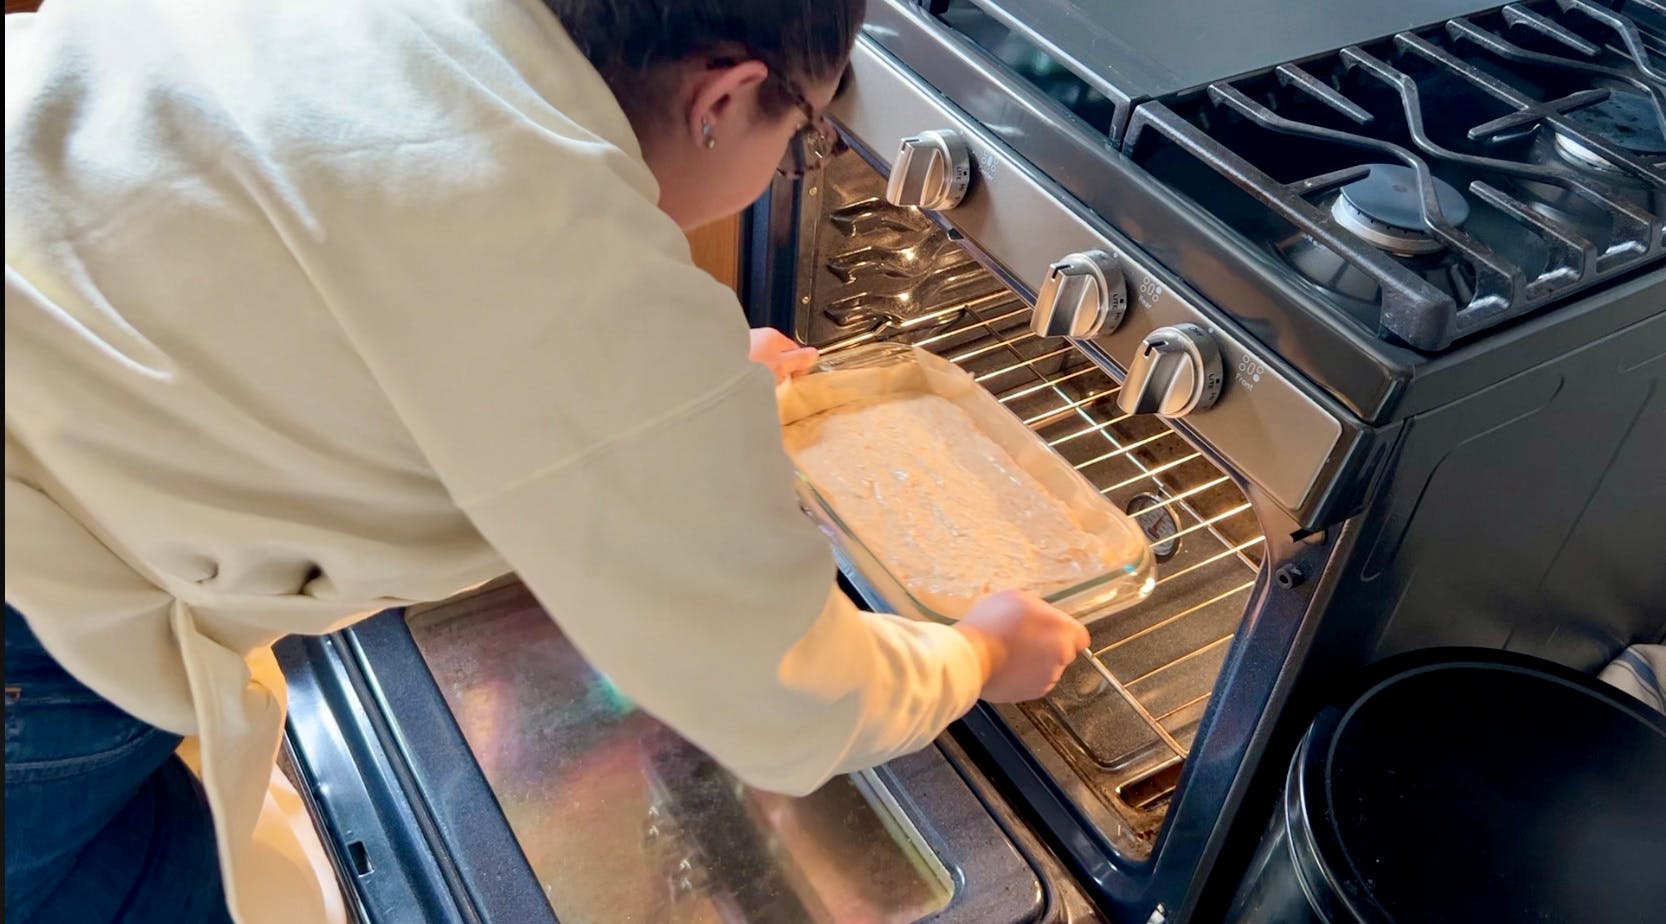
So next I added the dry ingredients and the buttermilk in alternating additions (and yes, the buttermilk WAS room temperature. That I had made sure of ahead of time!). Luckily, it seemed like the lumps were a thing of the past, and it was really starting to look like a gorgeous and luxurious cake batter! It went into my lasagna dish that was lined with greased parchment paper, and then into the oven.
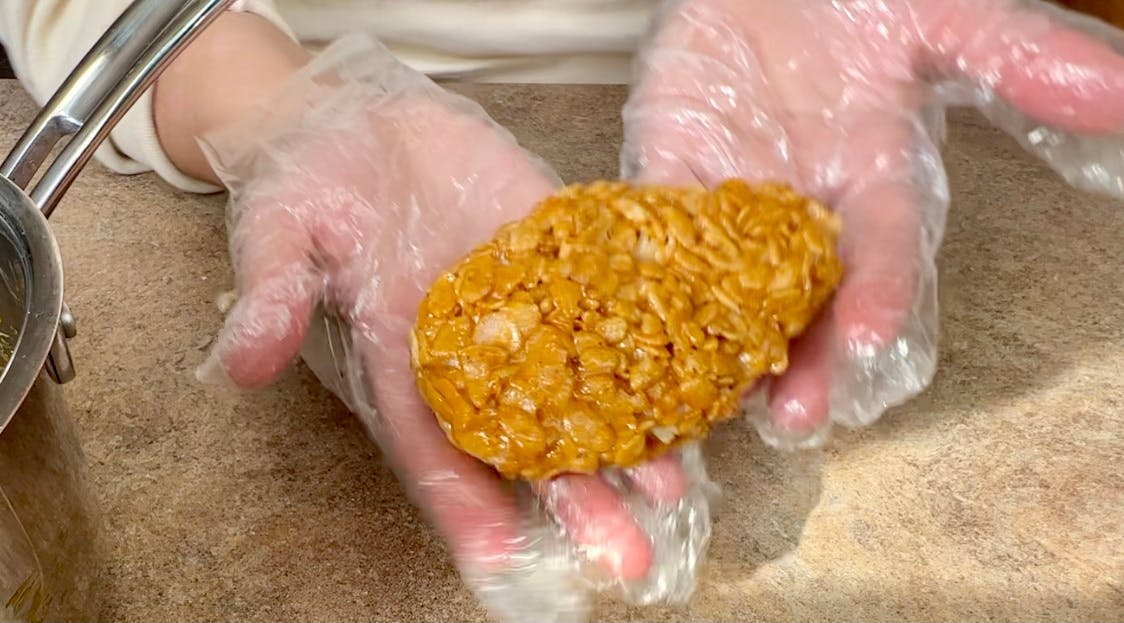
The Rice Crispy "Chicken Katsu"
For the rice crispy "katsu" (Japanese fried chicken cutlet), I knew I would separate out about half of the rice crispy mixture to leave un-dyed make the center aka the chicken meat, but I wanted the outside to be that brownish color of fried breading. I was VERY excited to try out the new gel food coloring set that I got, so I started thinking about color theory which I know very little about. After getting some help brainstorming from Josh, I decided to try the orange-red and the brown together.

So I made an 8th recipe of rice crispy treats, and mixed in food coloring to one half. And it REALLY didn’t work. It started getting hard so I put it back in the pan to warm it up, but even then, the only kind of chicken it was reminding me of was RAW chicken. The orange-red was just far too red.
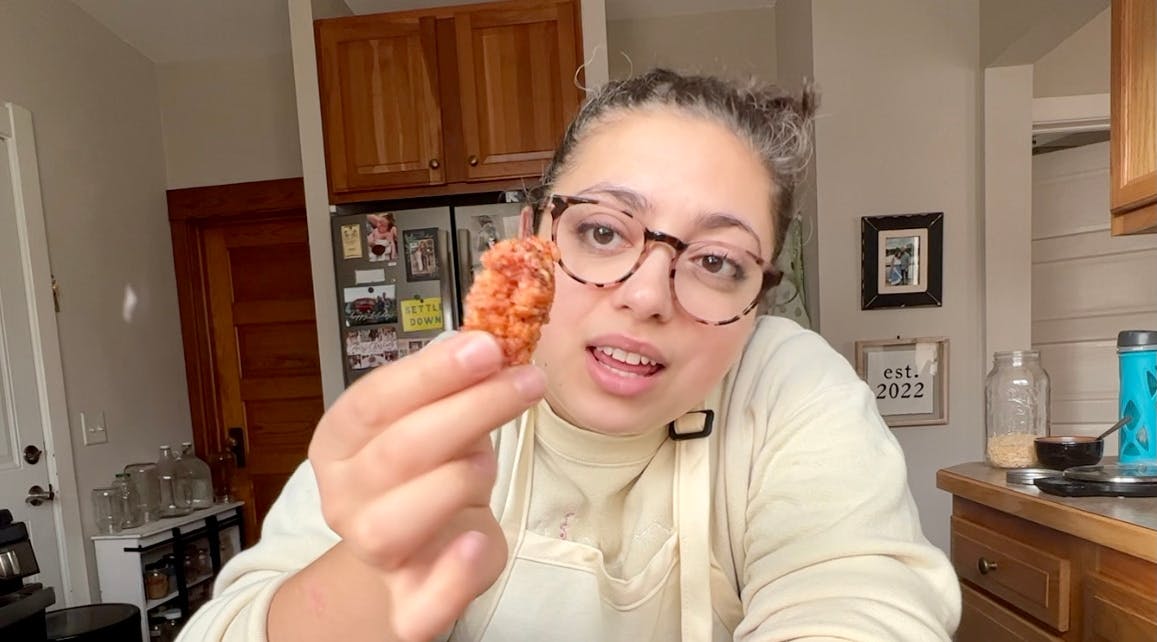
Take two worked sooo much better! This time I mixed the coloring in while everything was still in the pan and hot, instead of after the cereal was added, and I used yellow and brown to get that perfect fried katsu look. It was spot on, so I patted it around the uncolored half from the first batch, and shaped it into something perhaps reminiscent of a piece of chicken katsu.
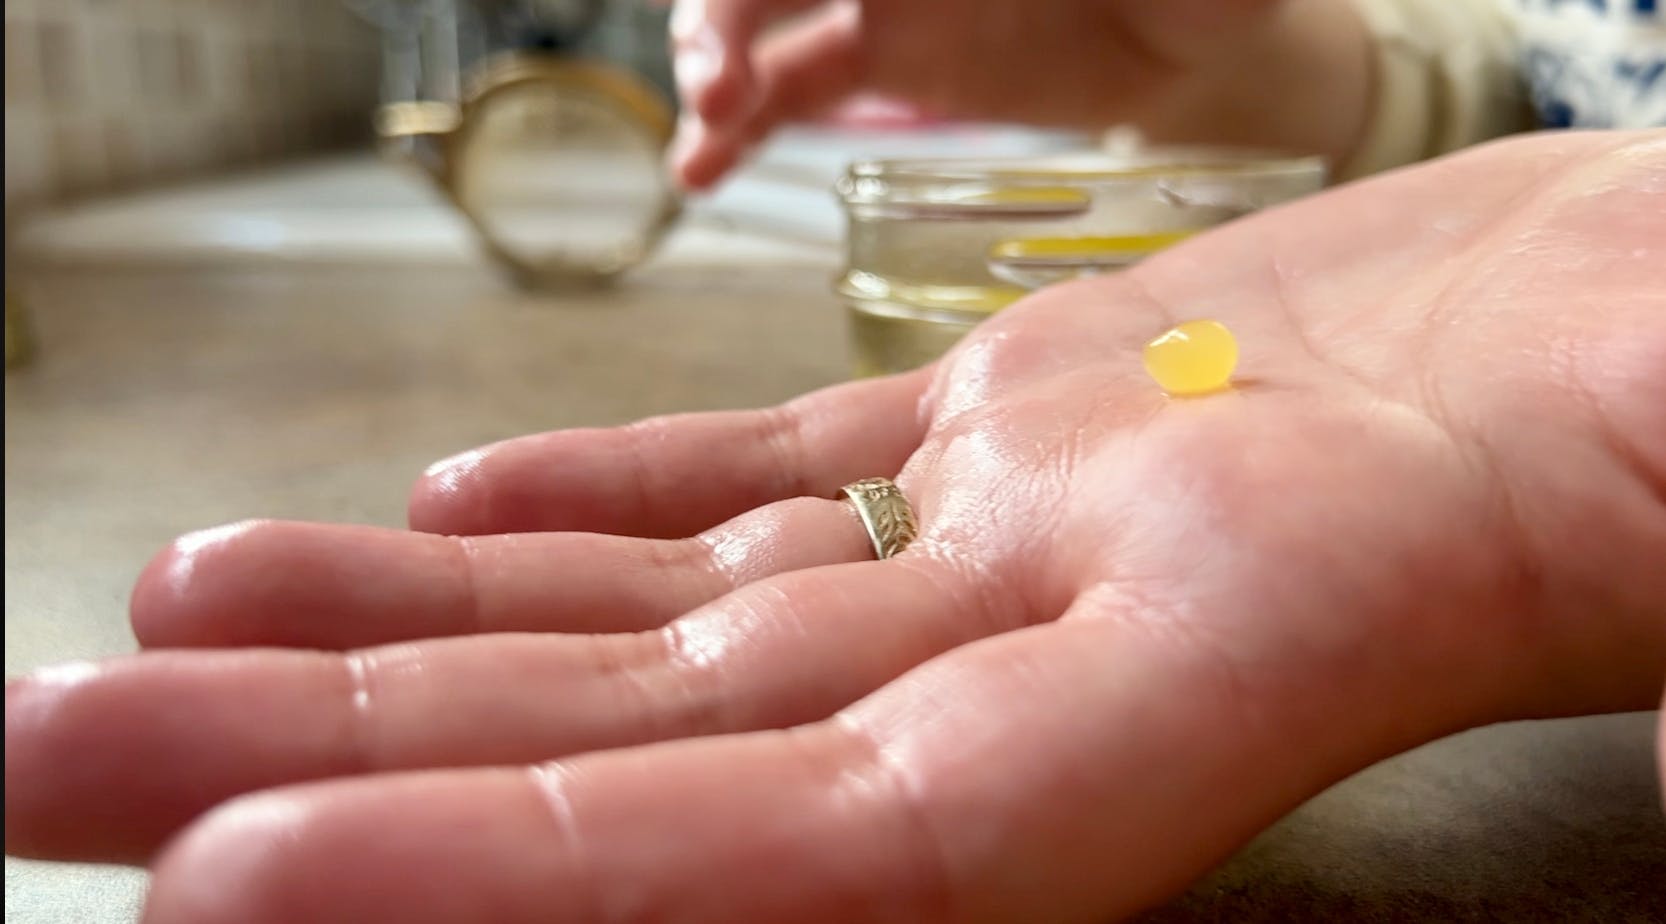
The Mango "Salmon Roe"
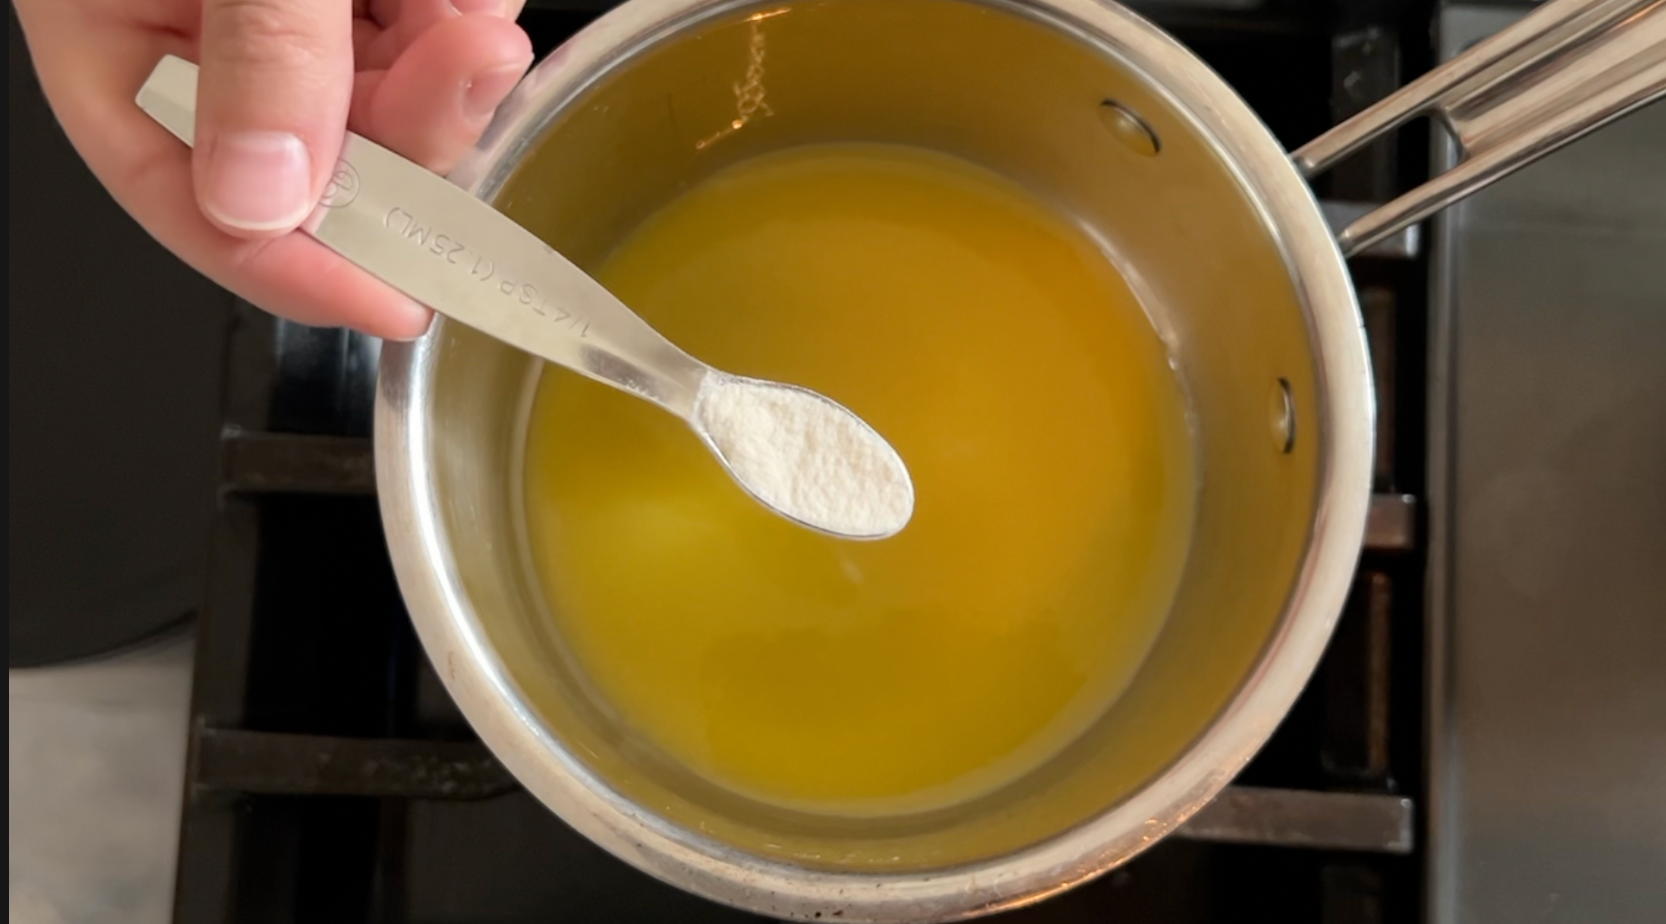
Next I decided to tackle the mango caviar. Spherification, or making fruit caviar, starts by taking fruit juice or puree and boiling it for just a few minutes with agar agar powder. Agar agar is a plant based gelatin made out of algae, and something that I have never worked with before.
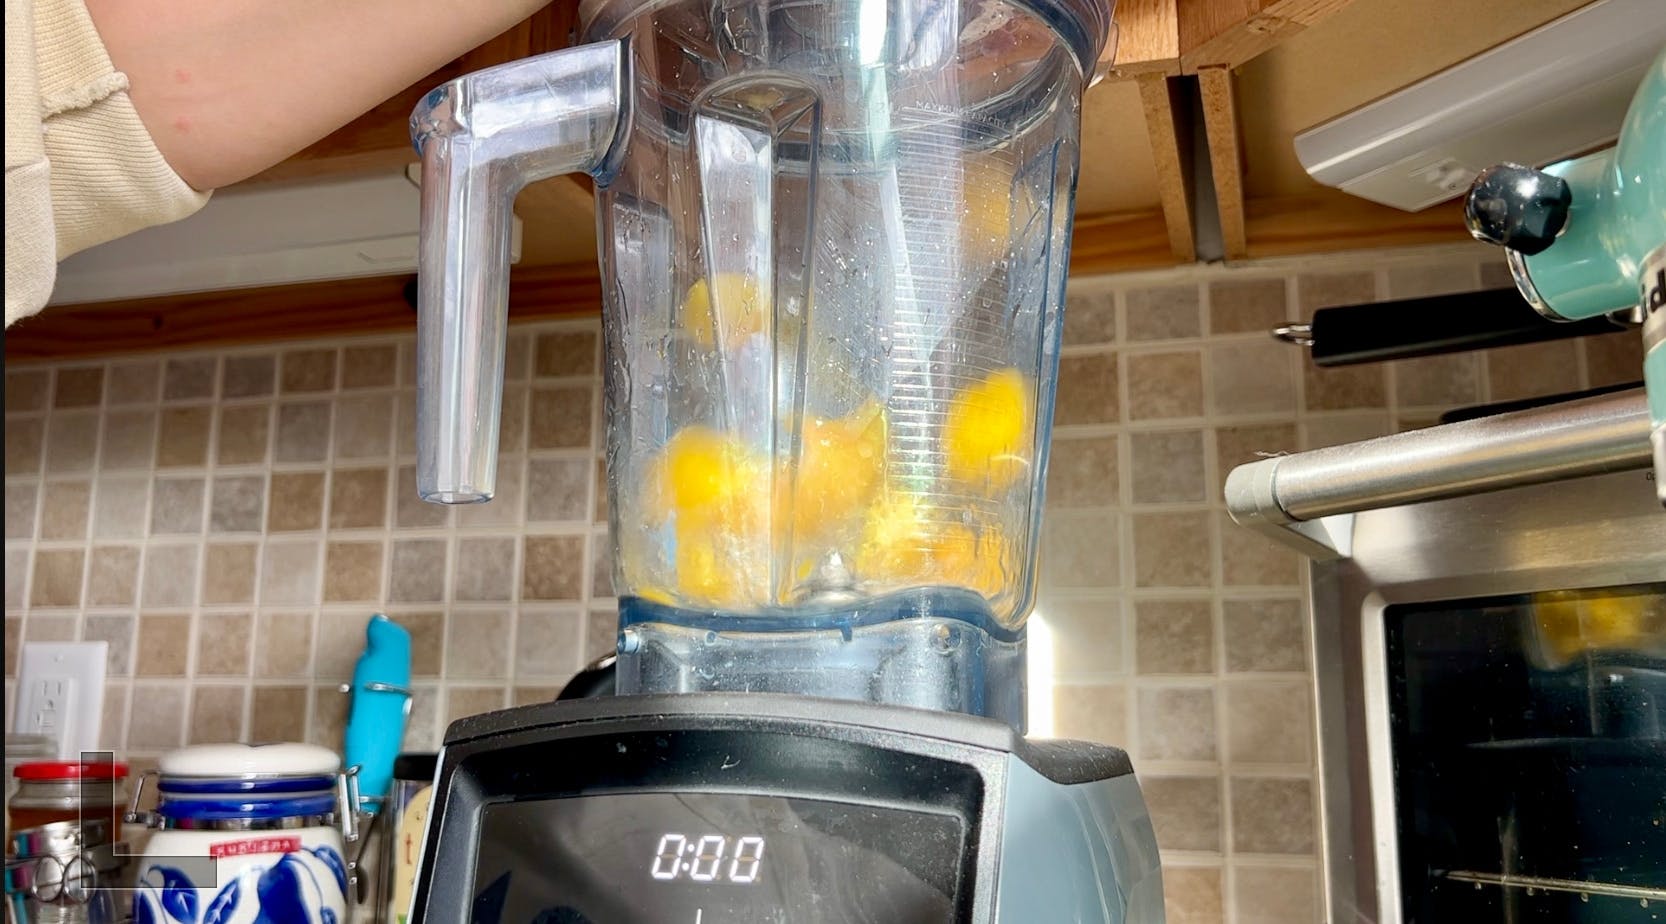
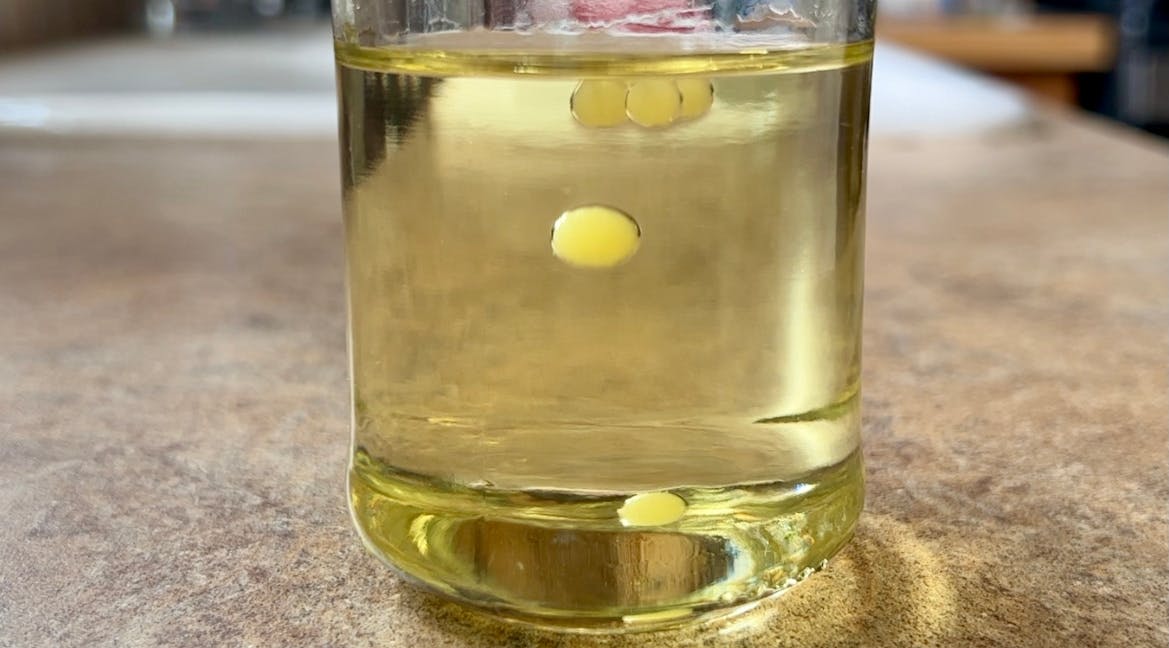
The first step of this actually happened the night before when I thawed some frozen mango overnight in the fridge. The next step was to put some vegetable oil in a thin jar into the fridge so it could get really cold. Then I blended the thawed mango with a bit of water to make a puree. The puree and agar agar went in a little sauce pan, and I let it bubble for a bit while whisking well.
Then I used a (clean and new!!!) pipette to drip the warm mango mixture into the cold oil. The first ones worked so well!!! When the warm juice hit the cold oil it formed perfect little mango spheres.
Then the spheres can be rinsed off with cool water, and you have "caviar" that tastes like whatever liquid you used - mango, kiwi, cherry, etc etc... I recently saw someone do it with vermouth, so the possibilities clearly extend beyond just fruit puree!
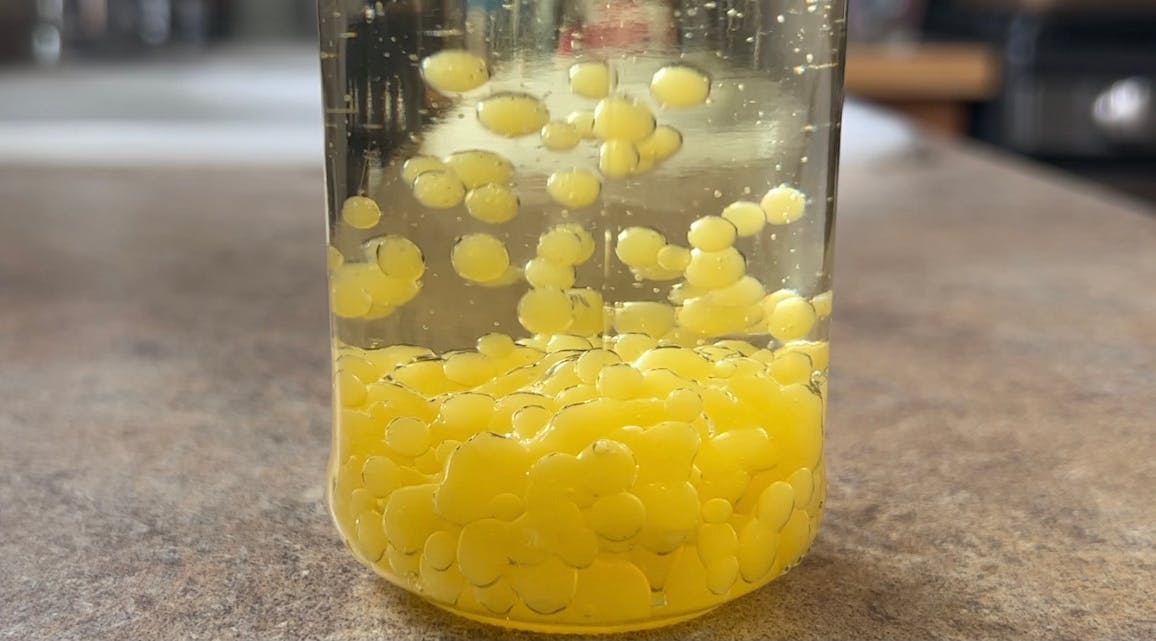
DISASTER STRIKES! A little stir of the pipette revealed that after many pipettes full of hot puree dropping into the oil had raised the temp of the oil too much. A lot of what had looked like spheres had turned into a big gooey lump. I rinsed the whole lot in cool water and was pleased to discover that I had plenty that DID work. The ones from the beginning held their shape no problem! If you do this - make sure your oil is REALLY cold. 15 min in the fridge is not enough, turns out.
The Fondant (For Every Other Topping)
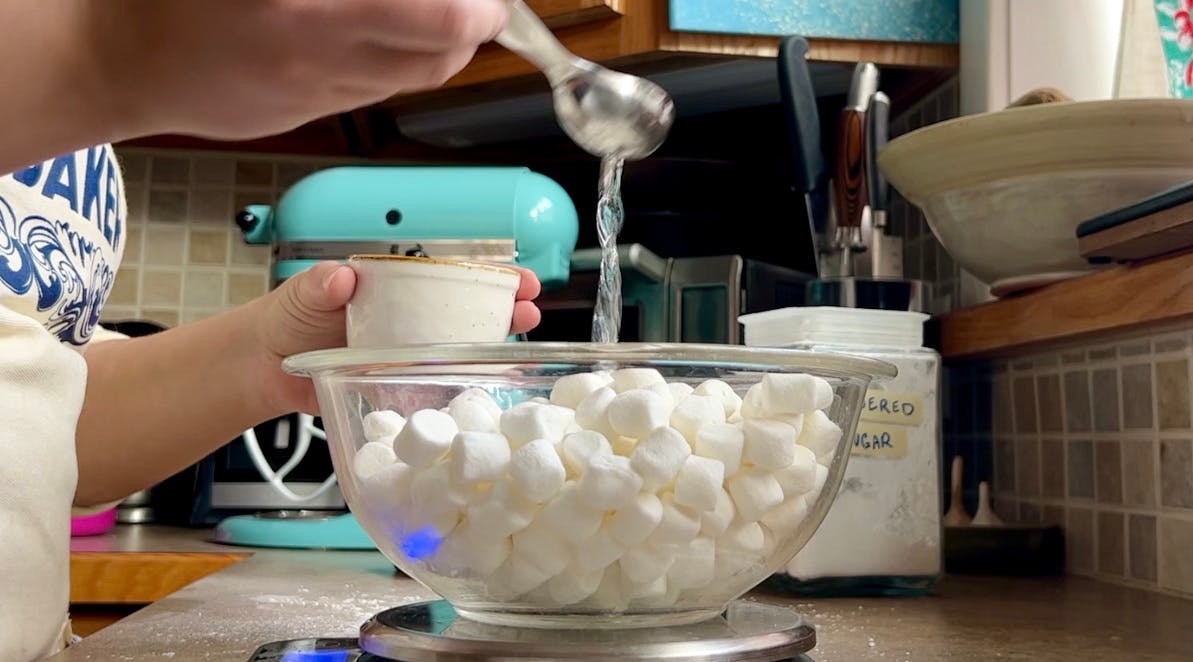
Fondant starts with a lot of marshmallows and a little bit of water that are microwaved together until melted and mixed with a lot of powdered sugar until it looks and feels like play dough. I gave up on mixing in the bowl pretty quickly and transferred to kneading. This is done exactly the same way as kneading bread dough, except you use powdered sugar on your counter, not flour. After about 6 minutes of arm workout, it was smooth and dense and ready to be used. I set aside one half to be the outside of the bowl, and used the other half to be all the toppings, which I split it into sections for each future item.

After picking the colors, I donned gloves once more and kneaded the colors into the fondant. It was tricky because the fondant didn’t want to absorb the color and I got a lot of it just on my gloves. Luckily the gloves rinsed off easily so I didn’t have to change them for every color.
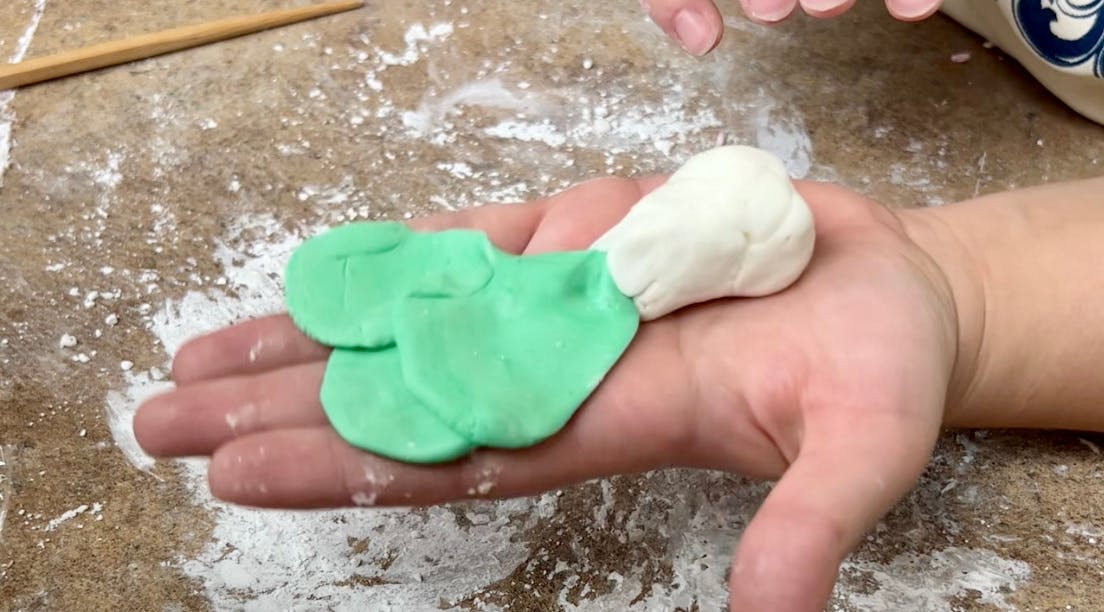
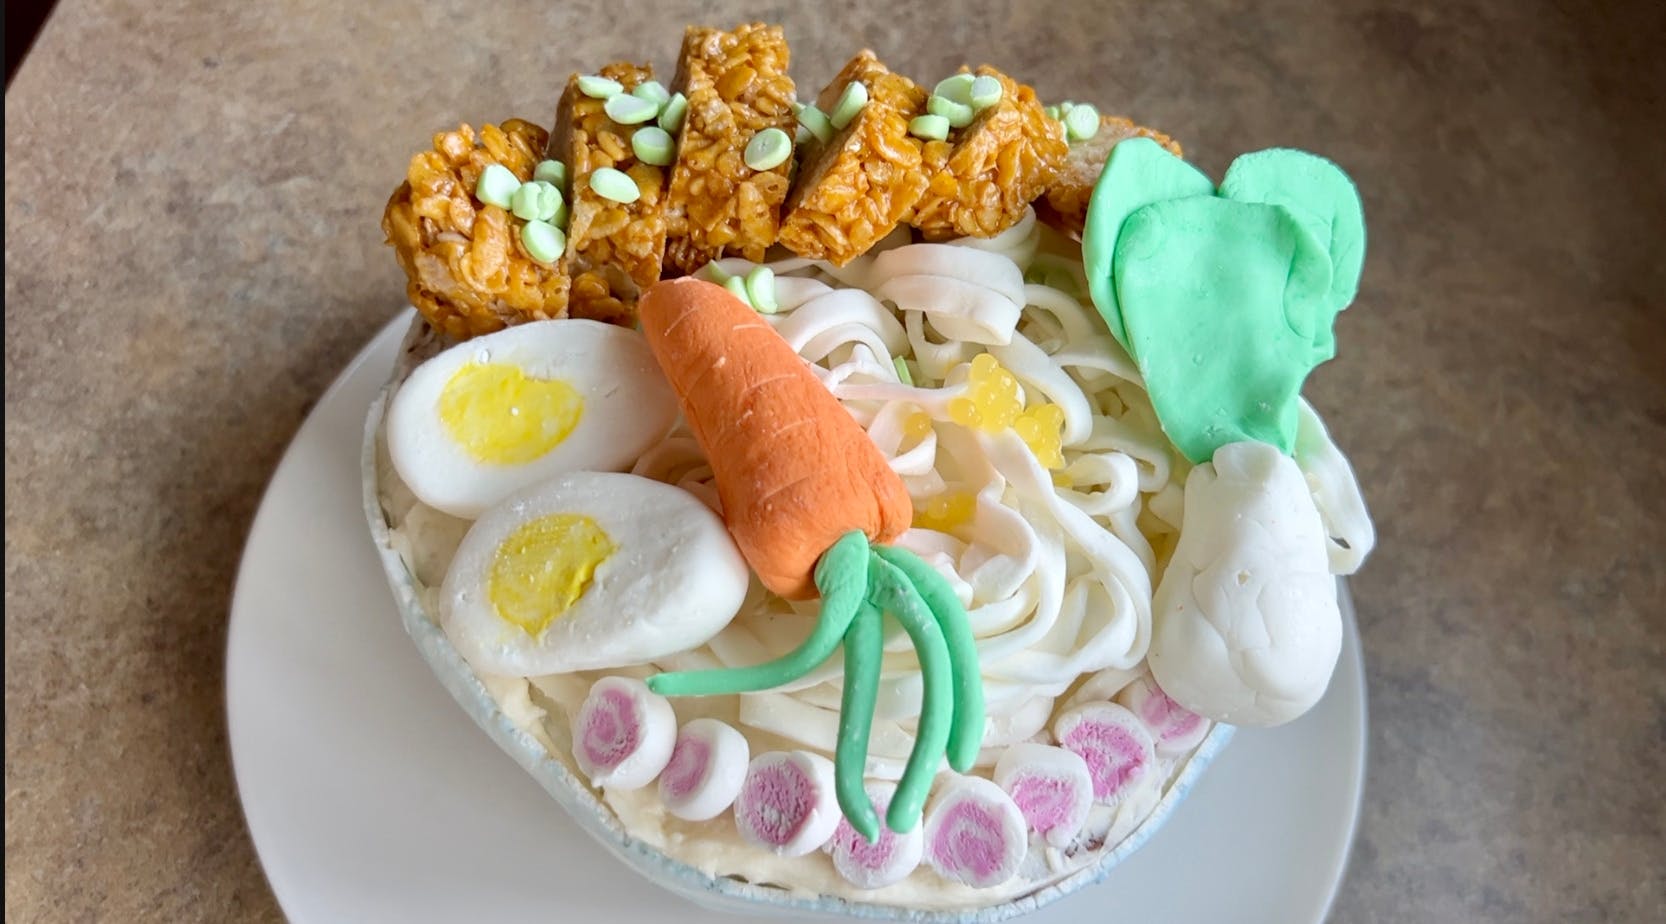
After I made my colored play dough fondant, I got to the fun part of shaping. I made the scallions by rolling light green around white, and then slicing them like actual scallions.
Then I made green leaves for the baby boy choy and put them onto a white base.
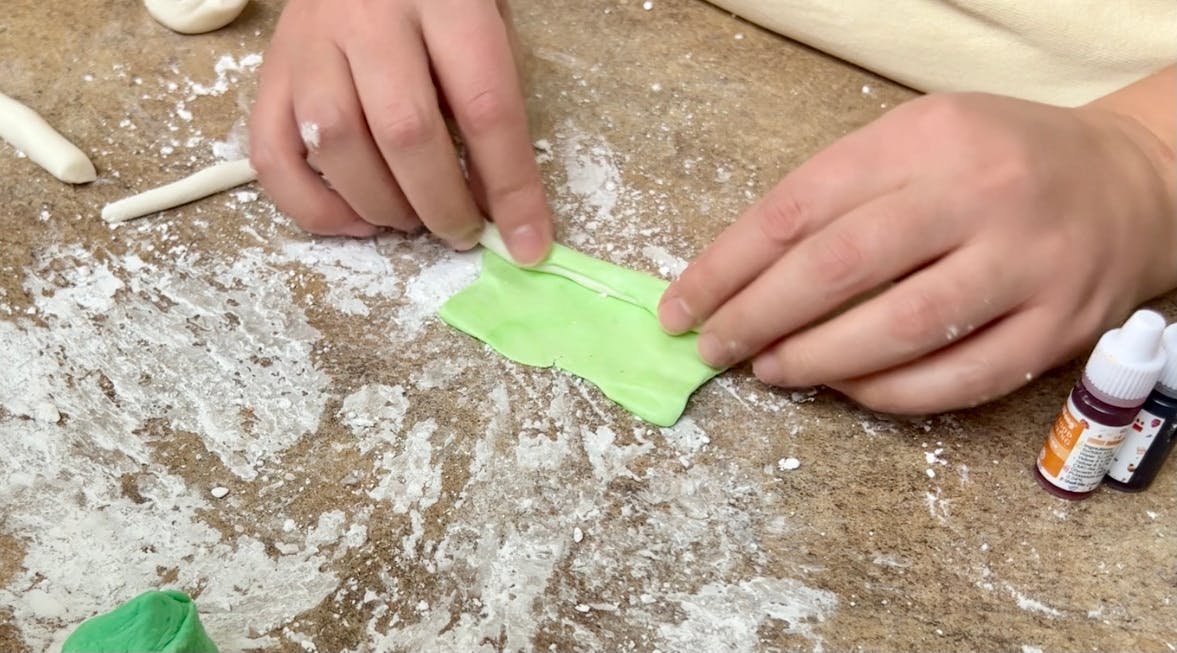
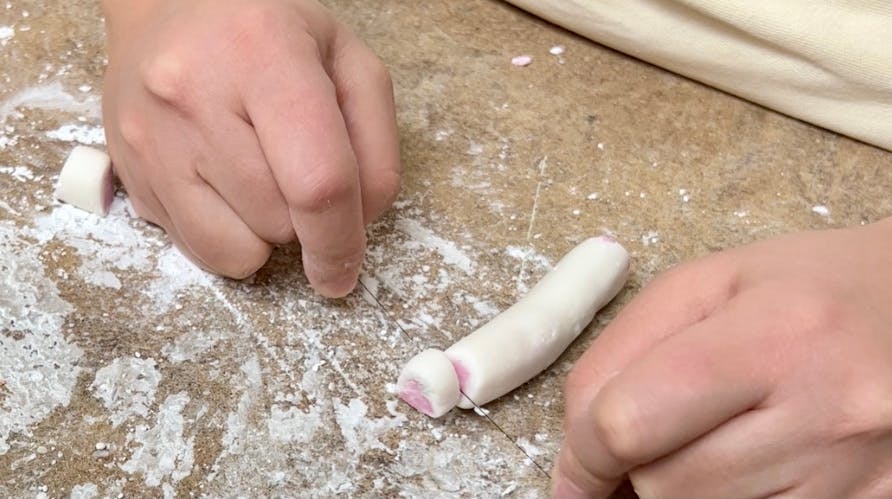
Then I rolled a sheet of pink and a sheet of white together into a spiral log which I then sliced with a piece of sewing thread to make the fish cake slices.
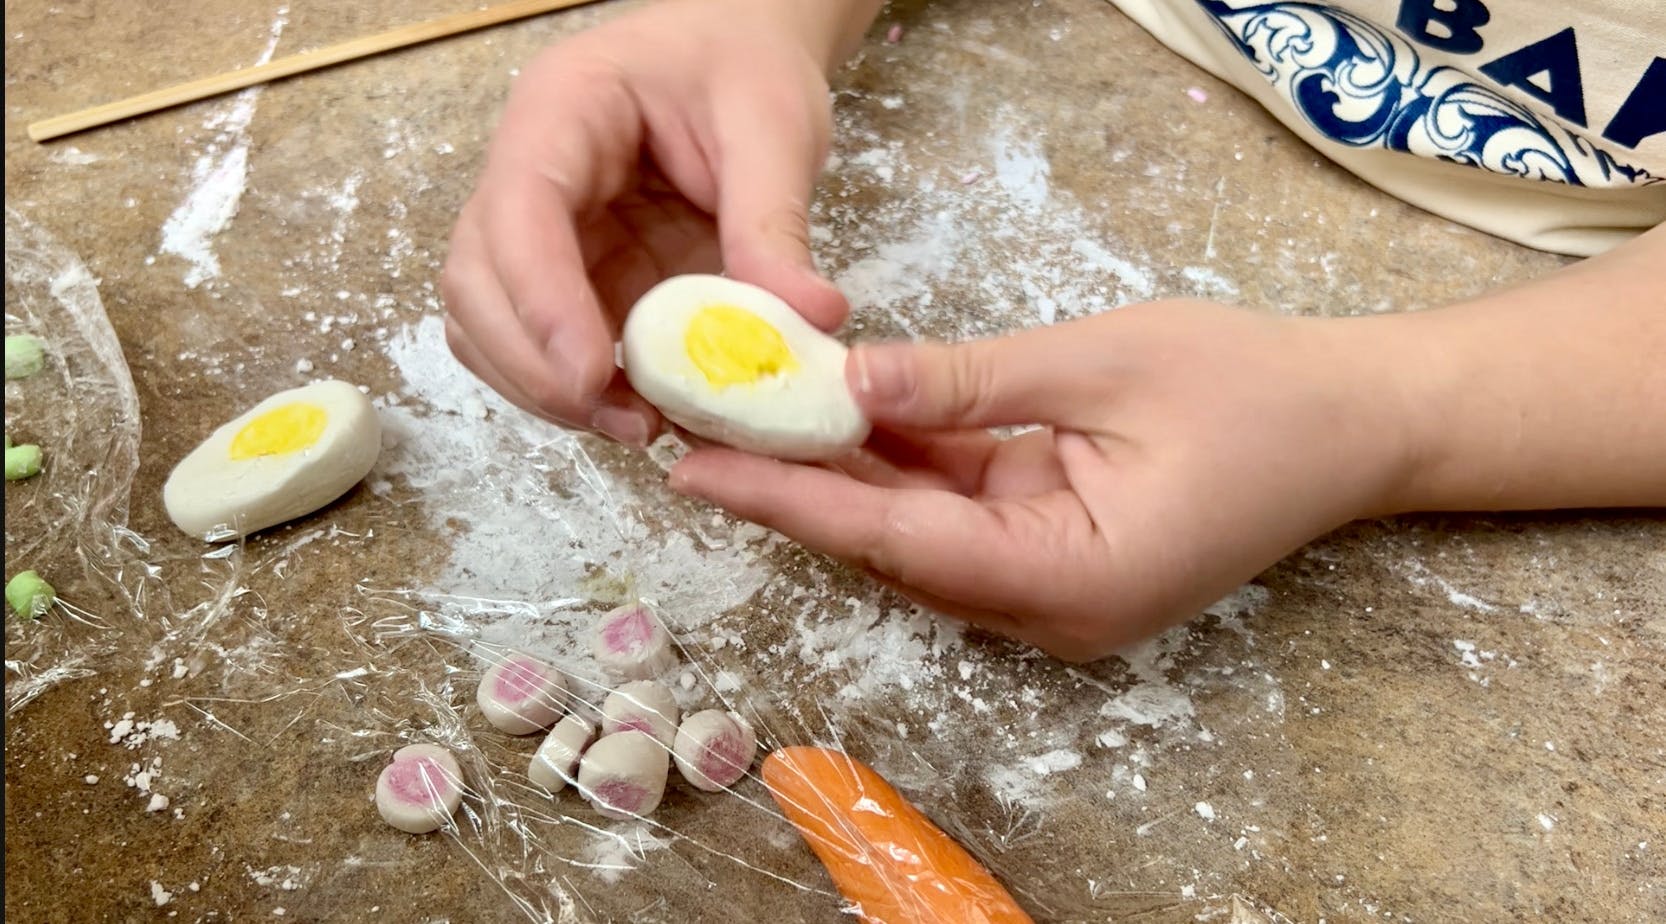
Then I shaped the egg white, popped in the yolk, and gave it a slice. It was a little misshapen after slicing, but it was easy to mold it back into a proper egg shape.
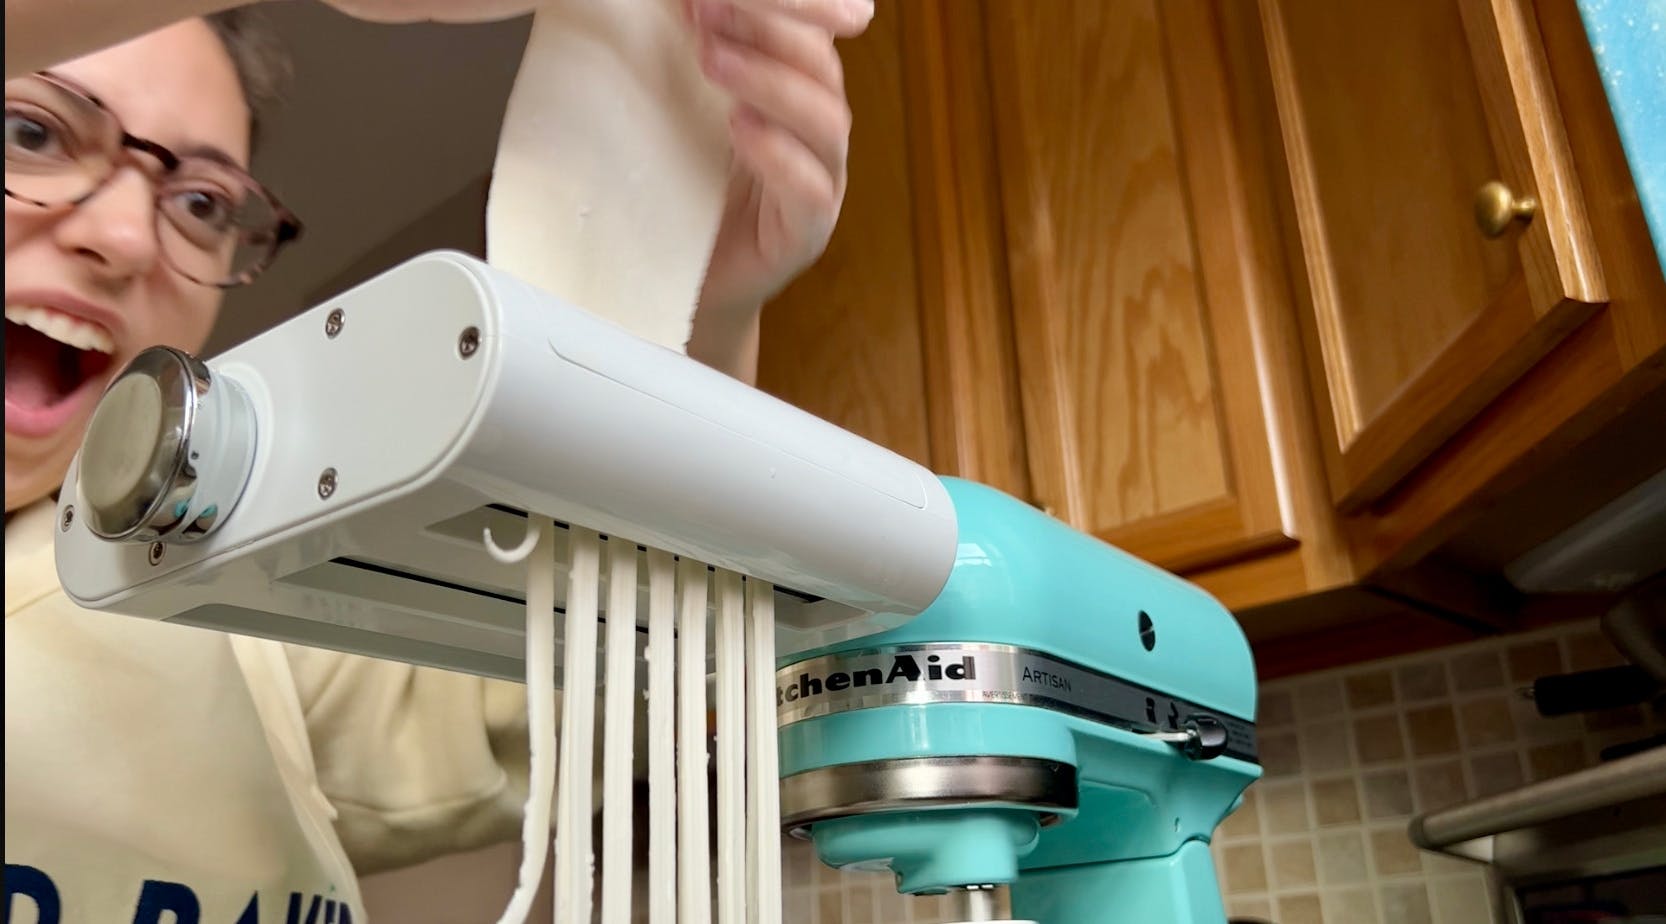
For the noodles, I ran some uncolored fondant through Art Vandelay’s pasta cutter attachment. I was so impressed! The fondant really looked like noodles!
Two Days Later - The Buttercream Frosting
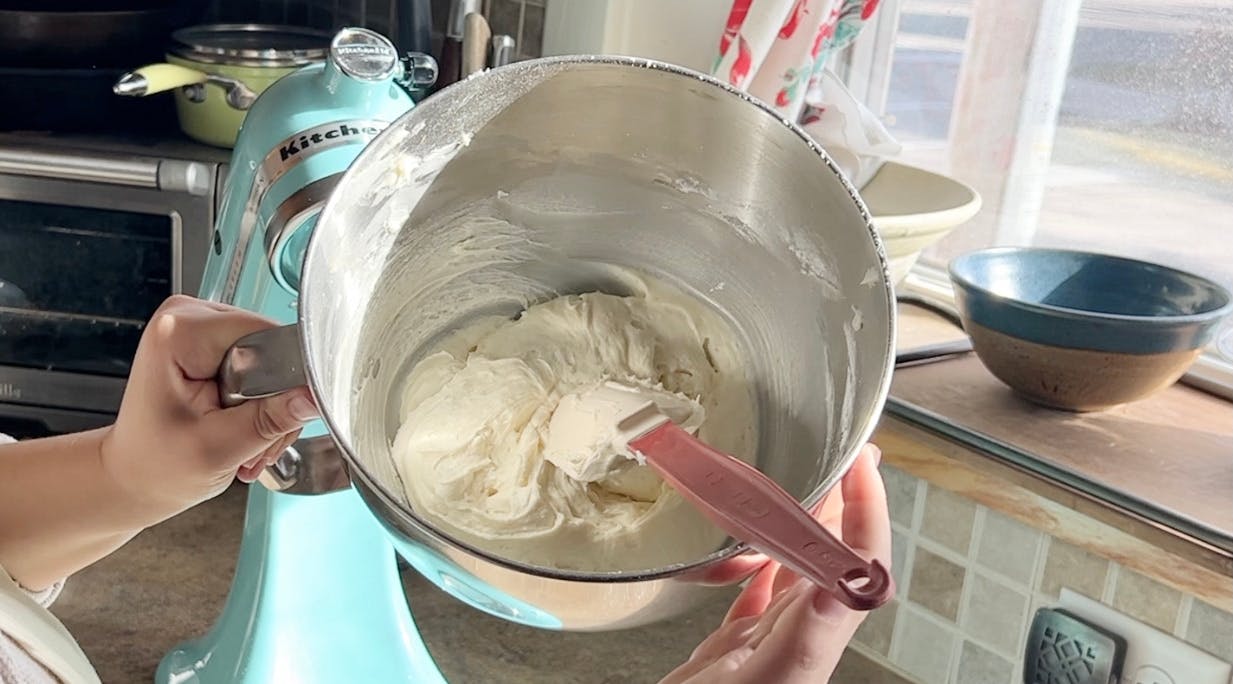
I took a wee break and dove back into this project by tackling the frosting. The hardest part about this frosting was remembering to take the butter and cream cheese out of the fridge with enough time to come to room temp. That is to say, it's really easy!

My go-to American buttercream frosting is BBCC - Brown Butter Cream Cheese Frosting - so I wanted to make that for this cake. I started by whipping up both of the dairy fat products until fluffy, and then added powdered sugar, vanilla, and salt. I let Art go for a while so that the frosting became super smooth.
The Assembly
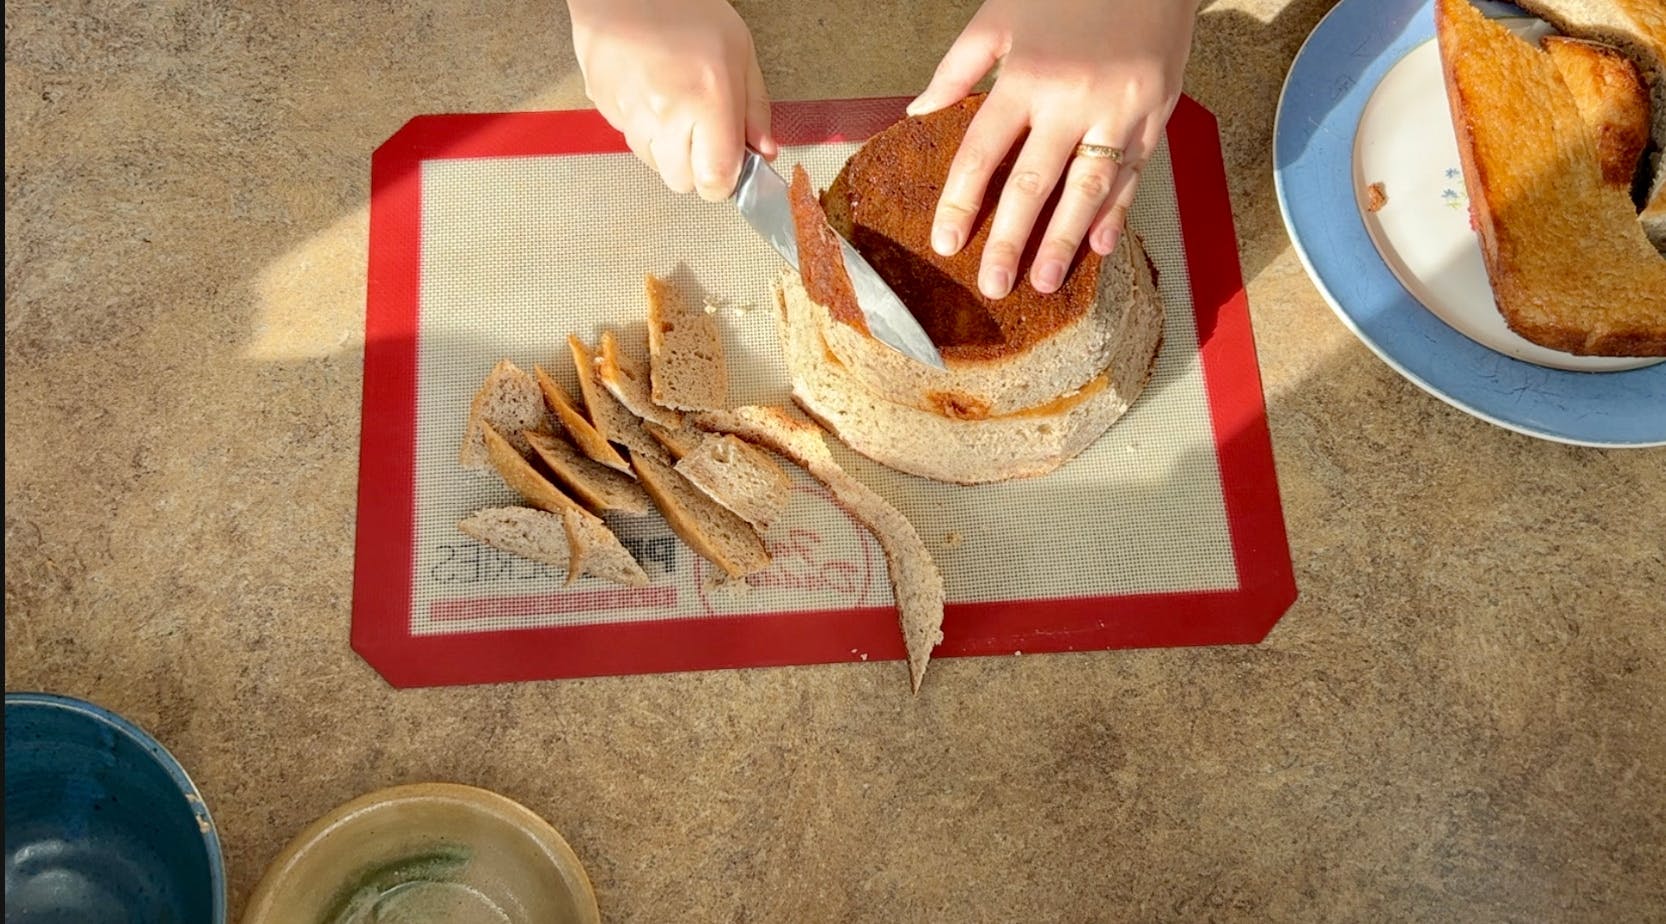
Cake carving time! There’s a first time for everything, and this was my very first time carving a cake into a shape. I used two bowls to measure the approximate size for each of the two layers, and gently scored the cake to make cutting lines. Because the cake was super chilled from being in the fridge for a nice long time, it was really firm and easy to cut without tearing. I removed the excess (which went in the freezer to save for future cake truffles!) and was left with two not so perfect rounds of cake.

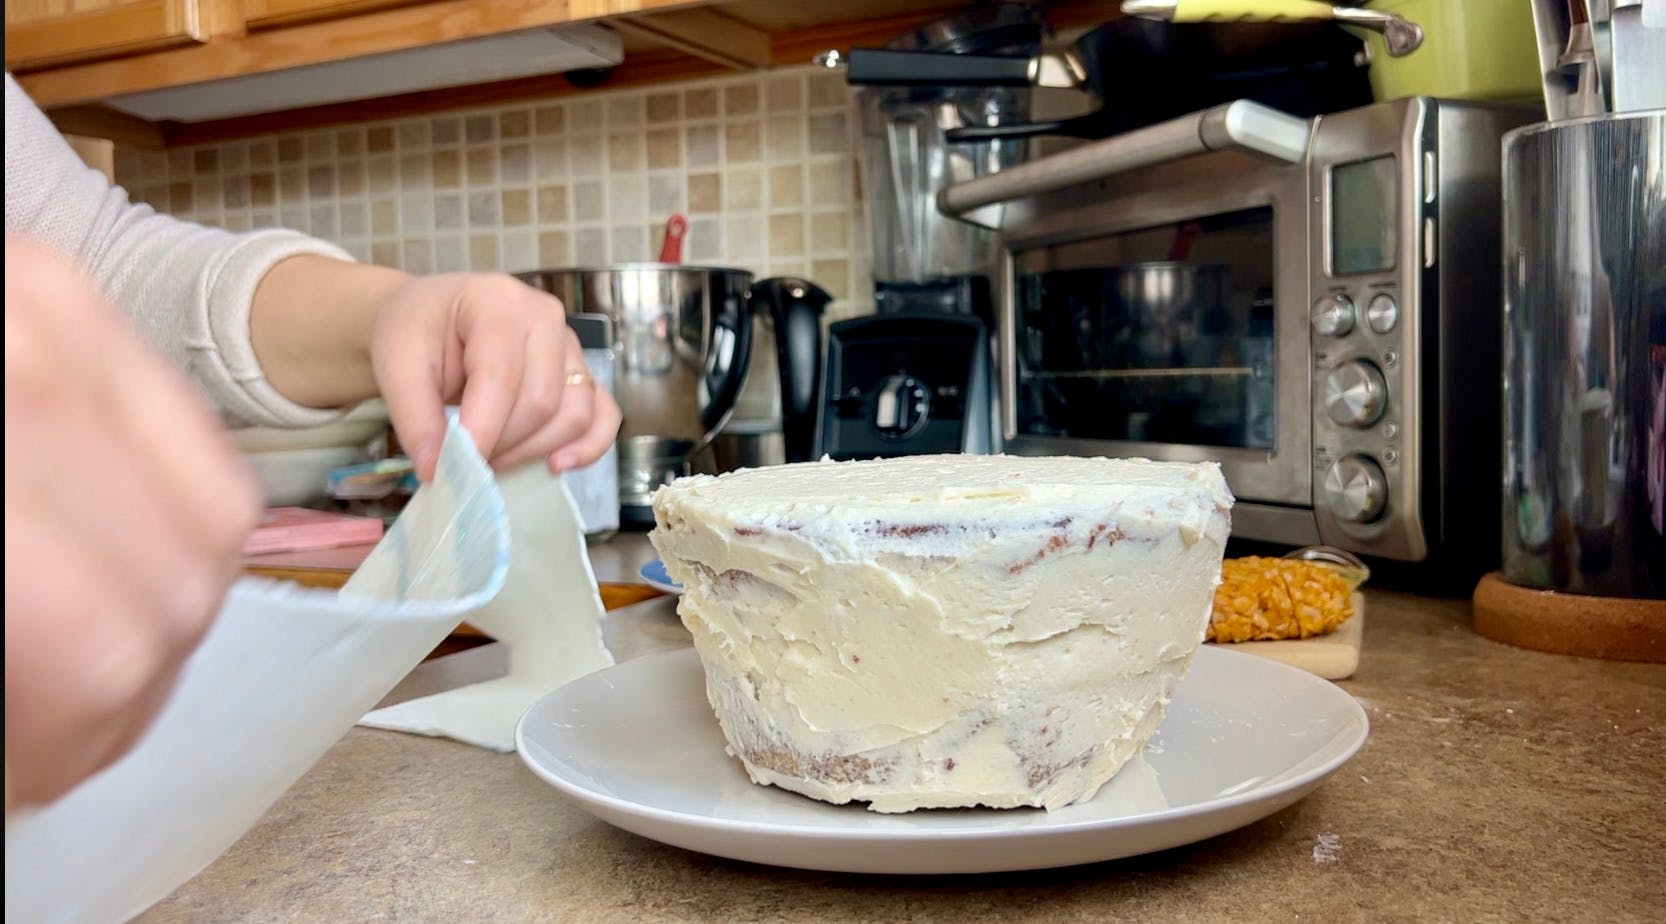
I stacked the smaller one on the larger one so it was as if the bowl of ramen was upside down, and started carving away more of the cake so that the sides were angled. I know it’s not perfect, but I think for my first time ever doing anything like this, it turned out pretty okay! I put a generous layer of frosting in between two cake rounds and put her little hat on.
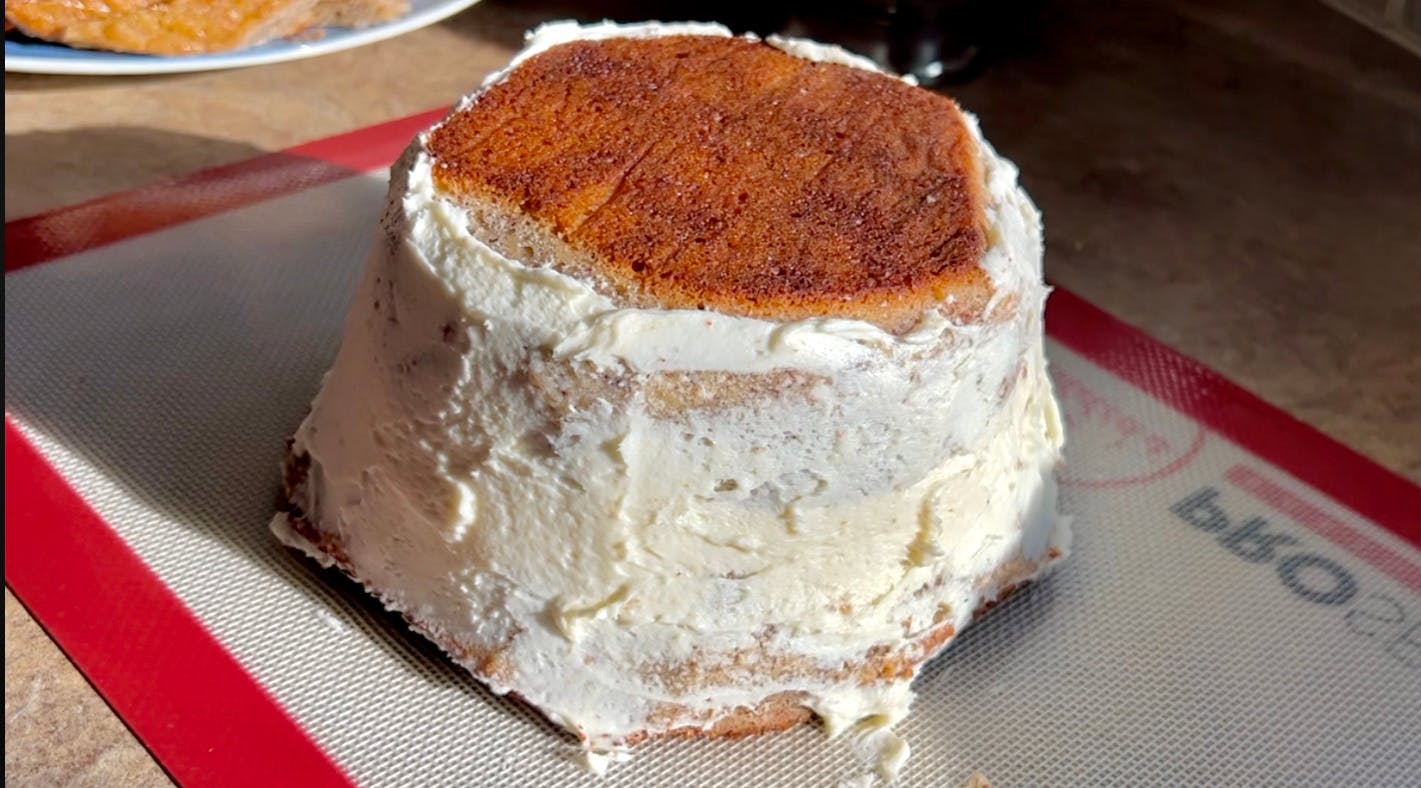
Then I did a crumb coat before putting the whole thing back in the fridge. (A crumb coat is a thin layer of frosting that you put on and then chill really well so it hardens a bit and seals the outside of the cake so that when you go to do the actual frosting, bits of cake don’t crumble into the frosting and mess up the look. I did not have to do this because this cake will be covered in fondant anyway, but I wanted to practice!)
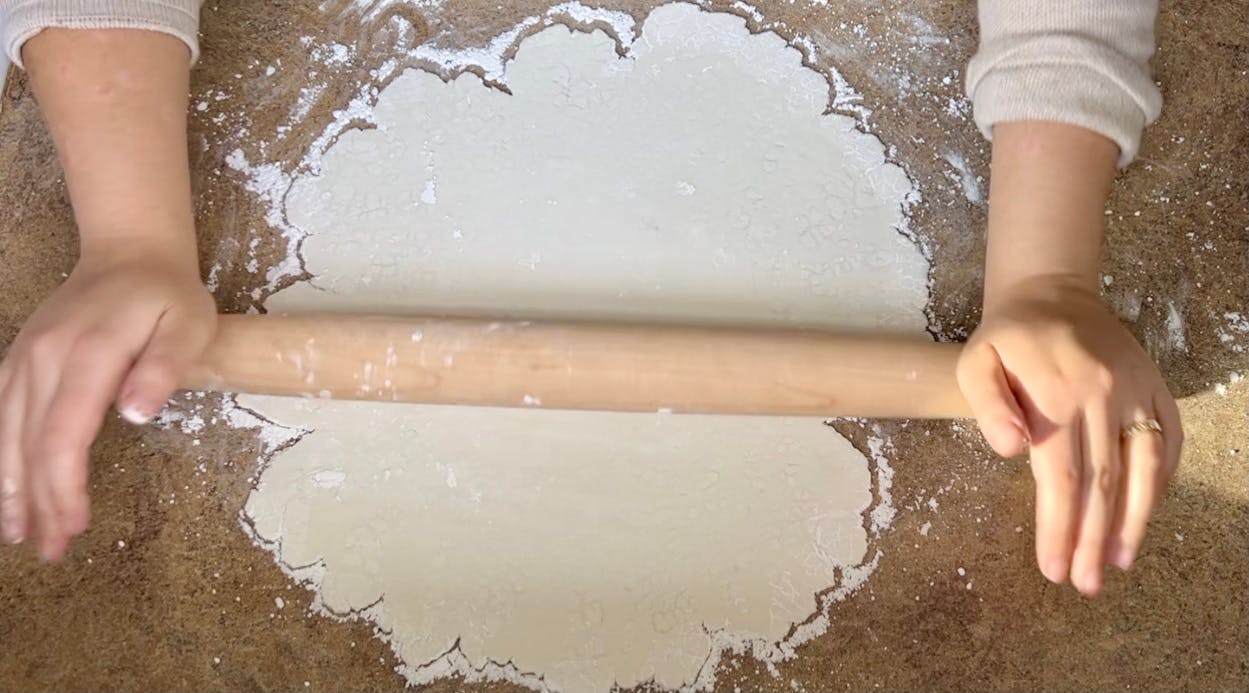
With the cake in the fridge, I decided to roll out the other half of fondant that had been all snuggled up in its plastic wrap blanket and was patiently waiting for this moment. I again used powdered sugar to provide a non-sticky surface for rolling out. I think even though I wrapped it super tightly that it still got a little bit dried out and it was not at all wanting to roll out thinly. I used my forearms on the rolling pin so I could really use my weight and it even though it took a really long time, it finally got nice and thin.
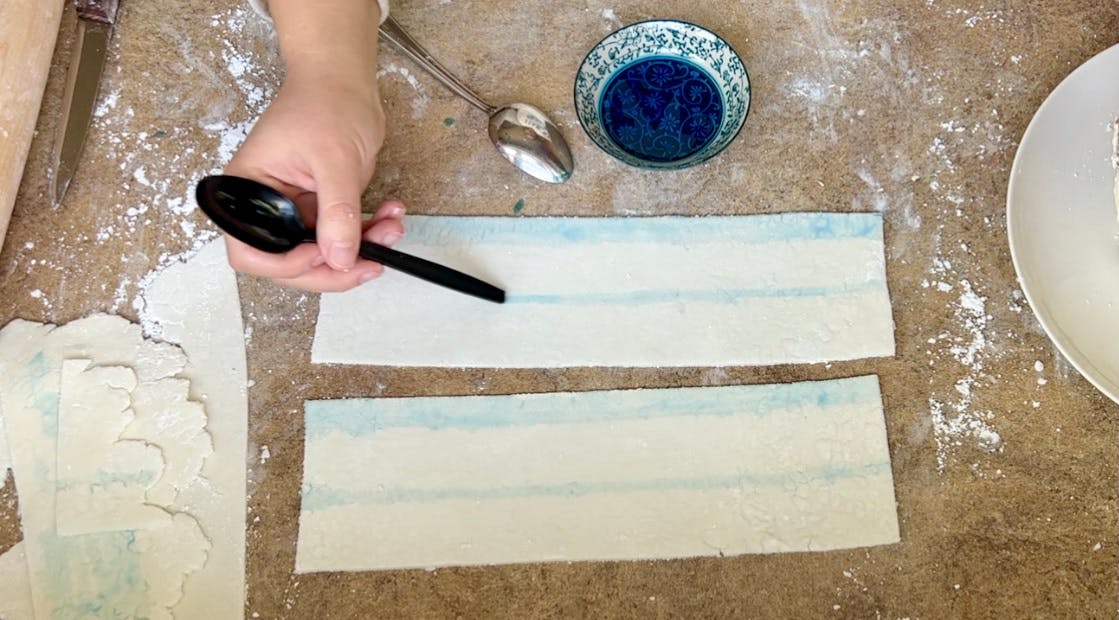
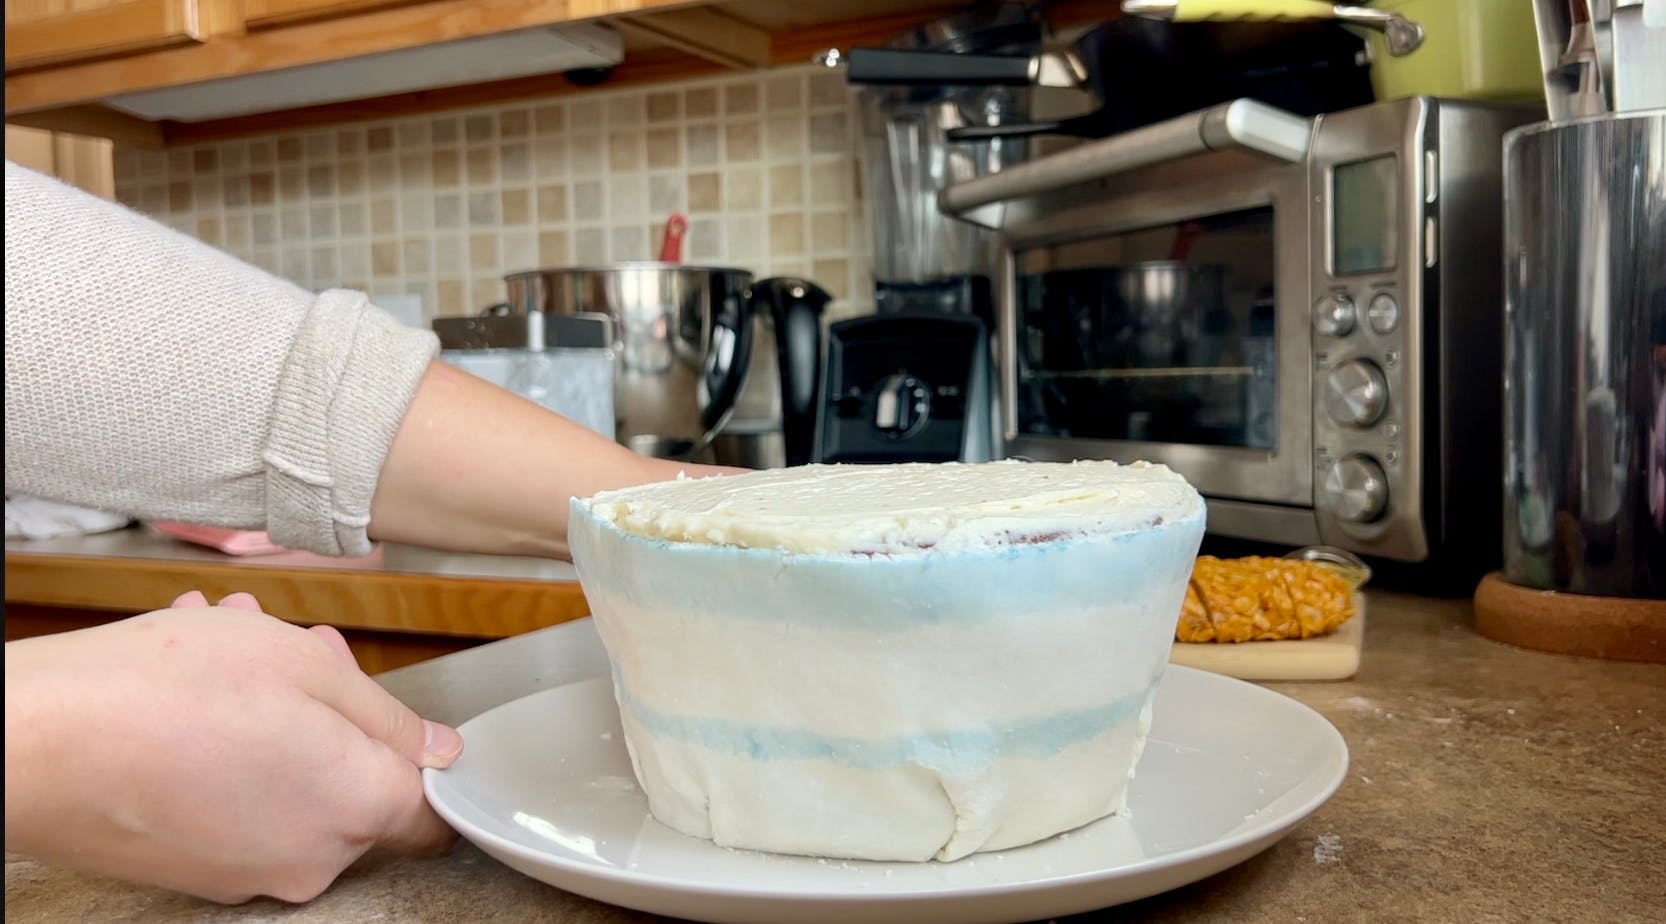
Then I cut it in two rectangles the width of the height of the cake, and make a little food coloring paint out of the gel and water, and painted some stripes on the bowl.
While the "paint" dried, I frosted the cake with a thicker and therefore more delicious layer of frosting, and then put it back in the fridge one more time. Then I used a little water to "glue" together strips of the fondant for the outside of the bowl, and wrapped the double strip around the cake.
Because the cake had an angle to it and the fondant did not, I took little tucks around the bottom to help it lay smooth. Pretty sloppy, I know, but I don’t have a fondant smoother thingy (clearly! I don't even know what it's called!) and I think my fondant was too thin and brittle for that to work anyway.
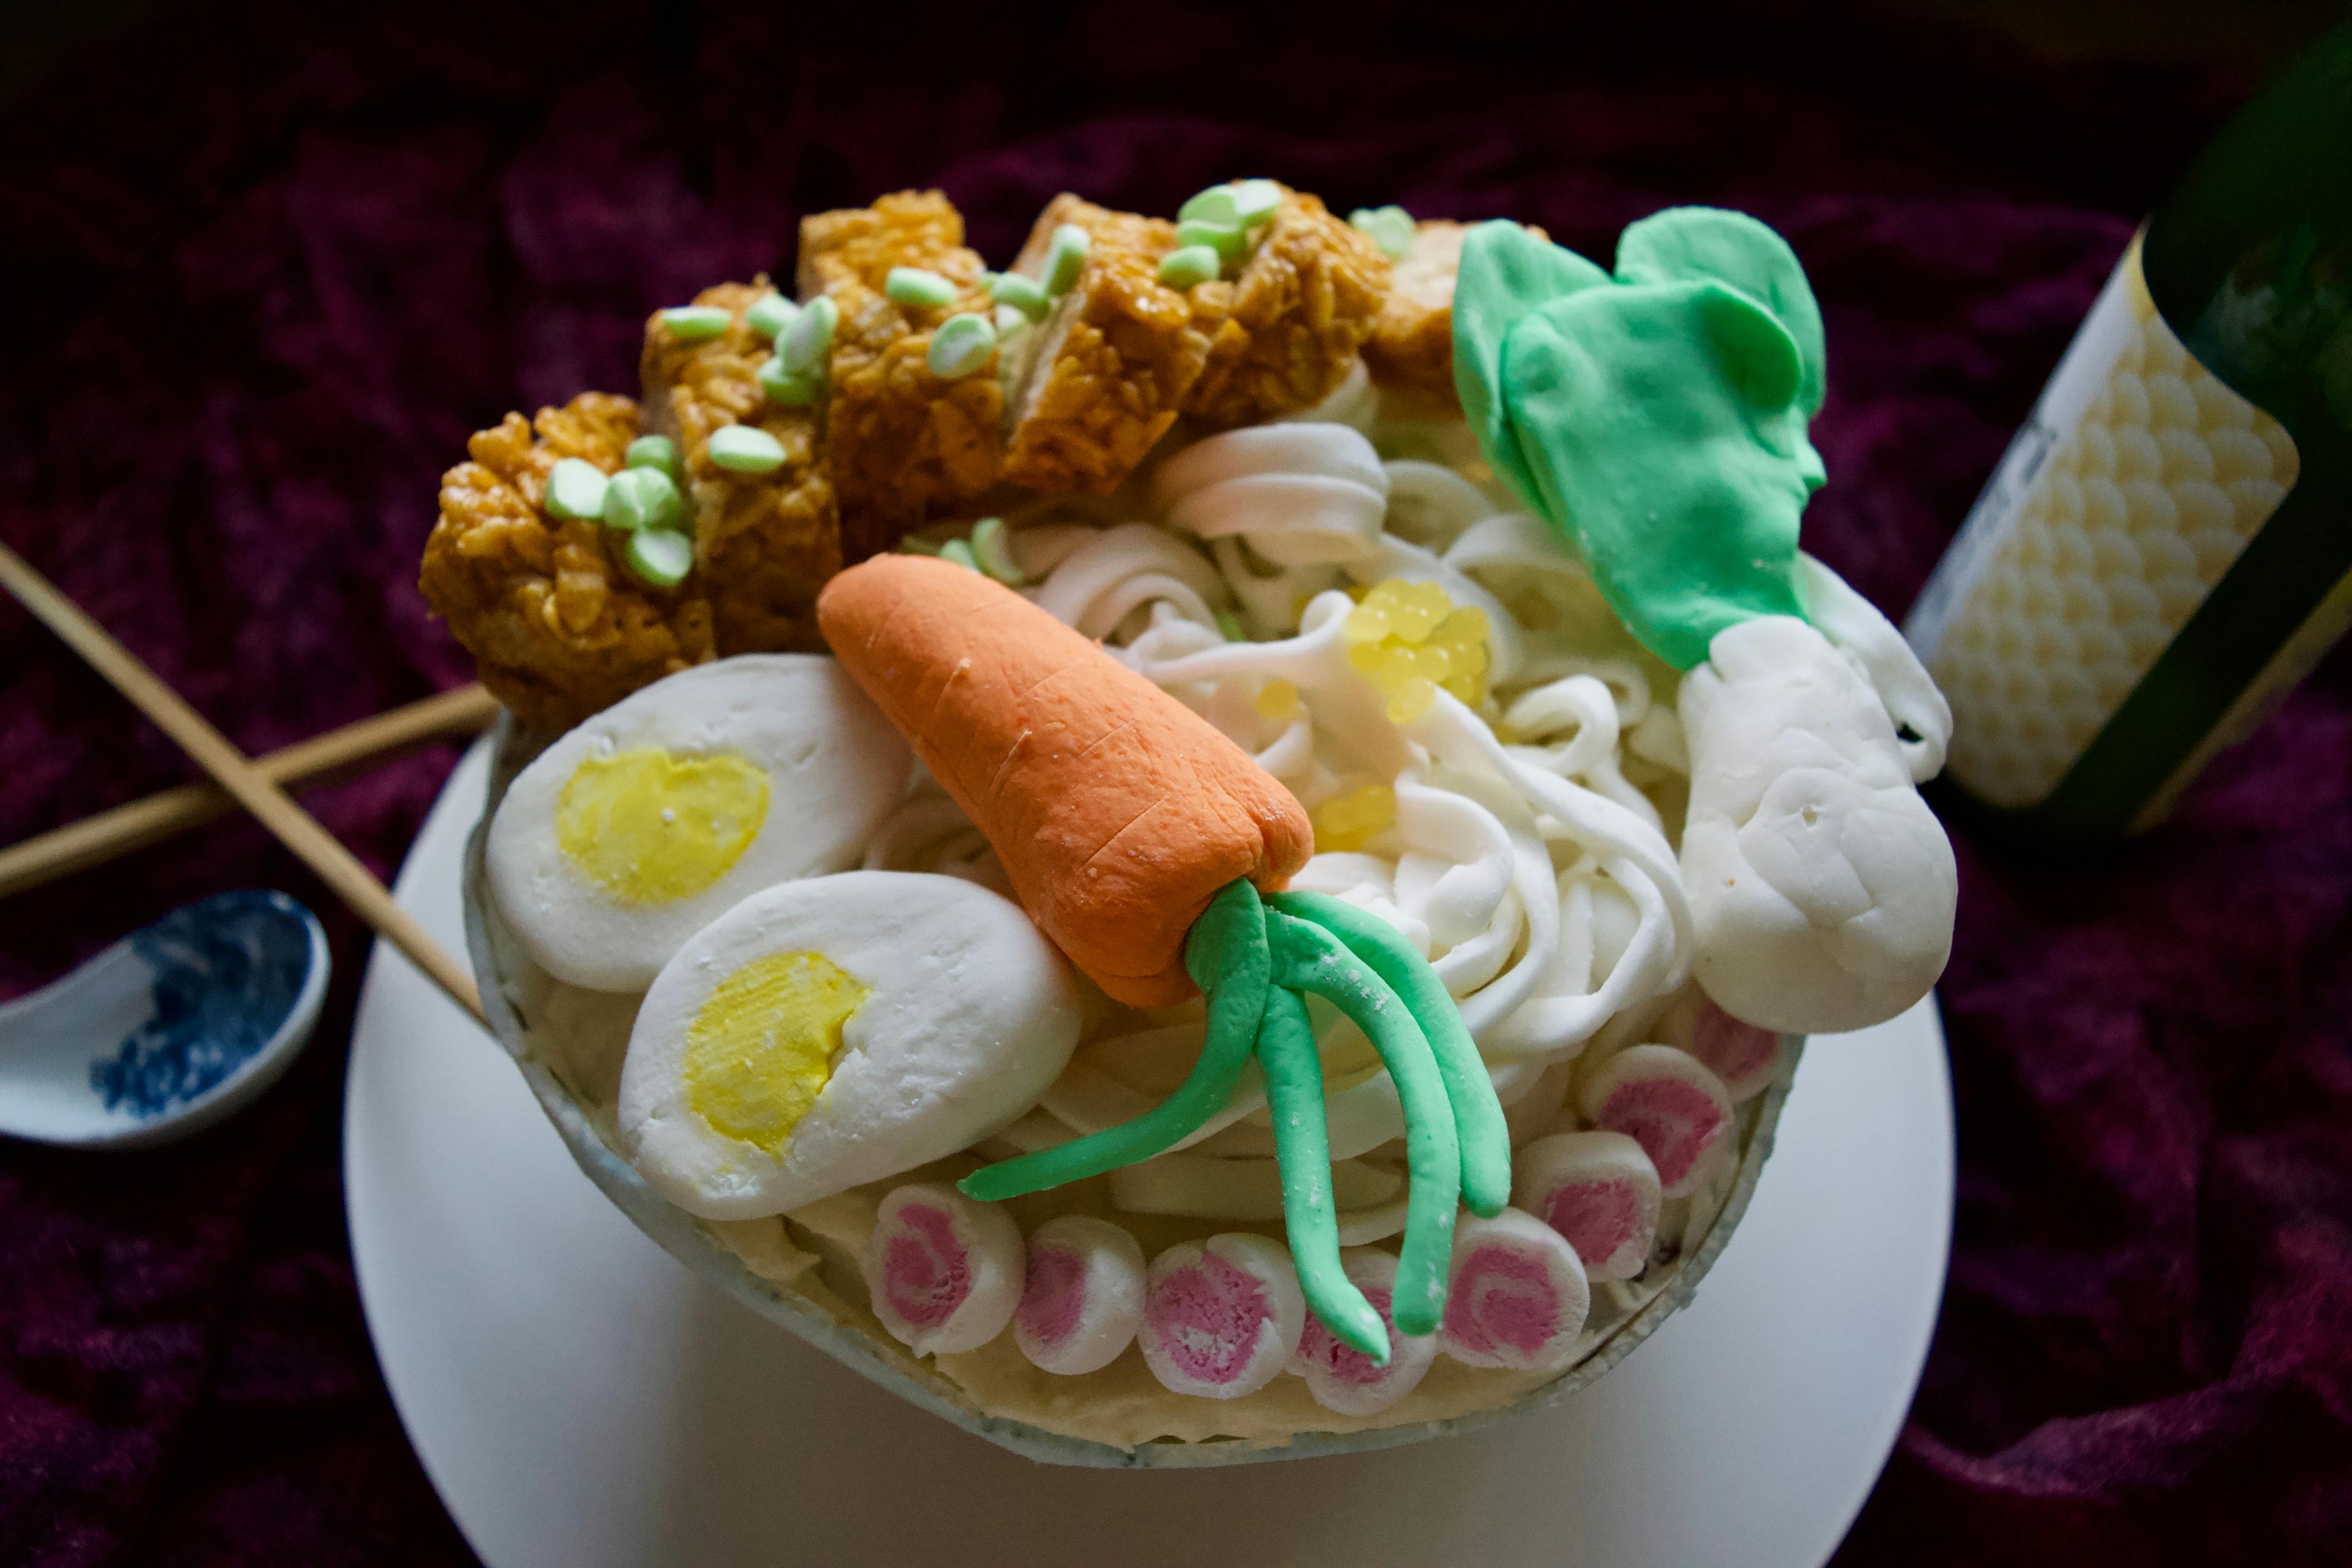
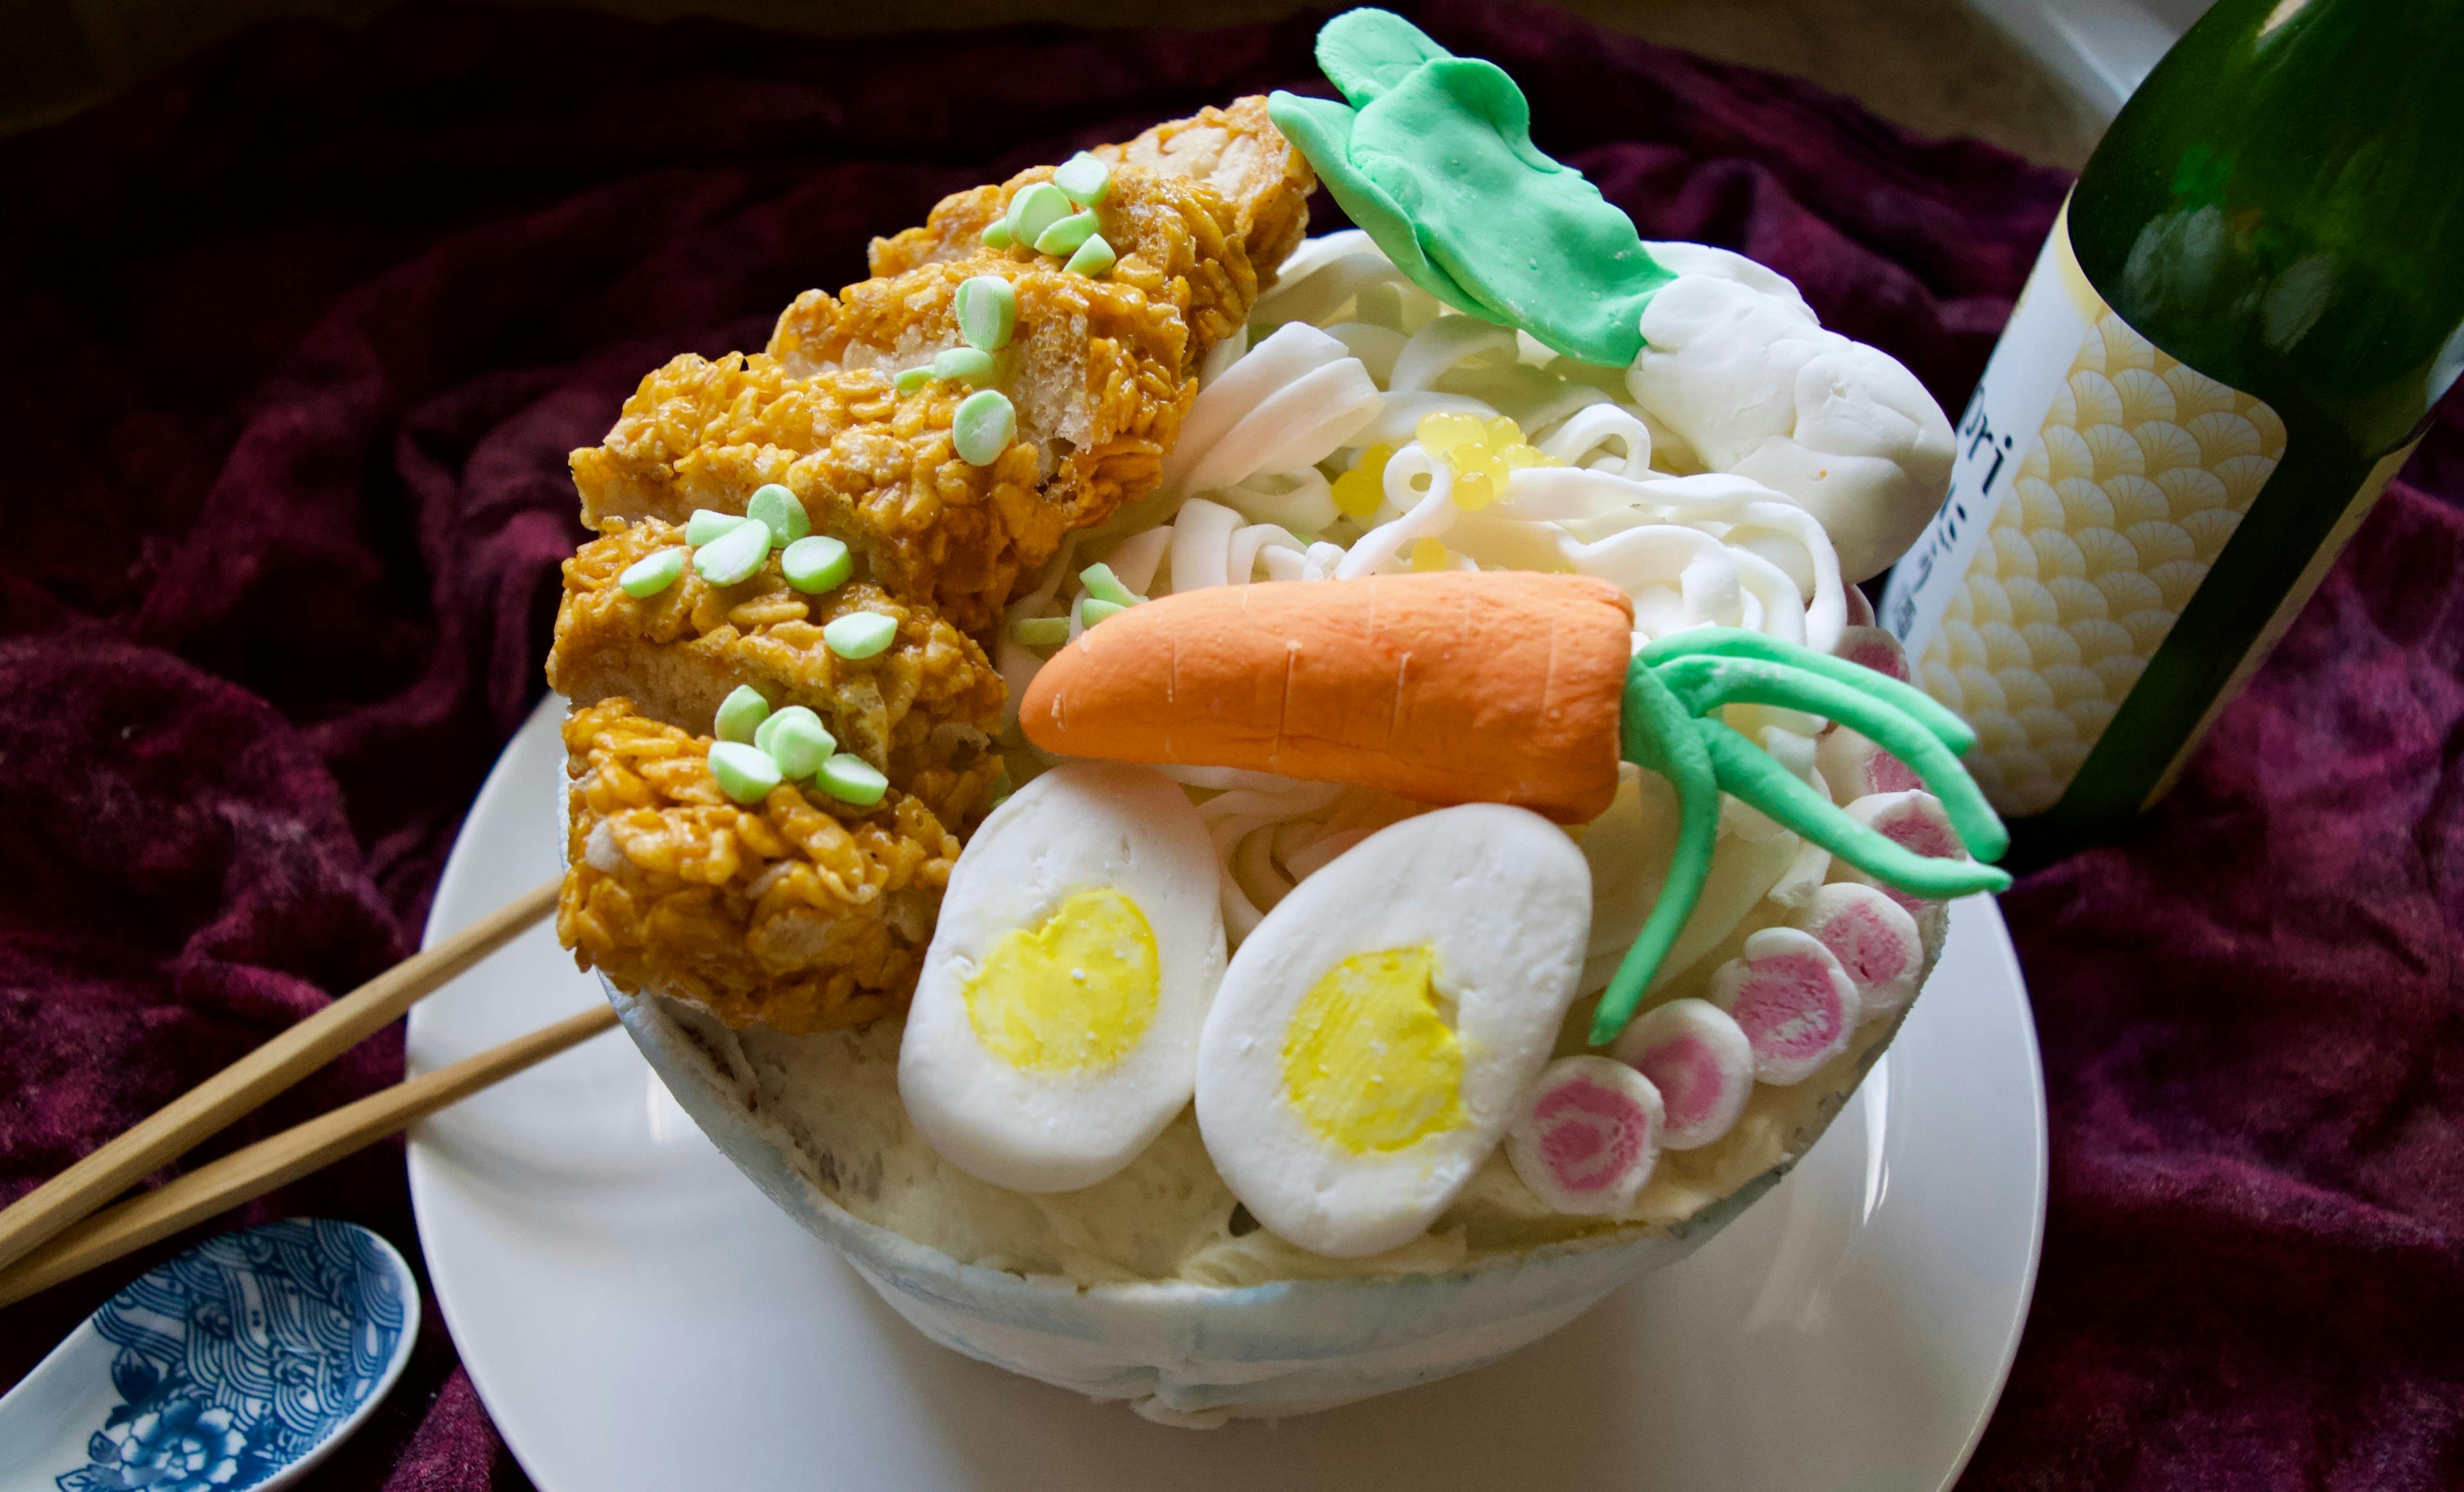
This part was to most fun! I gather the toppings and laid them onto the cake very similarly to how Yan laid out hers, and it was super satisfying and gratifying to have all the hard work come together and end up looking pretty good!
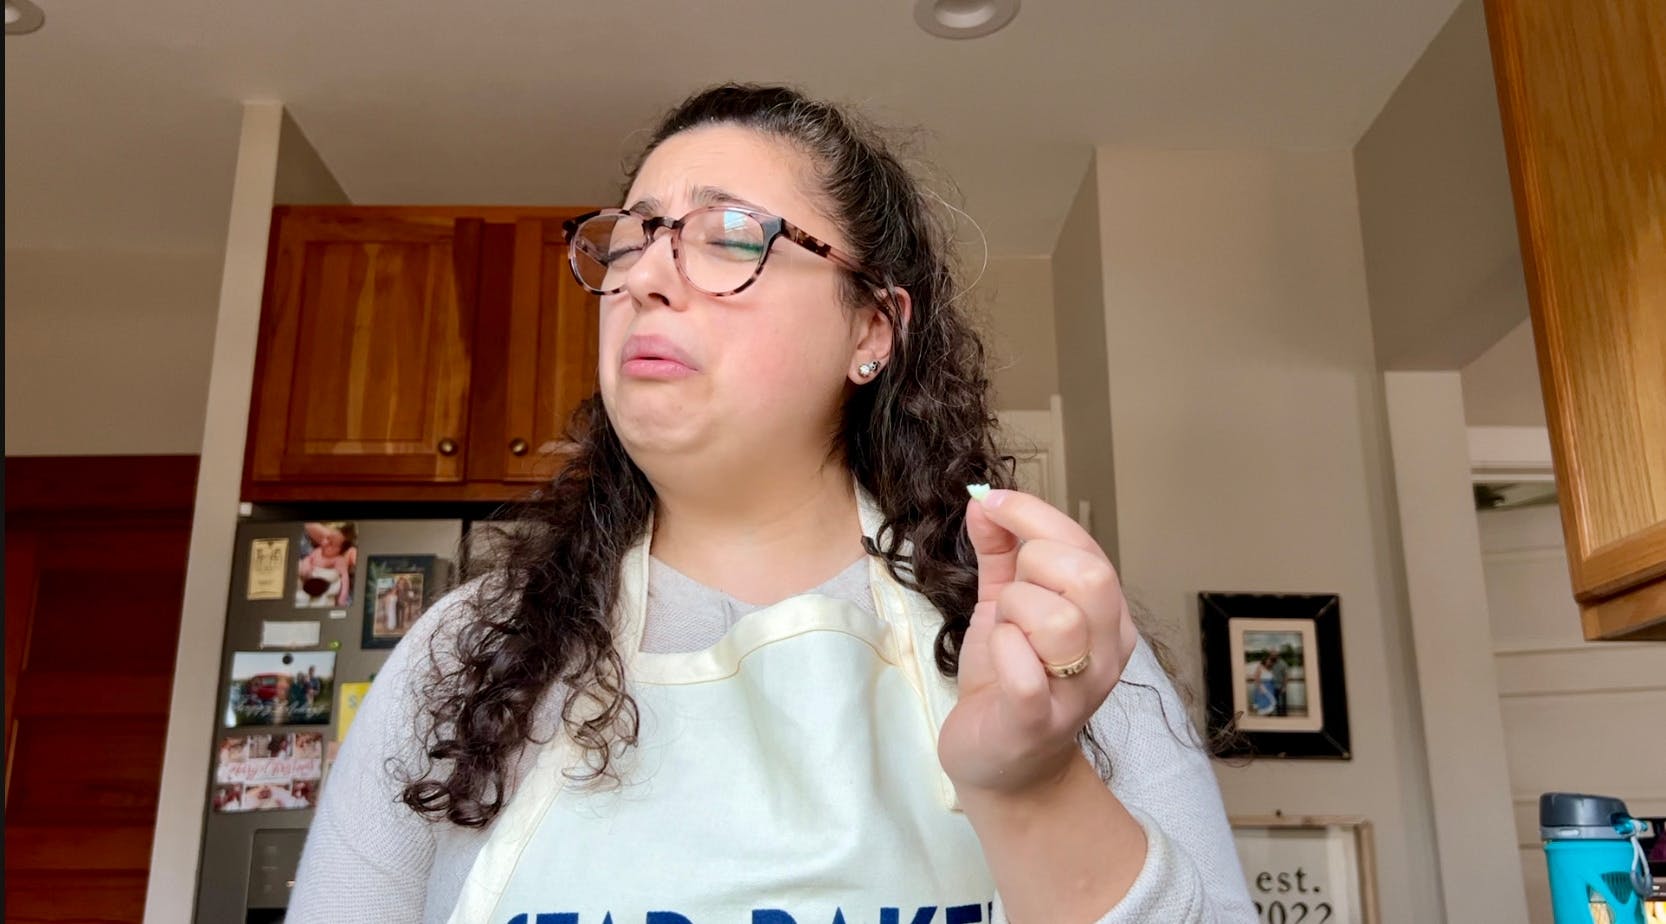
It was time to slice into this creation and I did my best to shut off my emotional connection to all the work I had done, and make the first cut. The cake was pretty dense, maybe a tad underbaked, but nonetheless, I took my chopsticks and my favorite ramen spoon and gave it a try.
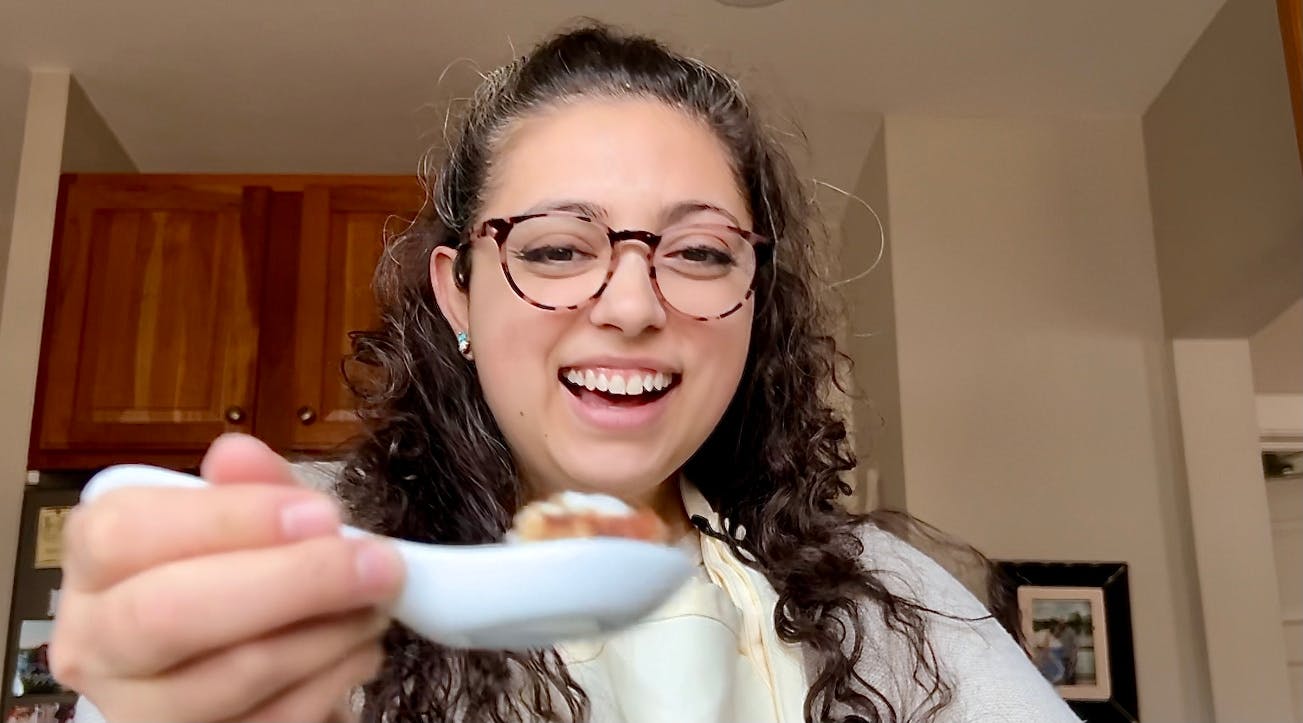
And this cake - wow. It's just delicious. Such a good, sweet, banana flavor. The frosting gave it a nice counter point with the lactic tang of the cream cheese and the nuttiness of the brown butter. I tasted the rice crispy katsu next and as expected, it was also delicious. Deb (whose rice crispy treat recipe I used, of Smitten Kitchen) can do no wrong in my eyes! The fondant on the other hand - I don't think I made it badly, but it's literally pure sugar, so it's not pleasant to eat. Not at all.
The Official Rating
Paul’s handshakes are only bestowed upon the bakers when they have baked something really exceptional.
My rating for how likely I am to bake this recipe again is: 10/10 handshakes
🤝🏼🤝🏼🤝🏼🤝🏼🤝🏼🤝🏼🤝🏼🤝🏼🤝🏼🤝🏼
I would TOTALLY make this cake again! I always have way too many bananas in the freezer and this was really really good and a nice departure from banana bread... which is also cake... but we aren't ready for that discussion. ;)
My rating for my execution of this bake is: 8/10 handshakes
🤝🏼🤝🏼🤝🏼🤝🏼🤝🏼🤝🏼🤝🏼🤝🏼
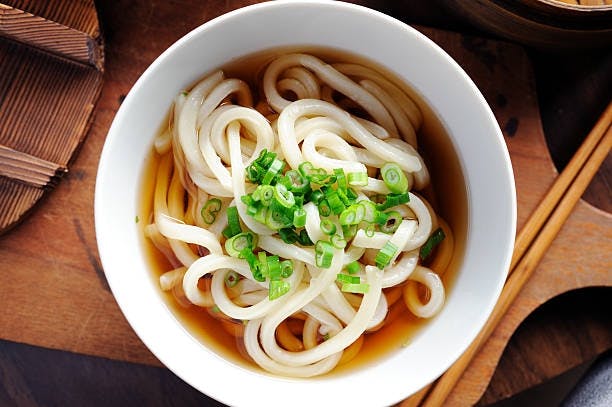
I didn't do too bad! While the flavor was perfect, I know that my fondant work and use of food coloring could use some improvement. I also totally made udon noodles and not ramen noodles, so that was a big misstep visually!

To Sum Up
MAKE THIS BANANA CAKE! It's really so good. I highly recommend adding a touch of cardamom and browning the butter for the frosting, but even without that it's a fantastically delicious recipe. Sally wasn't lying when she said it's the Best Banana Cake! I am proud of myself and can't wait to see what I learn in the next episode!

Head to the links below for the other two bakes from Collection 5, Episode 1 - Cake Week!
Stay tuned for the bakes from Collection 5, Episode 2 - Biscuit Week!
I hope you have a beautiful rest of your day and thank you so much for being here!
💖, Katrina
Comments: