Kate's Cookie Jumanji Board Game
September 30, 2023
* Products linked below may be affiliate links. I may receive a small commission if you place an order through them (at no cost to you). For more, see our Affiliate Disclosure.
Welcome to Katrina's Great British Baking Project, aka Bake Along with Bake Off! If you haven't checked out my post about the hows and whys of this project, please head over there and give it a quick peruse. (TL, DR: I am baking the recipes from Bake Off that sound the best to me for fun, deliciousness, and learning!)
Check out the other bakes from this episode:

The Challenge
This challenge comes to us from Collection 5, Episode 2: Biscuit Week. For those of us continental folks, in British English, a biscuit is a thin, crisp cookie. I love cookies, so this has been a fun episode! The next bake is The Showstopper, which in this episode is for a "Biscuit Board Game".
The Rules
The Bake Off rules stipulate that the board games must be:
- 40cm (15.75") minimum in diameter
- Contain at least 8 elements
- Be playable and edible
- Any flavor or type of biscuit
Pitfalls To Beware Of
The judges mention that there are three main things they are going to be judging on:
- Neatness and detail. They wanted bright colors, clean lines, and lots of decoration.
- Robust flavor. They want to be able to really taste the flavorings and add-ins.
- Perfect texture. Strong enough to not crumble when "played", but not so hard that they are unpleasant to eat.
My Favorite Bakes
There wasn't a single bake that sounded bad, but I narrowed it down to three:
- Sophie's Snakes and Ladders (chocolate, lemon, and bergamot)
- Chris' Map Game (rum, orange, cardamom, ginger)
- Kate's Jumanji Board (lemon, grains of paradise, cardamom, orange)
The Jumanji Board Is Chosen
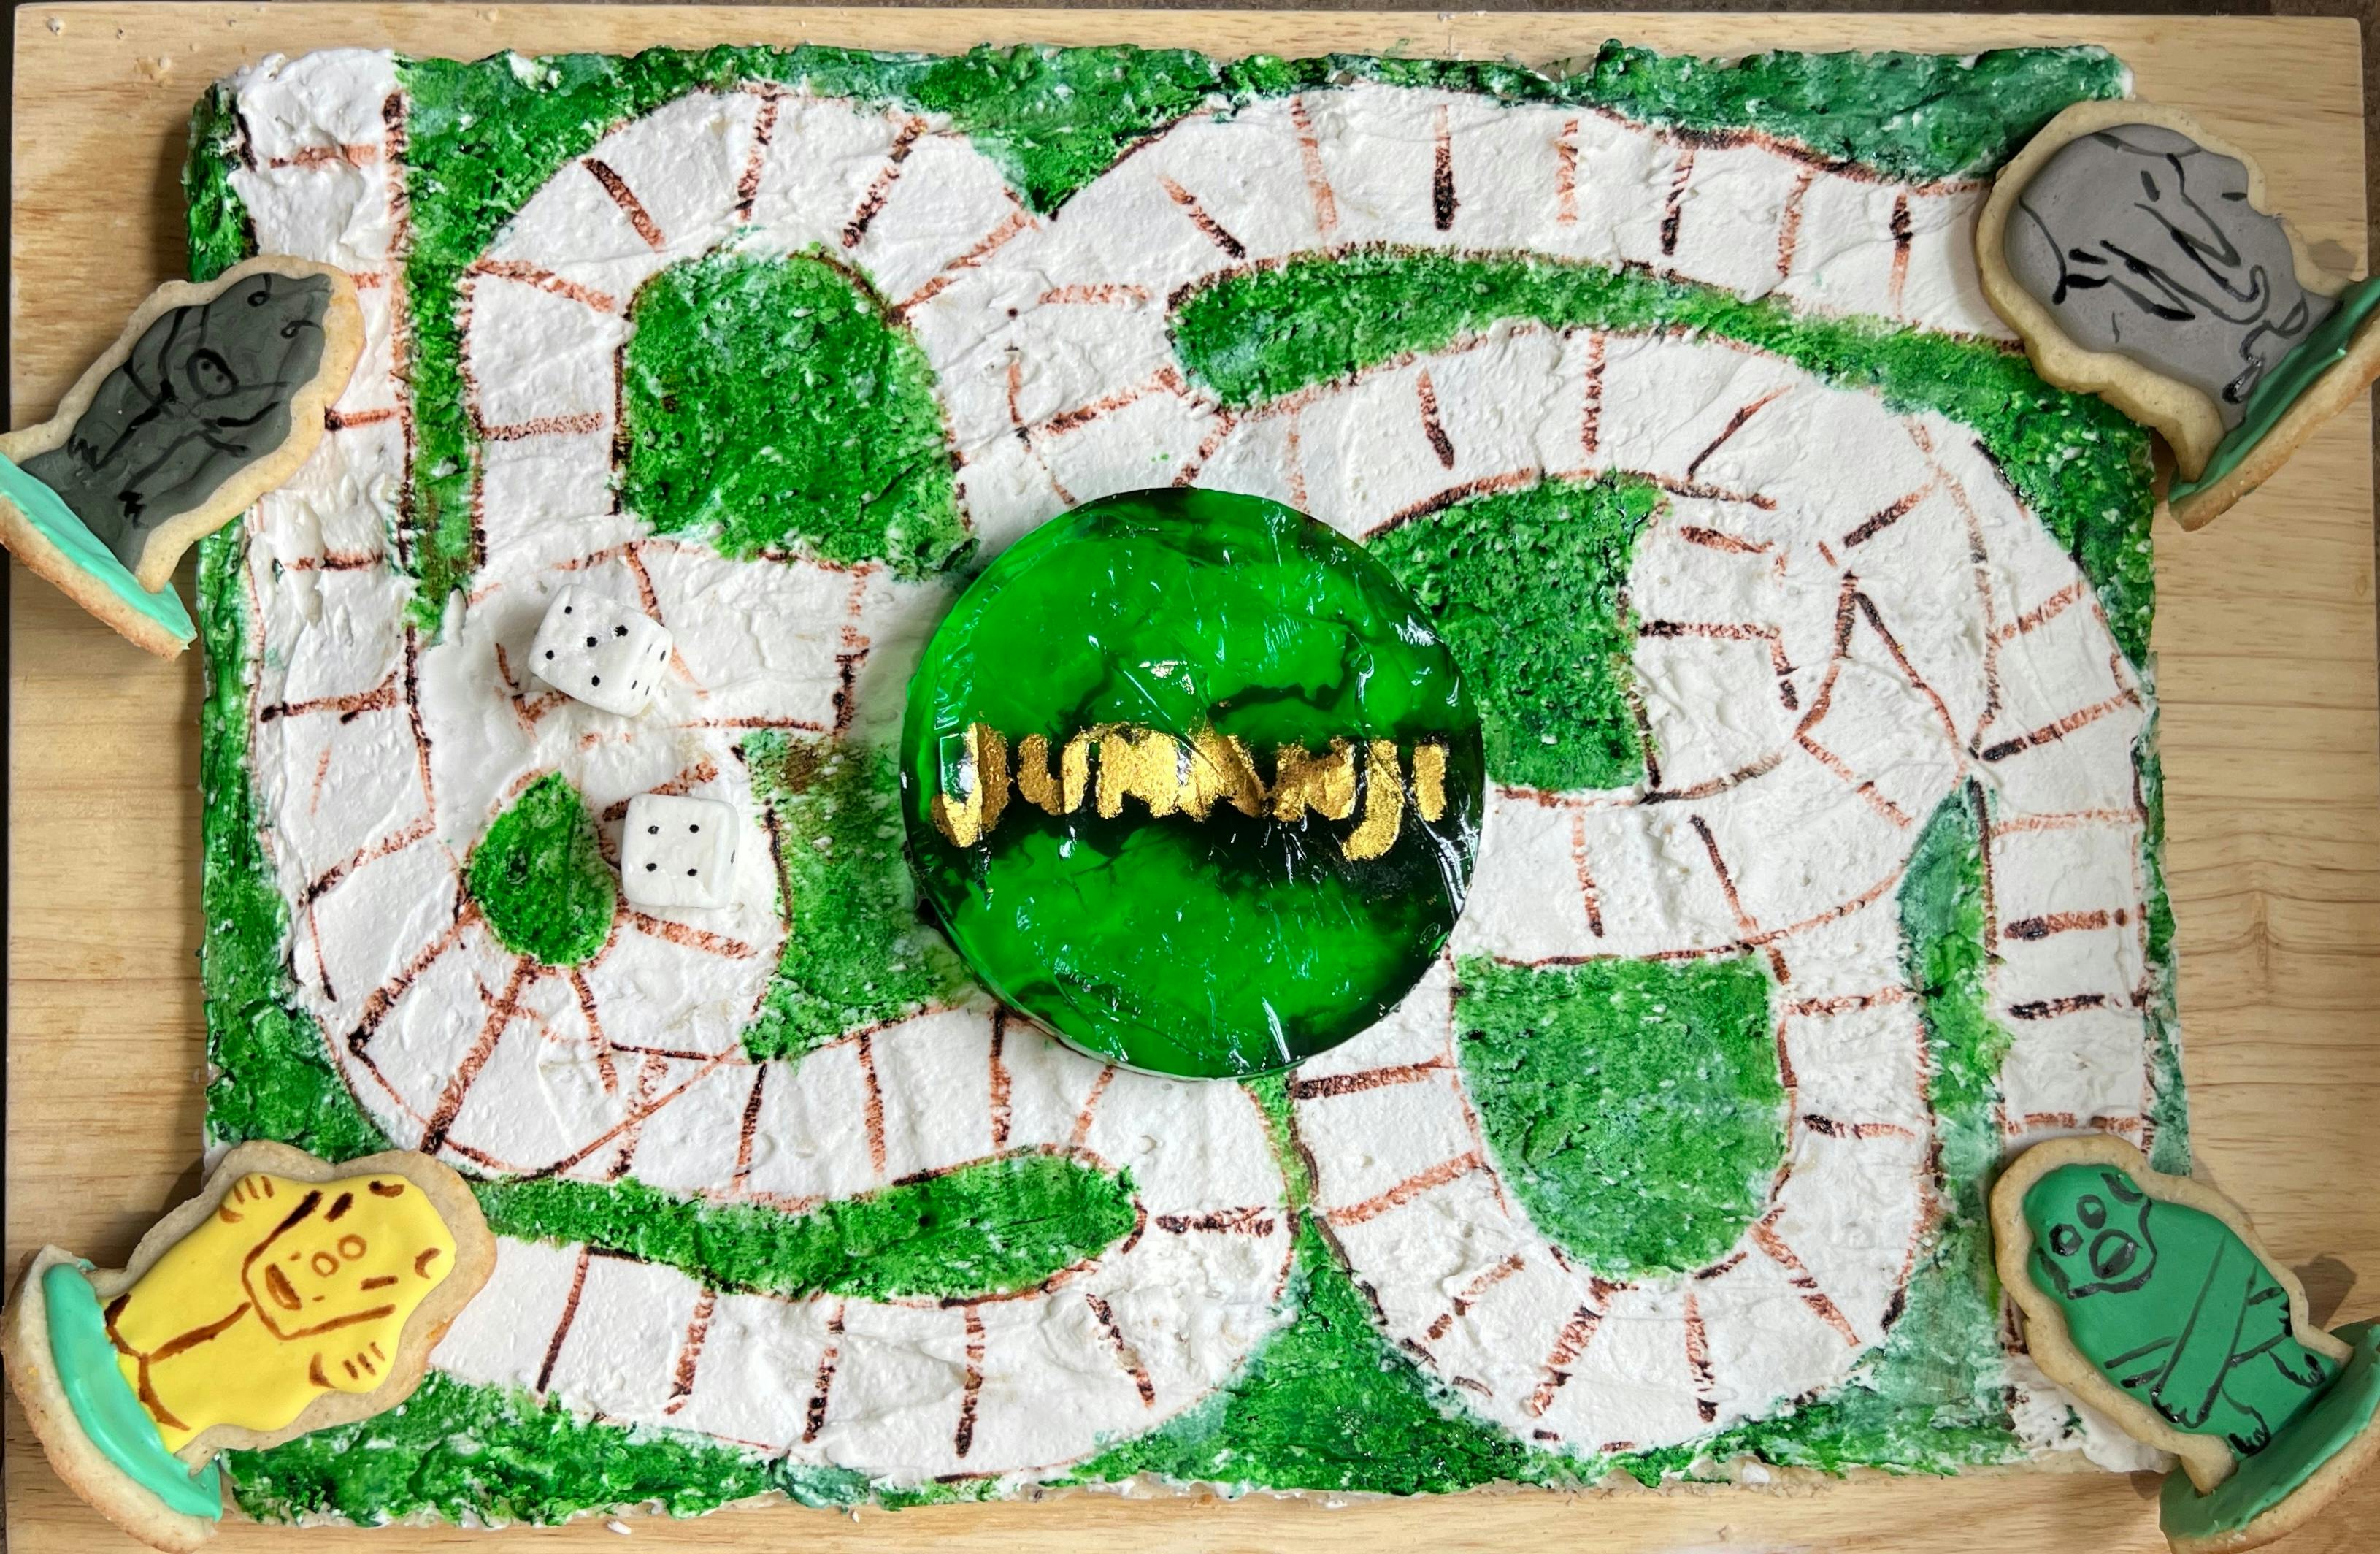
Okay, please hang tight for a SOMEWHAT SPICY TAKE - In my eyes, the bakers did not have enough time to do this bake. Almost every single one struggled with the decoration, and I believe it had everything to do with the fact that they were rushed rather than lack of skill. So while I am choosing Kate's cake, I actually am doing the design completely differently so it matches the movie a lot more, and I'm only taking inspiration for the flavors and overall concept.
The bake has multiple components and I found a separate recipe for each.
- For the board itself, I used Simmer + Sauce's Frosted Sugar Cookie Bars.
- For the pieces, I used the Best Sugar Cookies and Royal Icing from Sally's Baking Addiction.
- For the jello at the center, I followed the recipe on the box.
How I Did It
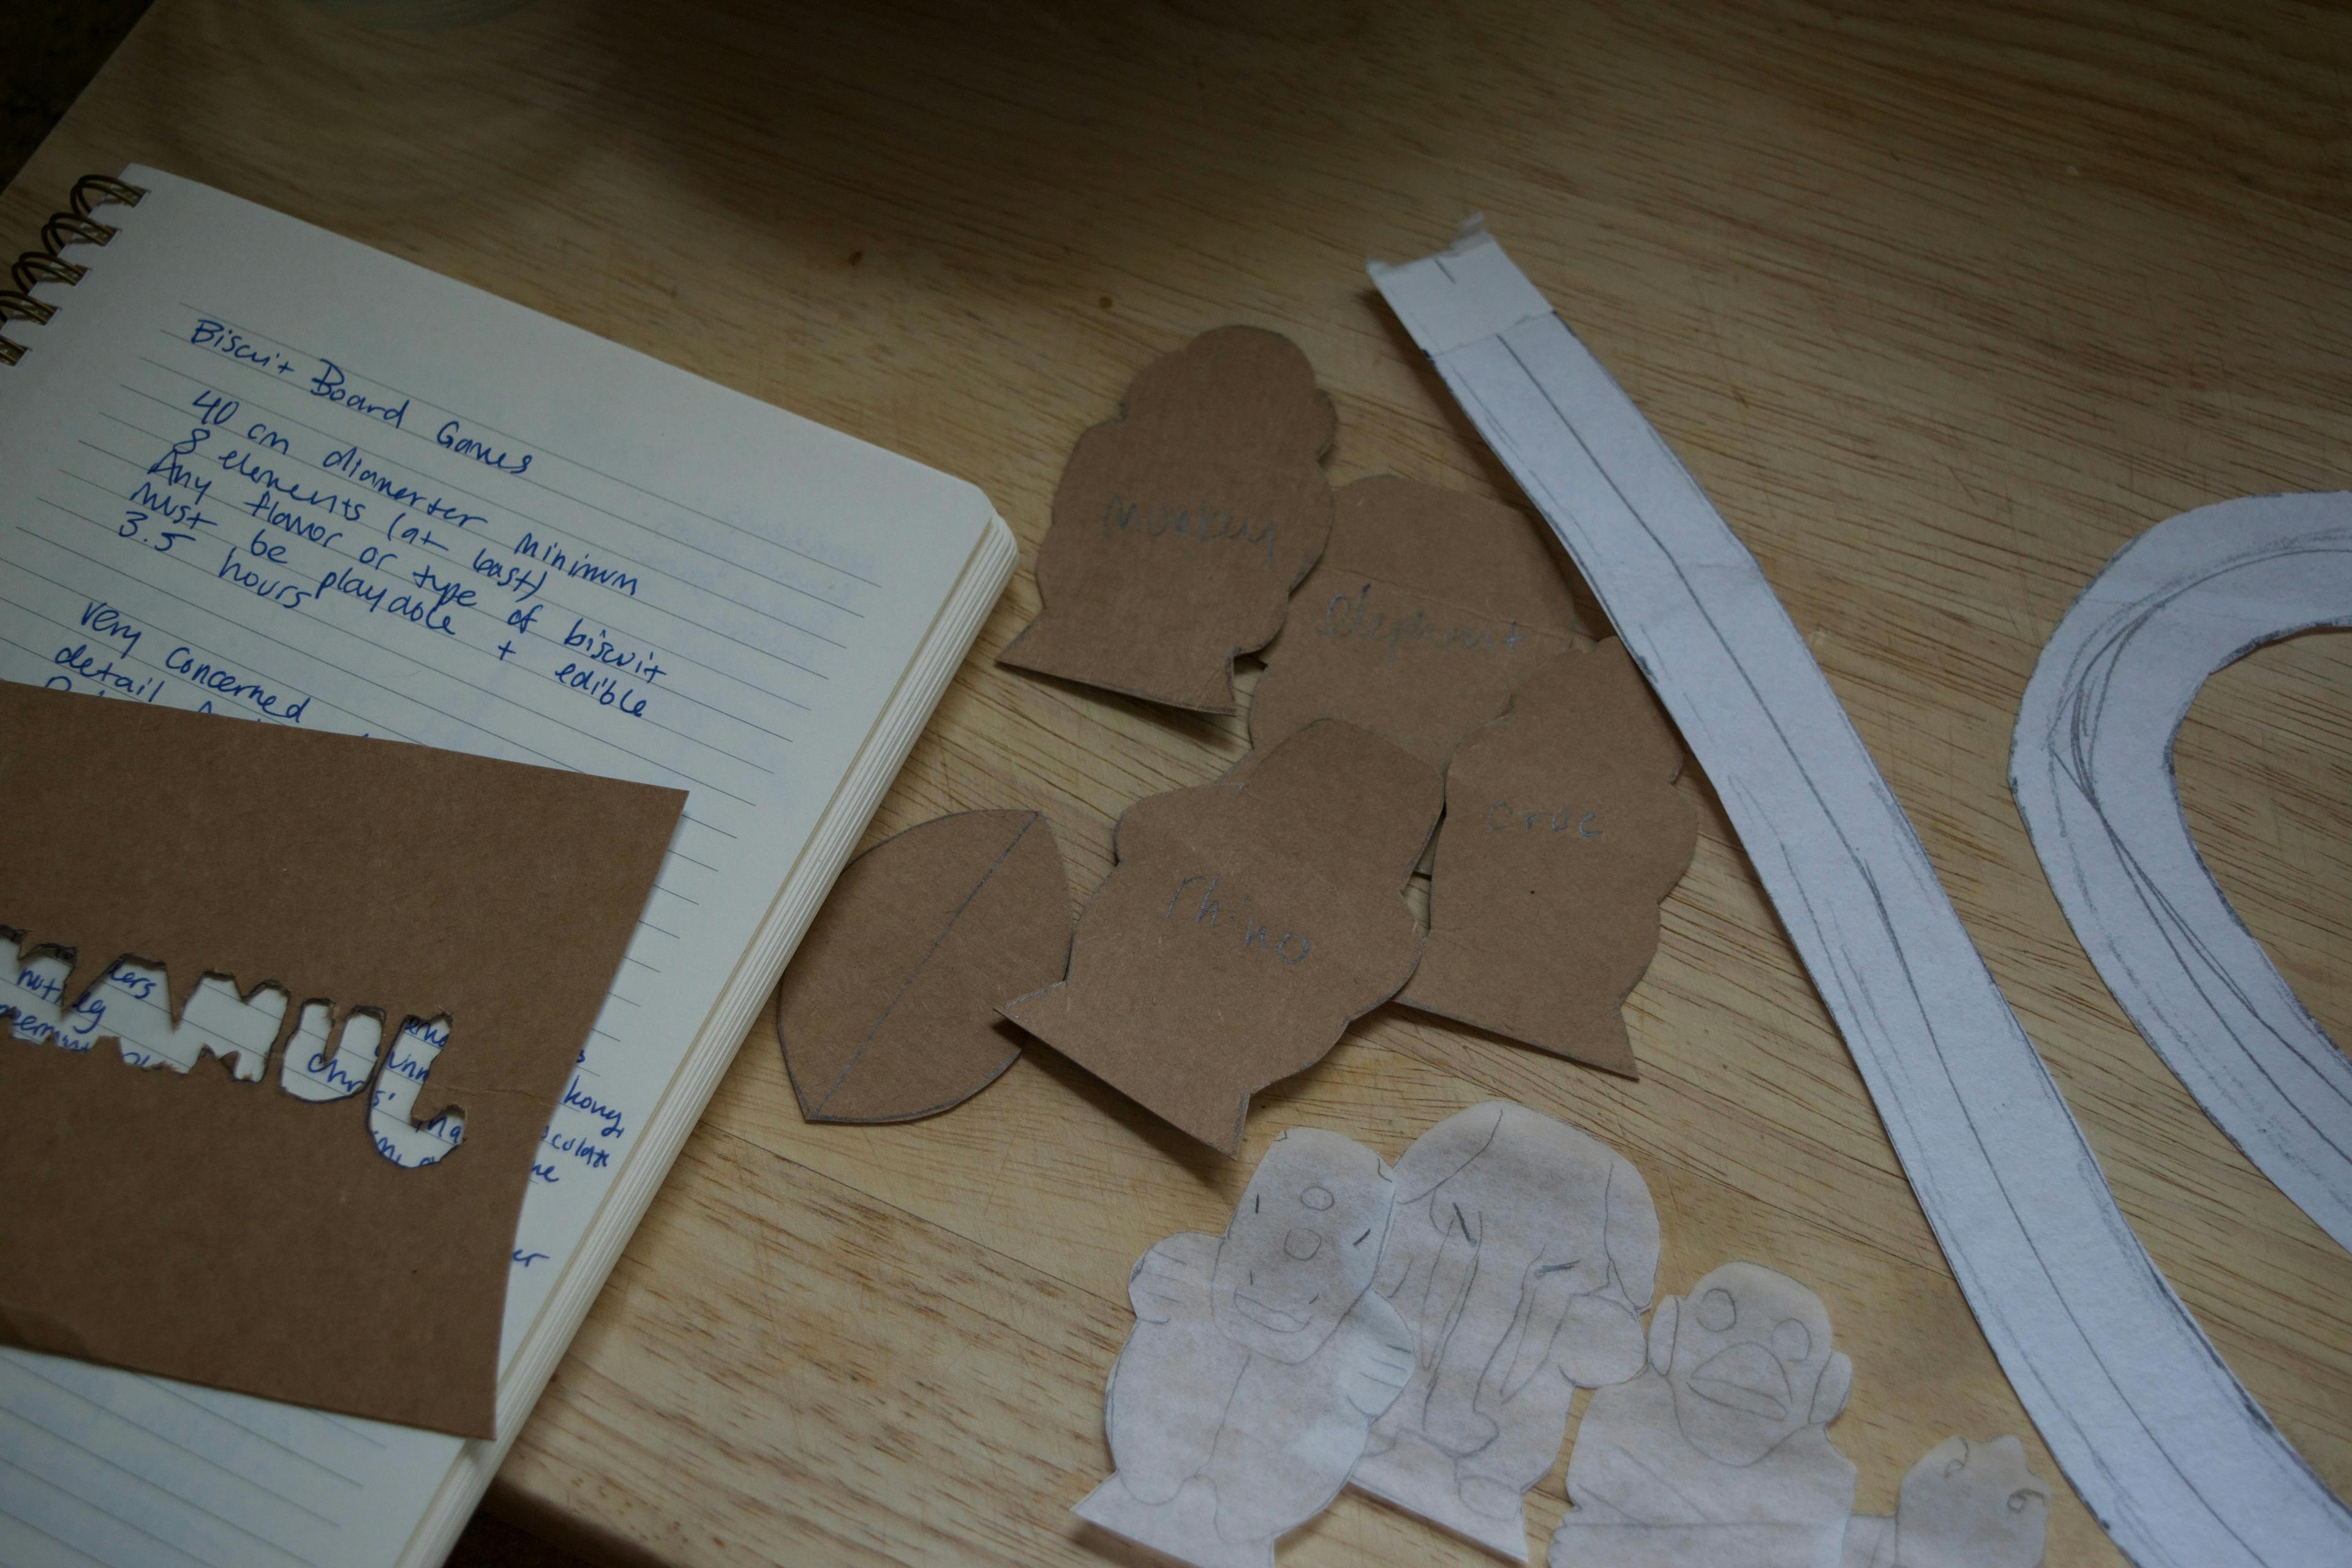
I started by making some stencils out of paper and cardboard for the pieces and the board itself, including a stencil of the word "Jumanji" for the center of the board.
Lime Jello and Fondant Dice
If you’ve seen the movie, you know that the movie is about a magical board game and that the center of the board is a circle of green glass that shares different ominous messages when the dice are rolled. I’m going to give credit where credit is due and say that Josh had the brilliant idea to make this circle out of lime Jello.
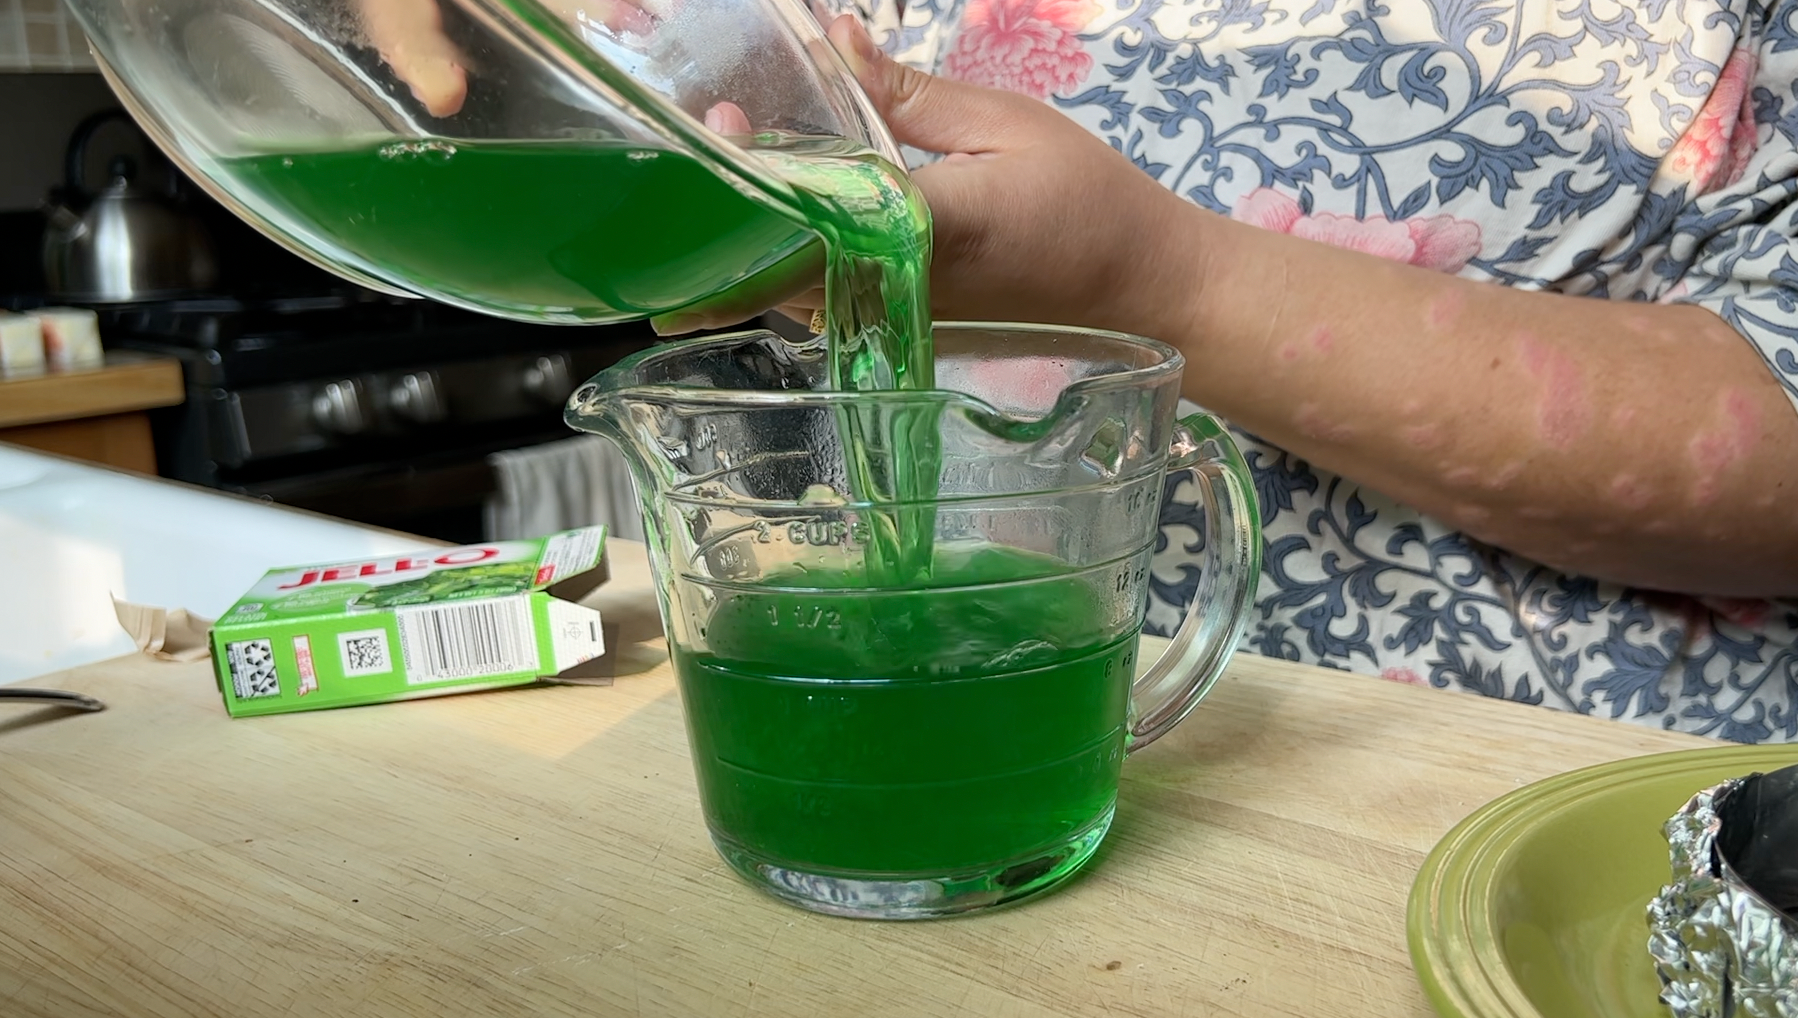
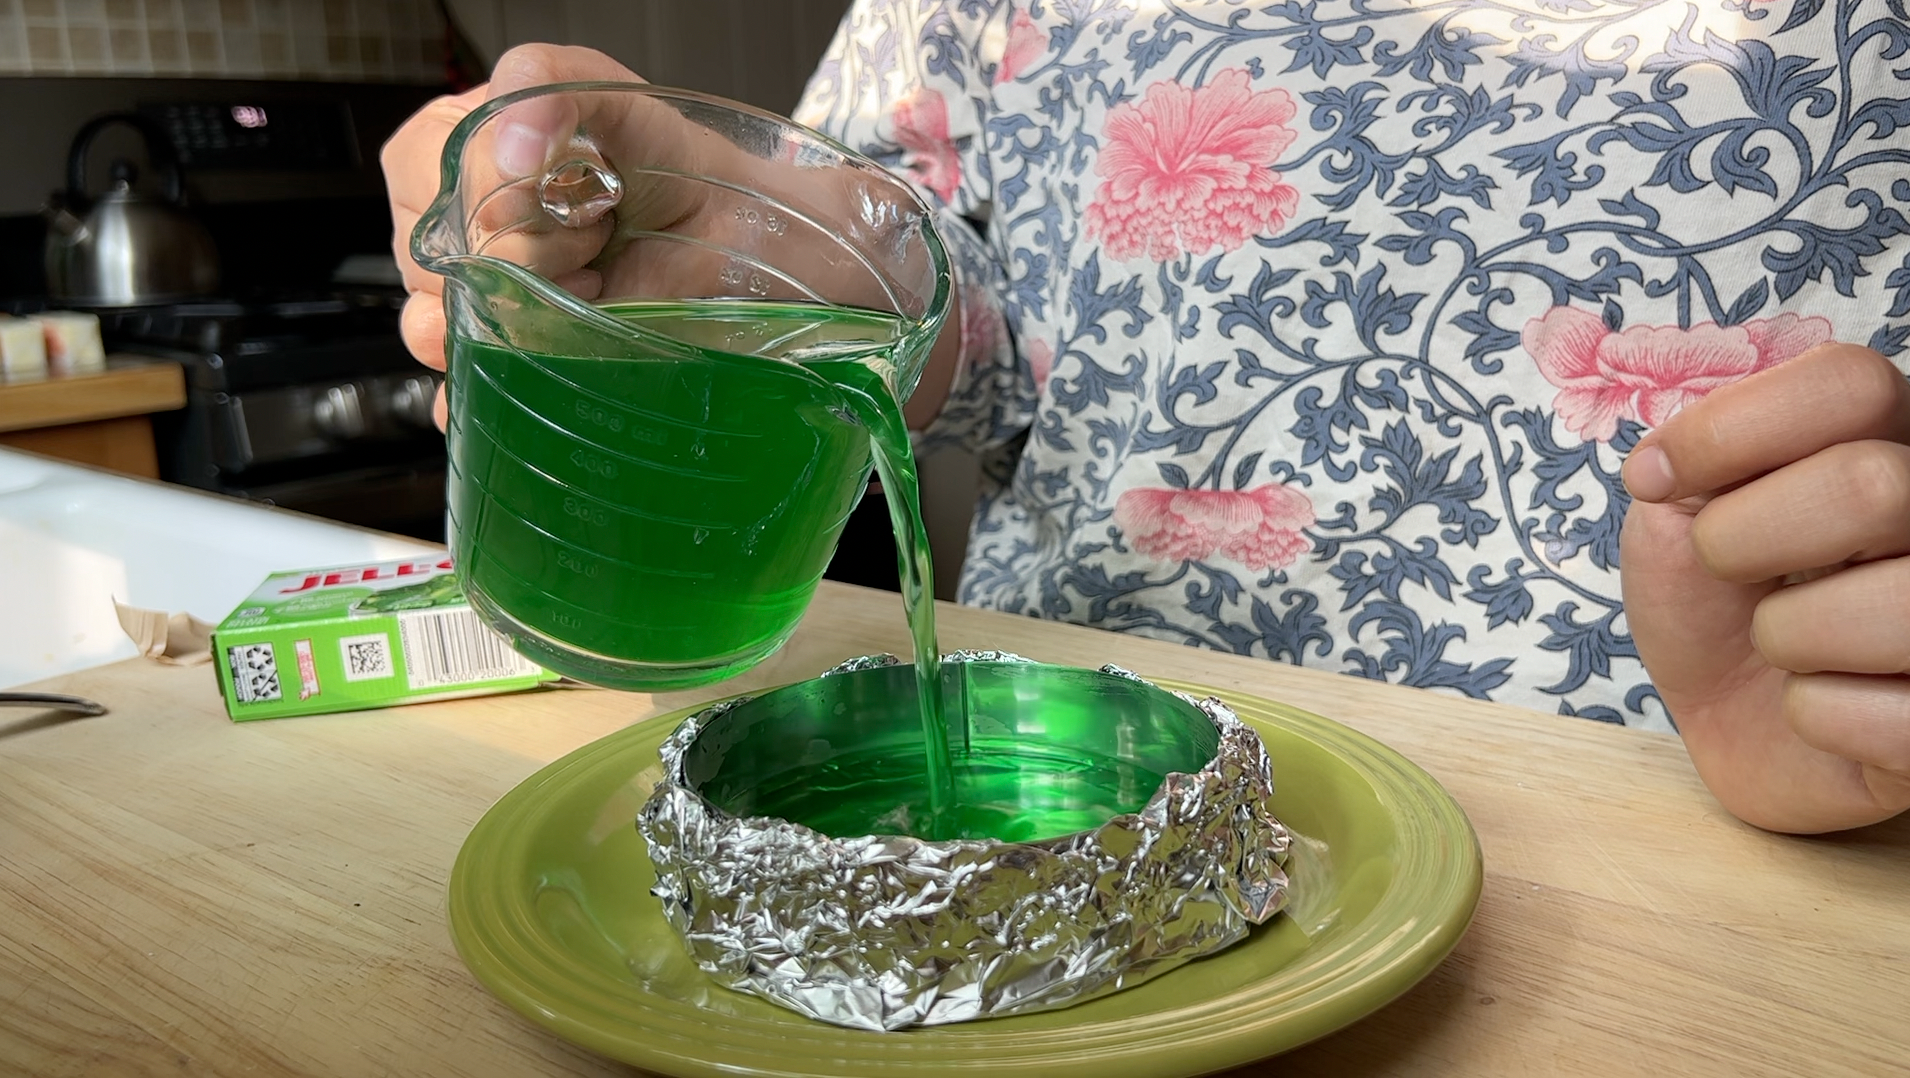
Jello takes about 4 hours to set, so I wanted to get it going first. I followed the package instructions (hot water, then cold water) and poured it into a mold I made out of a ring cutter and some heavy-duty foil. It immediately started leaking so I made a stronger mold and the second iteration was much more successful.
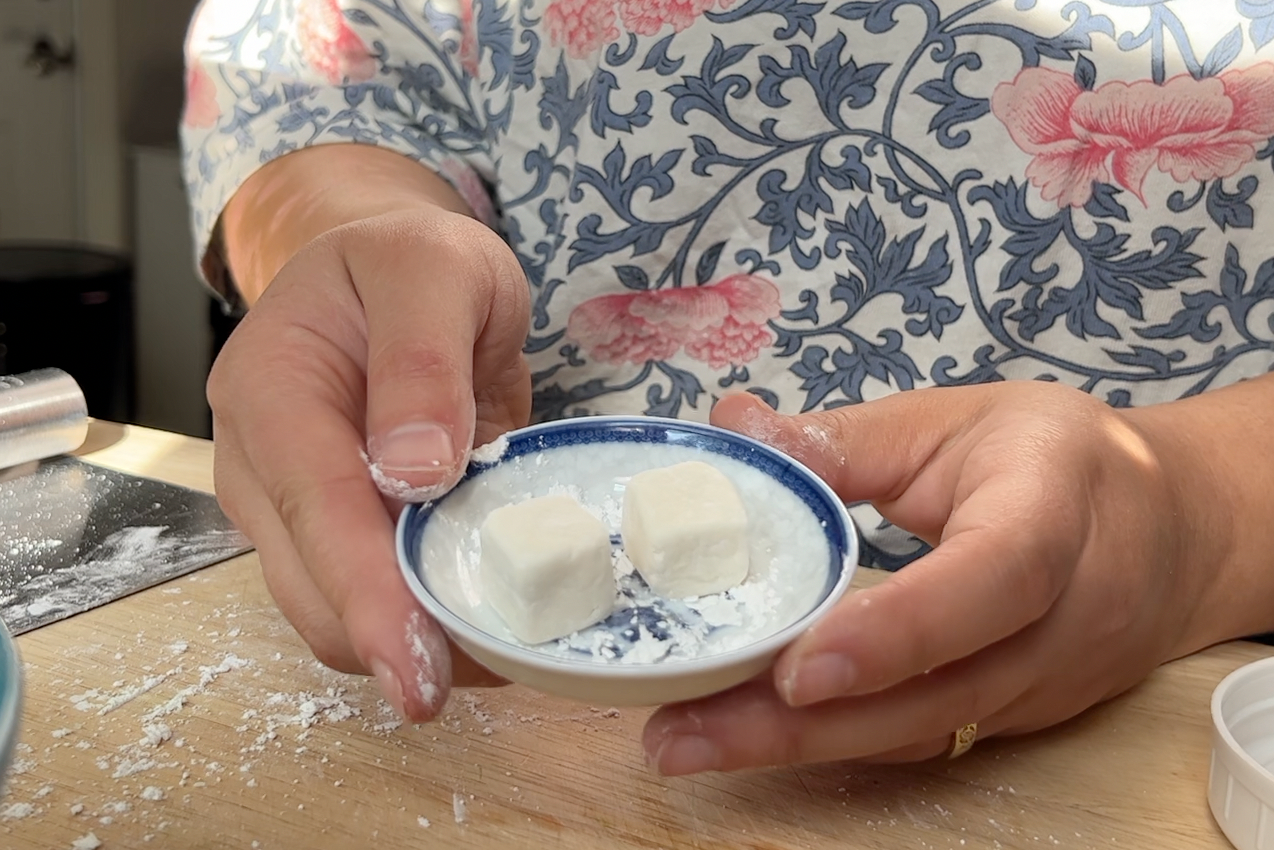
Next - fondant dice. Fondant is melted marshmallow and powdered sugar that are kneaded together to create a moldable dough. I didn’t follow a recipe for this, I just melted the marshies in the microwave, added a splash of water and a spoonful of sugar, and mixed it all together. Then, using my bench scraper, I shaped what I had into two cubes and got them chilling in the fridge as well.
Sugar Cookie Dough for the Pieces
I turned my attention to the cookie dough for the pieces since it also needed time to chill before baking. The recipe was a basic sugar cookie with Kate's chosen flavorings of orange and cardamom added in. These cookies start by mixing the dries, which are flour, baking powder, and salt.
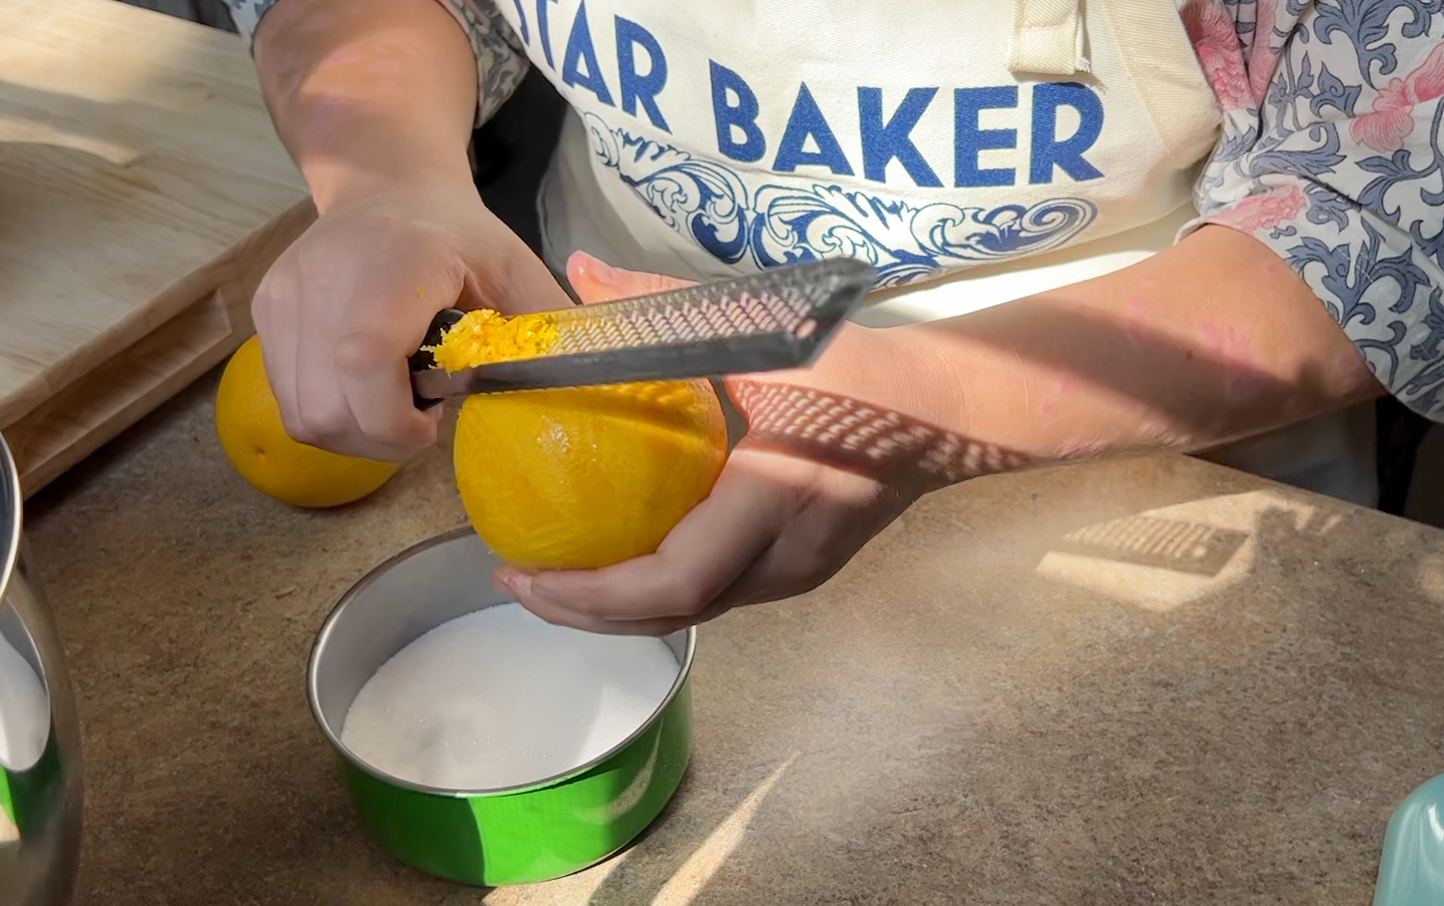
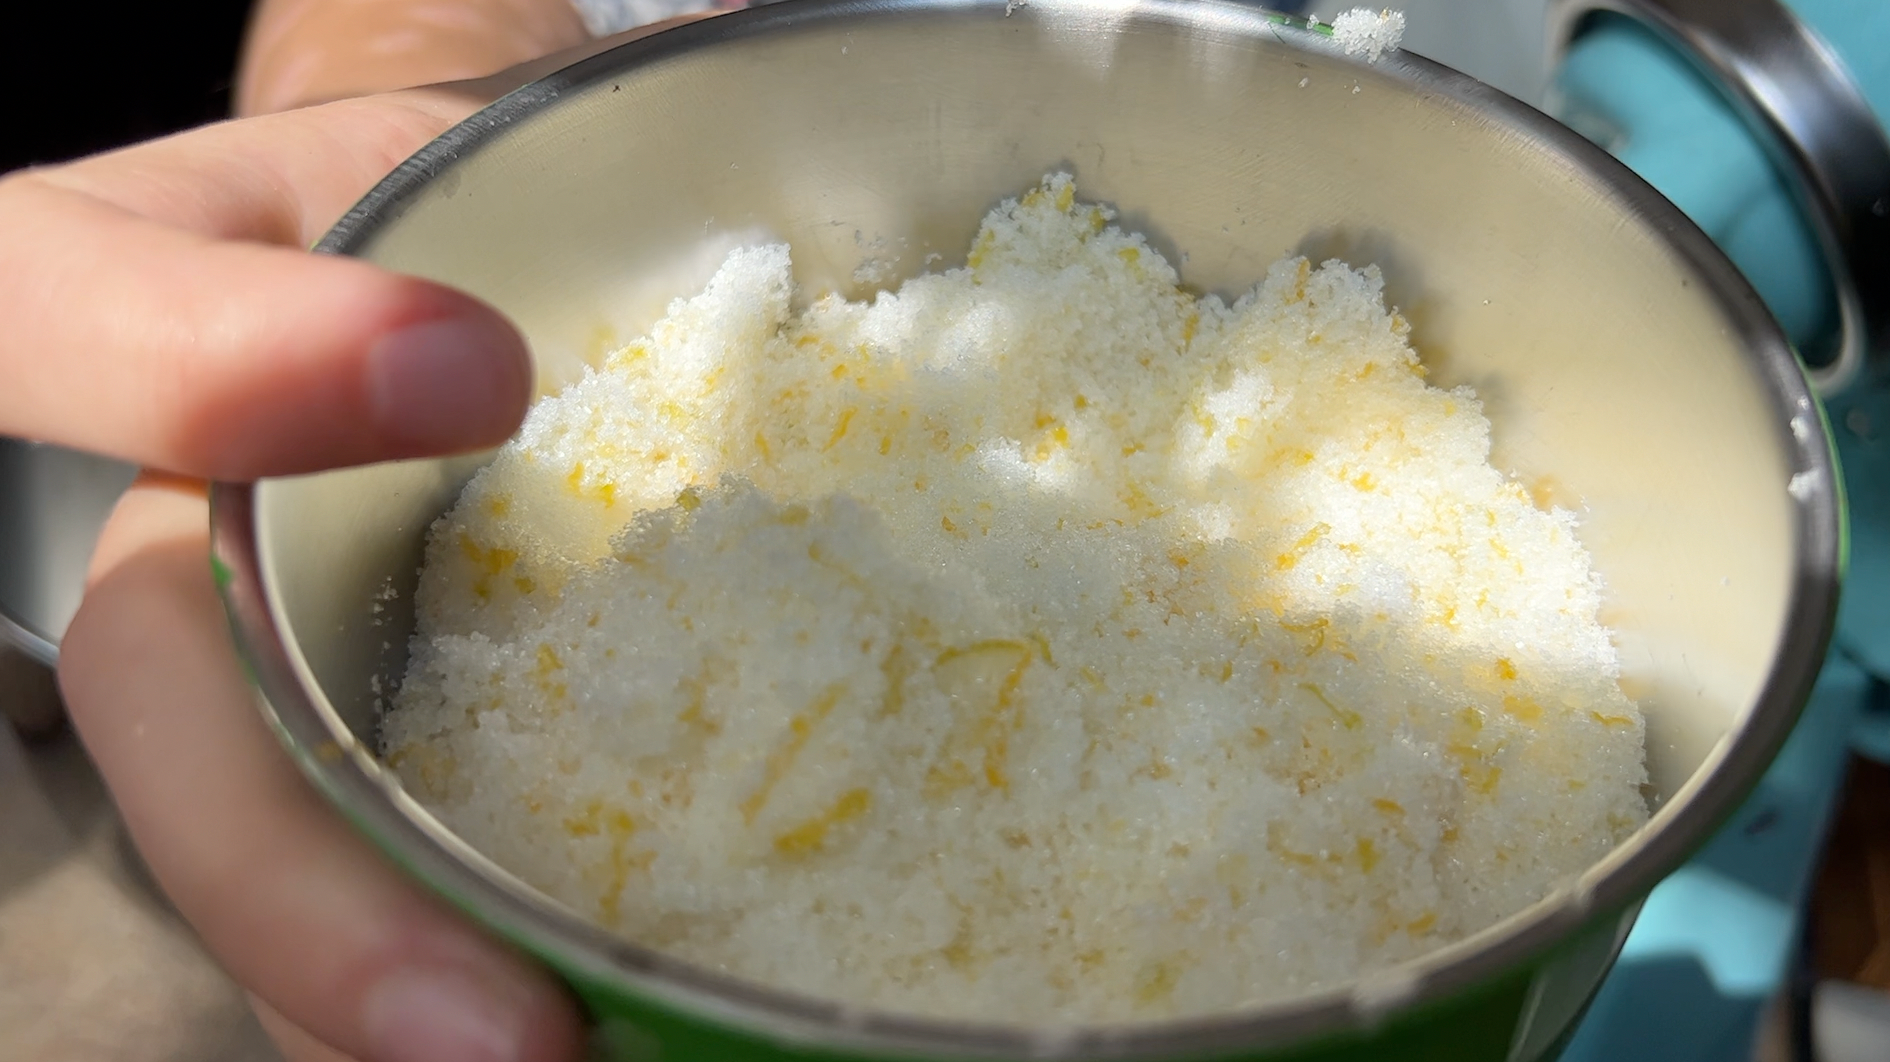
I zested two oranges and added the zest to some granulated sugar and crushed it with my fingers to release as much fragrant orange oil from the zest as possible.
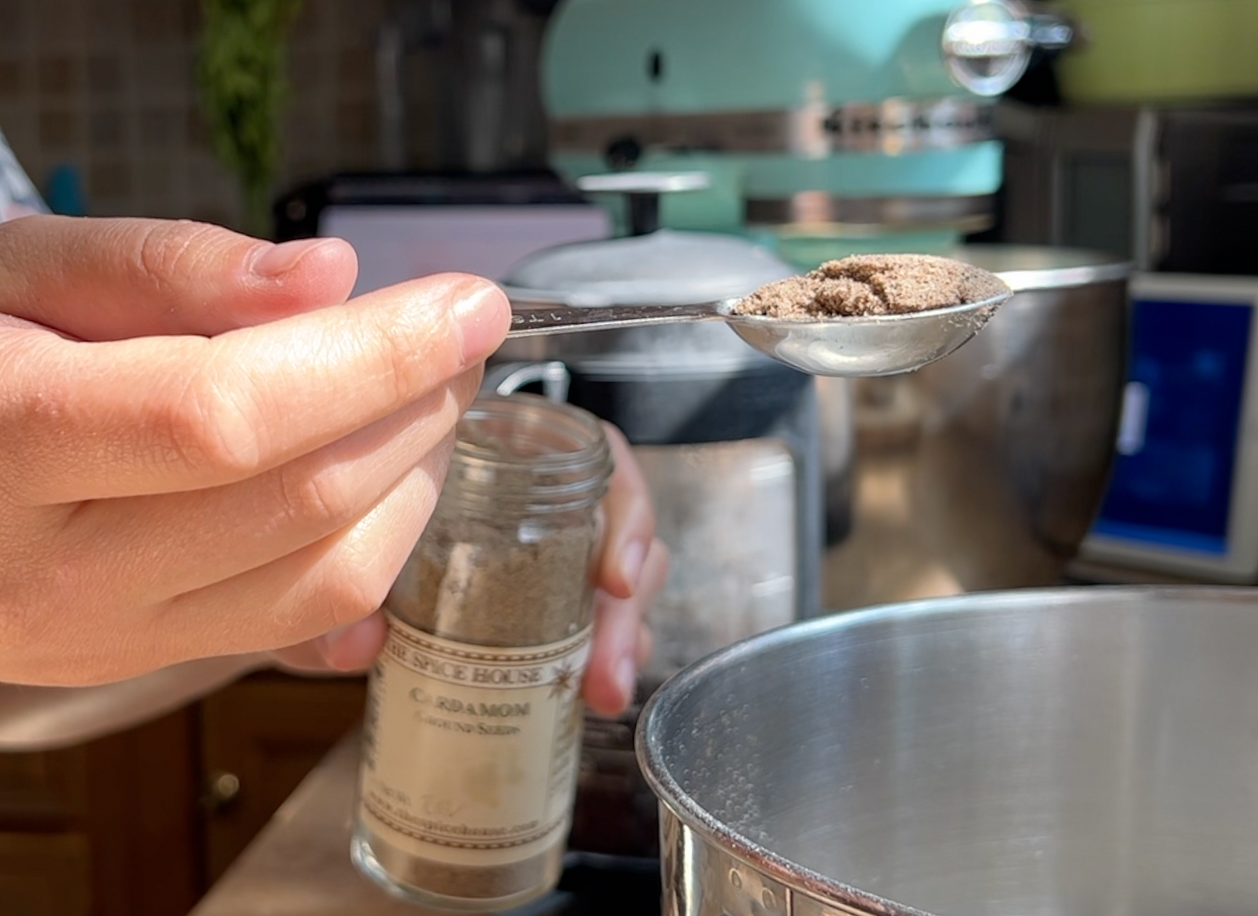
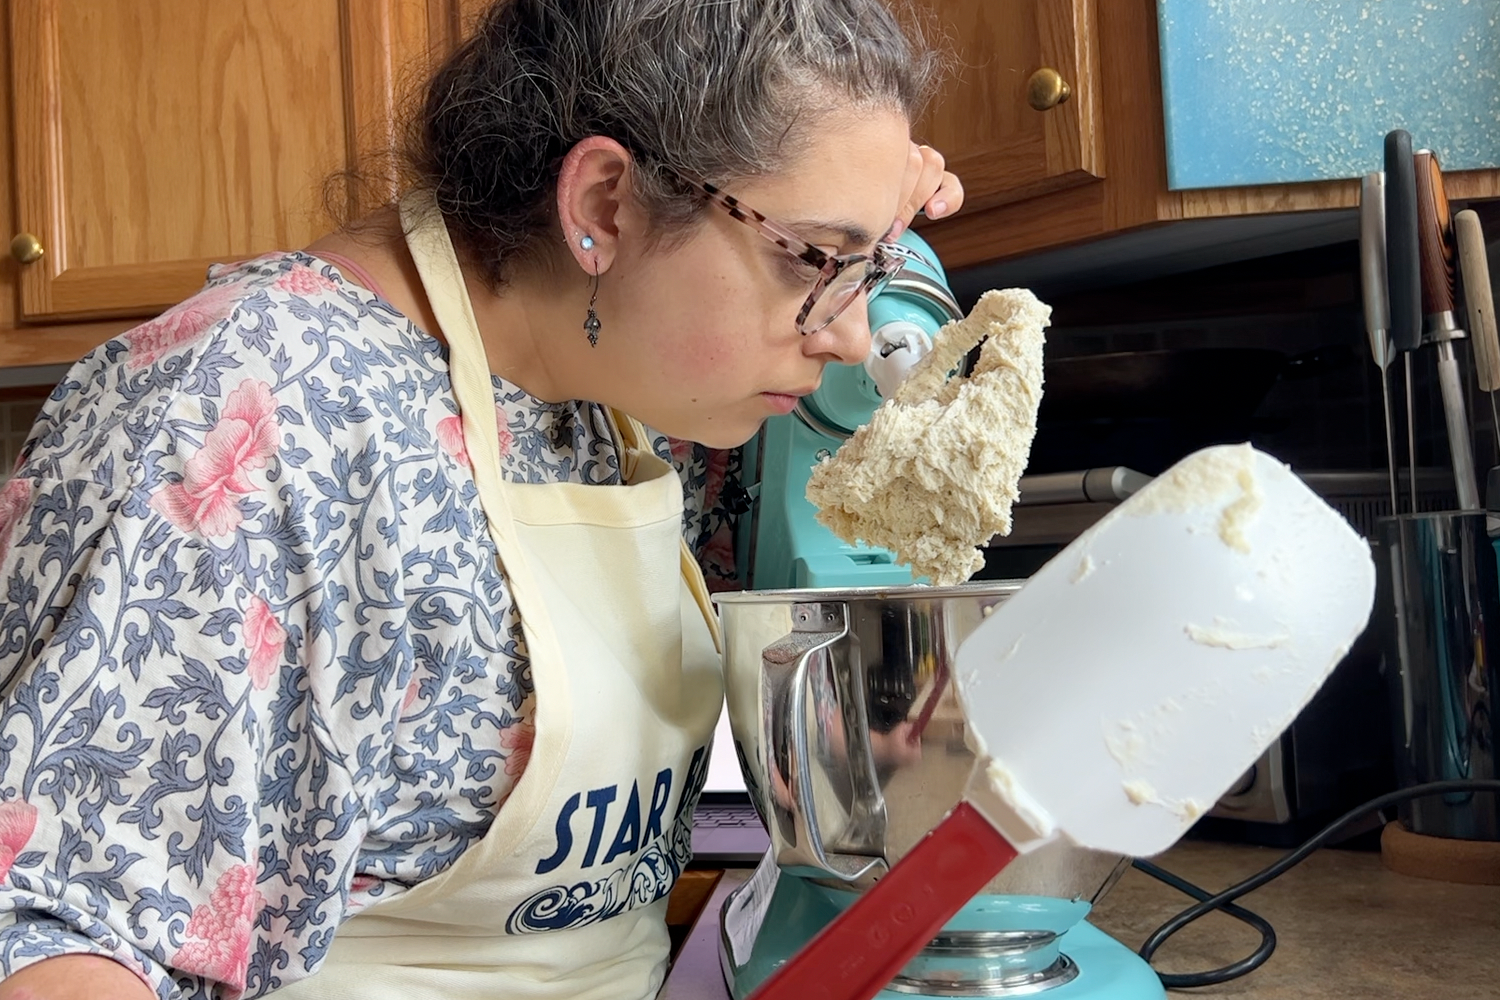
Then I beat the sugar and some butter together with the help of my stand mixer, Art Vandelay. While that was going on, I realized I had forgotten to put the cardamom in, so I made a wild guess as to the amount and put in a full teaspoon. Then some vanilla and an egg joined the party, followed by the dries.
Then I rolled the dough out on some floured parchment and got it chilling in the fridge. It smelled super good already so I had high hopes that they would taste amazing too!
Cookie Bars for The Board
One of the main reasons that I chose to recreate Kate's bake for this Showstopper had everything to do with one ingredient: grains of paradise.
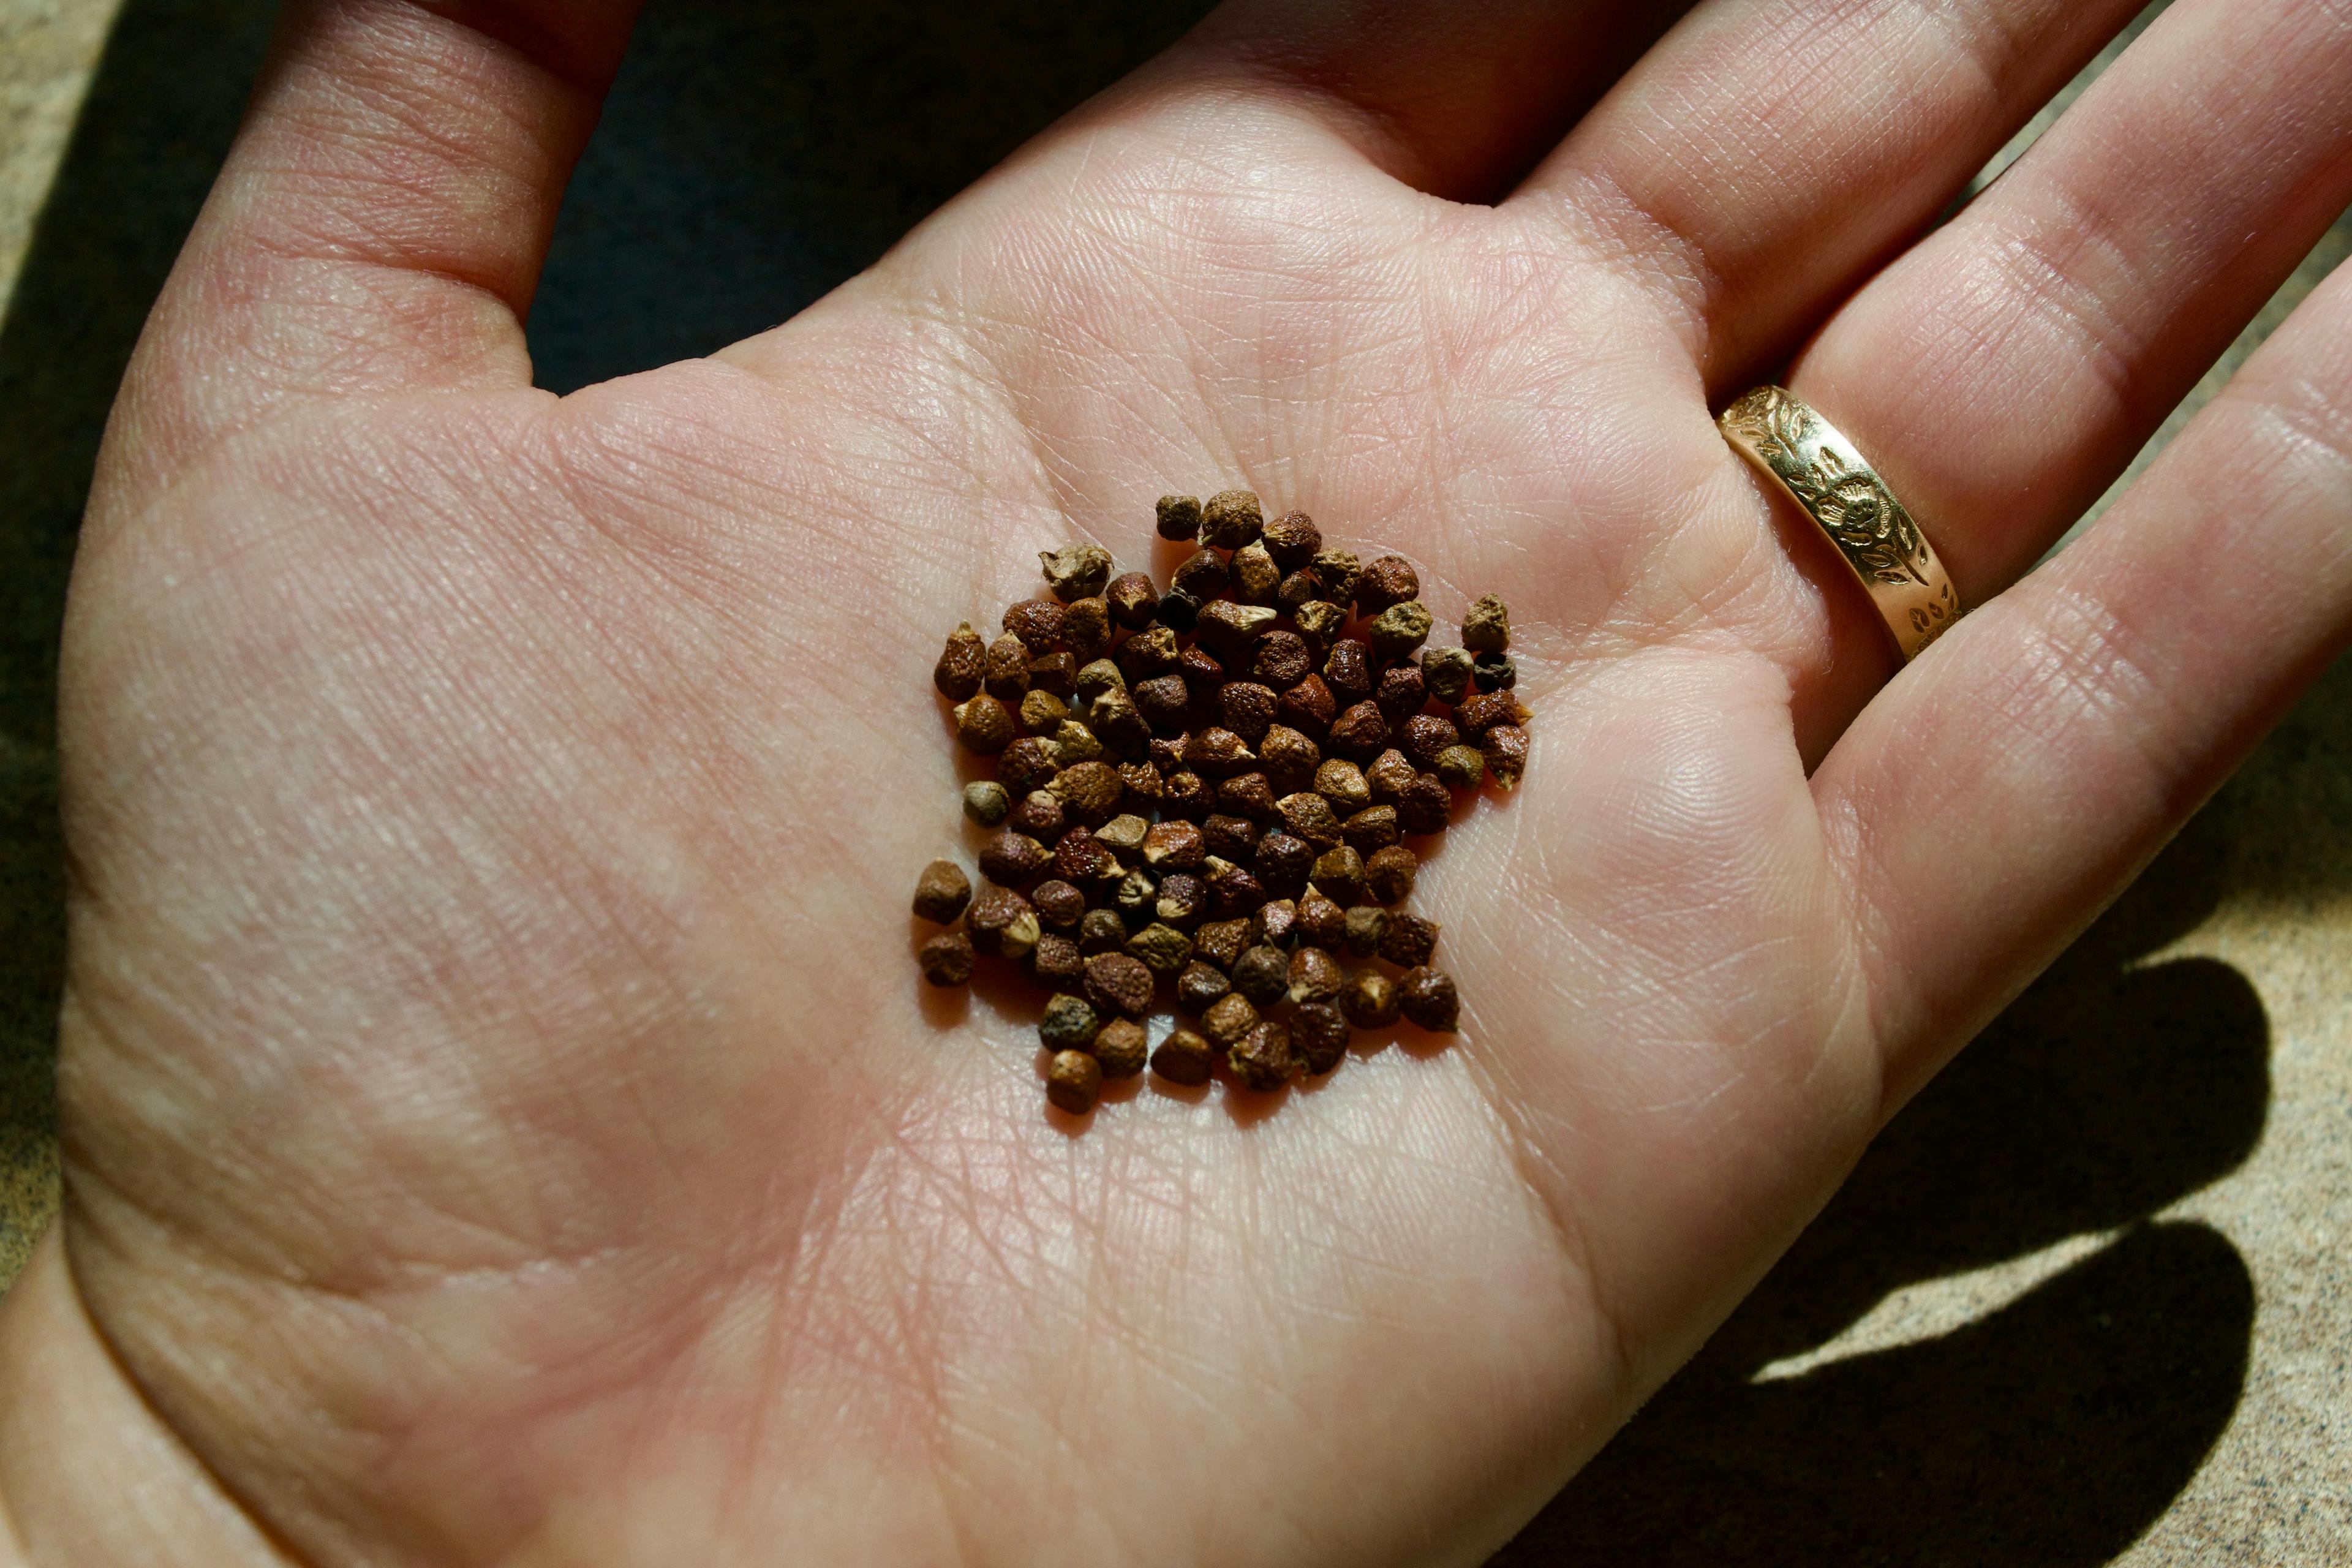
This spice is similar to a Sichuan peppercorn but without the numbing property. They were a new-to-me ingredient, so I crunched on one to get a feel for it, and it was DELICIOUS! (A bit strong though, I don't recommend them for snacking this way!)
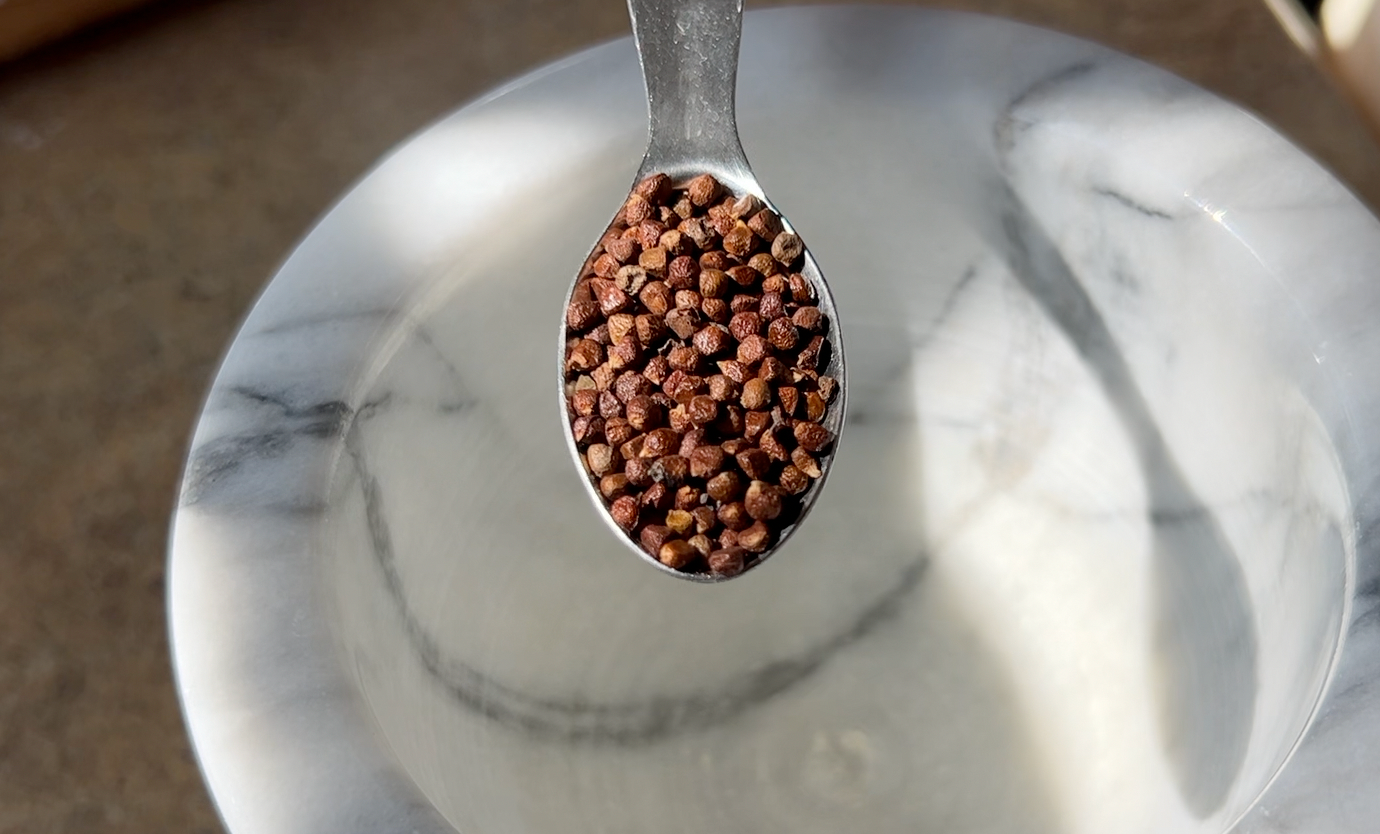
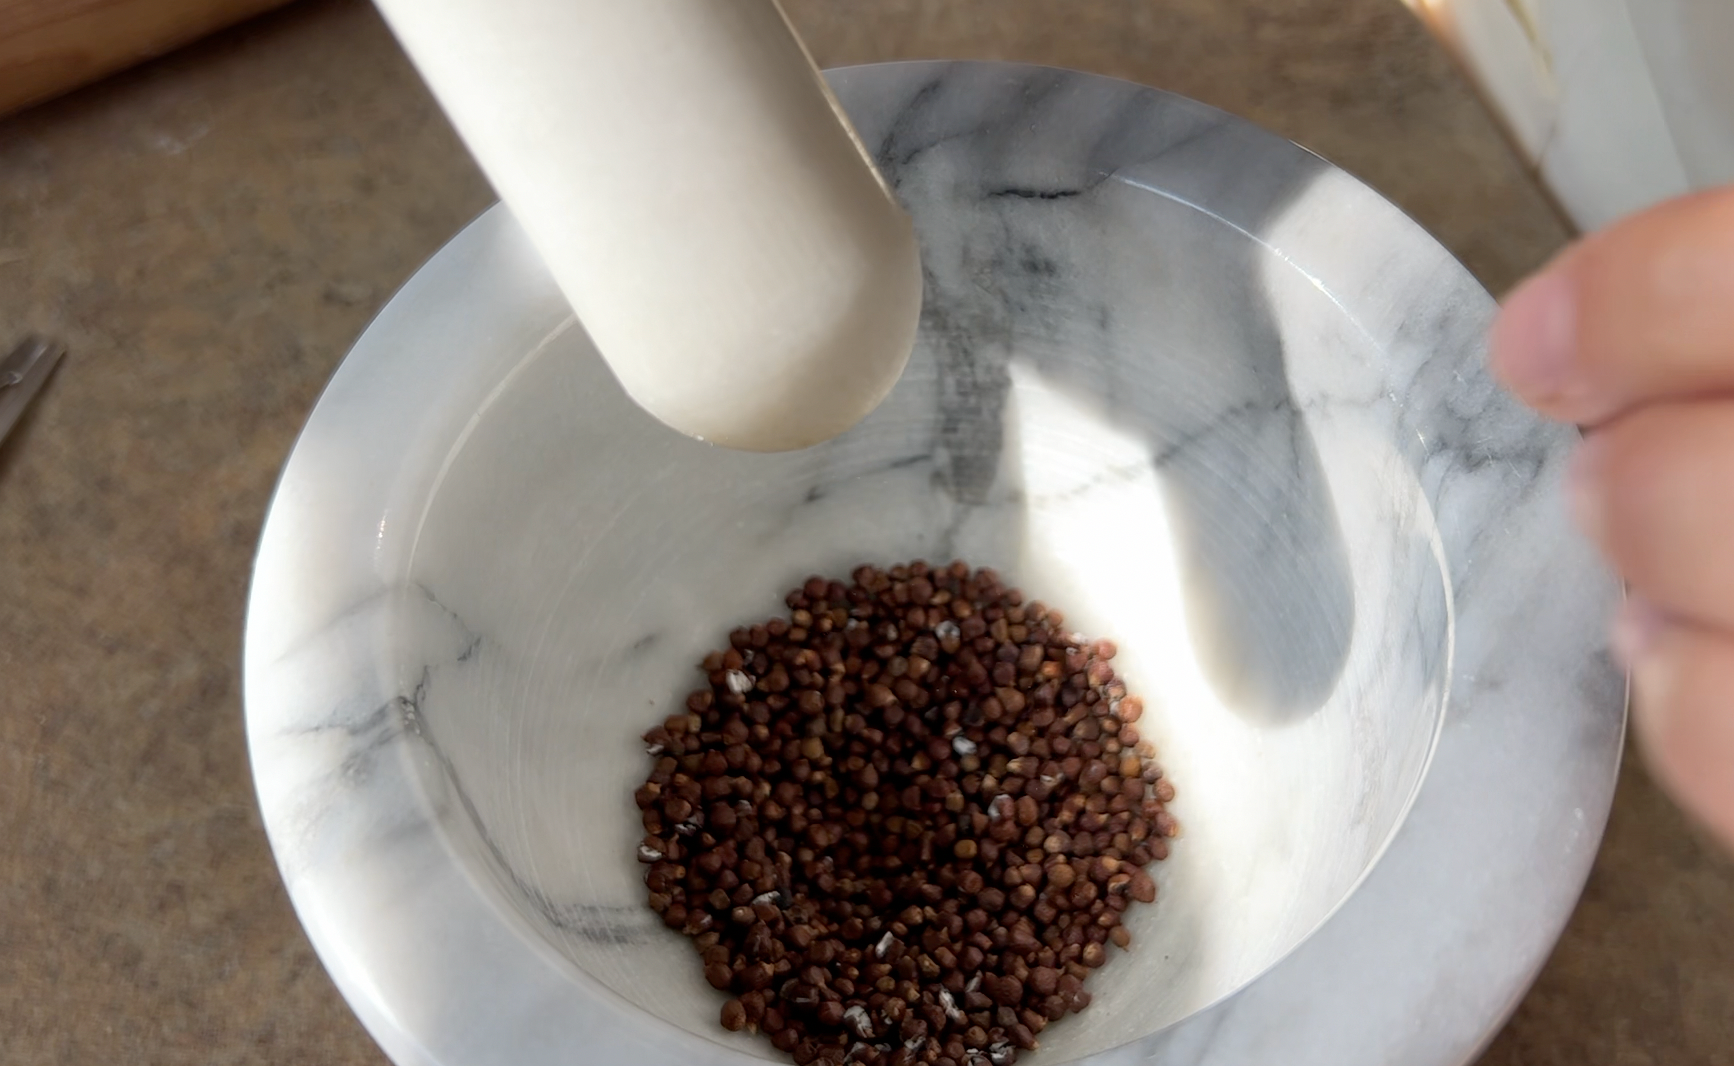
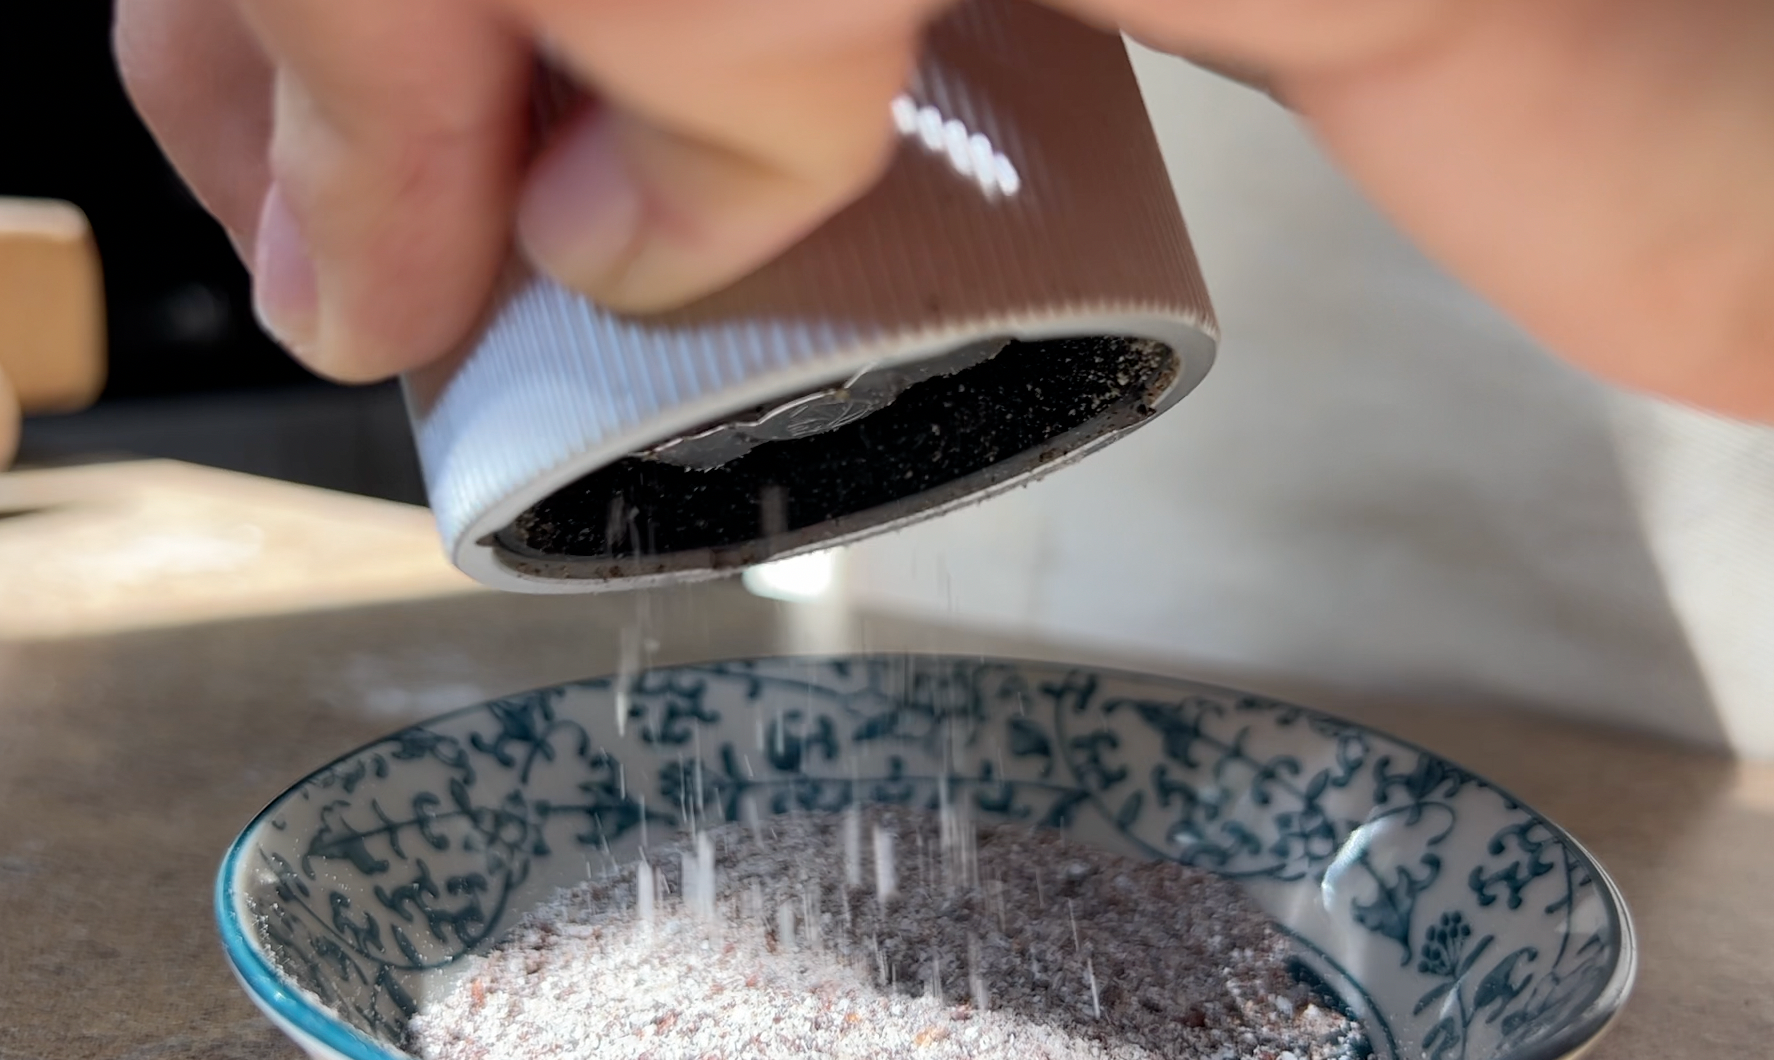
I started crushing them in my mortar and pestle, but they just flew everywhere and didn't crack very much, so I emptied the black pepper out of my pepper mill, and ground the grains that way.
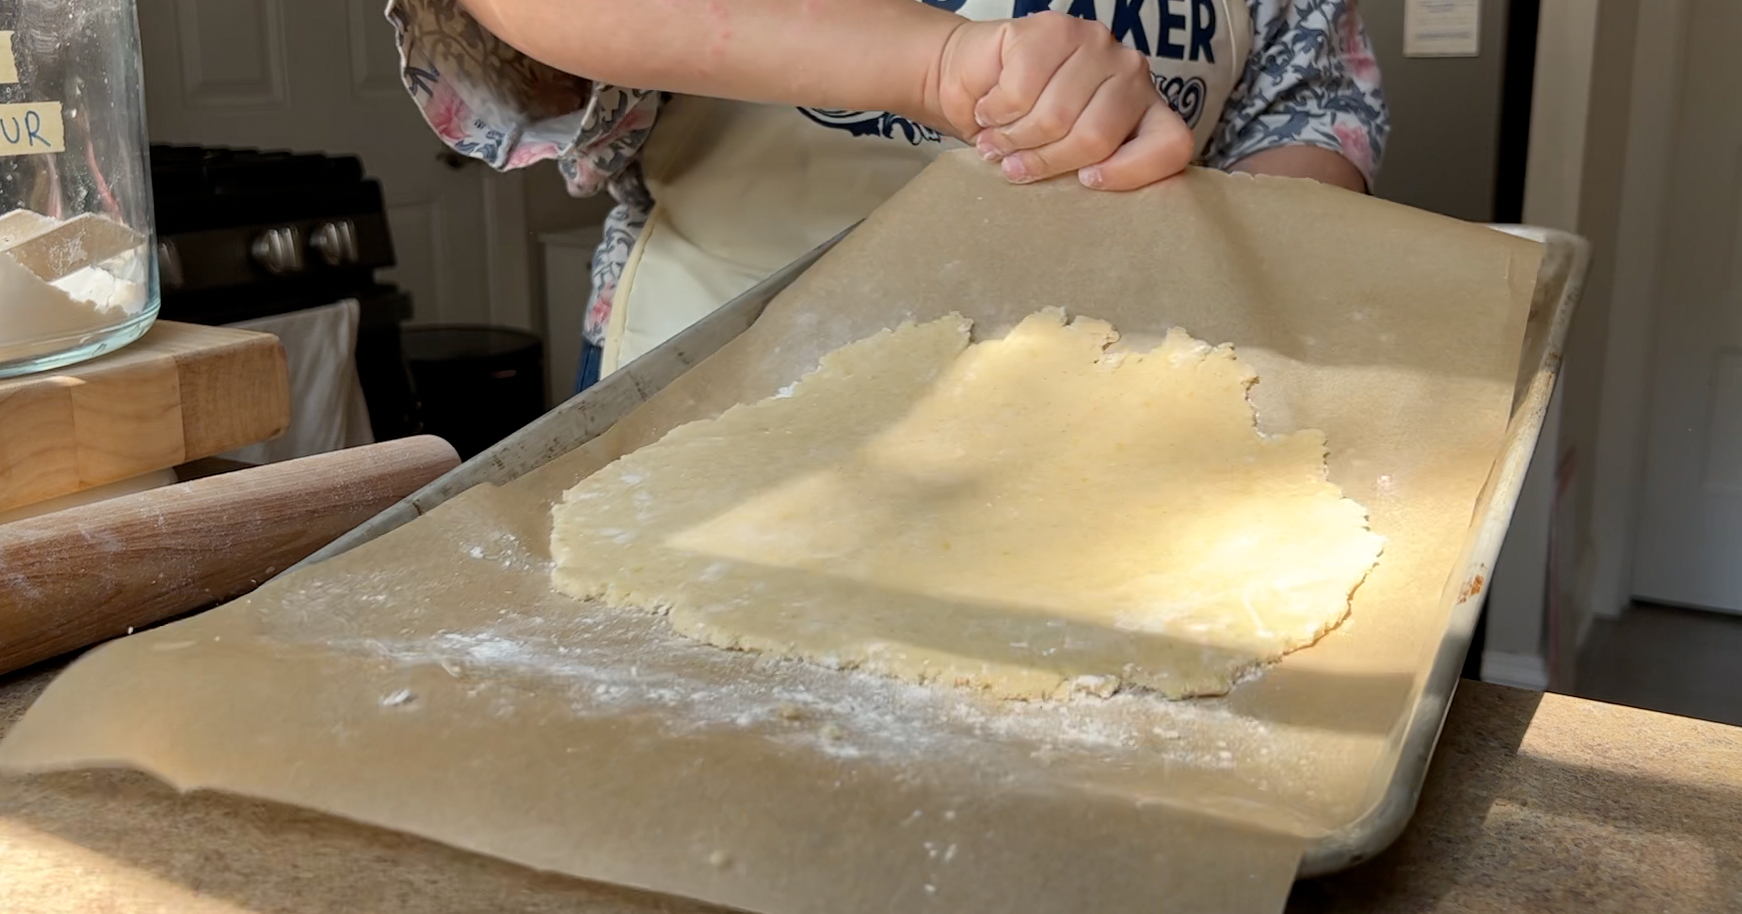
I went with a recipe for cookie bars for the board, and the construction of this second dough was very similar to the first. Whisk together the dries (flour, salt, grains of paradise). Lemon zest this time, crushed into the sugar. Beat the butter and cream cheese, add the lemony sugar, vanilla, and egg. Then the dries went in and after a gentle mix, the dough was ready.
I had a tricky time spreading out the dough, because I had used two pieces of parchment and the overlap kept moving around. In hindsight, I should have just used one piece of parchment paper and not worried about it coming up the sides of the tray. I was struck at this moment by the fact that five simple words in a recipe, such as “spread into an even layer”, can be so time-consuming and challenging.

I got it as smooth as possible, convinced that the dough would spread out and even out as it baked, and on this point, I was sorely mistaken. The dough didn’t budge AT ALL and came out of the oven with the exact same shaping that it went in with.

Baking the Pieces
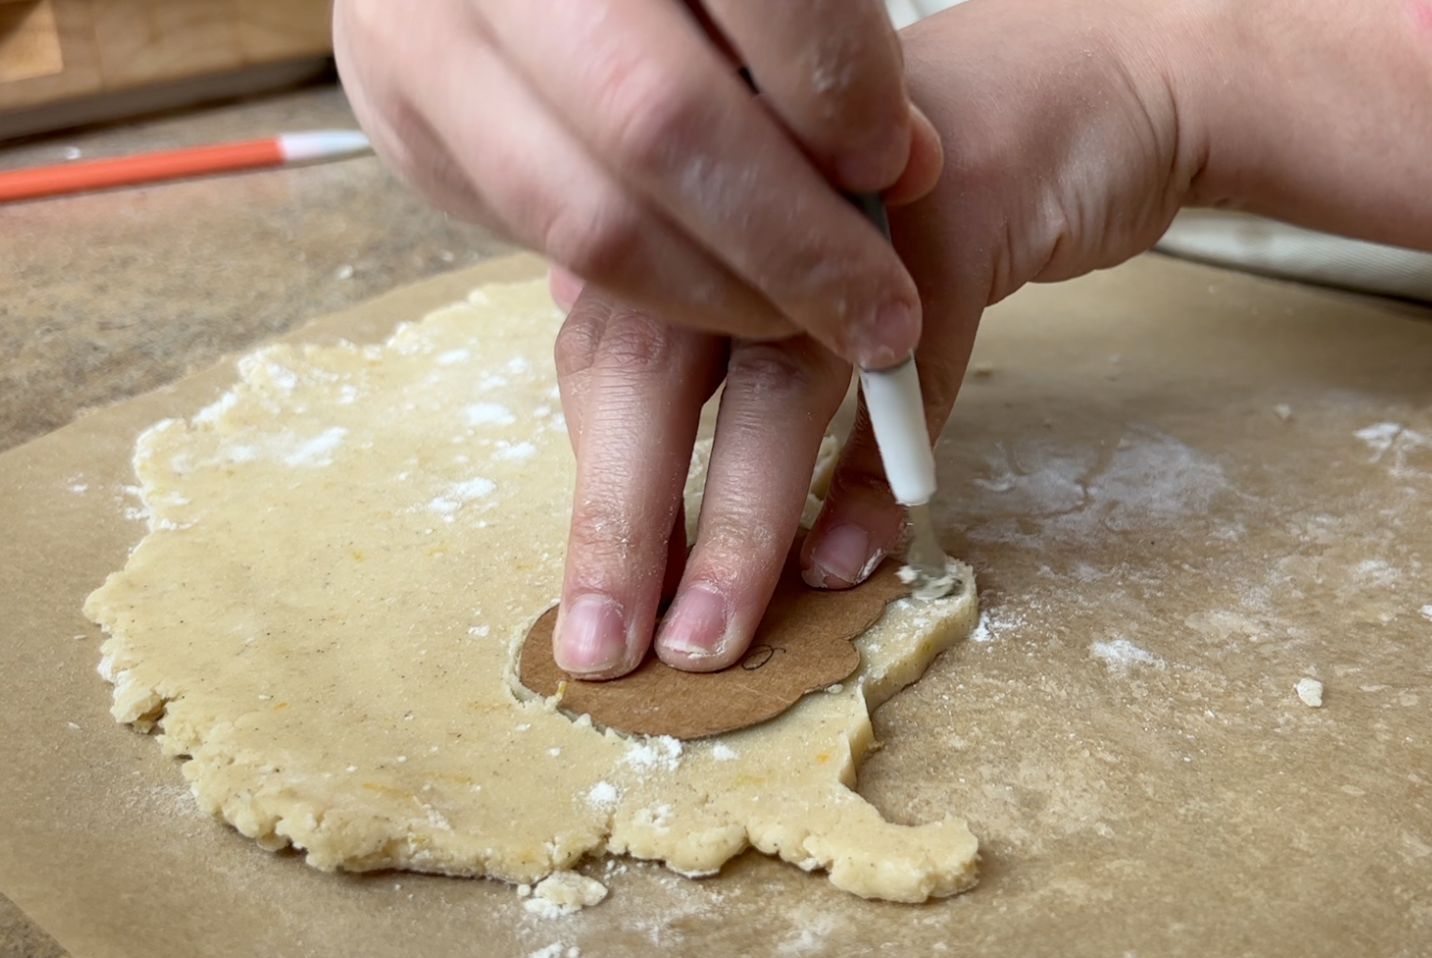
The dough for the pieces was quite chilled by this point, so I used my stencils and a little cake-decorating knife to cut out the cookies for the pieces. I cut two of each just in case something went wrong along the way.

Cookies Need Decor!
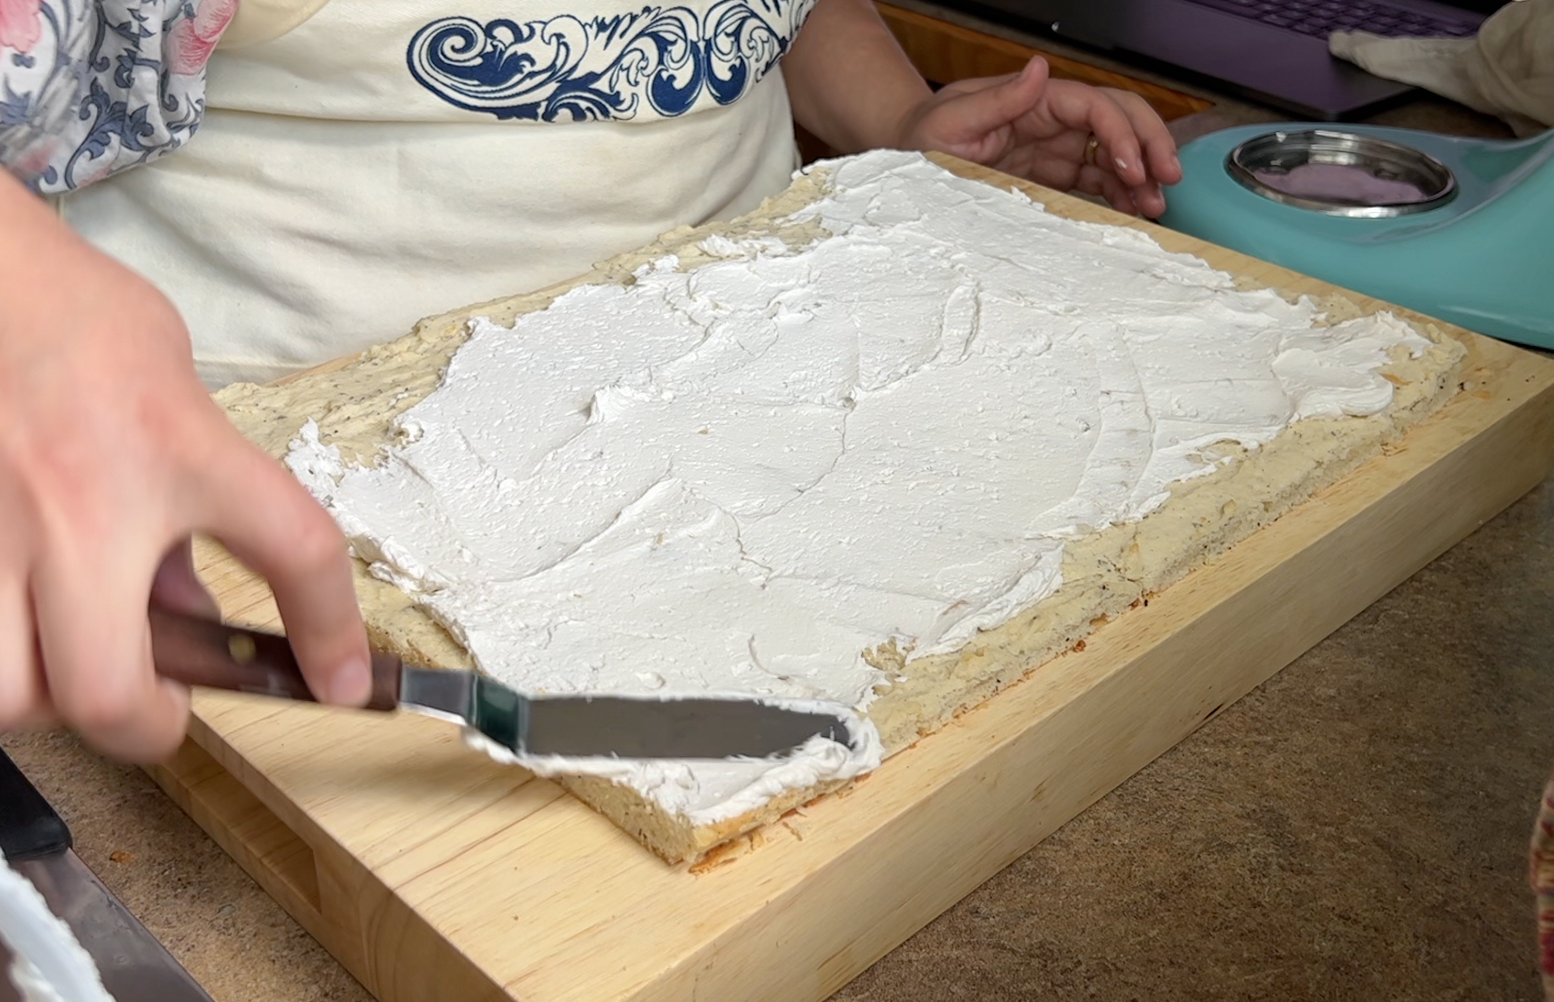
While everything baked, I started on the American buttercream for the board itself. I started by smoothing out some butter before adding a ton of sifted powdered sugar. While it whipped up, I added vanilla and salt, and then it was done. That one was easy!

I slid the board off the tray and trimmed the edges. Then I dumped on all of the frosting and smoothed it as best I could before putting the whole board into the fridge so the frosting could chill and harden.
Then I moved on to the trickier of the cookie toppings, the royal icing for the pieces. This started with a whole bag of powdered sugar and then some meringue powder which is a new ingredient for me, and a few tablespoons of water.
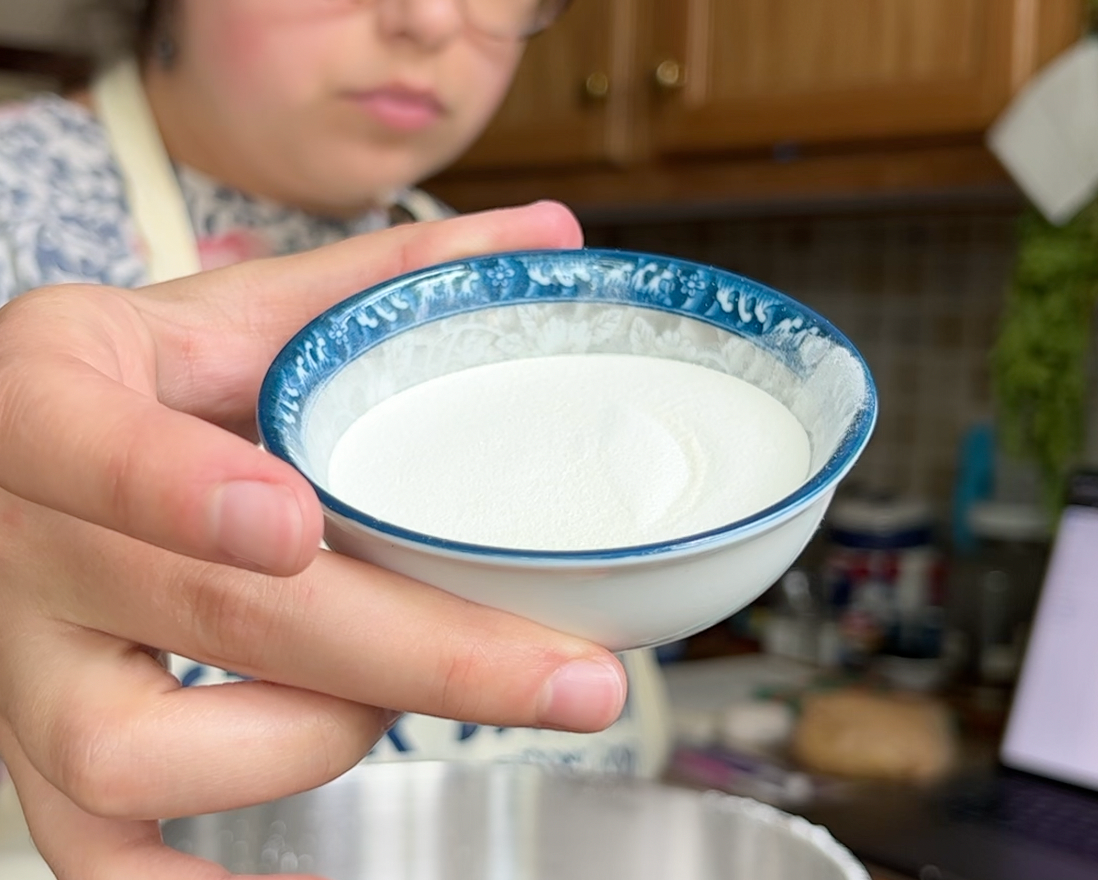
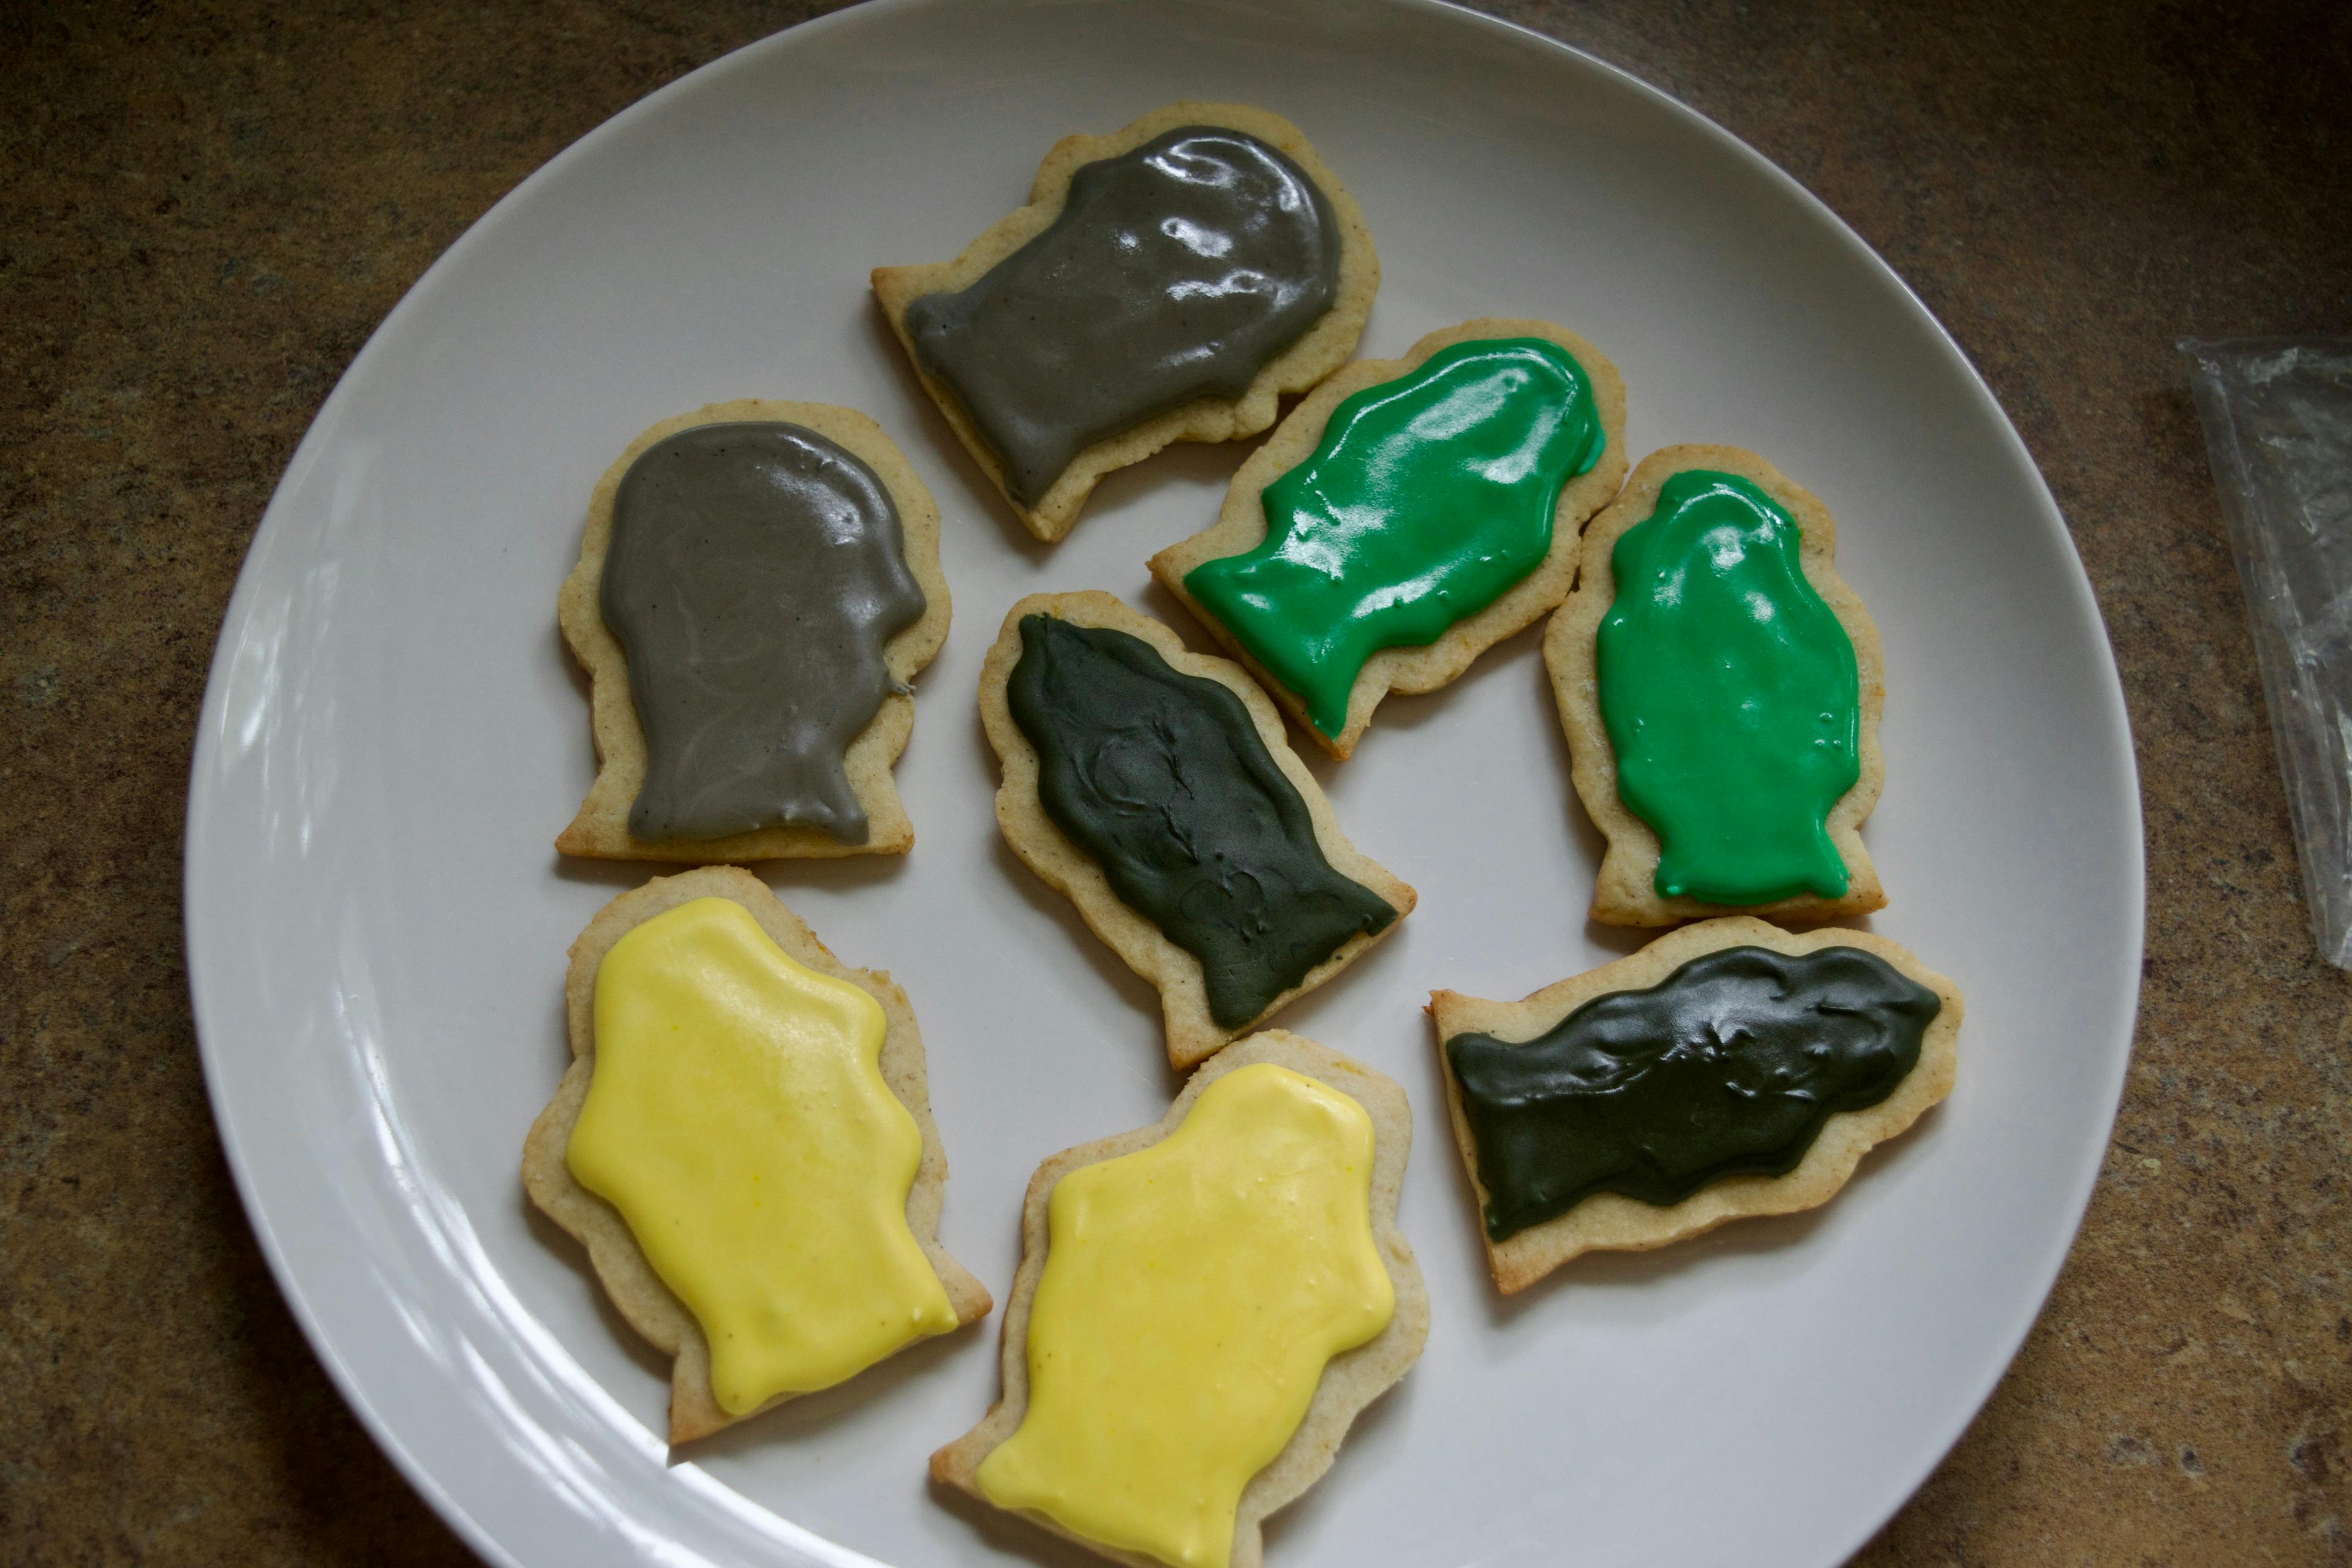
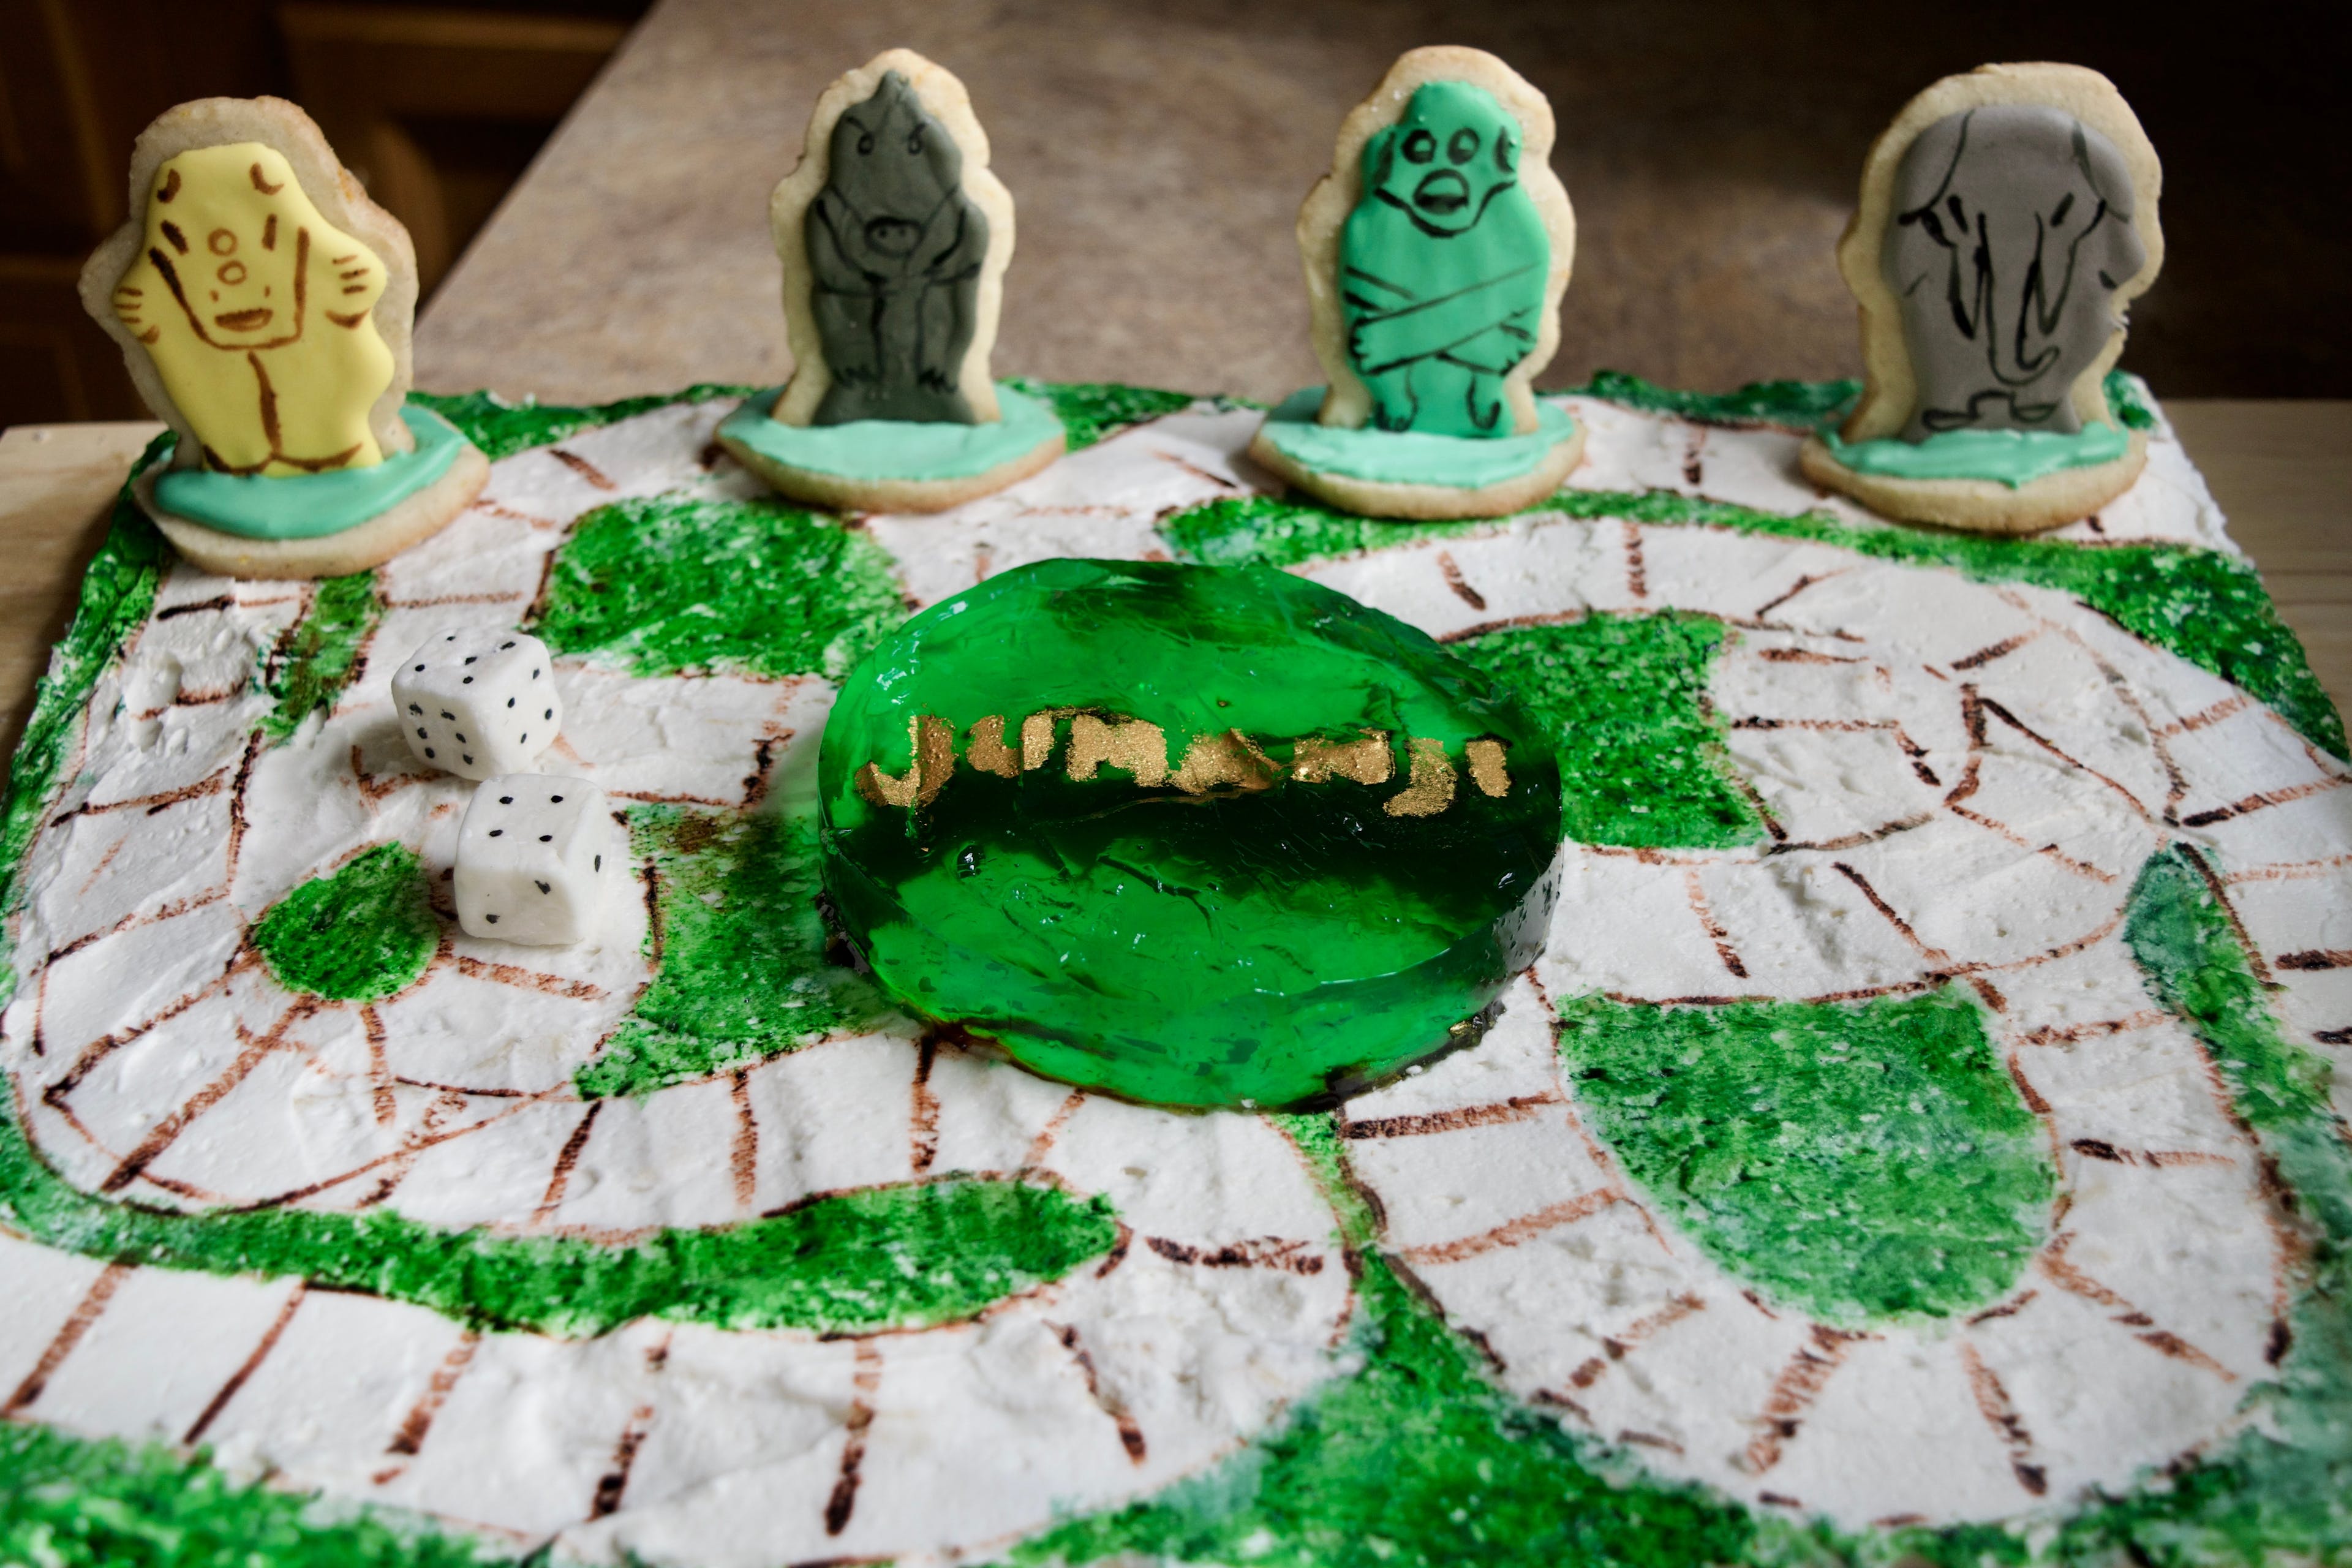
Once it was the right consistency, I put tiny amounts into some tiny dishes with a few drops of gel food coloring, added it to a piping bag, and started piping the green for the monkey pieces, gray for the elephants, black for the crocodiles, and yellow for the hippos.

I got everything in the fridge and decided I would pick the project up the following day.
Day 2 - Painting the Pieces! And the board!
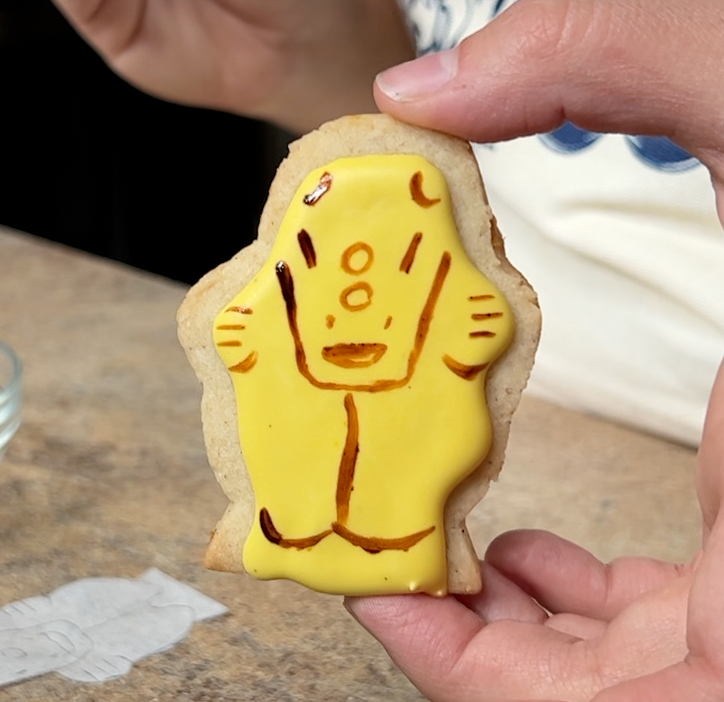
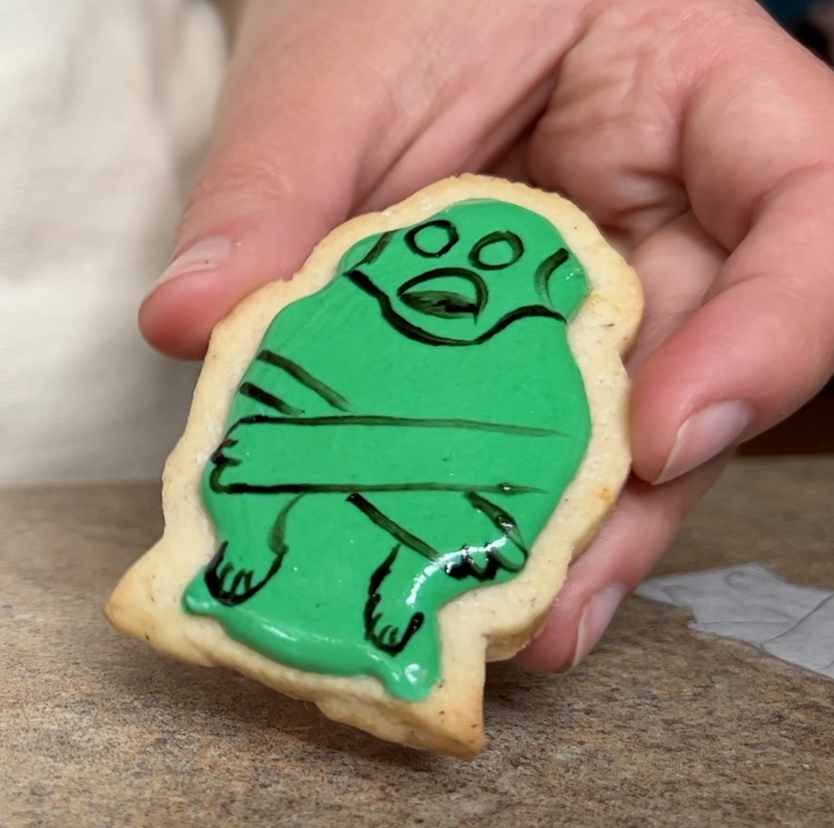
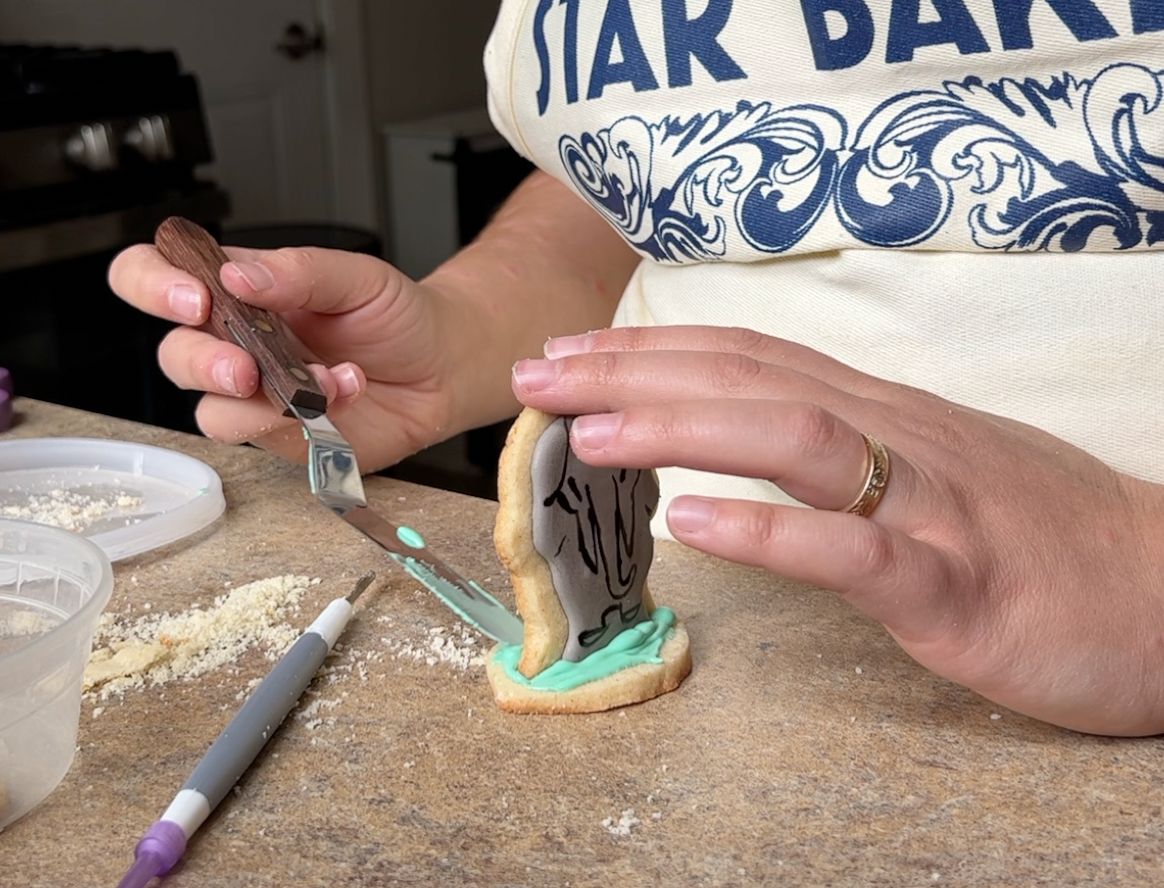
I put a little brown food coloring in a bowl, and using the tiny brush and my trace of the piece for reference, I started painting the details. I messed up the first rhino and was very glad I had made backups in preparation for this very exact eventuality. The second one came out much better, so I repeated the process on the following pieces, including the dice.
I began the jello unmolding process so that I could use the ring cutter to mark the center of the board, and then laid out the template I made for the pathways. I used brown food coloring to mark the outlines and to make the spaces.
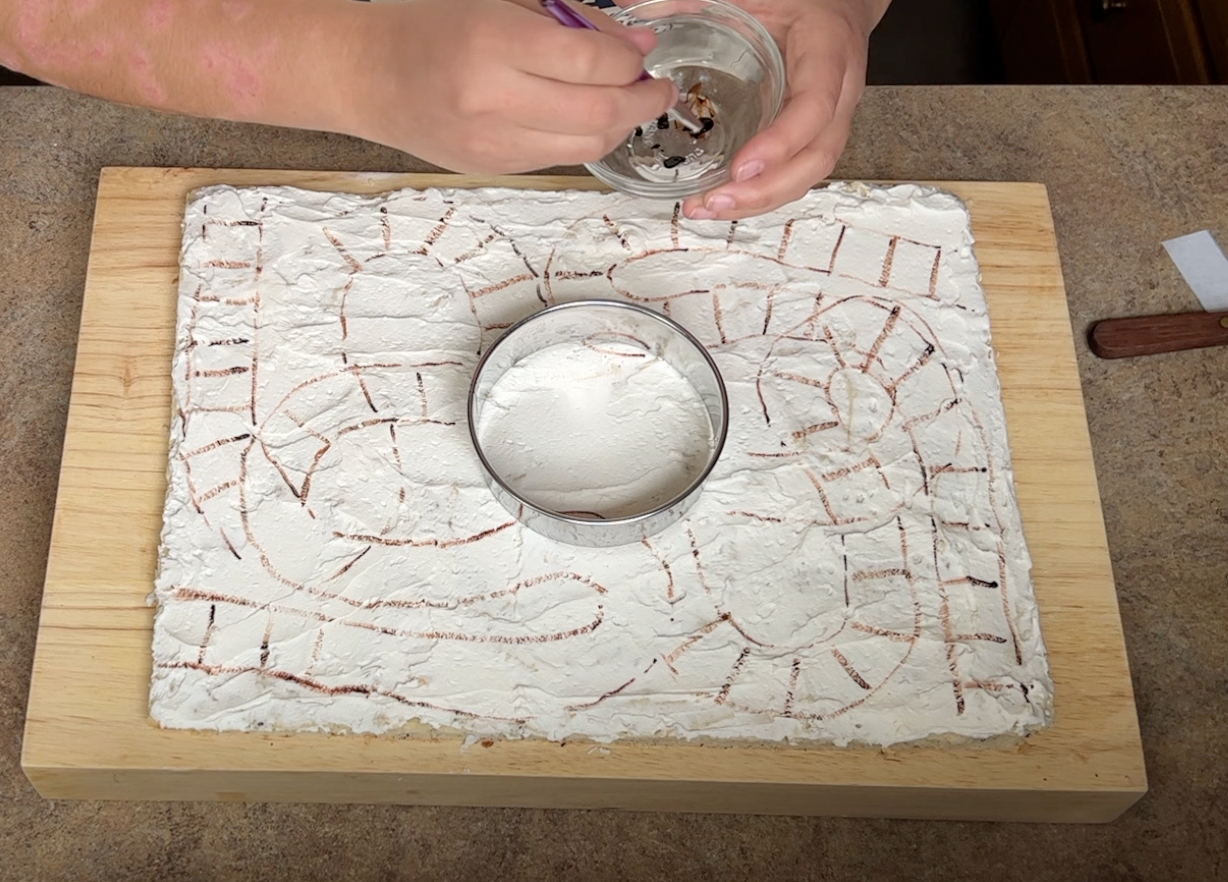
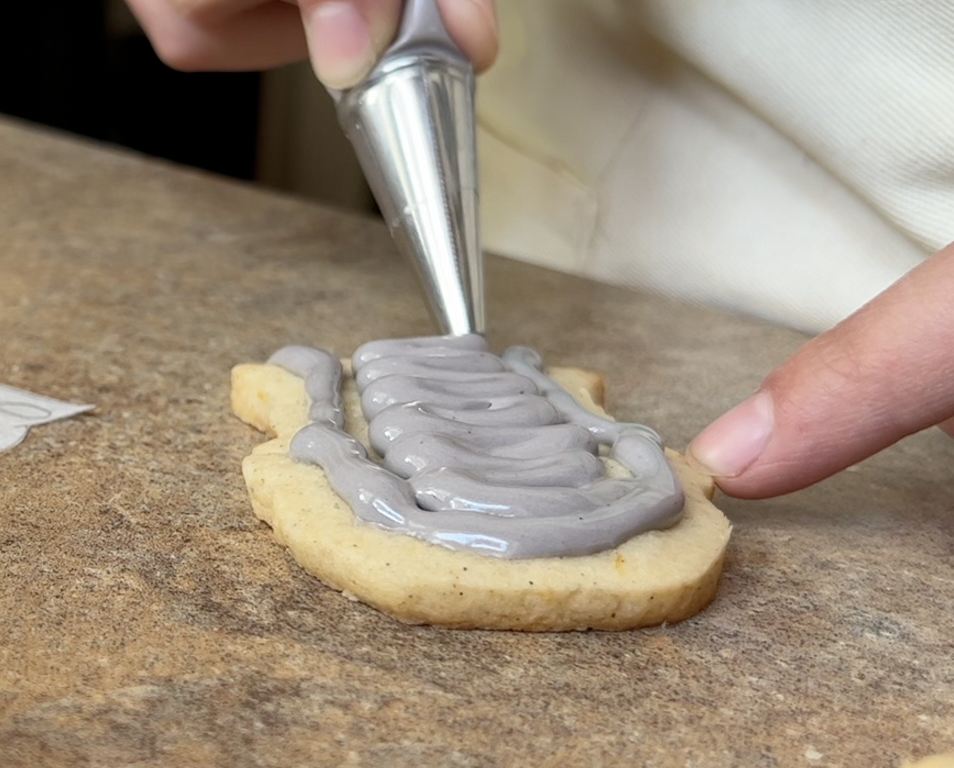
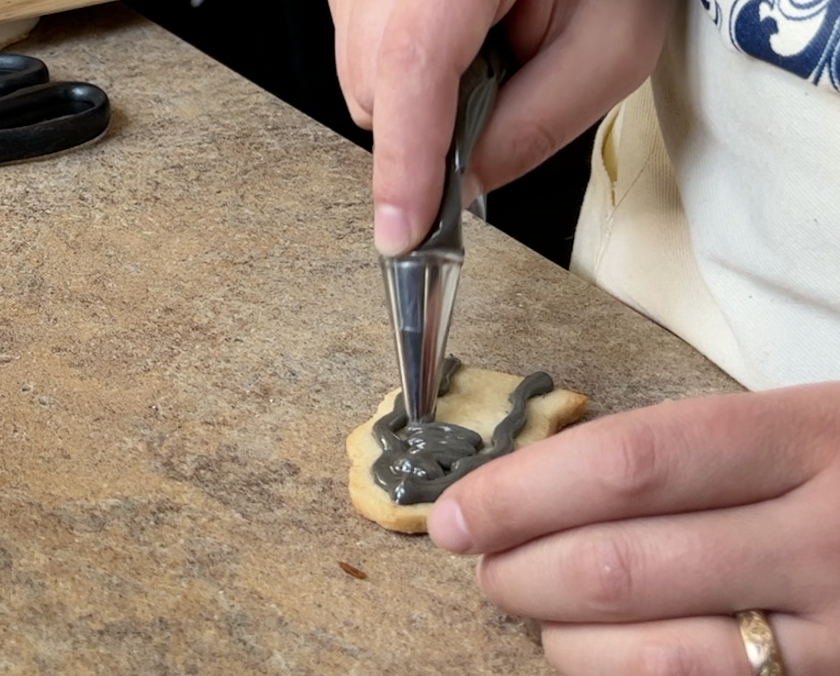
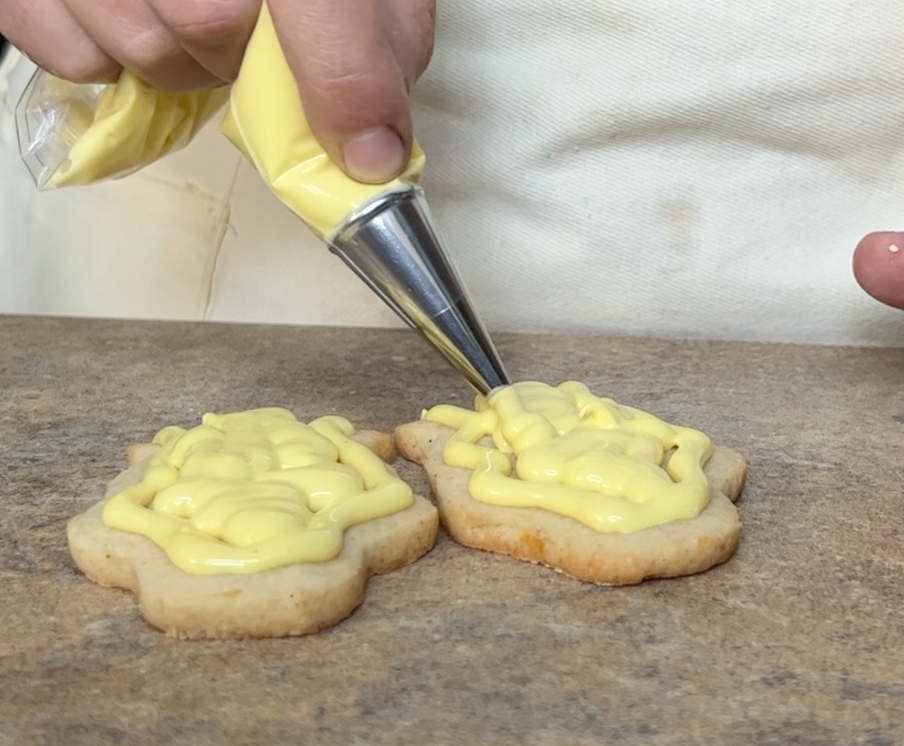
It was starting to get soft, so I put it back in the fridge to set up again while I used the little knife to scrape out a channel in the leaf-shaped cookies so that I could stand the animal figures in them.

Then I spread green royal icing on the leaf bases and stuck the animal cookies into the channel. Once the icing dried, they were glued together and quite sturdy!
Finishing Touches
I looked up exactly how dice are painted and used black food coloring to make tiny dots, letting them dry a bit between each side.

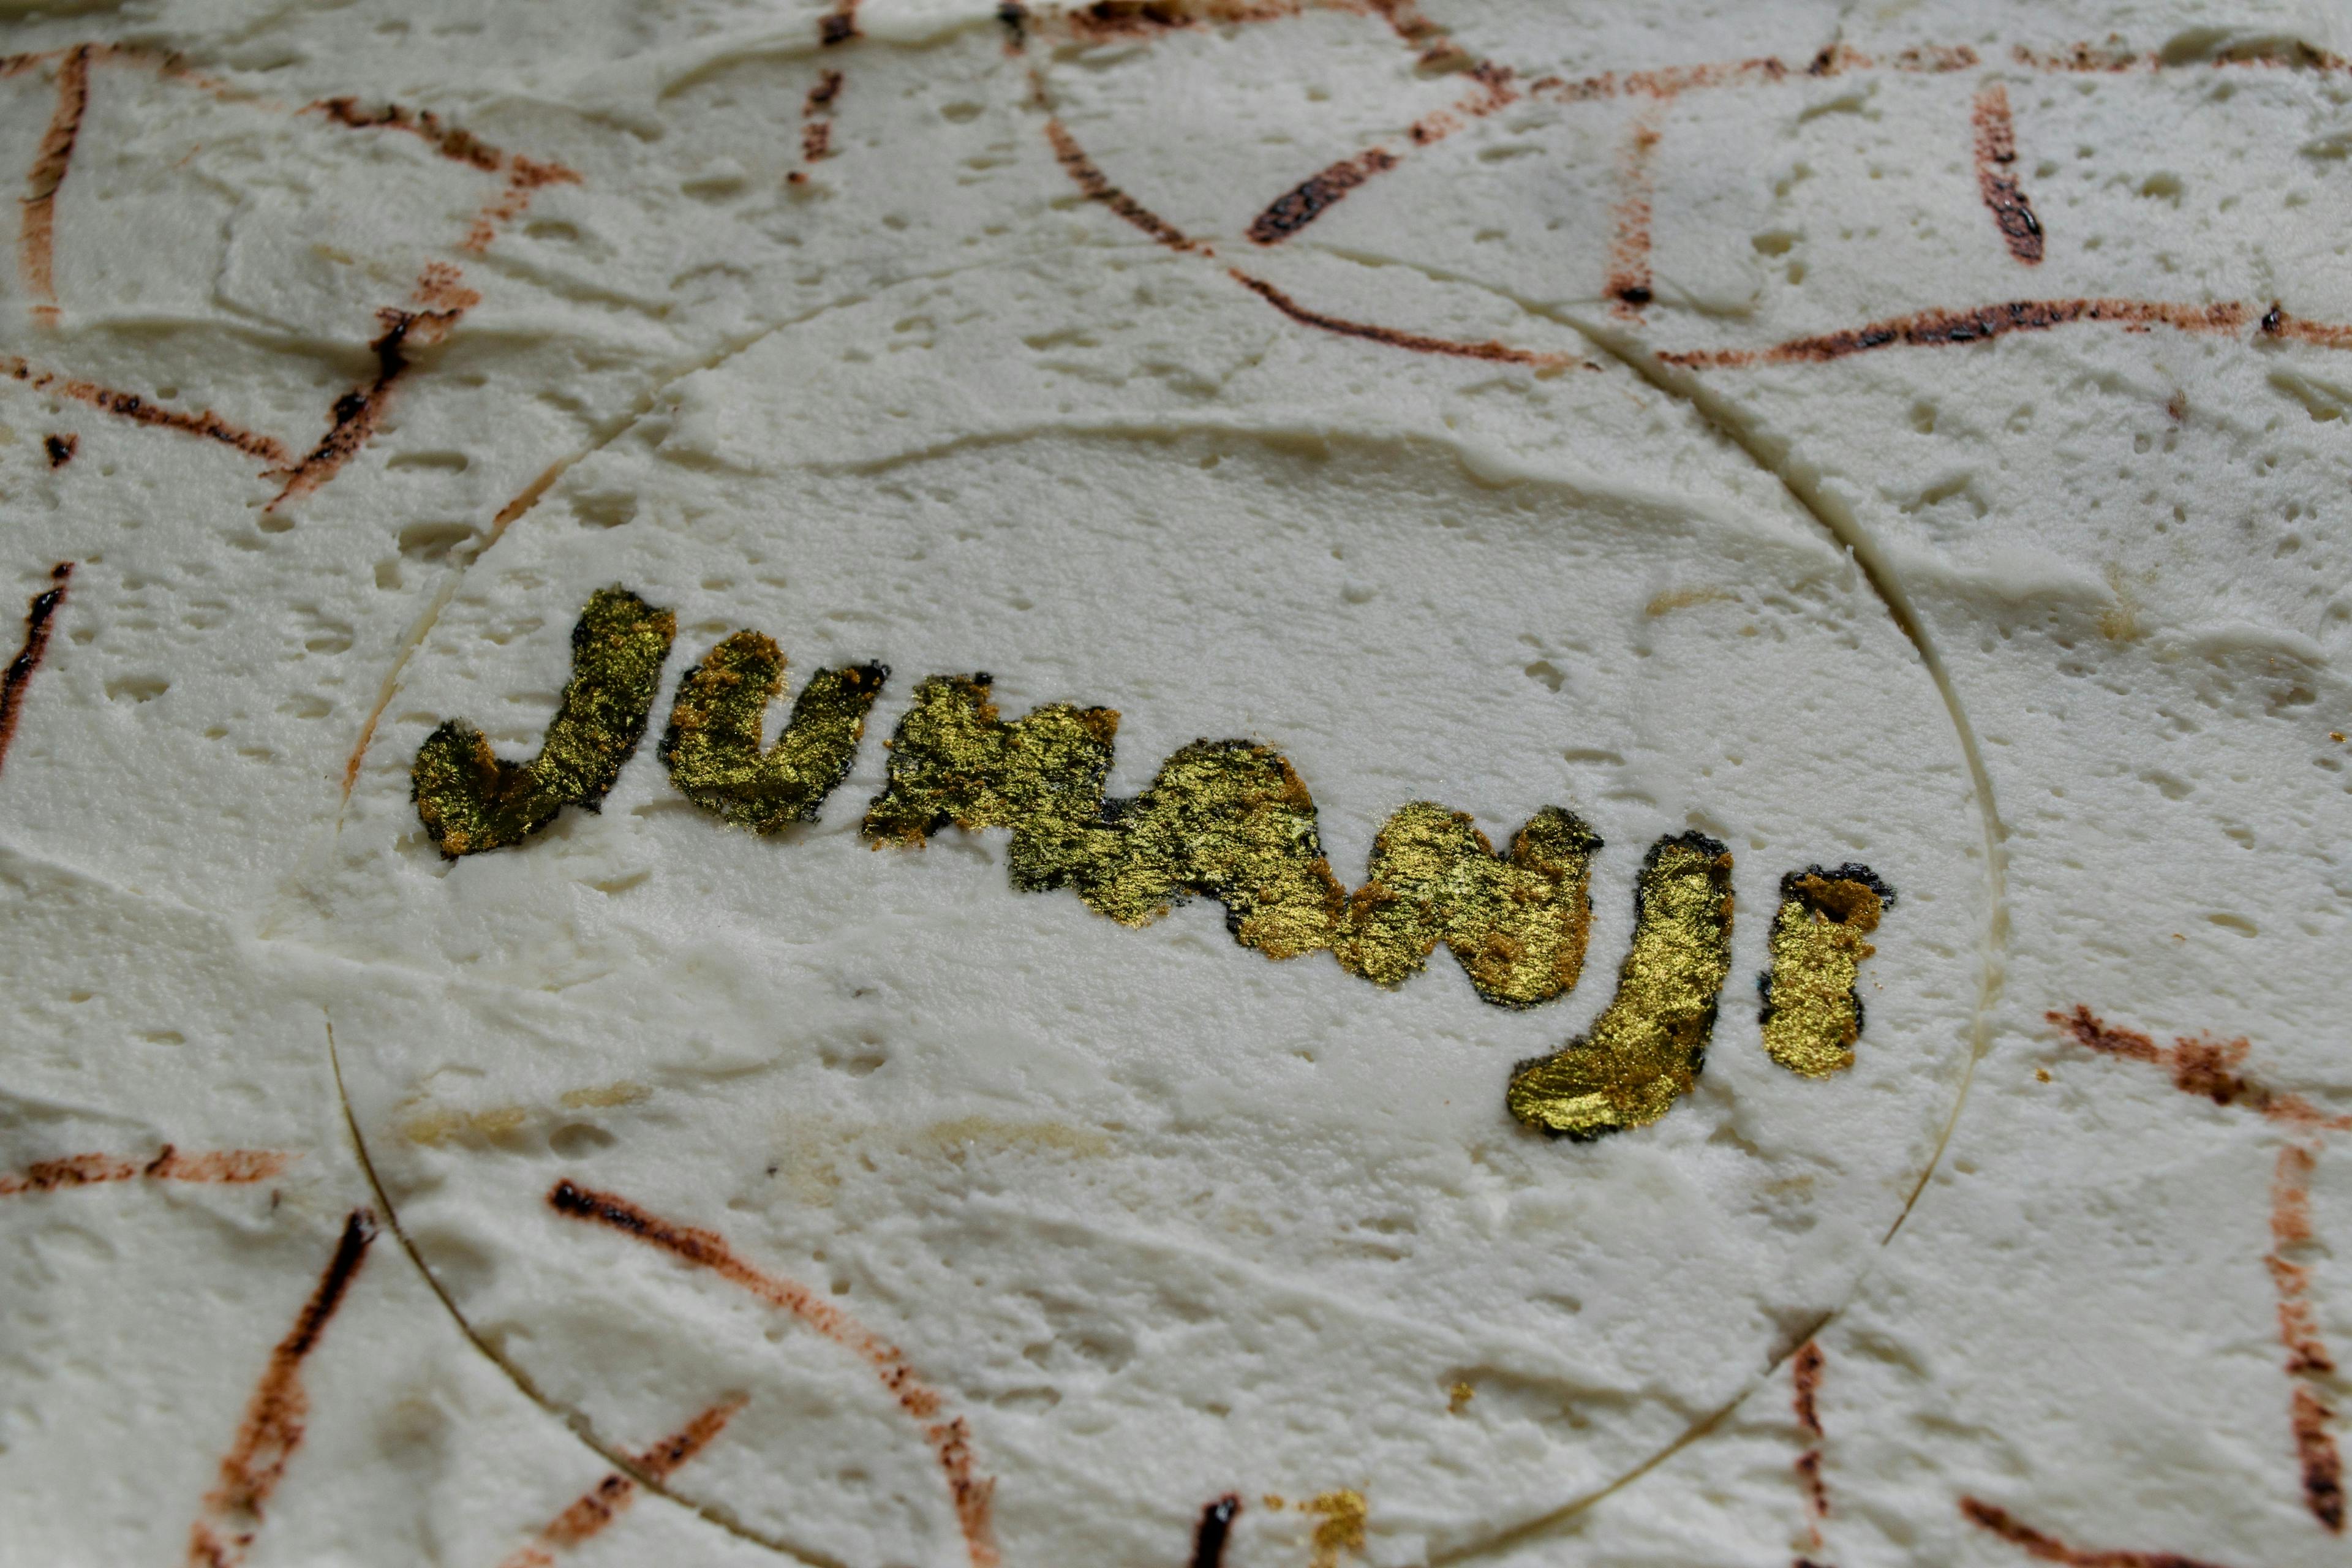
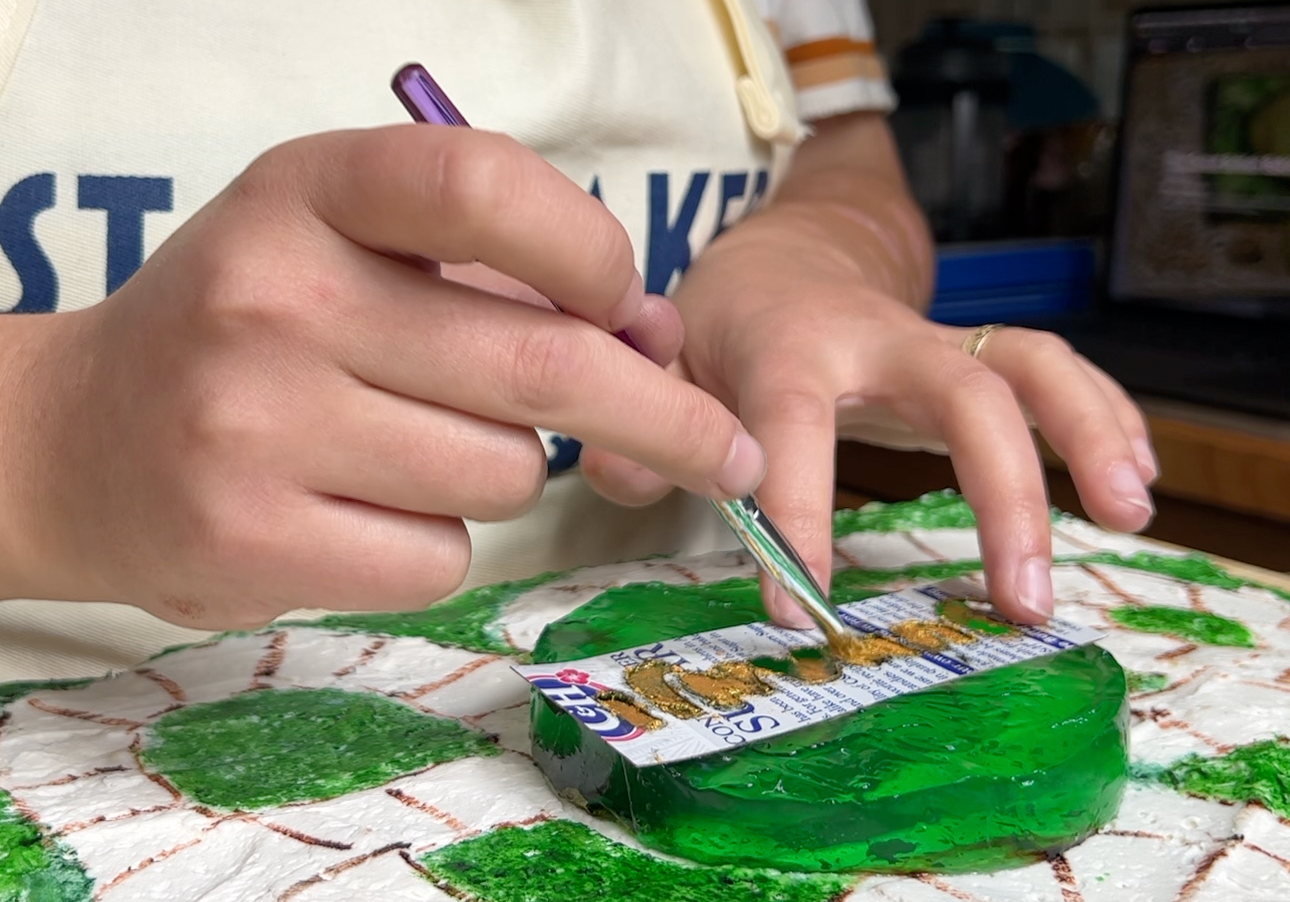
I used a bigger brush to stencil the word Jumanji in the center of the board with black food coloring and then followed it with some gold edible glitter.
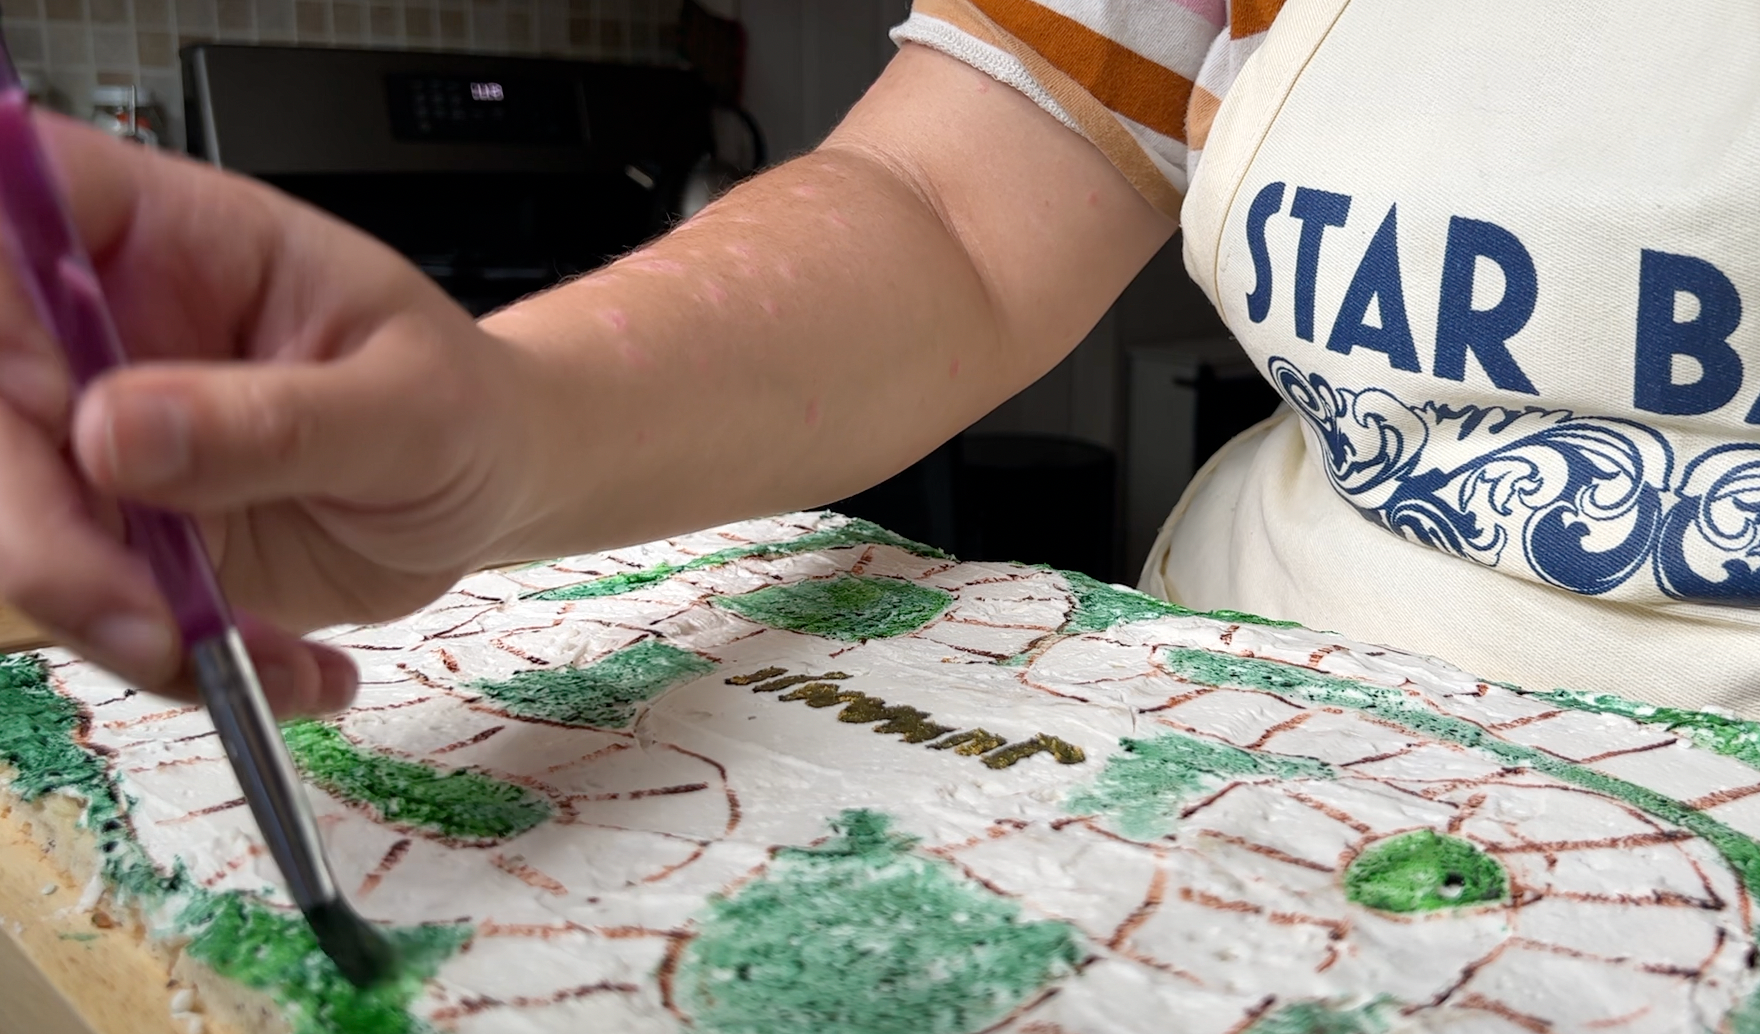
I mixed some green food coloring with a little water and started painting in the spots between the pathways. I repeated with a slightly different shade of green and filled in any white spaces that were still showing through, and then again with a third shade of green.
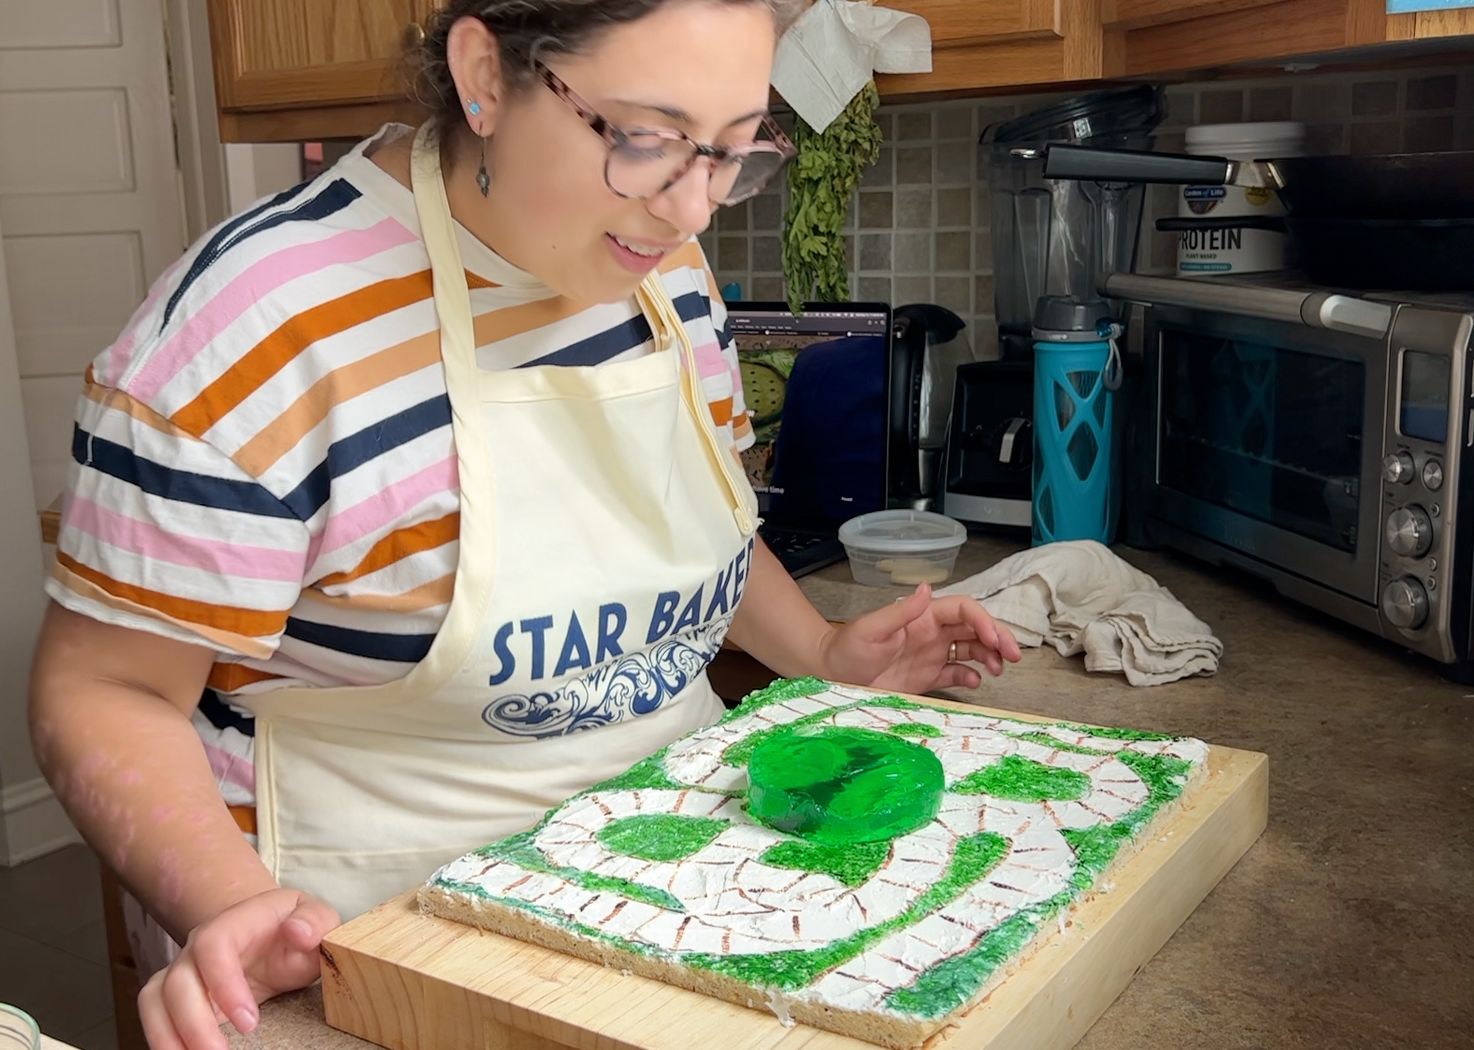
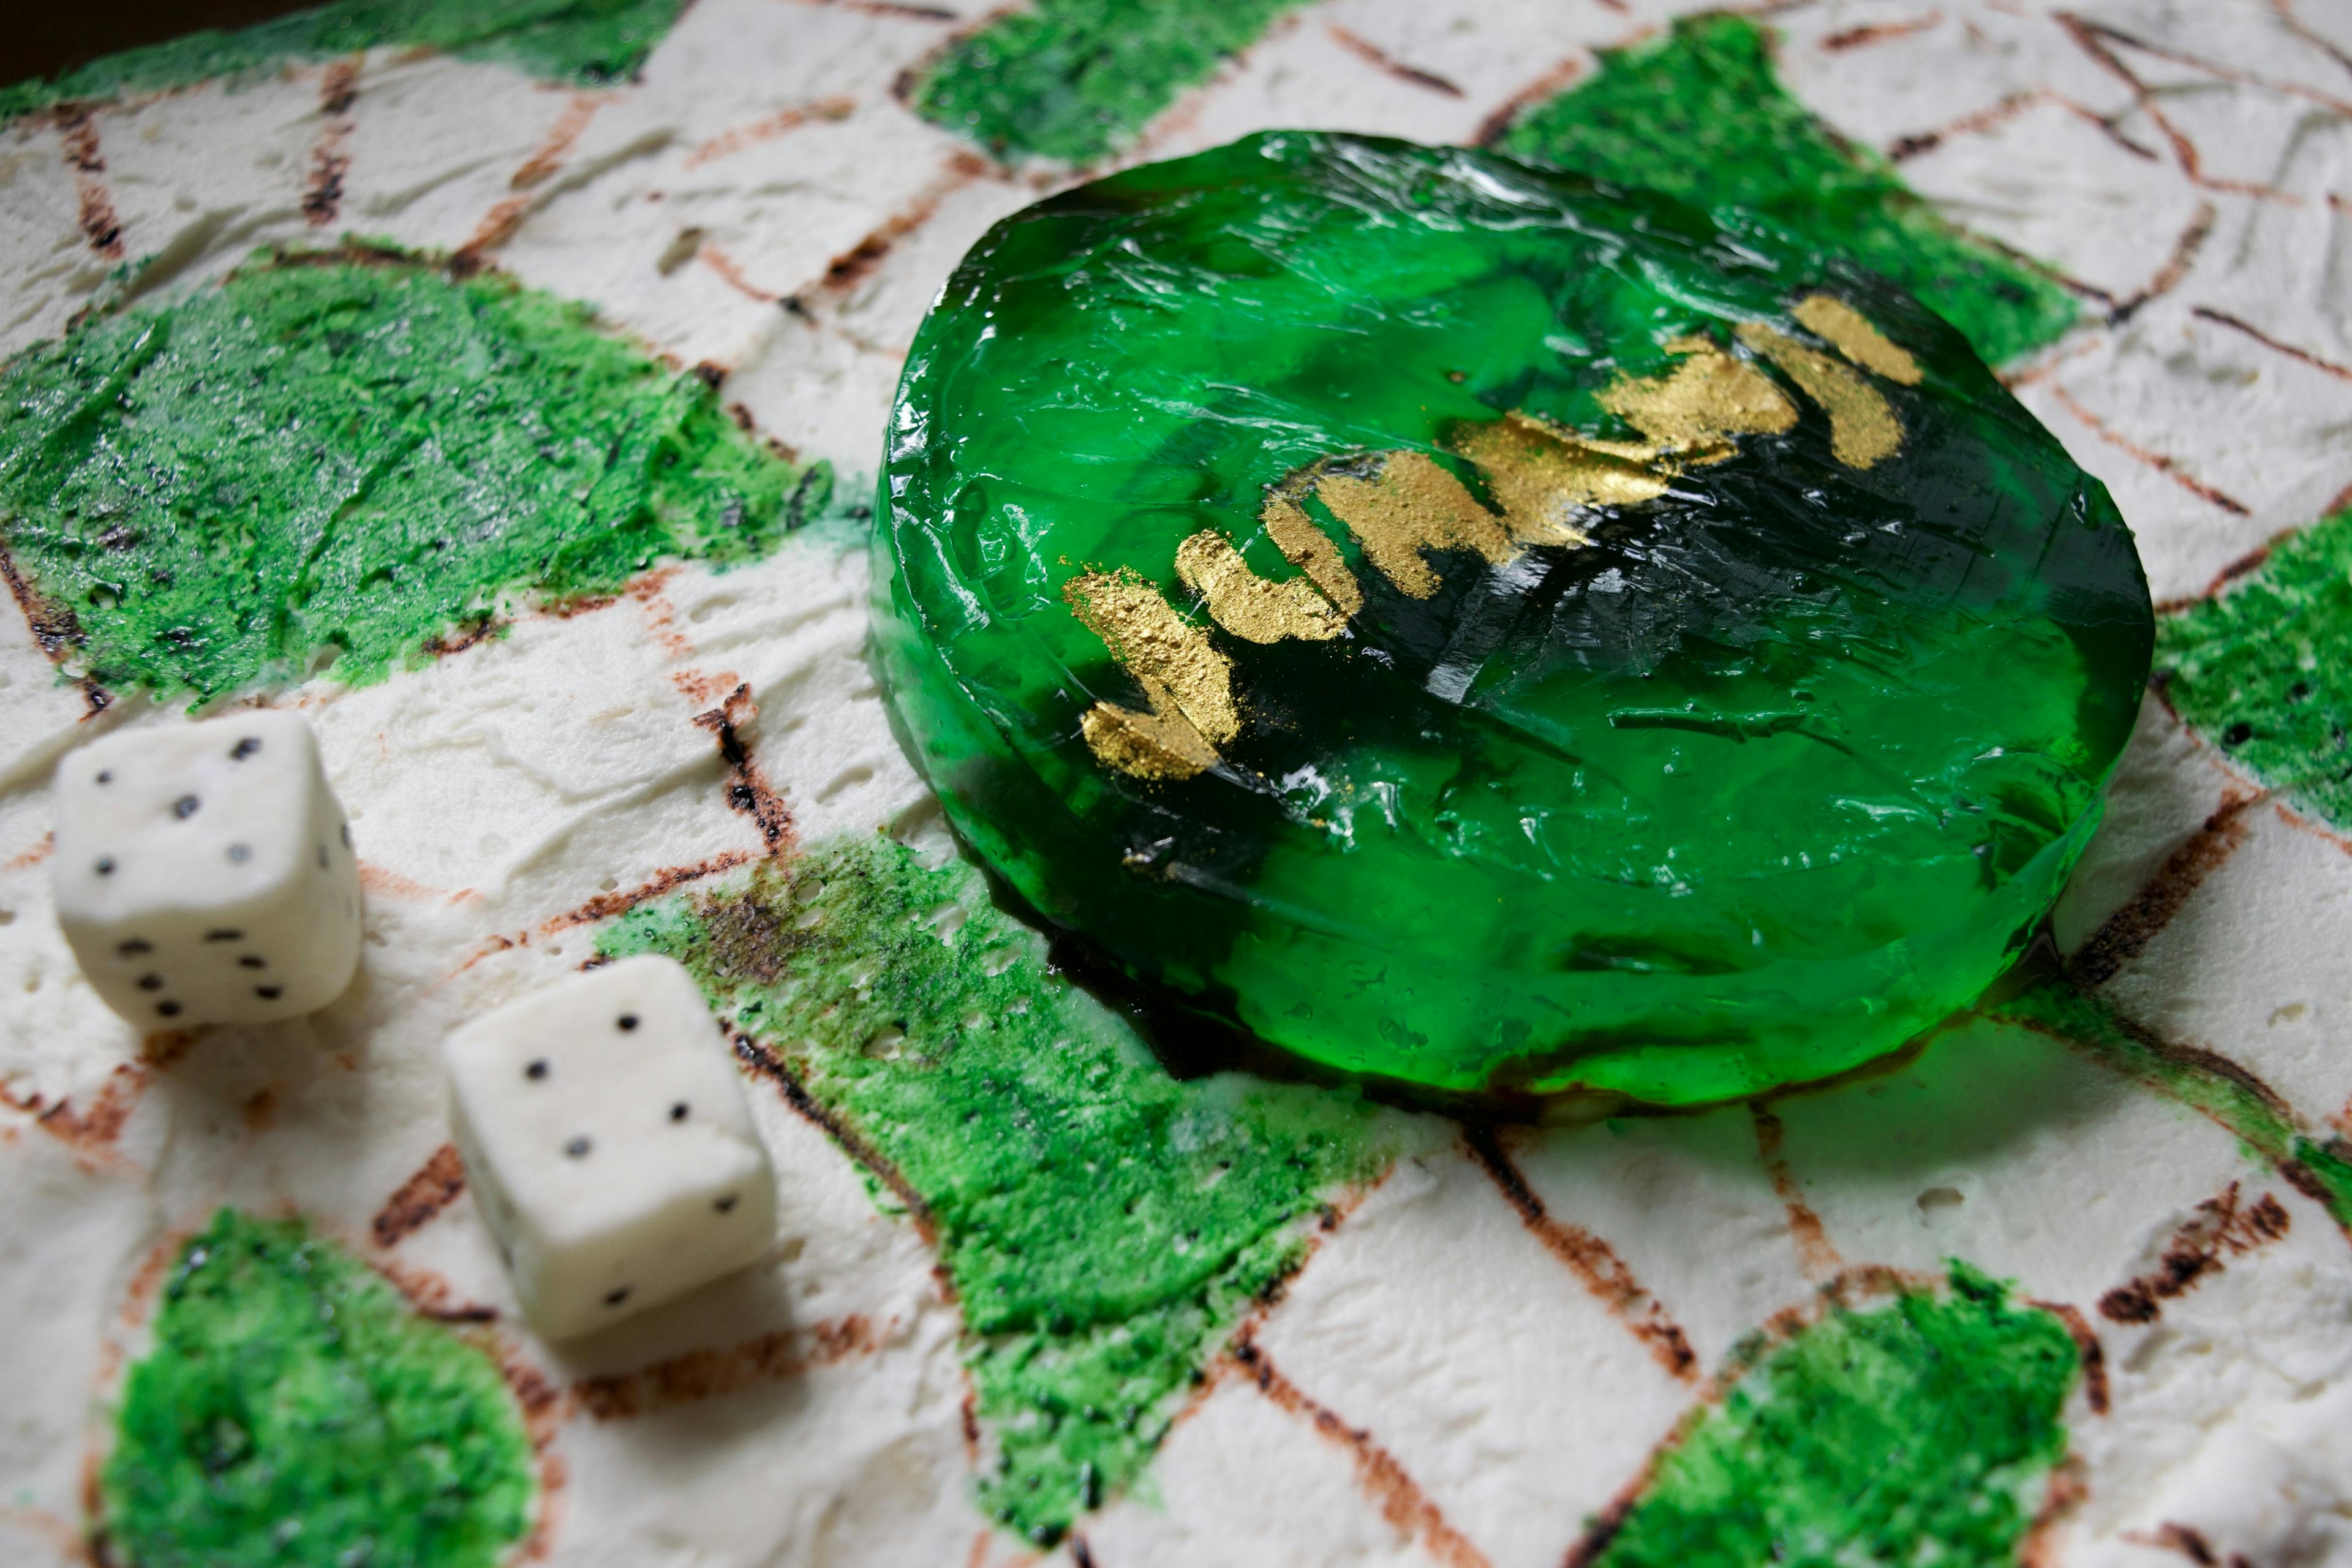
I was very, VERY nervous to transfer the jello to the board, but was able to do so with a confident flip. It wasn't perfectly centered but it was darn close, and even though the foil ripped off a bit of the jello, I trimmed it flat with a sharp knife and it looked very much like the glass in the movie.
But a few minutes later - tragedy! The wetness from the jello started to make the gold dust disappear, and then the black food coloring started bleeding out around the edges until I couldn't read the "Jumanji" at all anymore. I WAS SO SAD!!

The only solution I could come up with was to use the stencil again on top of the jello, and just use the glitter instead of food coloring as well. It actually came out beautifully!
And then it was finally time to put it all together. I placed the pieces on the board and tossed in the dice and there she is, in all her glory!
The Official Rating
Paul’s handshakes are only bestowed upon the bakers when they have baked something really exceptional. Josh helped with the judging this time and we decided the following.
My rating for how likely I am to bake these recipes again is: 10/10 handshakes
🤝🏼🤝🏼🤝🏼🤝🏼🤝🏼🤝🏼🤝🏼🤝🏼🤝🏼🤝🏼
The cookies were delicious! The textures and flavors were wonderful! What's not to like?!
My rating for my execution of this bake is: 8/10 handshakes
🤝🏼🤝🏼🤝🏼🤝🏼🤝🏼🤝🏼🤝🏼🤝🏼
I think the execution of the elements in terms of flavor and texture was spot on, but the decor definitely had room for improvement. And the leakyness from the jello was NOT pretty. I won't be winning Is It Cake? anytime soon, that's for sure!
To Sum Up
This was delicious and fun, and I think I've calmed down a bit when it comes to Bake Along (at least for this bake!) which made the process even more enjoyable! I am so glad I finally got to taste and work with grains of paradise, and I can't wait to find new tasty ways of enjoying their flavor. All in all, a very yummy experience!
Stay tuned for the bakes from Collection 5, Episode 3 - Bread Week!
Head to the links below for the other two bakes from Collection 5, Episode 2 - Biscuit Week!
I hope you have a beautiful rest of your day and thank you so much for being here!
💖, Katrina
Comments: