Itty Bitty Pug Stuffie
March 16, 2023

* Products linked below may be affiliate links. I may receive a small commission if you place an order through them (at no cost to you). For more, see our Affiliate Disclosure.
Let's Start at the Beginning
This post is about how I made a perfectly sized, tiny fabric baby toy for my friend's new baby. But first: some context. I am in my early 30s. That means that at the moment, I have 6 close friends with babies and 1 more with a baby on the way (that I know of!). It is officially BABY SEASON. And for me, that means it's baby gift season!
The Inspiration
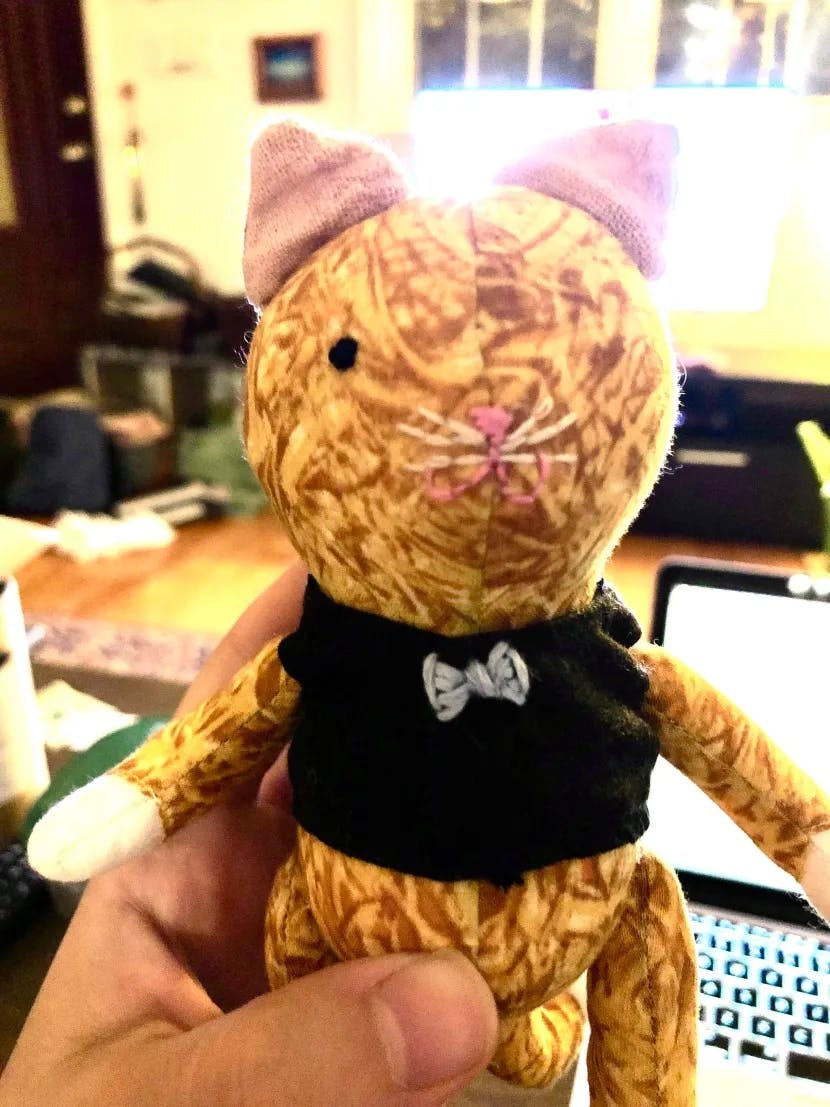
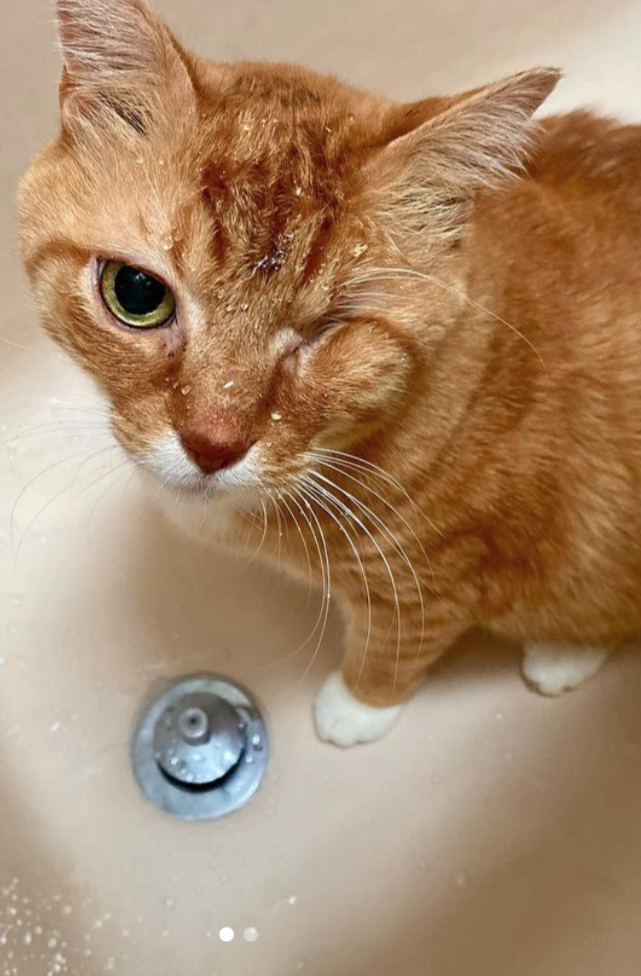
The kid I used to nanny for had a set of very small Sesame Street stuffies. He loved snuggling them during diaper changes, and I loved how they were the perfect size for him. I had never considered it before, but regular stuffed animals are about the size of an infant. That's just too big very small humans to carry around! The little guy's love of Elmo and Oscar inspired me to make my first itty bitty stuffie. It was for my friend Amanda's baby, Fern. I found the perfect pattern on Etsy (check out the amazing pattern here!), and got to work on making her cute little one-eyed kitty, Peter Falk.
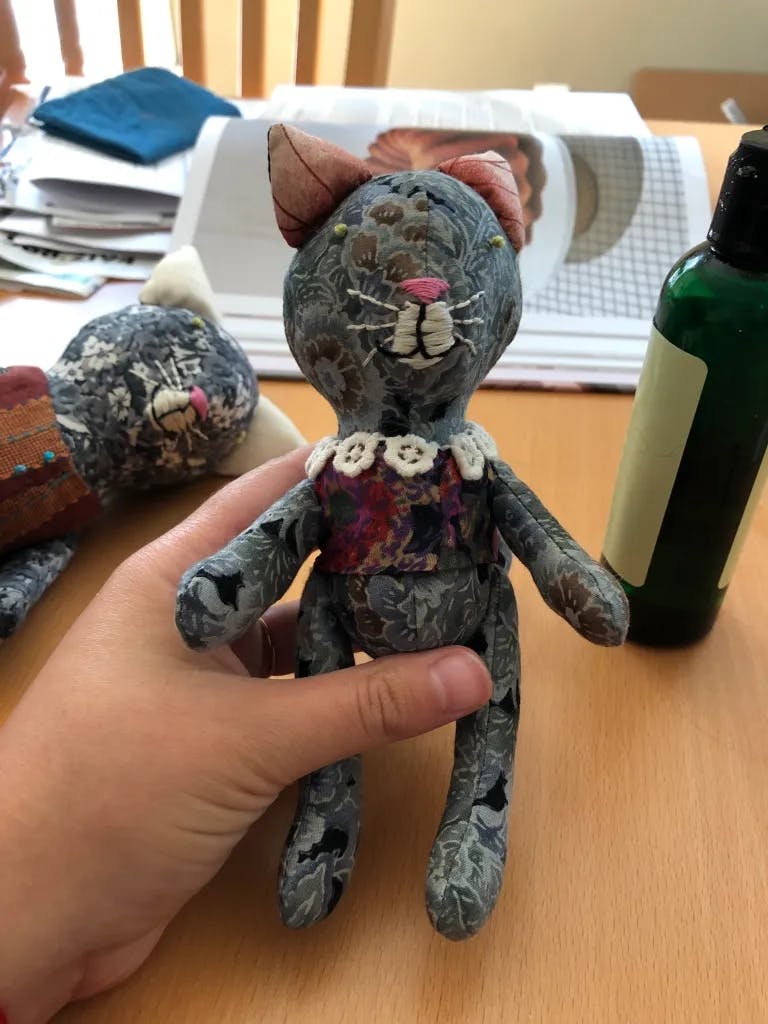
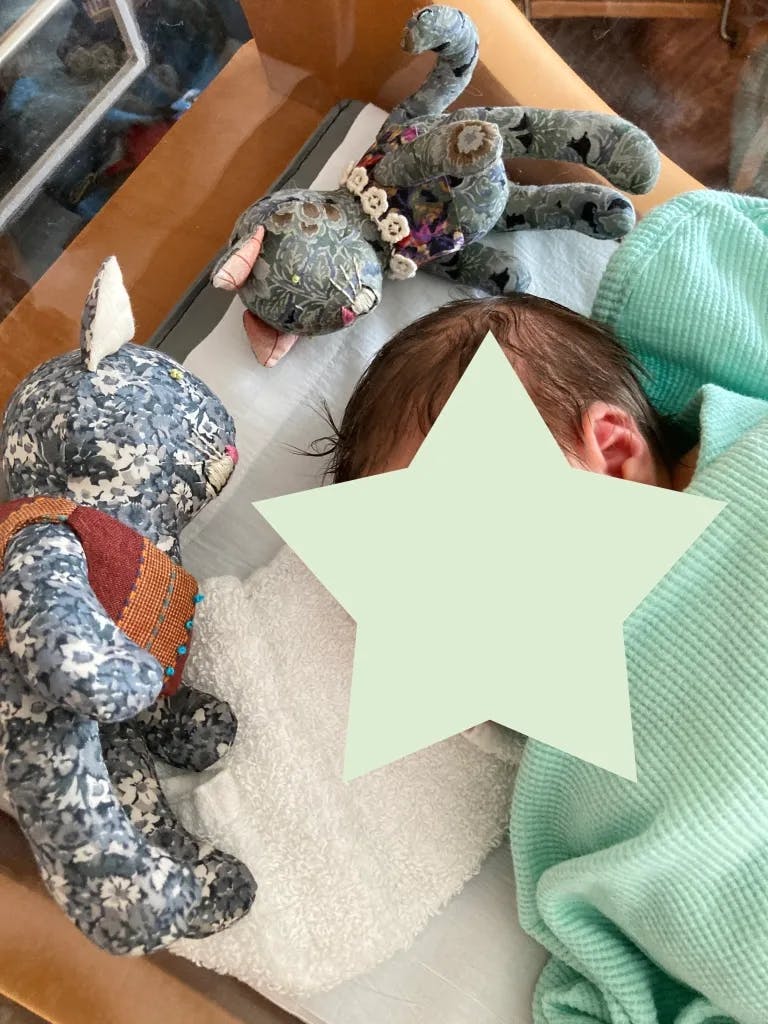
Then my childhood bestie Hester told me she was pregnant! Her love of her kitties Kimchi and Barley is undeniable so it should go without saying that I had to make the pair for her baby Leora. Kimchi is much bigger than his sister, so I made a slightly larger version of the pattern for him. You can see this best in the hospital picture on the right! I went a bit more abstract in the fabric choices and had fun with the clothing. Barley has one very orange paw, so I fussy-cut the fabric of her left arm to represent that.

College roommate Marybeth and her baby Rupert were next, and another little fabric stuffie was on the way. This time of Winnie the dog - a mini Winnie if you will! I changed the cat pattern to add a longer snout, floppy ears, and a thinner, straighter tail.

Which Leads Me to Now
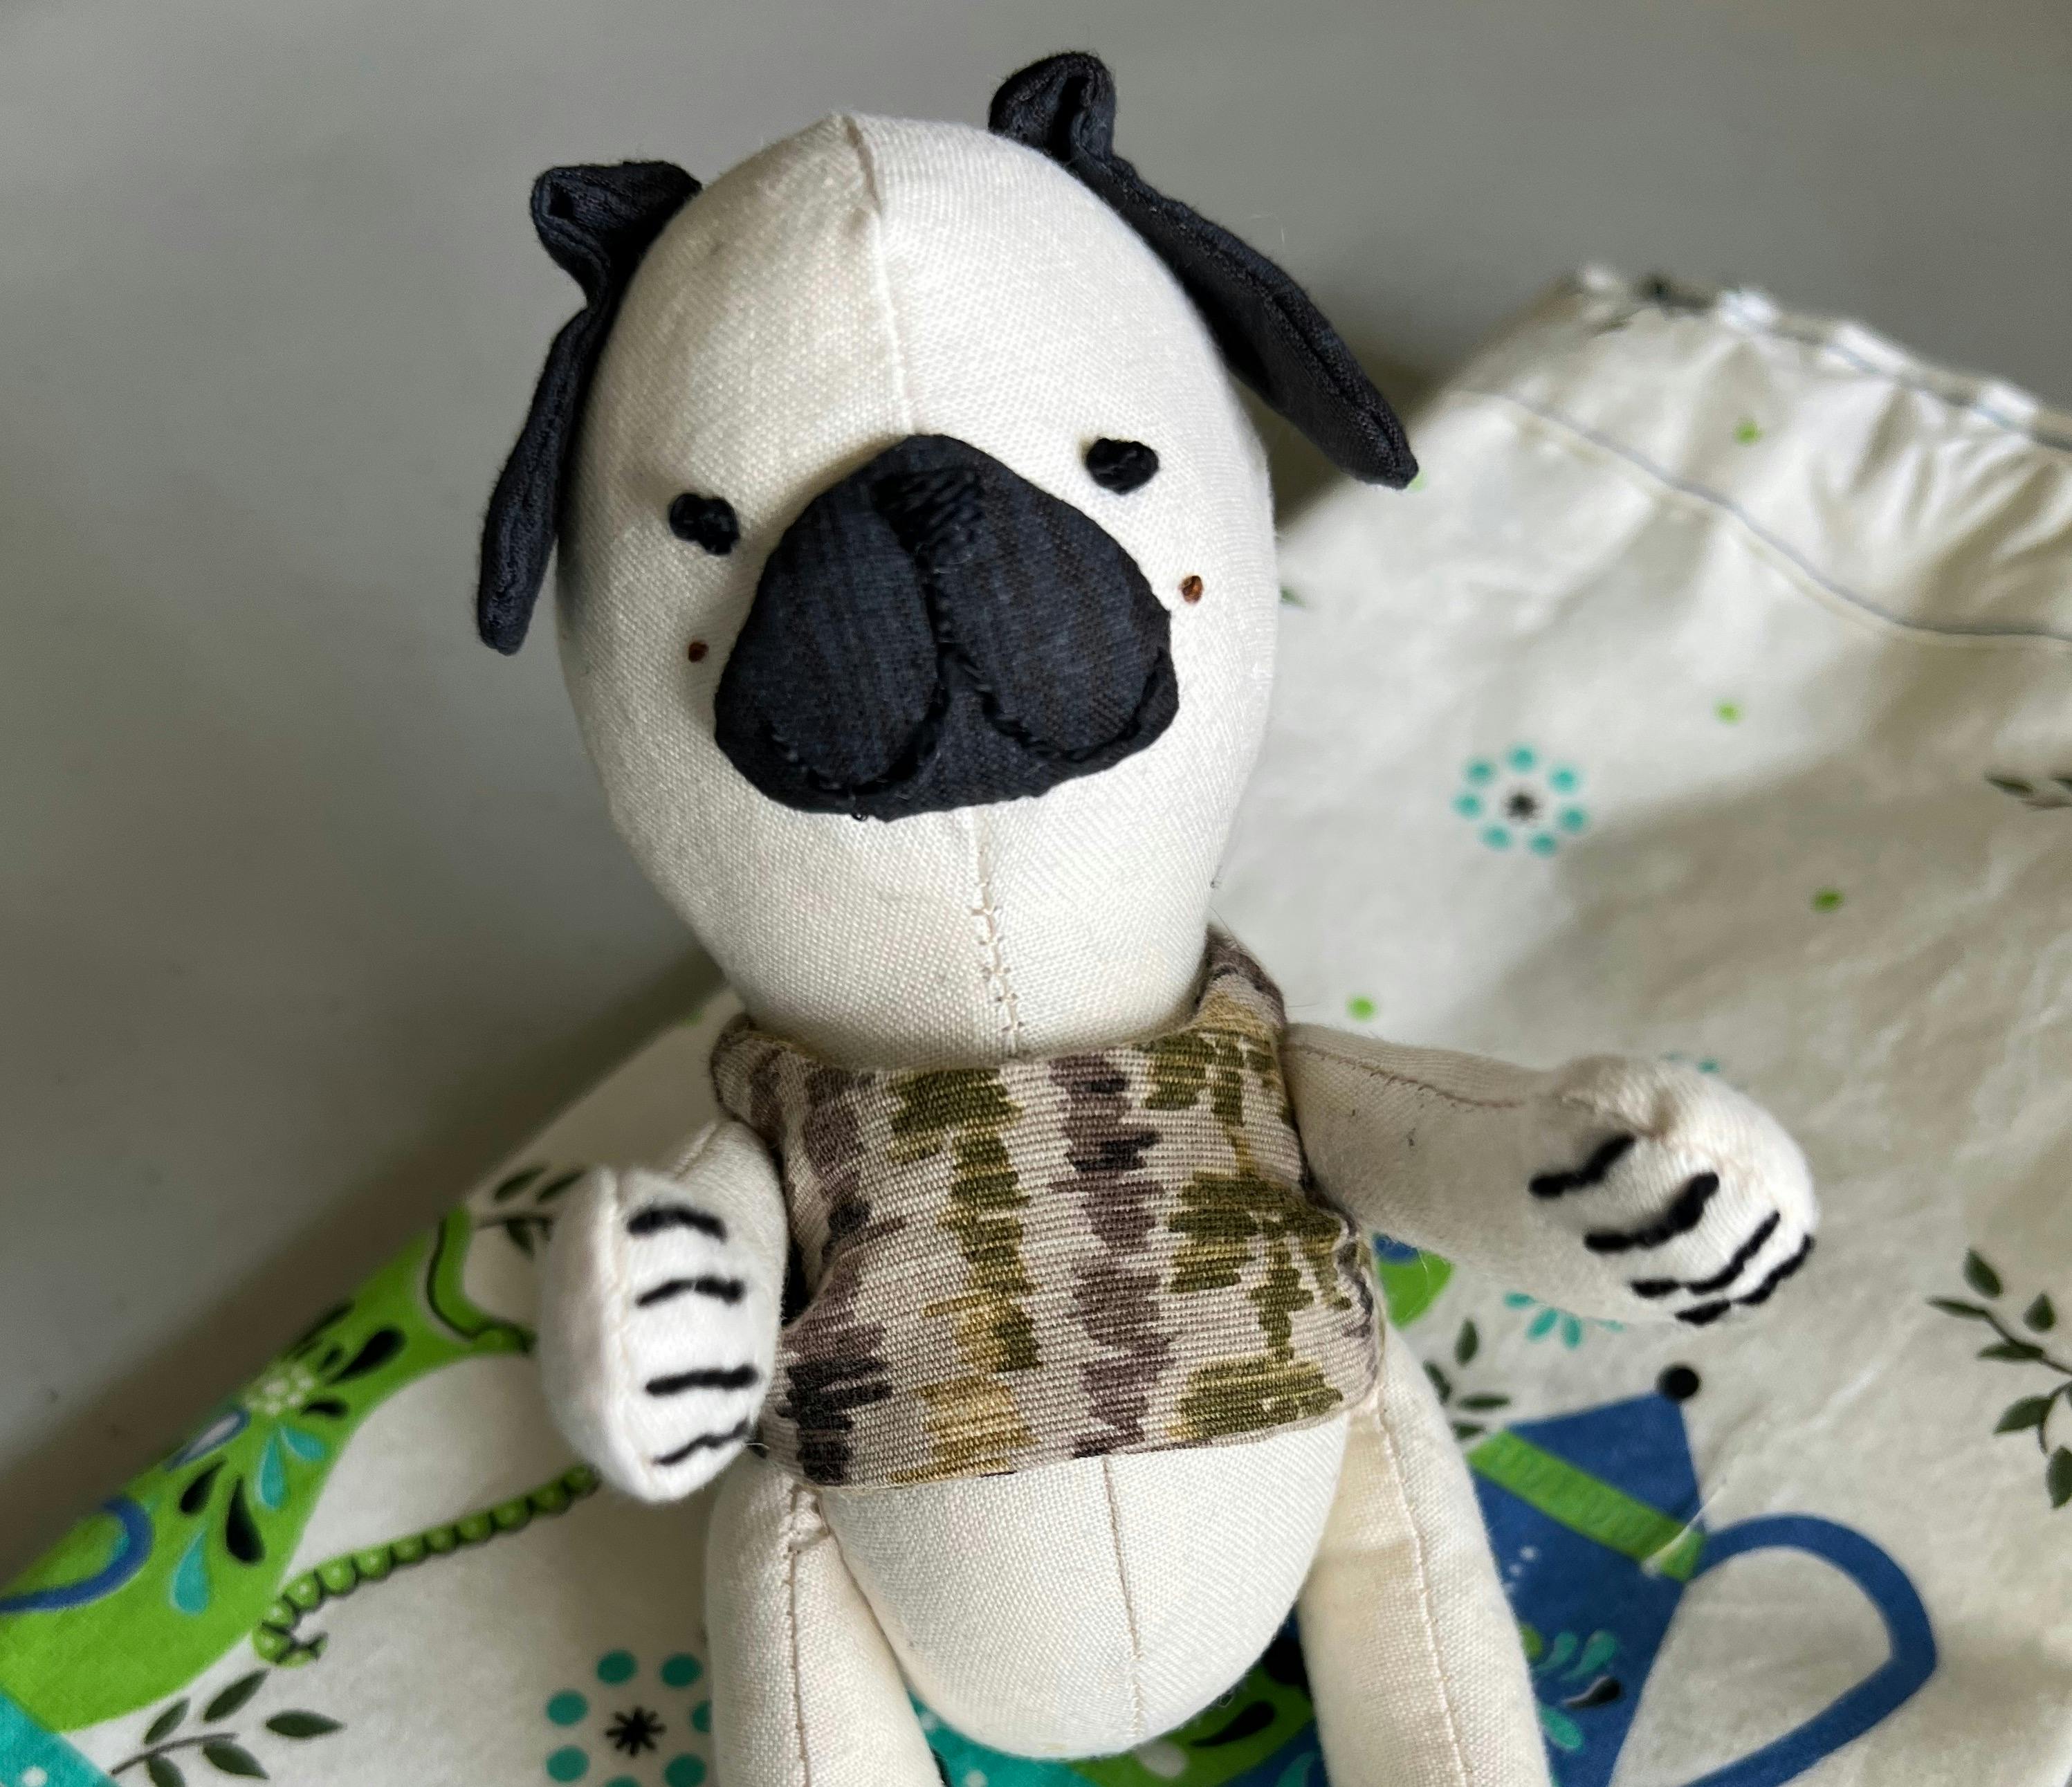
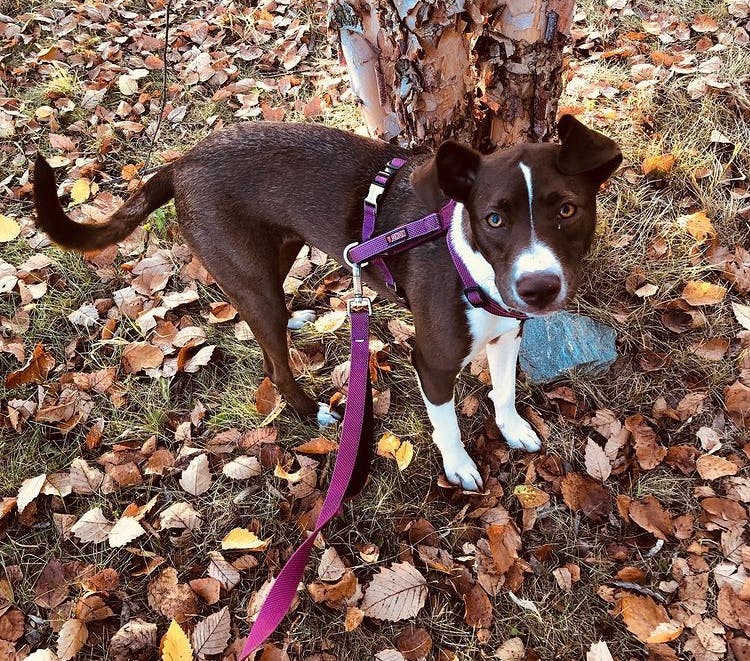
A few months ago, my college roommate and best friend Kayla told me that she was pregnant with Stella. Naturally, it was time to get to work making a replica of her pug, Brexley. I started the same way I always do when I make these fabric stuffies - getting fabric and supplies from my mom's stash! My mom is a fiber professional and has a MASSIVE amount of fabric (she makes art quilts and repairs antiques! Check out her blog here!). I am sooo lucky and grateful that she is always happy to provide supplies for my projects. Thanks, Ma!
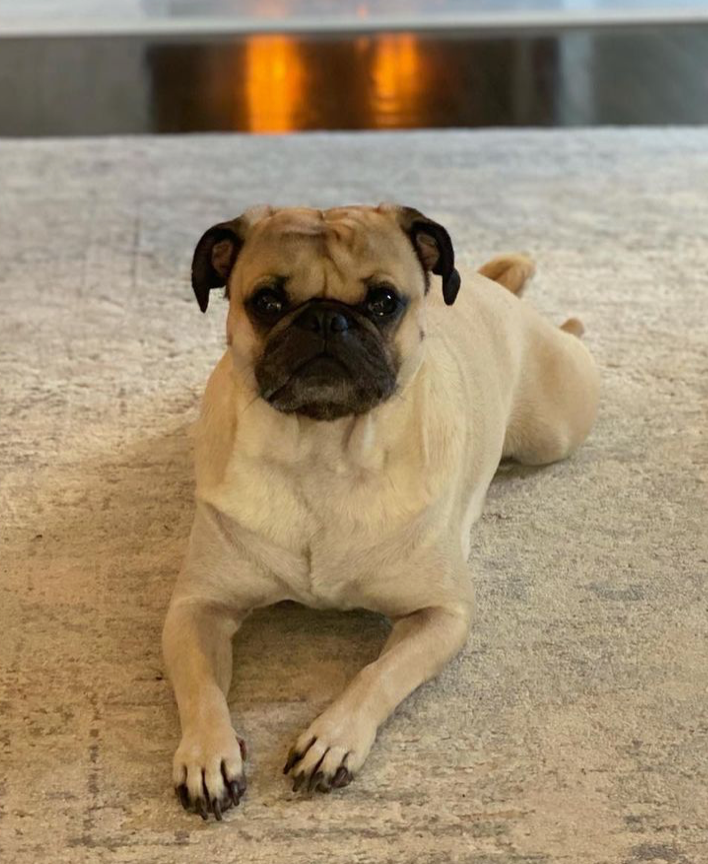
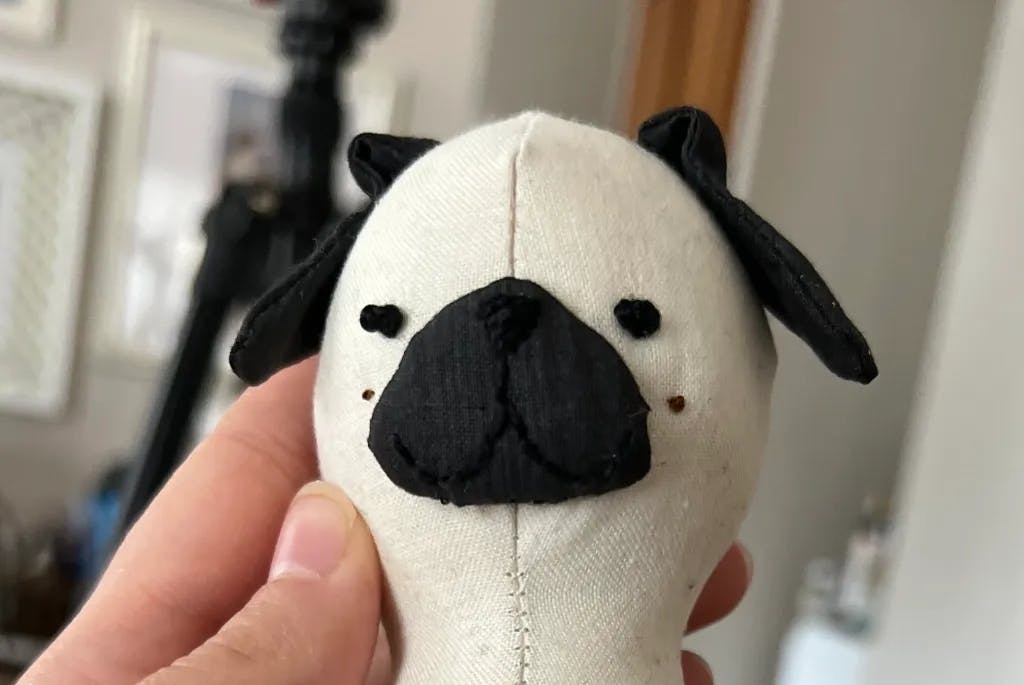
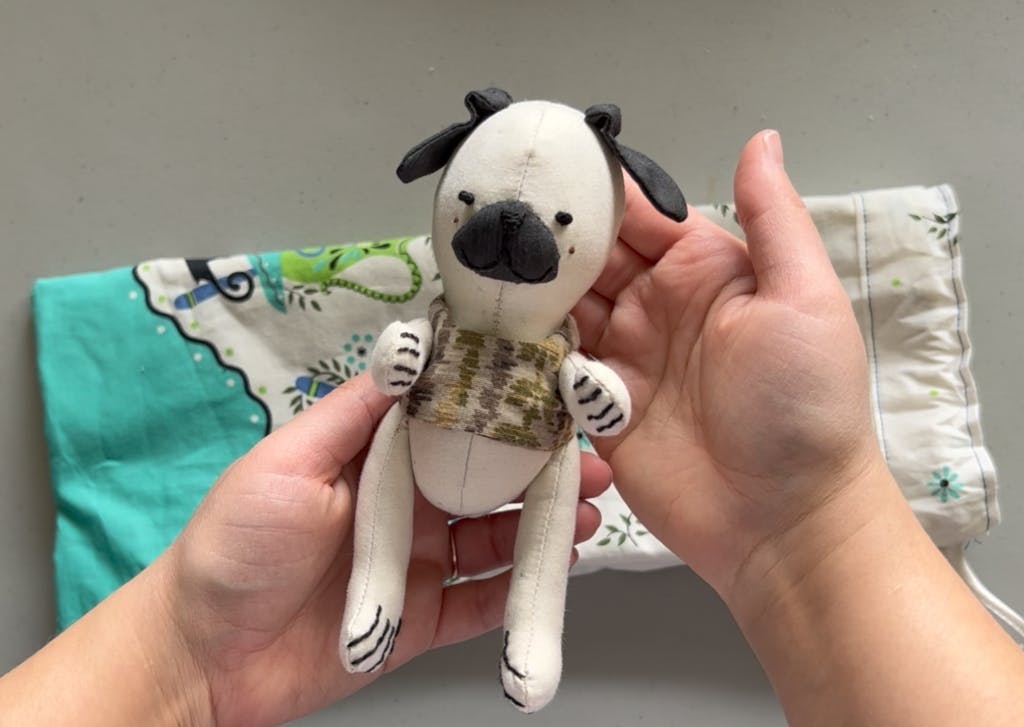
For Brexley, I grabbed a solid, light tan for his body, a dark wood grain print for his snout and ears, and a shiny black embroidery thread for the details. My mom suggested a cute way to make his squooshed face, and I headed home with a plan. It was time to make the newest baby coming into my life her very own Brexley the pug stuffie!
How I Made Brexley
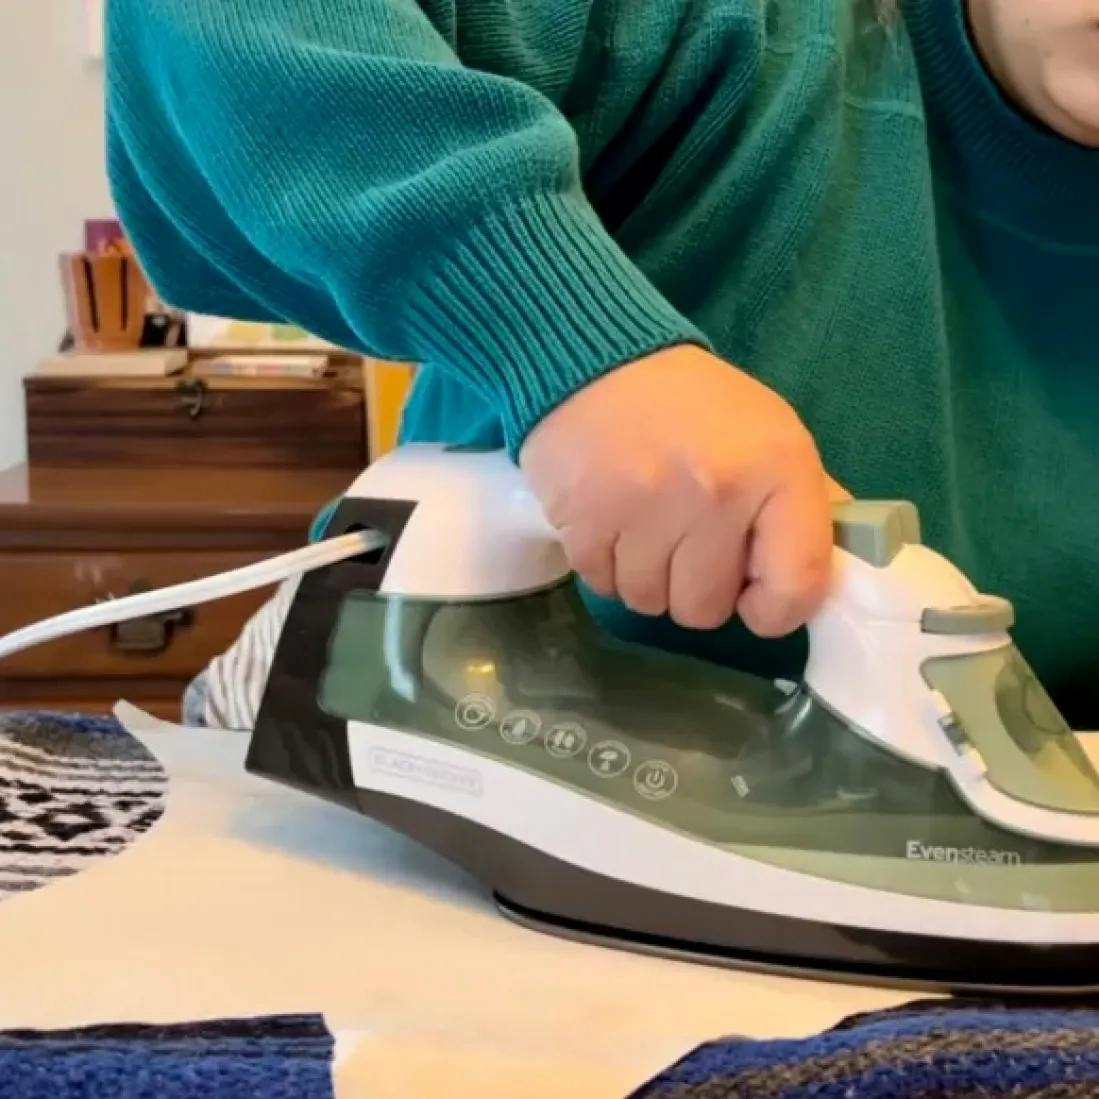
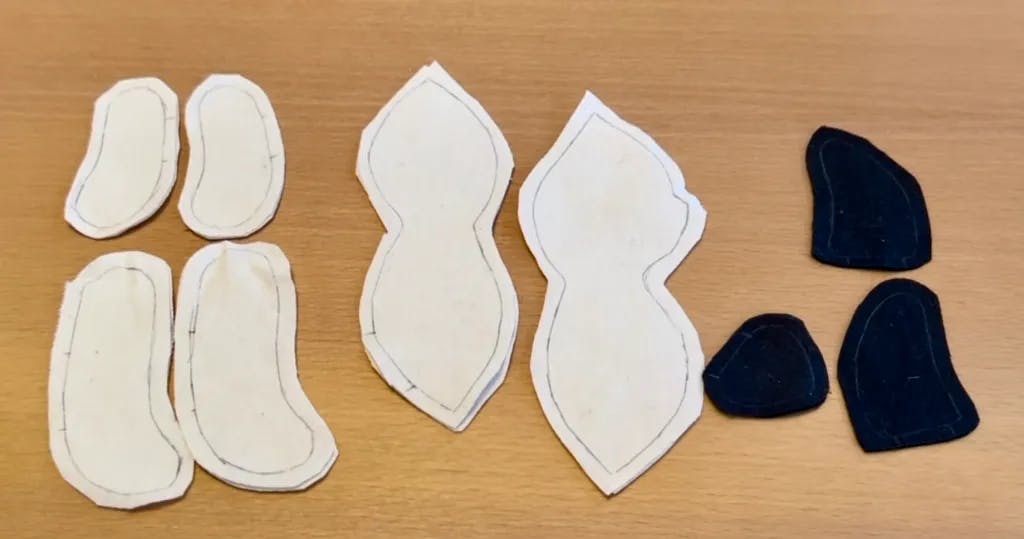
Prep Step 1: Ironing and Cutting out the Pieces
I started the only way you are supposed to start a fabric project - by ironing. In the past I had a distaste for ironing. I avoided it as much as possible. But, over time, I'm starting to enjoy it more! I try to feel awed by the way steam and heat work together to relax the fibers of the fabric. It's like a little steam sauna! I could use that for my shoulders...
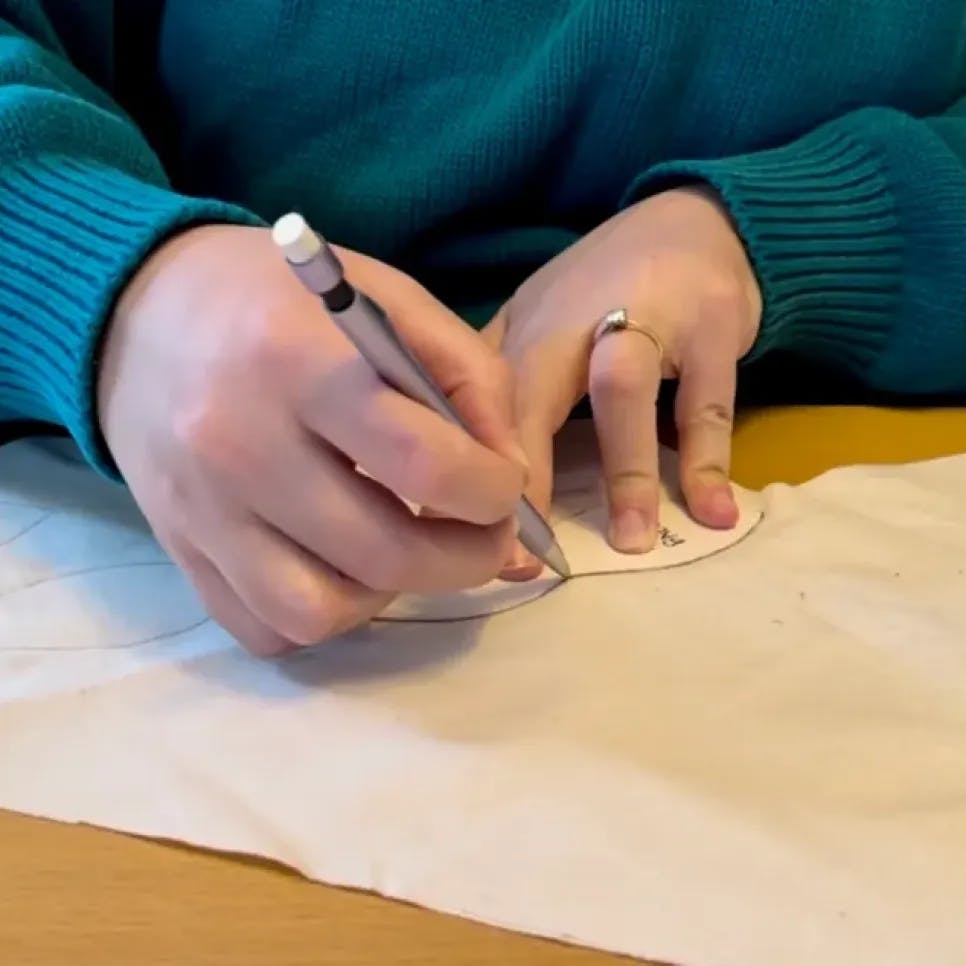
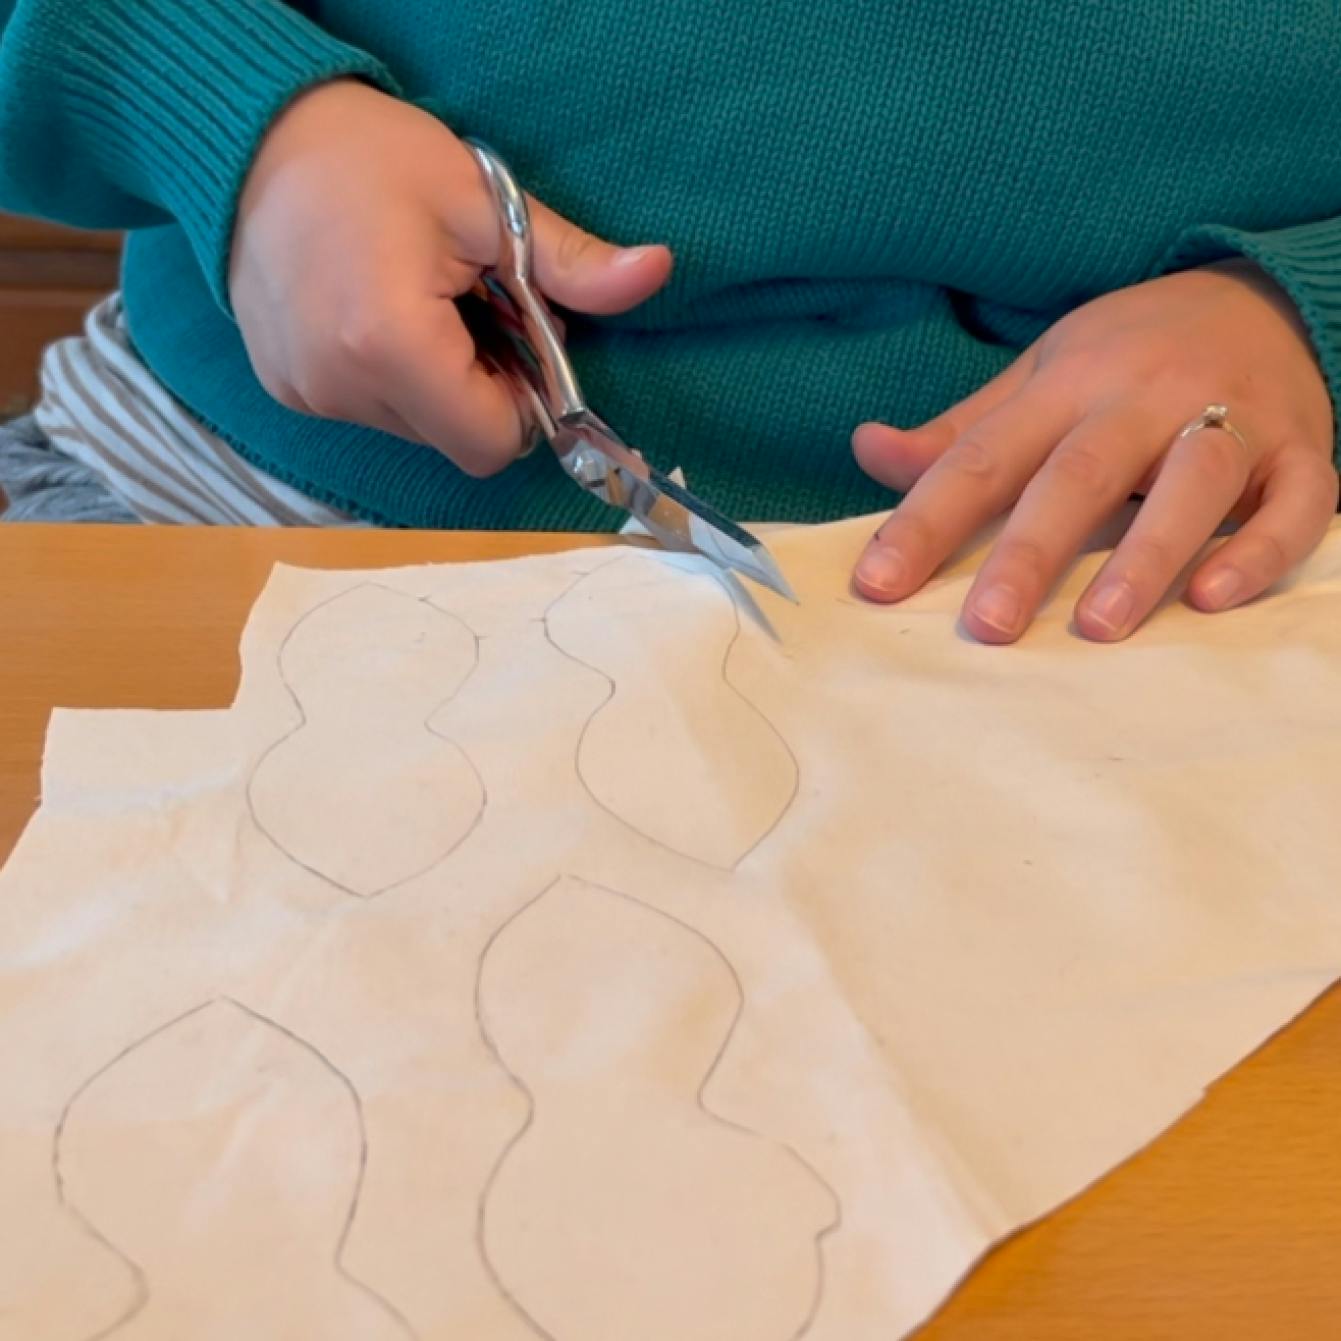
After ironing, I traced my pattern pieces onto the fabric and cut out the pieces. I cut out 2 for the front, 2 for the back, 4 each for the arms and legs, 4 for the ears, and 2 snout pieces. Brexley has a curly tail which intimidated me construction wise. I decided to leave the tail problem for future Katrina to figure out.
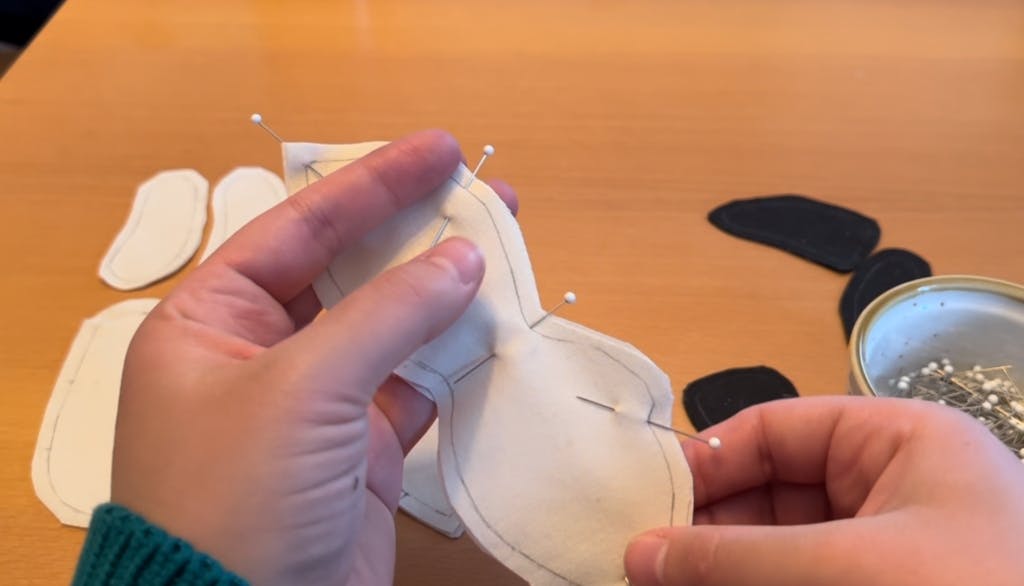
Prep Step 2: Pinning
After cutting out everything (minus the tail), I pinned the back pieces together along the back seam, and did the same with the front. It is important to line the pieces up perfectly! Otherwise the pencil lines might show, which would leave the finished project unbalanced.
Finally: Time to Sew the Pieces Together!
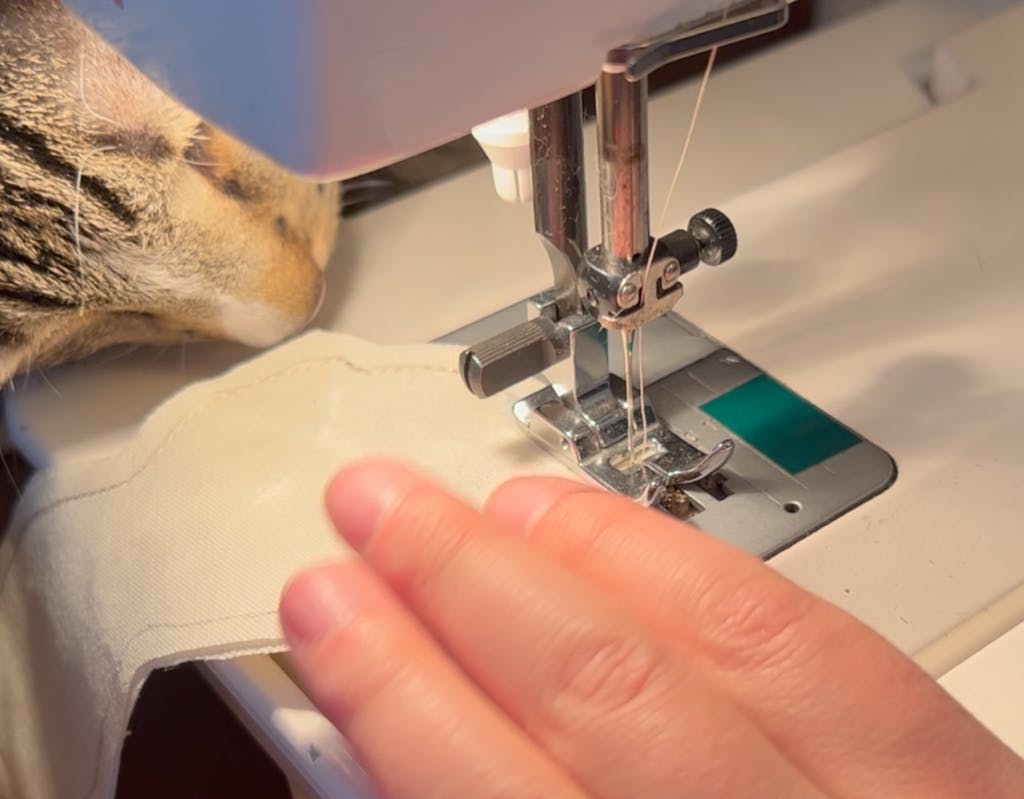
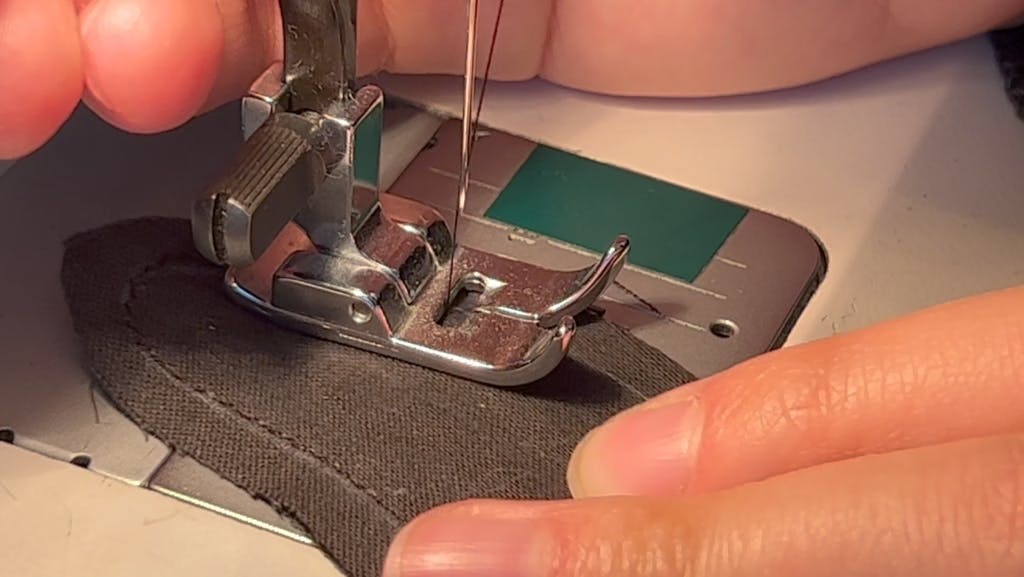
Finally! I turned on my trusty 1984 Elna machine and got to sewing. It's slow going with pieces this tiny and curved. I've learned that it requires frequent stopping to lift the presser foot and turn the fabric. If I push through without lifting the foot and try to just turn the fabric as it's stitching, I get wobbly angles instead of curves, which leads to misshapen lil' stuffies. It might be easier with a newer machine, but my sweet Elna is not the most advanced. ;)

Sewing: Body, Arms, and Legs
I started by seaming the fronts together and the backs together. I left a little opening on the back so that I could turn it right side out when the whole thing was done. Next, I pinned the two fronts to the two backs along the side seams, and stitched them together, carefully pulling the rest of the seams out of the way of the machine's path. This resulted in a perfect little 3D Brexley body!
Arms and legs were next, and I stitched each one with the same type of opening so that it was possible to turn them right side out. For the tiny pieces, I had to stop and start the machine to move the fabric A LOT - every few stitches sometimes!
Wish Me Luck: Time to Tackle the Troublesome Tail
After the arms and legs, I realized I couldn't avoid the tail forever and it was time to ENGAGE. I will spare you the details, but I spent HOURS trying to figure out a way to make a tail that curled. After going through about 3 or 4 tries, I finally tried the method I was hoping to avoid: the wire structured tail. It's honestly unclear to me why I was so against doing is this way, because it was actually really simple and super duper effective!
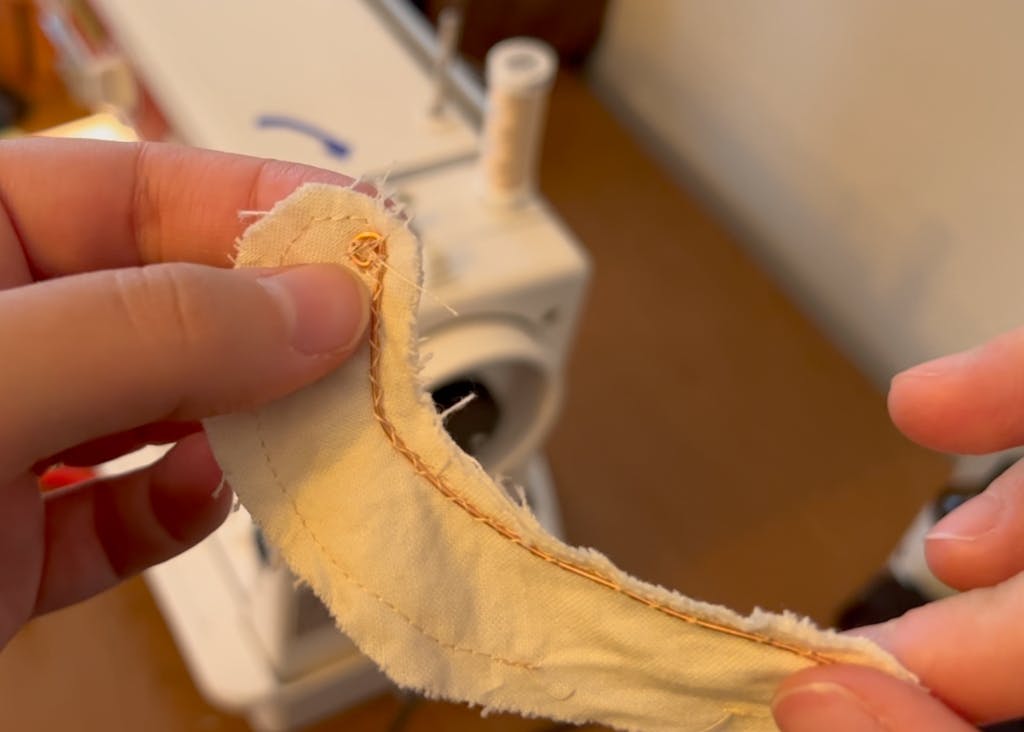
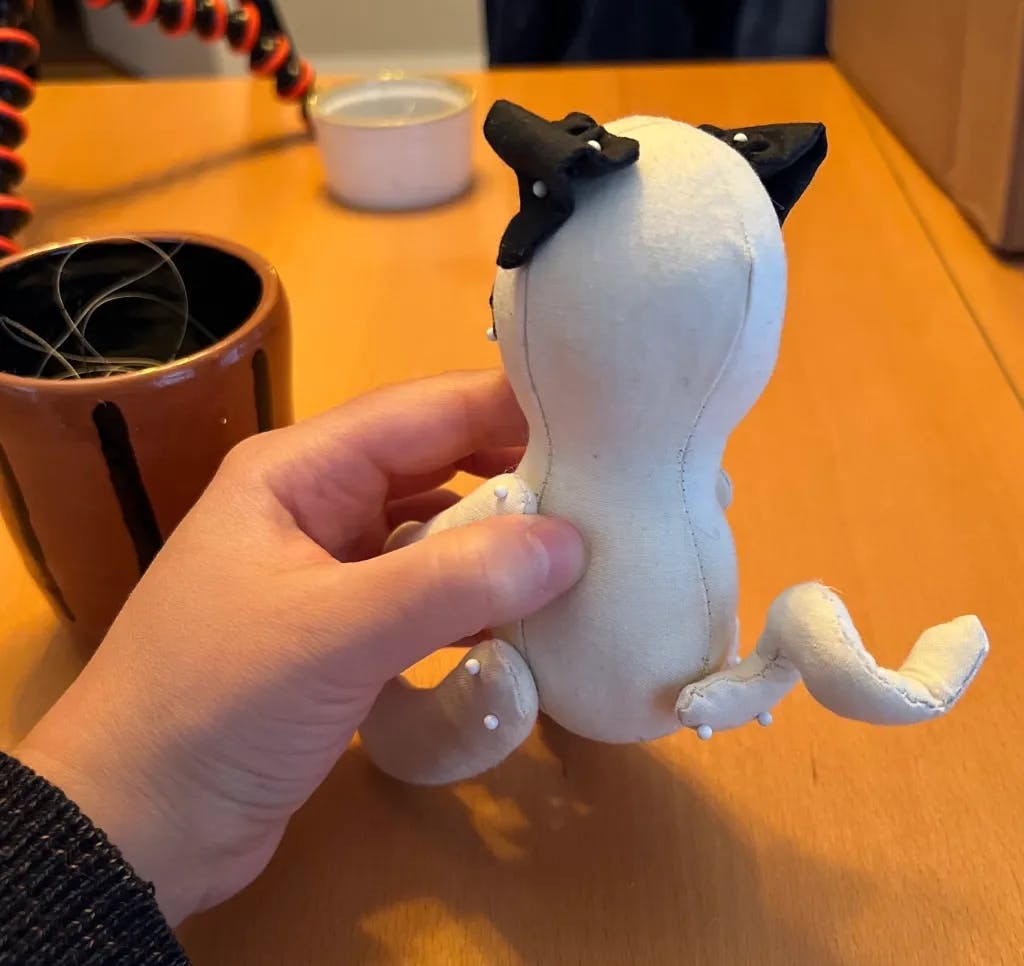
I simply ended up using the tail shape from the original cat pattern and a piece of 22 gauge jewelry wire. I learned from making Covid masks at the beginning of the pandemic how to successfully sew wire into place so it won't move. (THANKS COVID?) I made little loops on either end of the piece of wire with jewelry pliers and then zigzag stitched with my machine over the loops in two places to keep them secure. Then I zigzagged down the length of the wire and let me tell you, that bugger wasn't going anywhere. I was able to turn the piece right side out and stuff it like normal, and once it was stuffed it was super easy to coil into the perfect pug tail shape.
Sewing: The Face Pieces
With the tail done and out of the way, I switched the thread on my machine to black to do the same process on the ears and snout that I had done for the arms and legs.
When all the very small pieces were complete, I moved onto clipping the seam allowances so that the curves would lay smooth. "Clipping the seam allowances" means making teeny tiny cuts perpendicular to the raw edge of the seam allowance, being careful not to cut through the stitching.
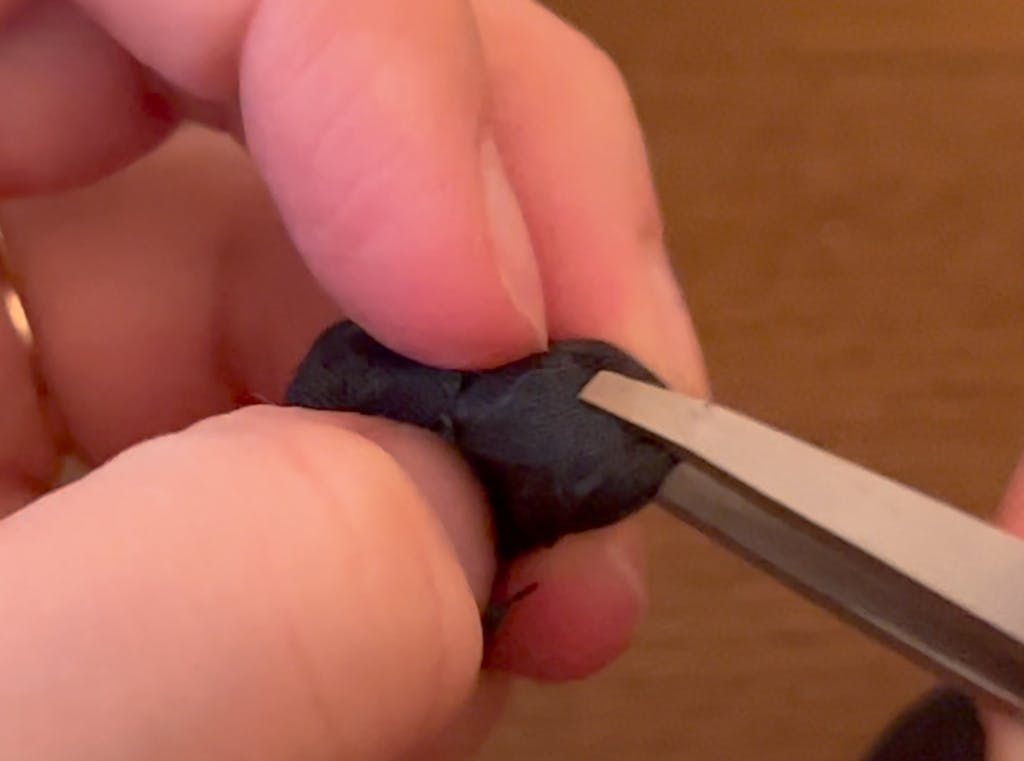
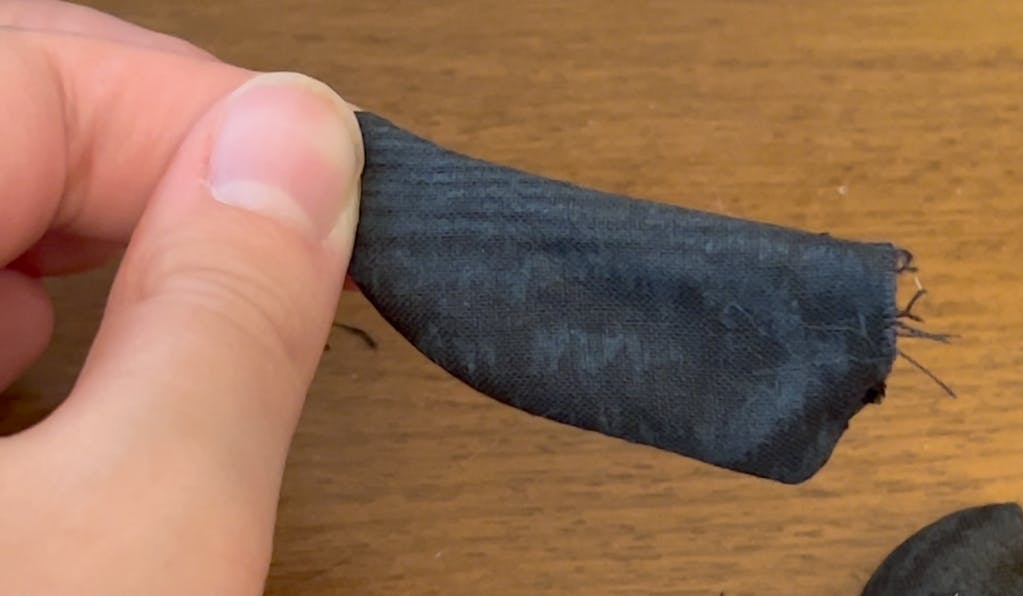
With all the allowances clipped, I turned each little piece right side out using a combo of very professional and fancy sewing tools: grippy Sephora tweezers to help with the actual turning out, and the handle of a paintbrush to poke out and smooth the edges.
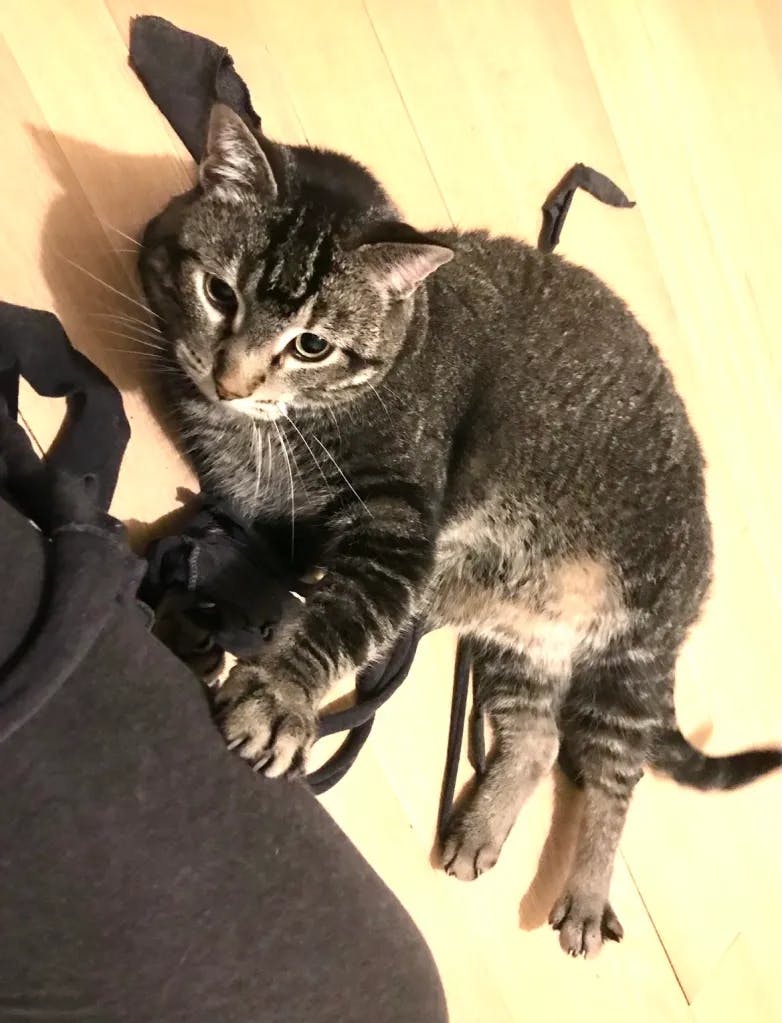
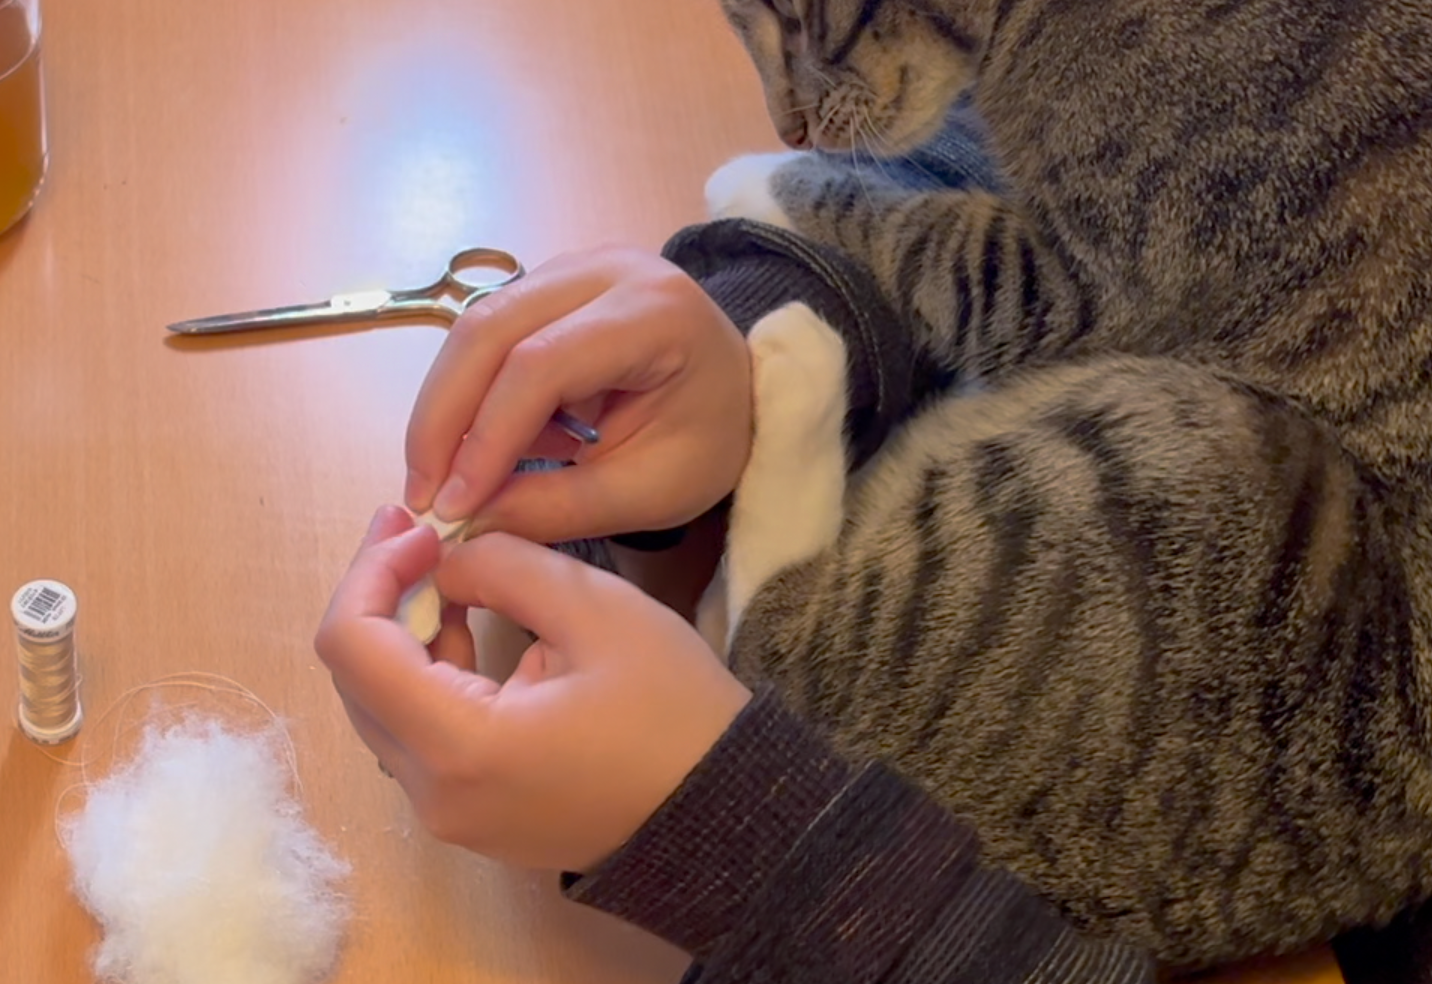
My Not-So-Favorite Part: Time to Stuff
Not gonna lie, stuffing these tiny guys is not my favorite part. Luckily, I had a companion (see photo). Brexley is stuffed with a recycled fiber fill and I used my trusty paintbrush handle to push the fill into the edges. Once full, I stitched up the opening with a ladder stitch, and pulled the knot through to hide it. Rinse and repeat with the body, arms, legs, snout, and tail (!). The ears did not get any stuffing, so I just stitched them closed along their bottom edge.
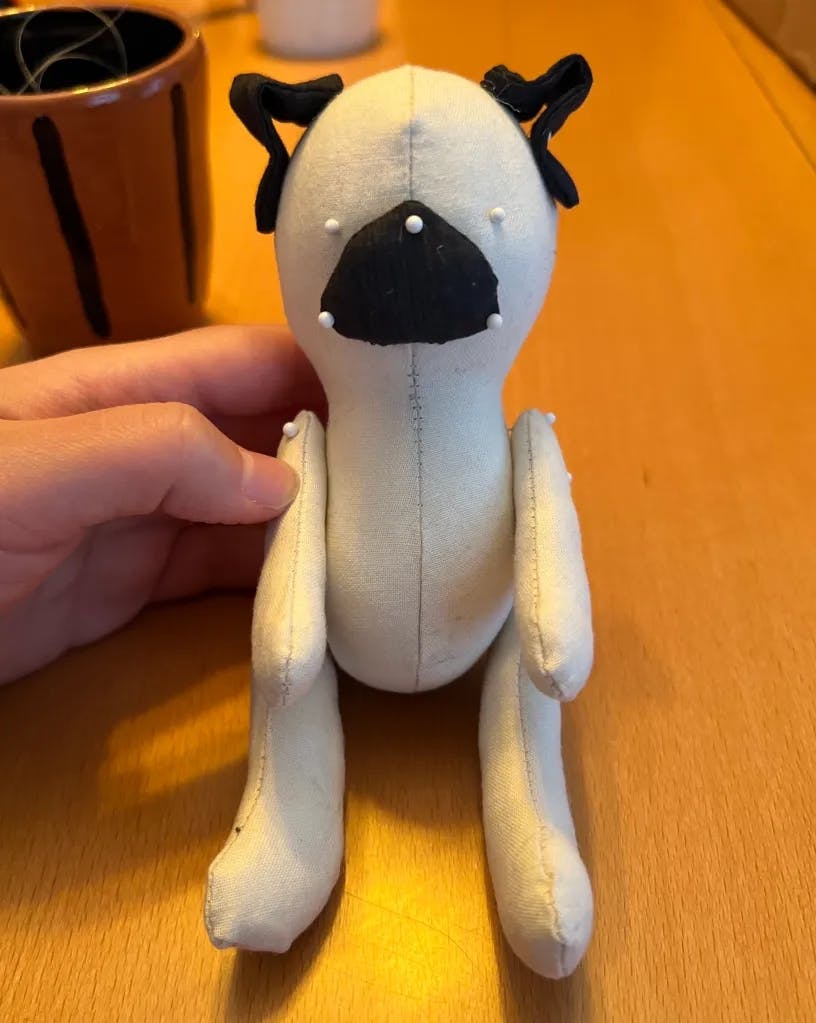
I then pinned all of the pieces together to get a feel for how this itty bitty pug was coming along and oh my gosh, this made me so excited. He was already looking so cute at this point! It was almost time for final steps: embroidered embellishments, assembly, and clothing.
Embroidery: Time for the Embellishments
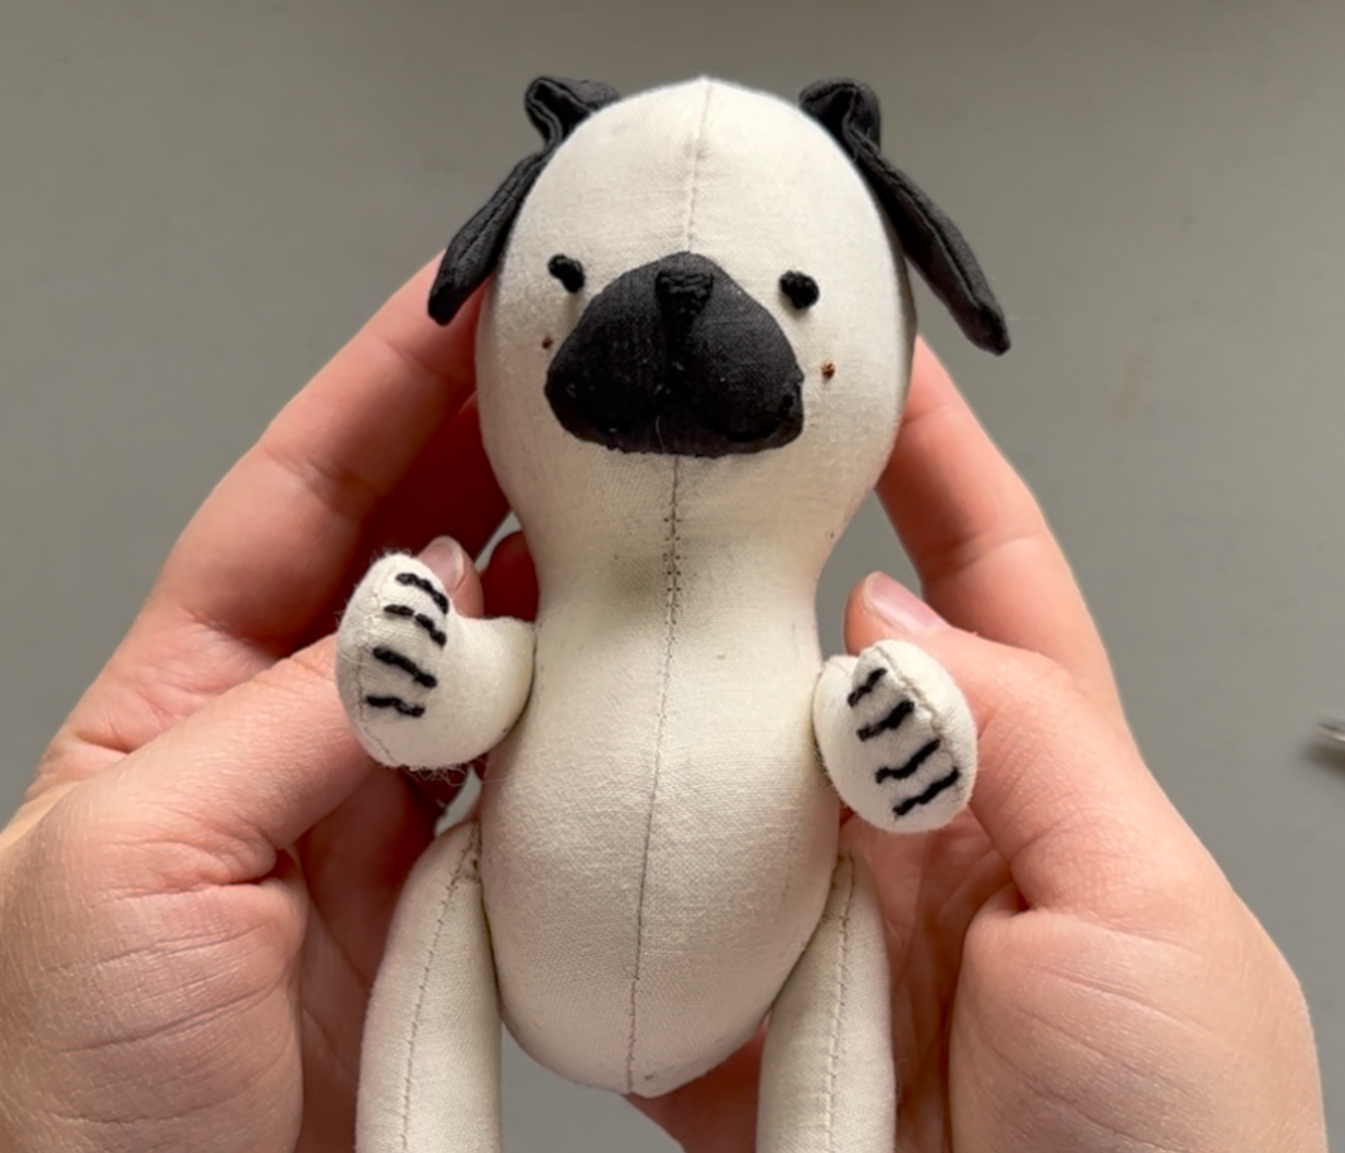
The embroidery embellishments for Brexley were pretty simple - just some lines on his paws for claws, French knots for eyes and his cute little cheek moles, and a simple straight stitch for his nose and mouth. I used the same shiny black floss for all of it, except for the moles which I did in a medium brown.
This is my favorite step! Not only is it fun to do, I feel like the tiny creature really comes to life once the embroidery is done.
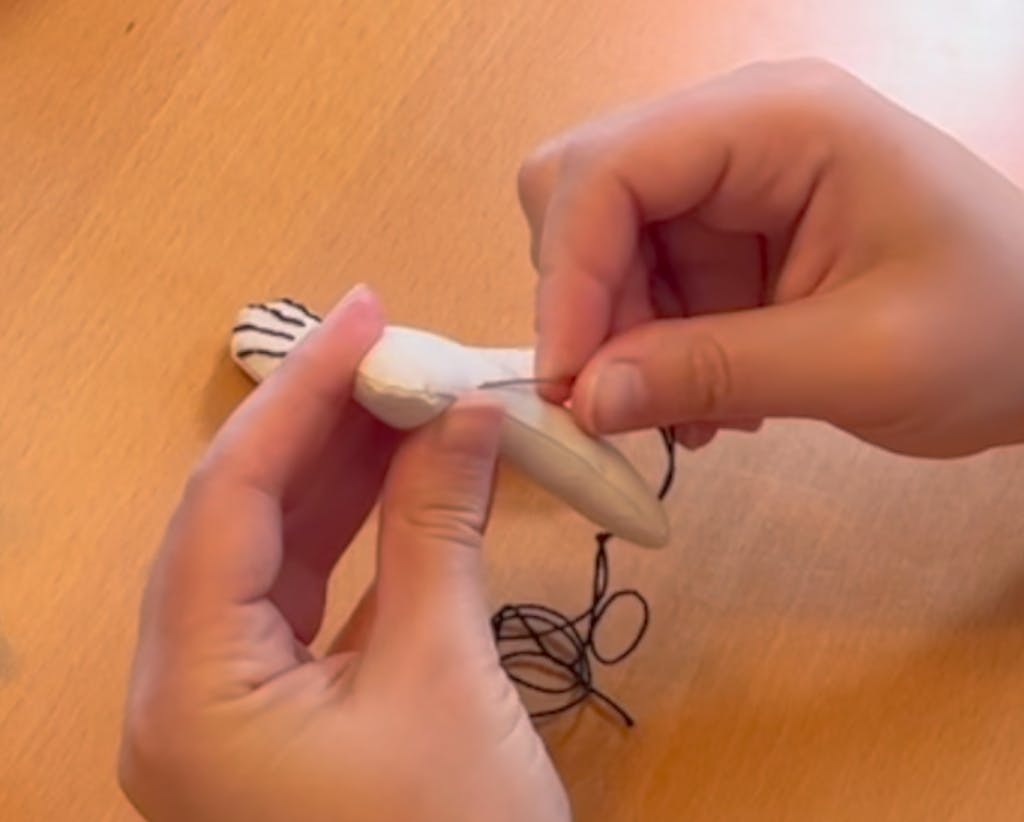
Assembly: Hand Sewing the Pieces Together
Assembling Brexley consisted of stitching his limbs and facial features to his body. After the menagerie of animals I have made, I've finally figured out the best way to do this: Make a tiny knot in a double thread, and hide it in the body. Stitch around the connection point twice. Make another tiny knot and also hide it in the body.
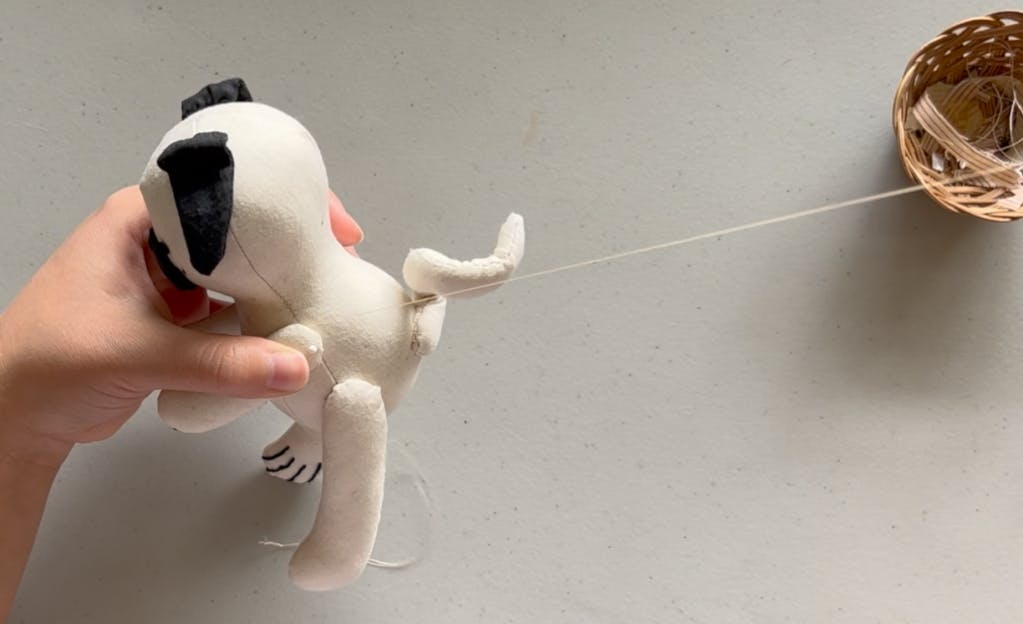
This is a moment where a video is worth a thousand words! I suggest checking out the video to fully understand this part.
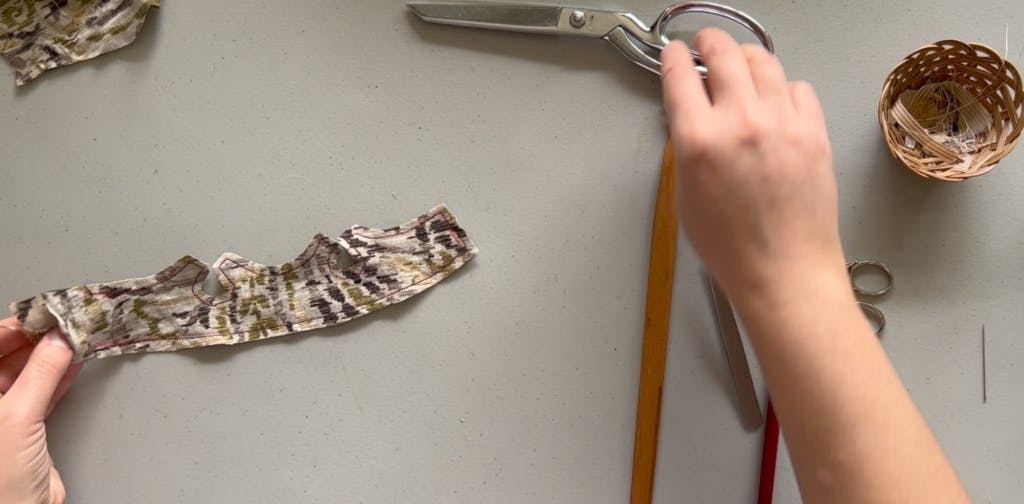
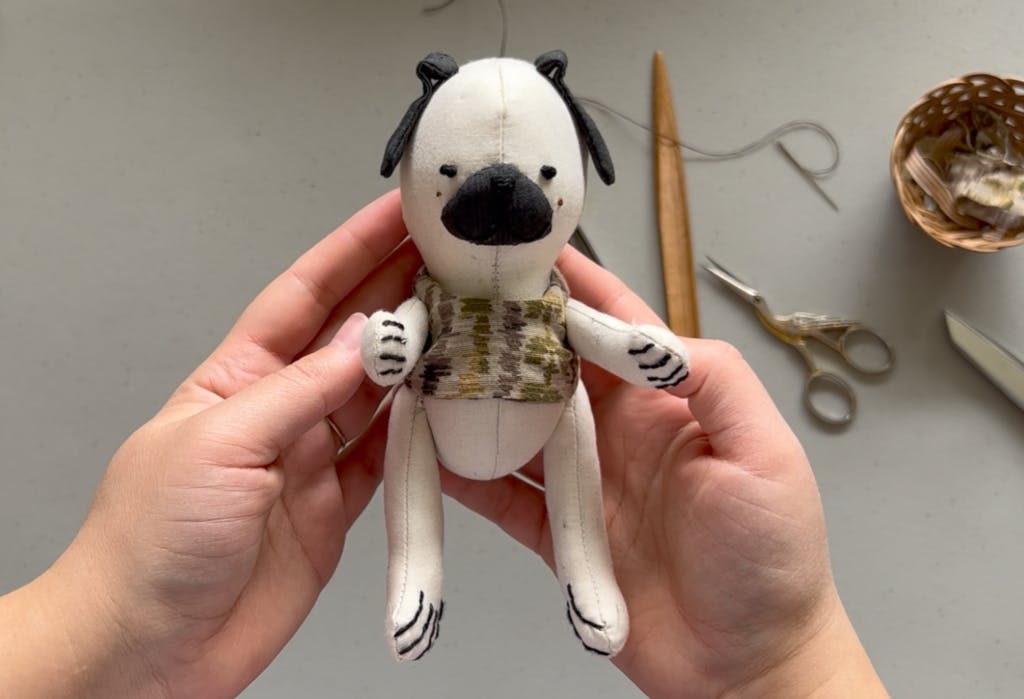
Finishing Touches: Brexley's Outfit
I decided that Brexley MUST have a little shirt. The original pattern came with a dress option, but I like using just the top part of it to make shirts and jackets. The fabric for Brexley's shirt came from our OTHER college roommate's bedding junior and senior year that I still have a pillowcase from for some reason. Thanks Ann-Marie! :)
The shirt is easy: two pieces sewn together, turned right side out, hand- stitched closed at the top of the shoulders to make arm holes, and then hand-stitched together along the back seam. So. Cute.
Final Step: Admire the Precious Puppy!
The boy is DONE! I made a little bag for him (because wrapping a stuffed animal in paper is HARD) and he and I were off to the baby shower!
Brexley goes home
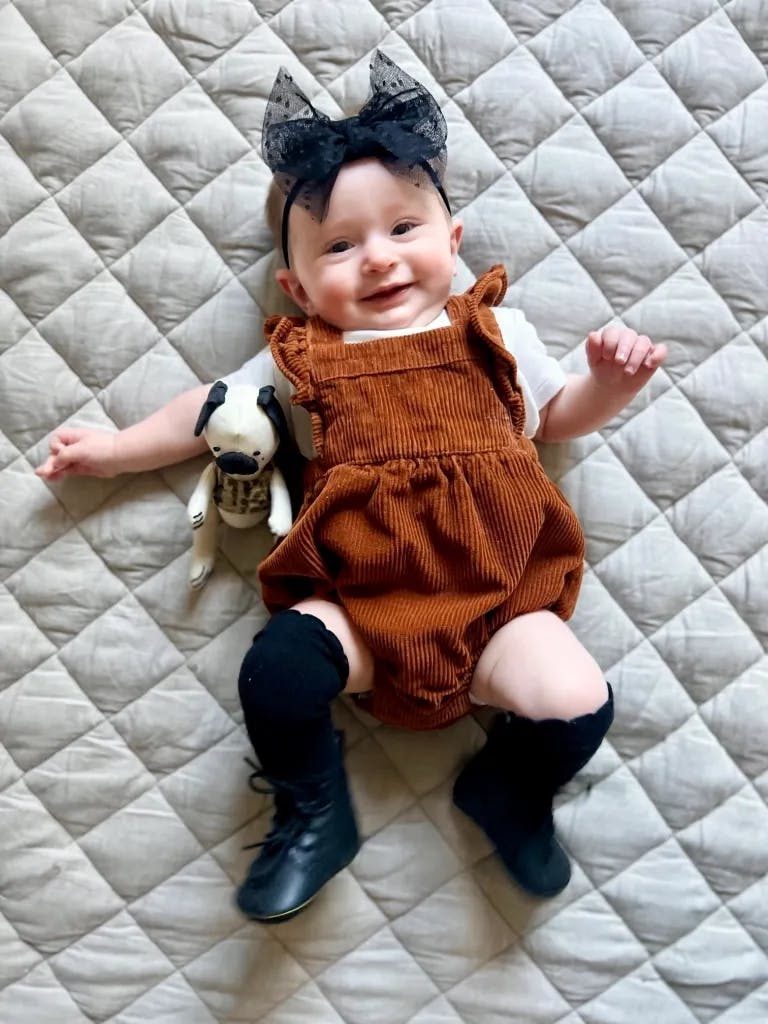
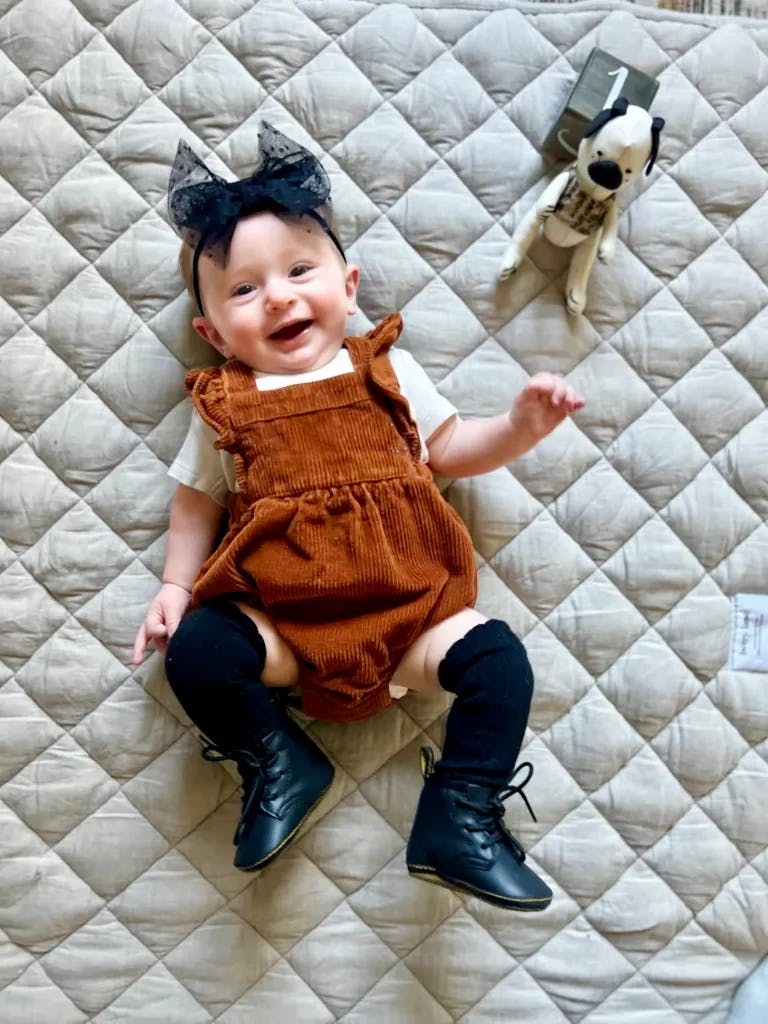
Kayla's baby shower was such a beautiful party! I think honestly that she and her mom should go into the event planning business, it was that incredible. (Kayla, Paula: Wanna plan my wedding?😉) It was so sweet to watch Kayla and her husband Kyle open the little bag and see the realization wash over their faces: It was their Brexley!

To me, this is a perfect baby gift for a few reasons. First, it's baby sized! I love the idea that this will be one of the first toys Stella will be able to pick up herself as she's learning to use her hands. The second reason is maybe a little sad. I don't have memories of the cat my parents had when I was born, and I think it's sweet that these little ones will have a tangible reminder of the animals that were a part of the family they were born into.
And third, um, it's adorable!
To Sum Up
It's hard to put into words how proud I am of this little guy. I think he captures the real Brexley's spirit, while being perfectly sized for a new human. Welcome to the world, Stella!
I hope you have a beautiful rest of your day and thank you so much for being here!
💖, Katrina
Comments: