Fabric Bridal Bouquet, Part 1: The Project Begins
March 13, 2023

* Products linked below may be affiliate links. I may receive a small commission if you place an order through them (at no cost to you). For more, see our Affiliate Disclosure.
This project is presented in 3 parts! Find Part 2 here and Part 3 here!!
A Project Begins
I love weddings. I really do. It is such a special ritual that encompasses so much and can be such a gift for all involved. I have been lucky to participate and witness some really incredible weddings (because I have such incredible friends!) and I have tried to make a little something for each of them to use on the day. The most elaborate was making the whole dang WEDDING GOWN for my friend Hester, but gifts for other special friends have included small personalized sachet (for holding the rings during the ceremony), monogrammed handkerchiefs (for catching happy tears), and garters (for… you know).
When my BFF Lauren and her then-boyfriend Jake started talking about “getting married someday”, the conversation naturally turned to what I could make for Lauren to have on the Big Day. One of the many qualities I love about Lauren is that she dreams big, so when she said, “What if you make my bouquet out of fabric flowers?”, I immediately and excitedly said yes and then immediately started freaking out.
How in the world do I even start a project like this?!
Step 1: Planning
The Vision
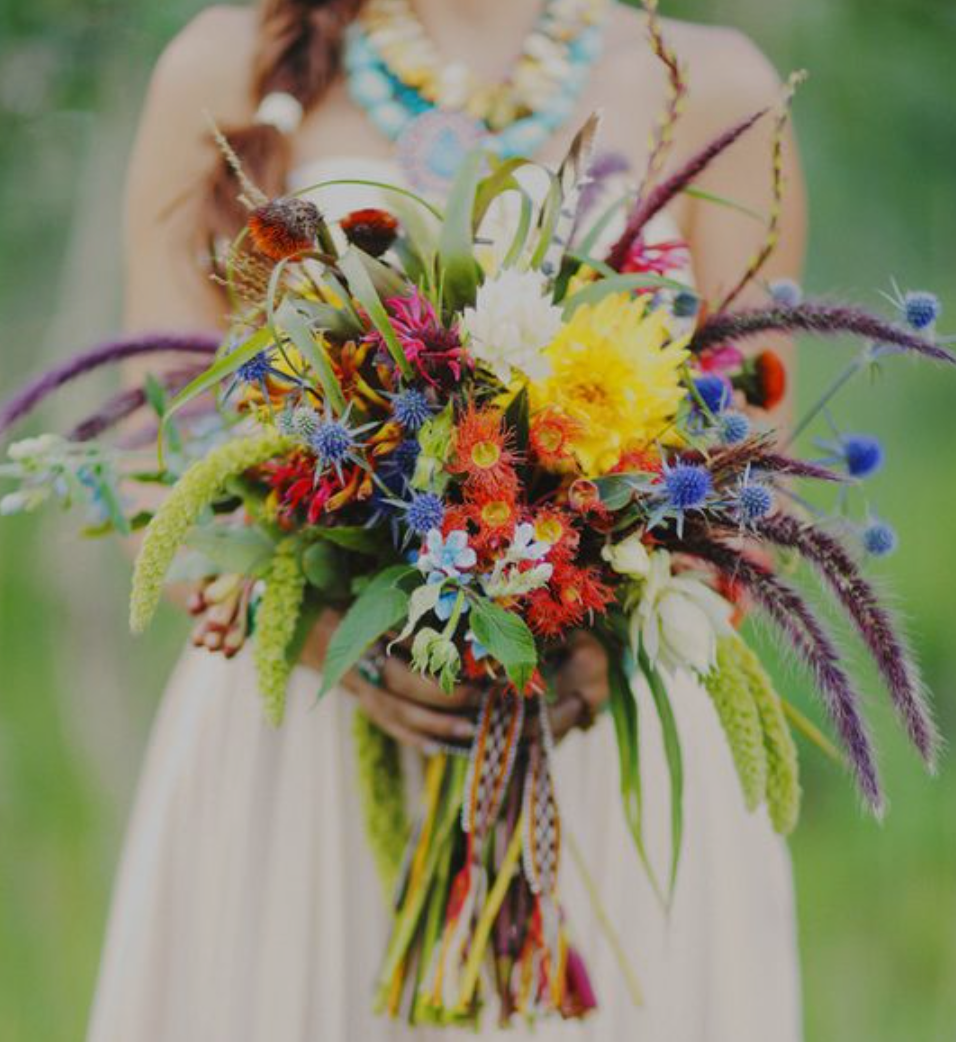
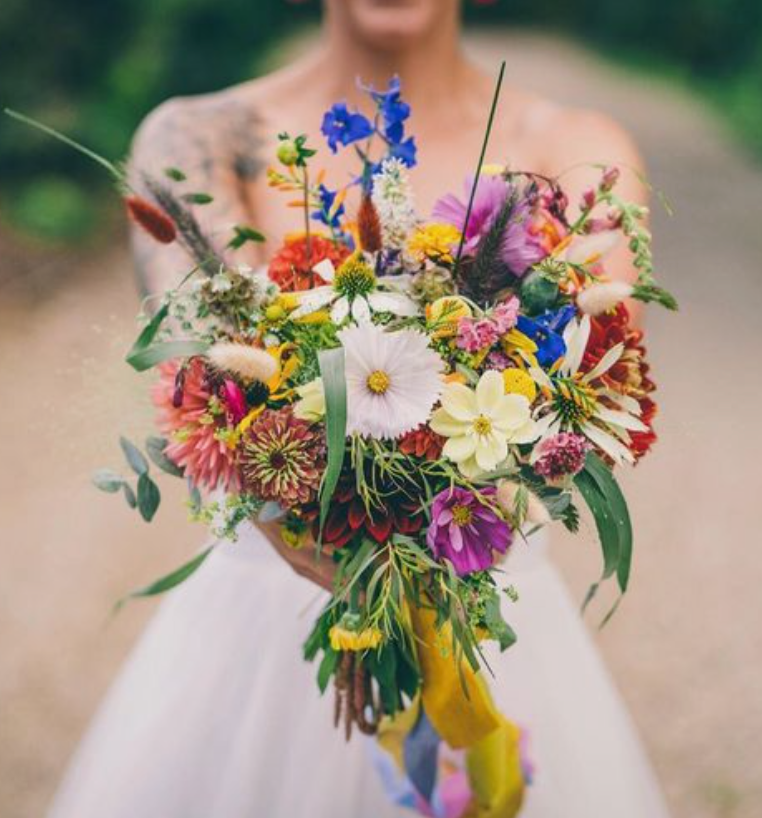
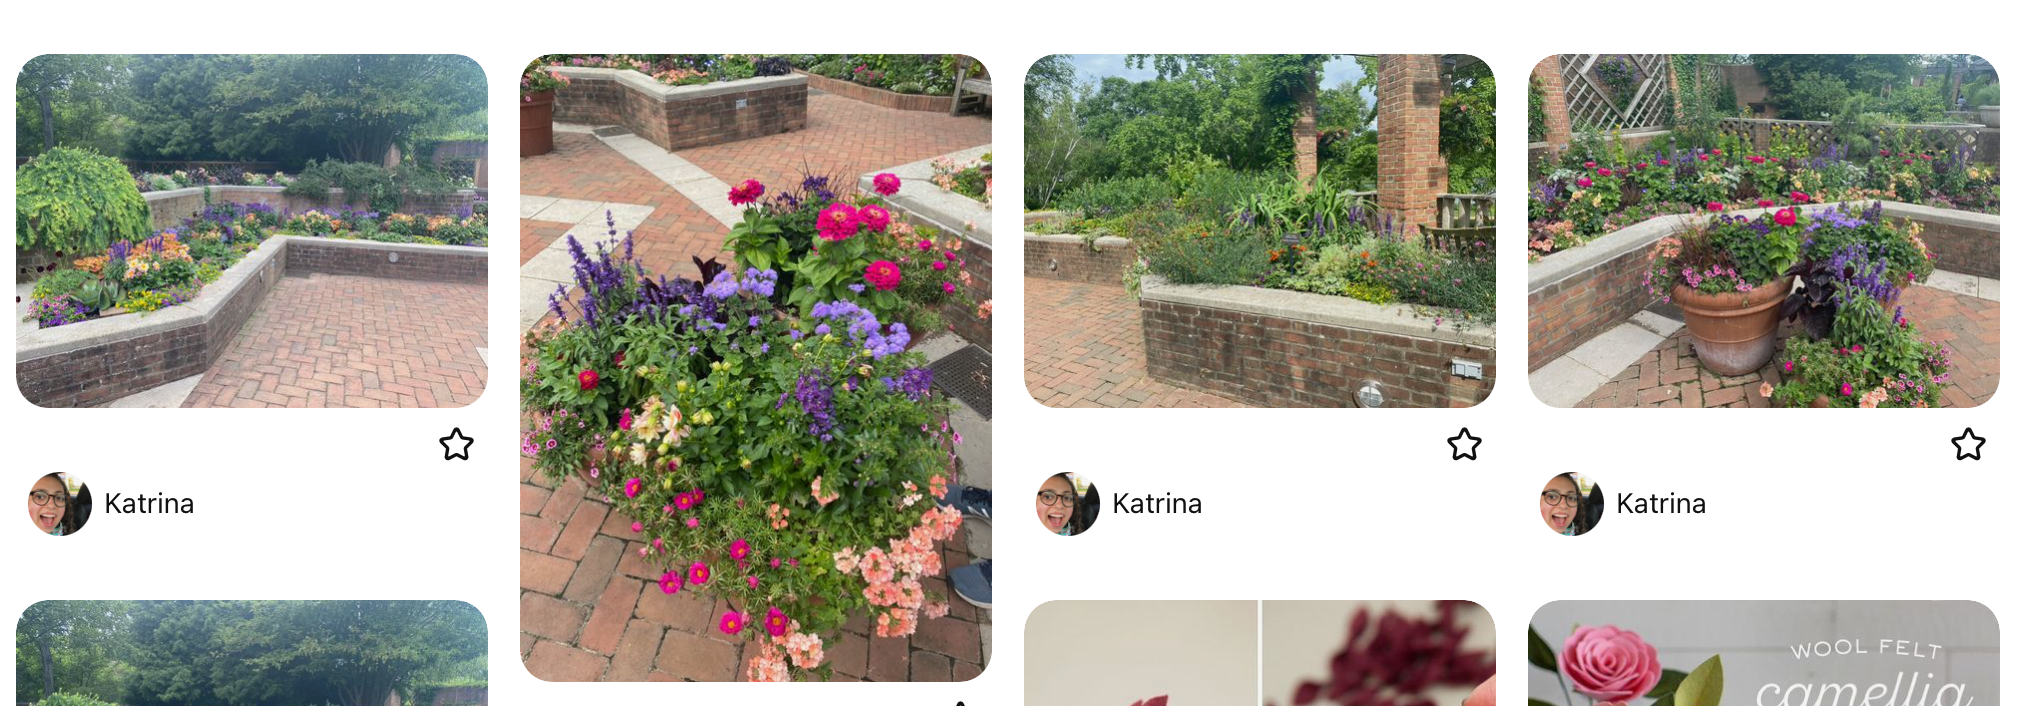
The first step was to plan out what she wanted it to look like. Her vision was for a multi-color, very full bouquet, with almost an overflowing look. I found a few on Pinterest that seemed like what she wanted, and she told me which ones were her favorites. These images were SO IMPORTANT to have for the whole process! I referenced them heavily both in the creation of the individual flowers and in the overall arranging. She also was inspired by a trip to the Chicago Botanic Garden (if you’ve never been, GO if you’re in the area! It’s one of my favorite places on Earth!), so I added those photos to the board as well.
The Method
The next step was to figure out HOW. I had never made a single flower out of fabric, let alone a whole bouquet, so I turned back to Pinterest for support. I found a bunch of tutorials mostly of fabric flowers but also some tutorials for paper that I thought could be adapted.
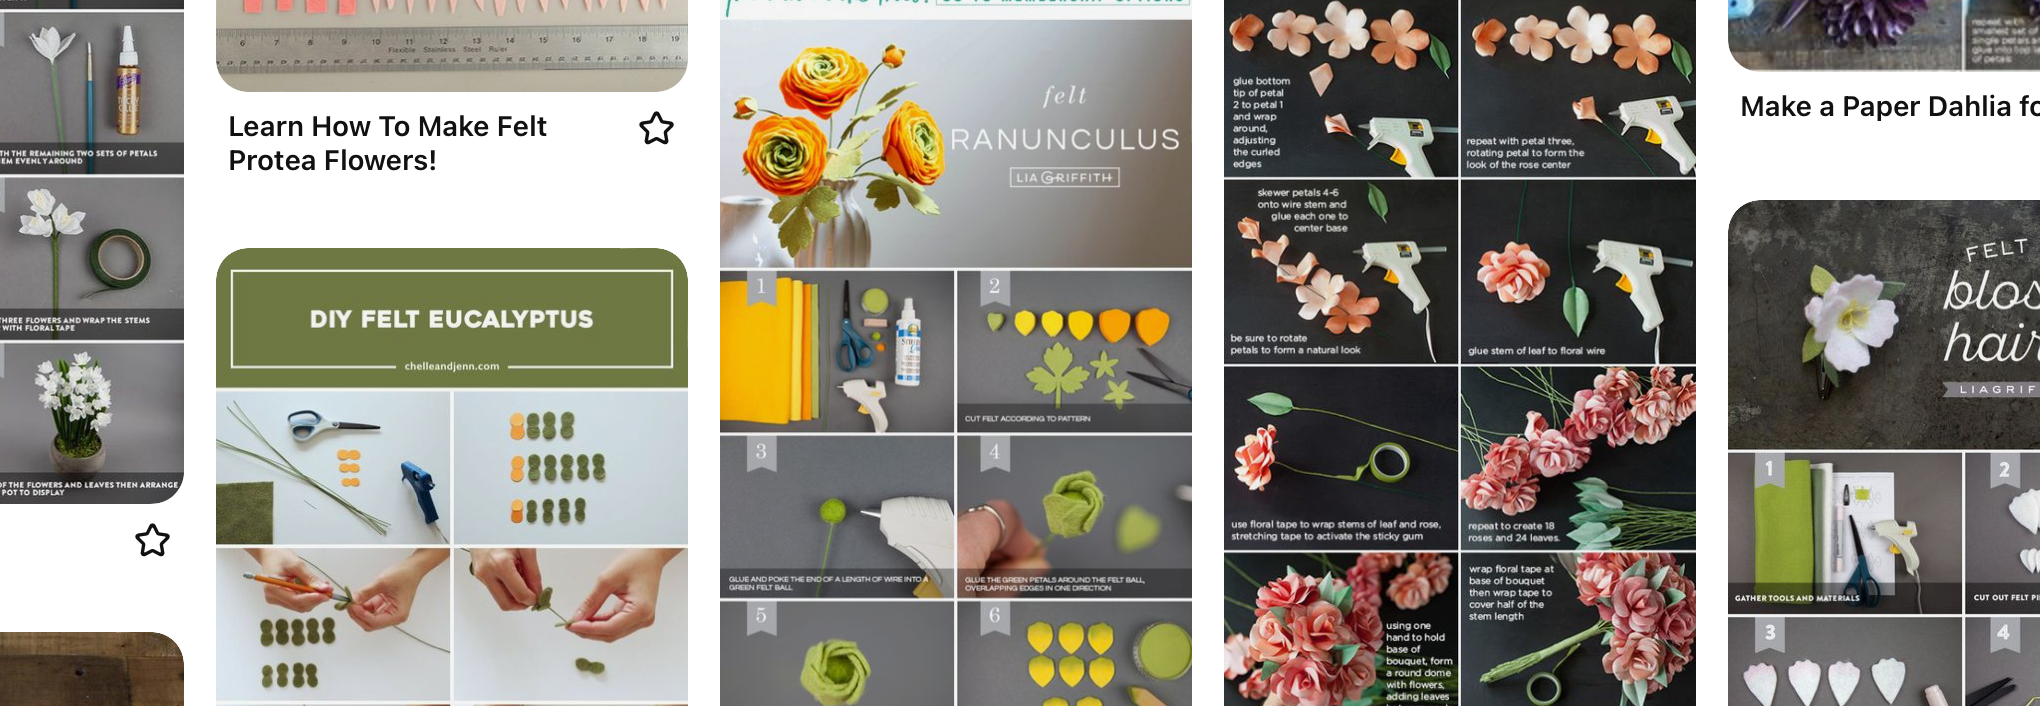
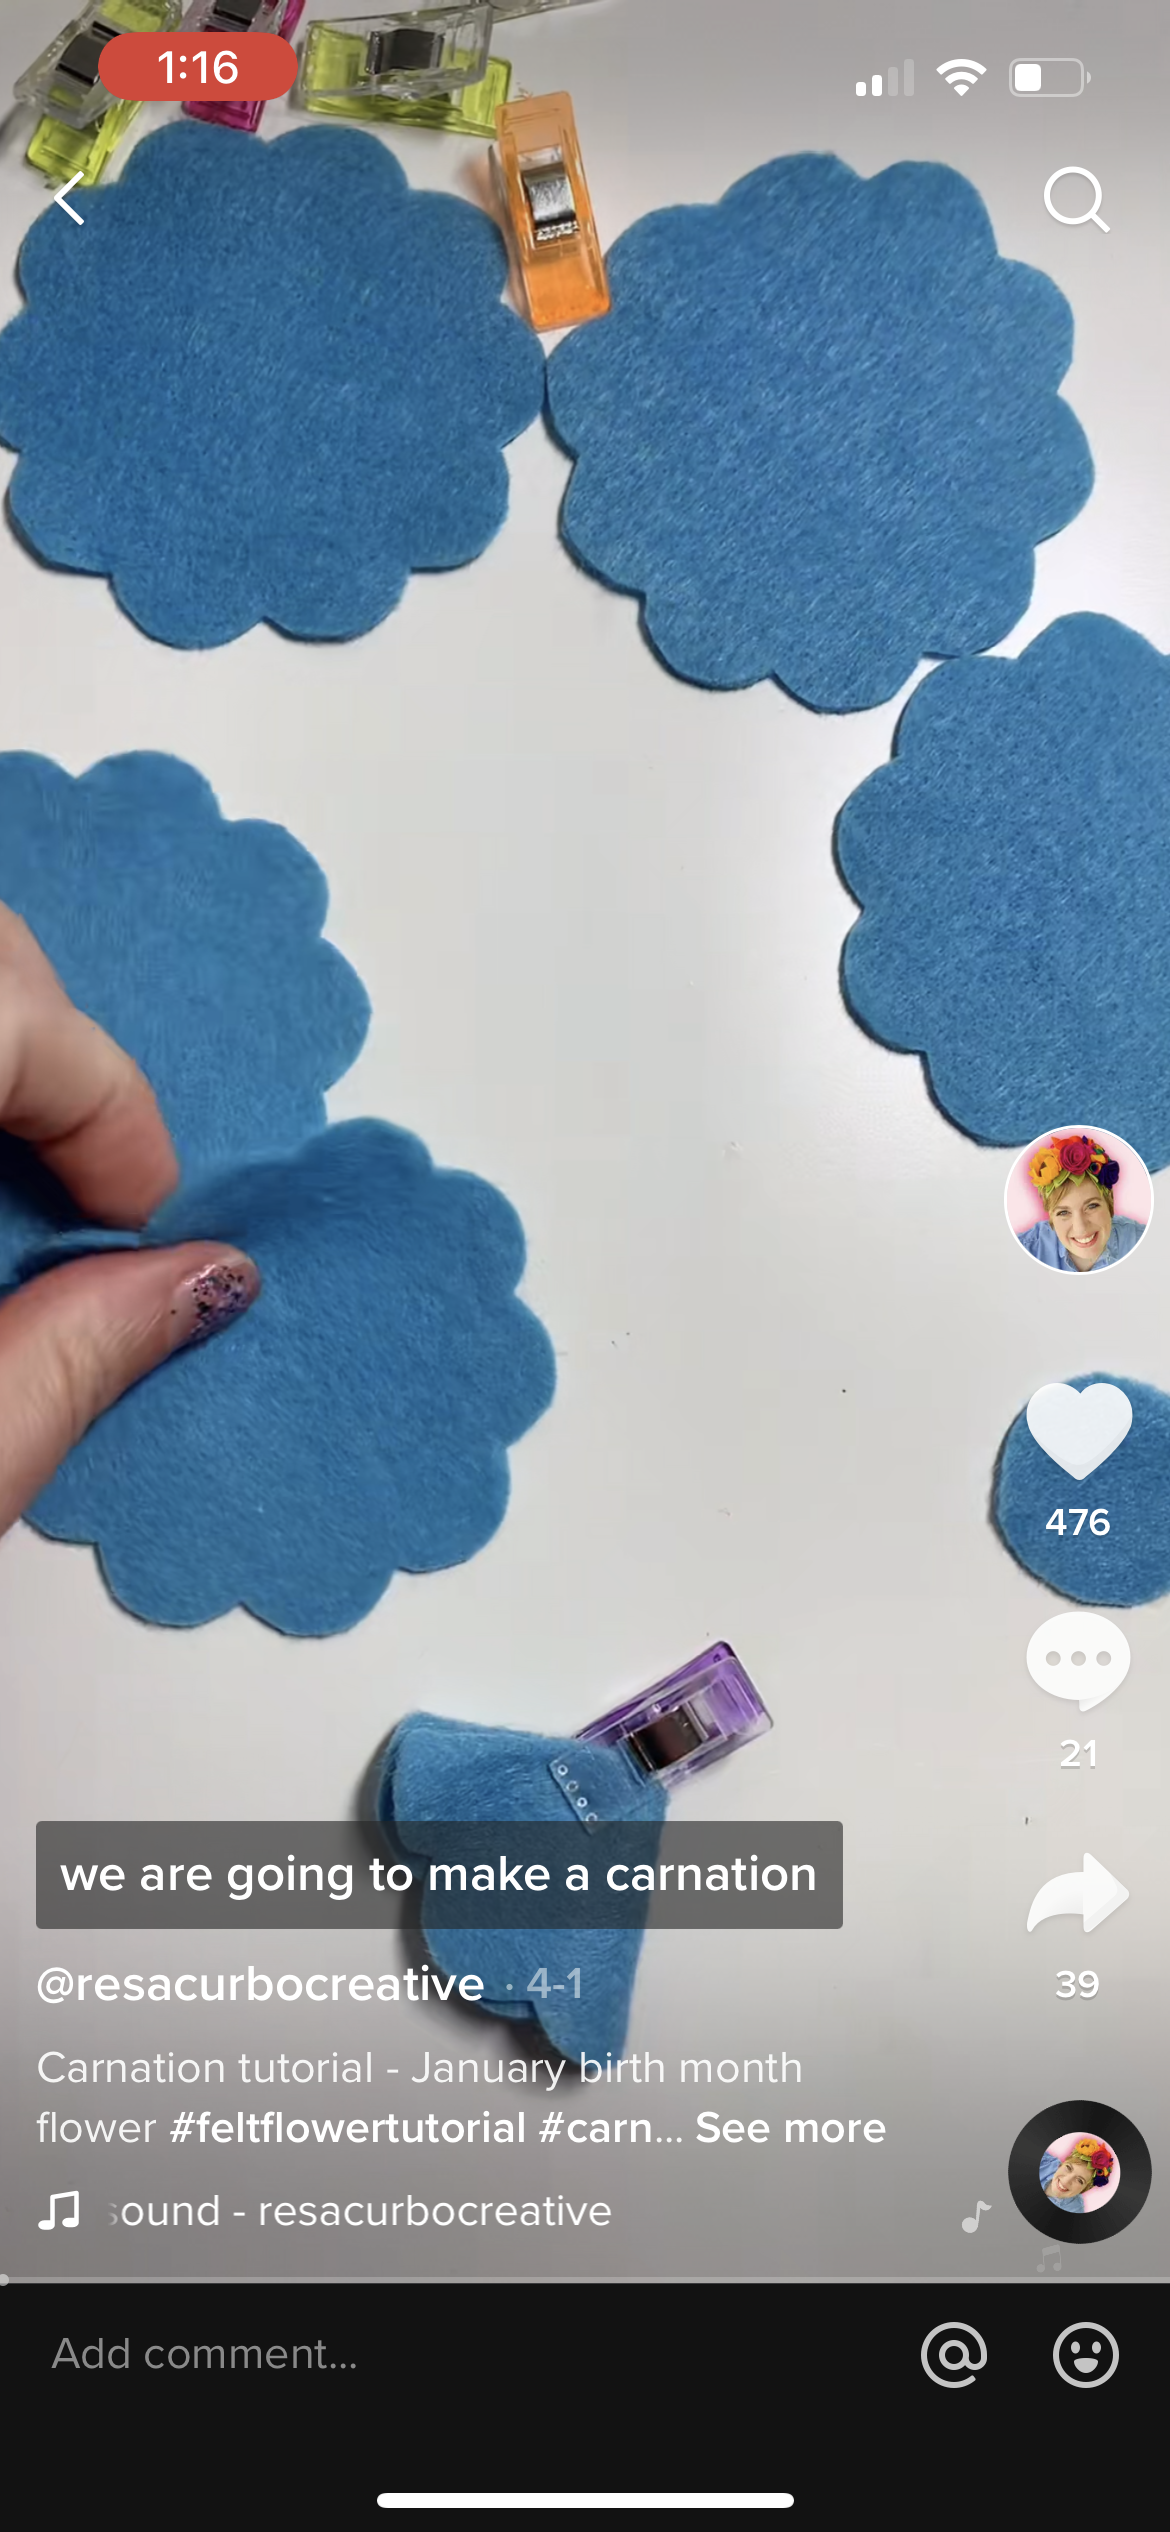
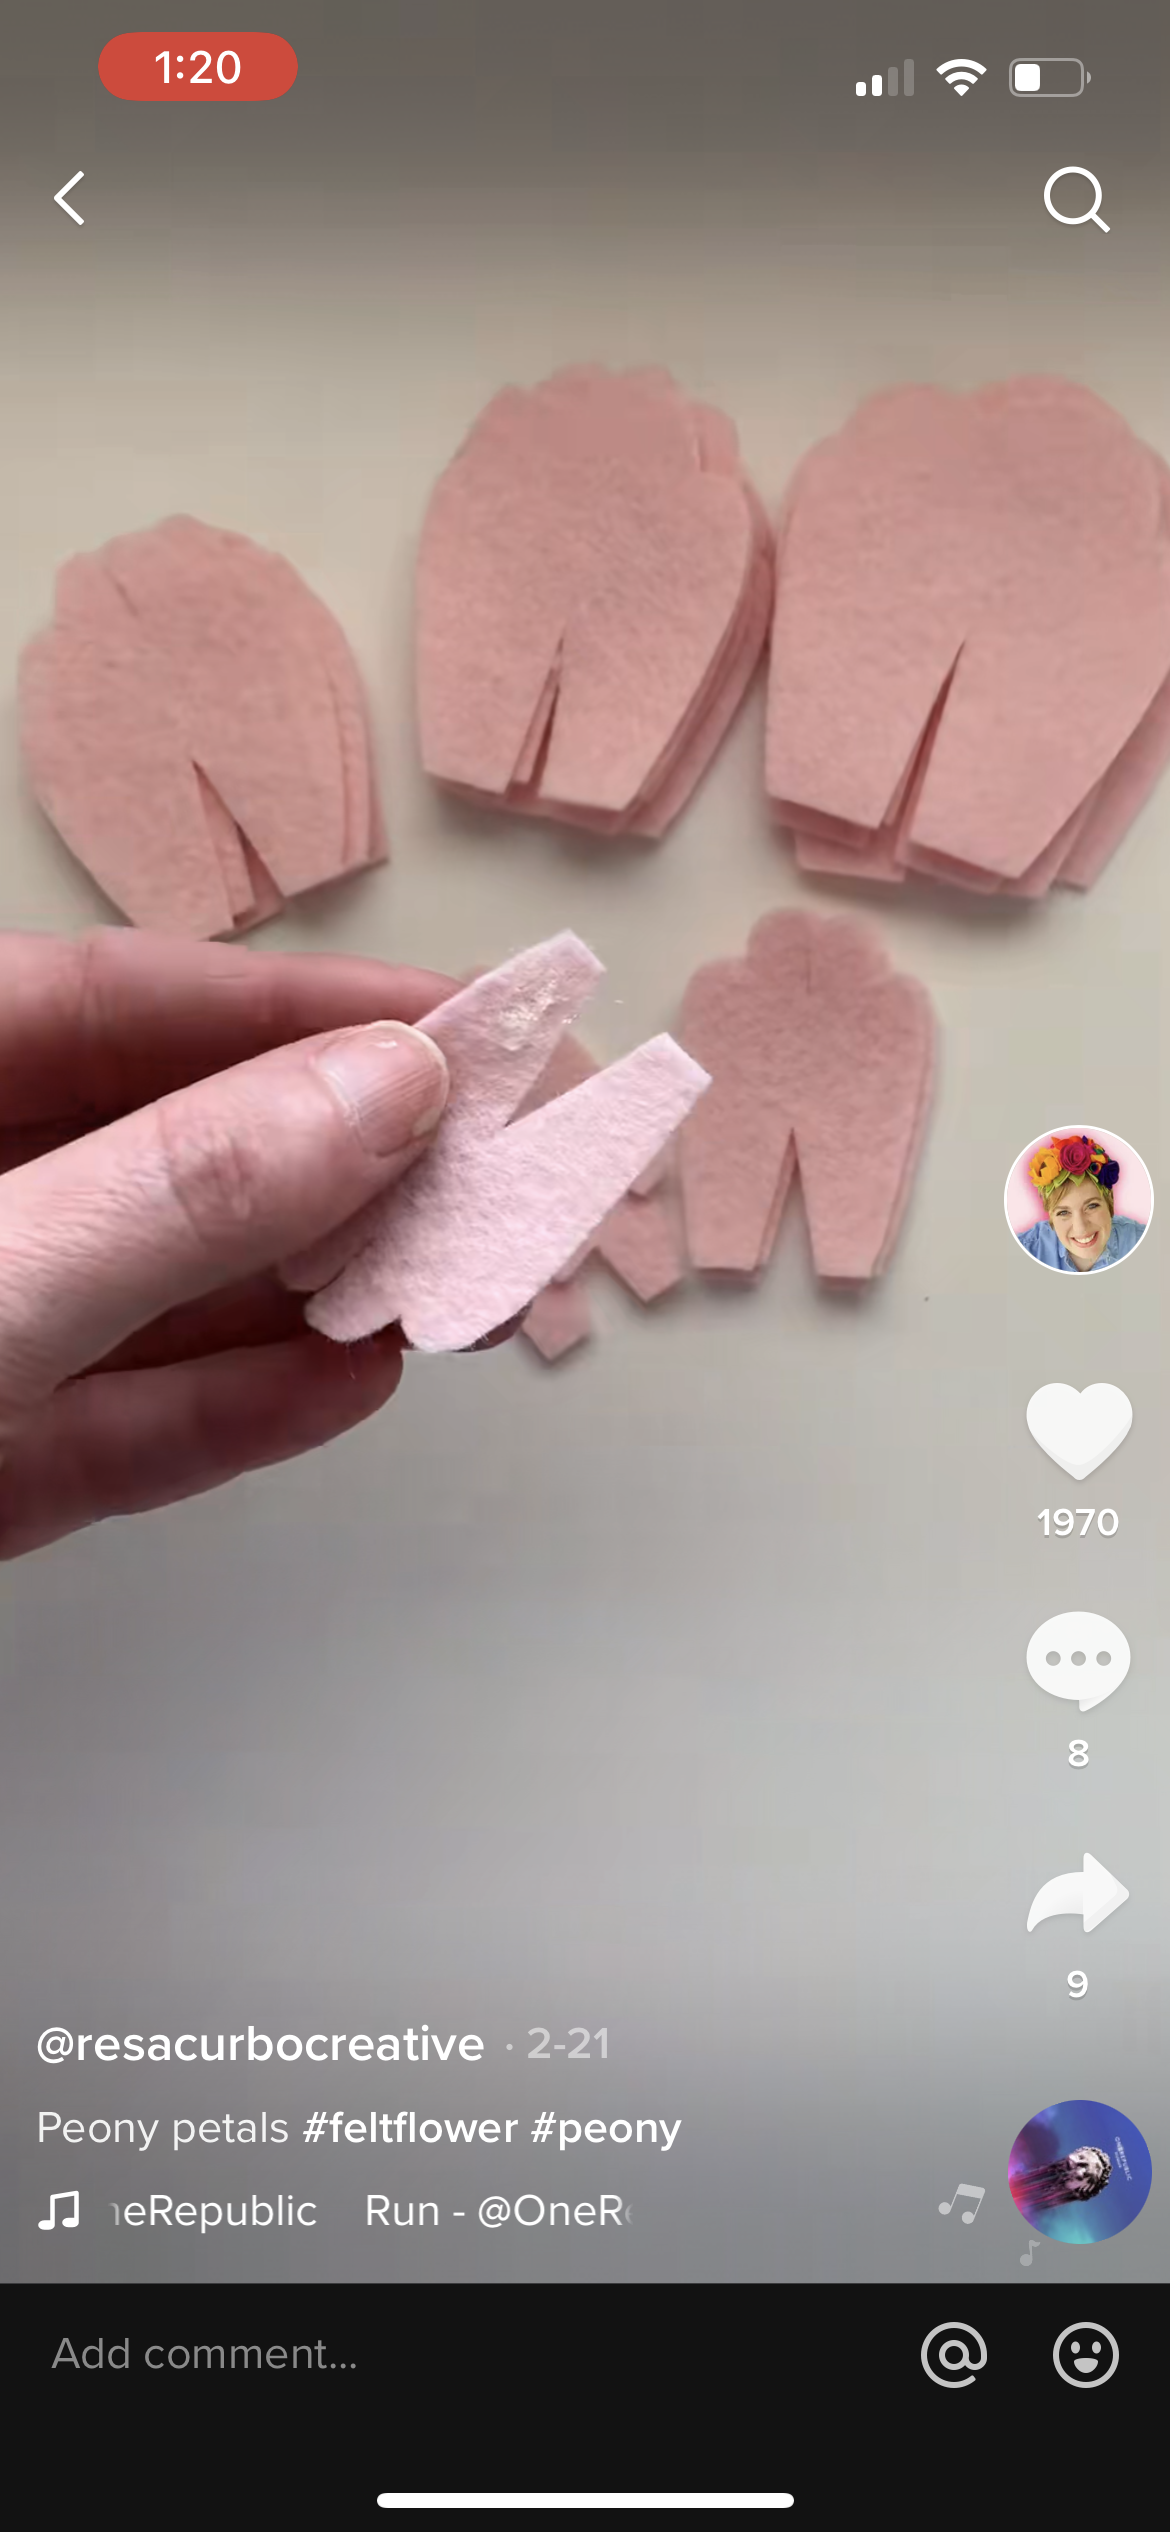
These tutorials were a step in the right direction, but the real windfall of information came in the form of @resacurbocreative on TikTok. She makes felt flowers and I cannot TELL YOU the relief I felt when I found this account! The way that she makes flowers is really unique and was exactly what I was looking for. On top of her flowers being exactly the right aesthetic, she is very generous with sharing her process, so she has a huge catalog of video tutorials showcasing tons of different kinds of flowers. Perfect perfect perfect.

Step 2: Gathering Supplies
The next part of the process was to gather all of the supplies. I like to have most of my supplies on hand when I start a project so that I can get to work without having to stop and procure more items.
The Fabric
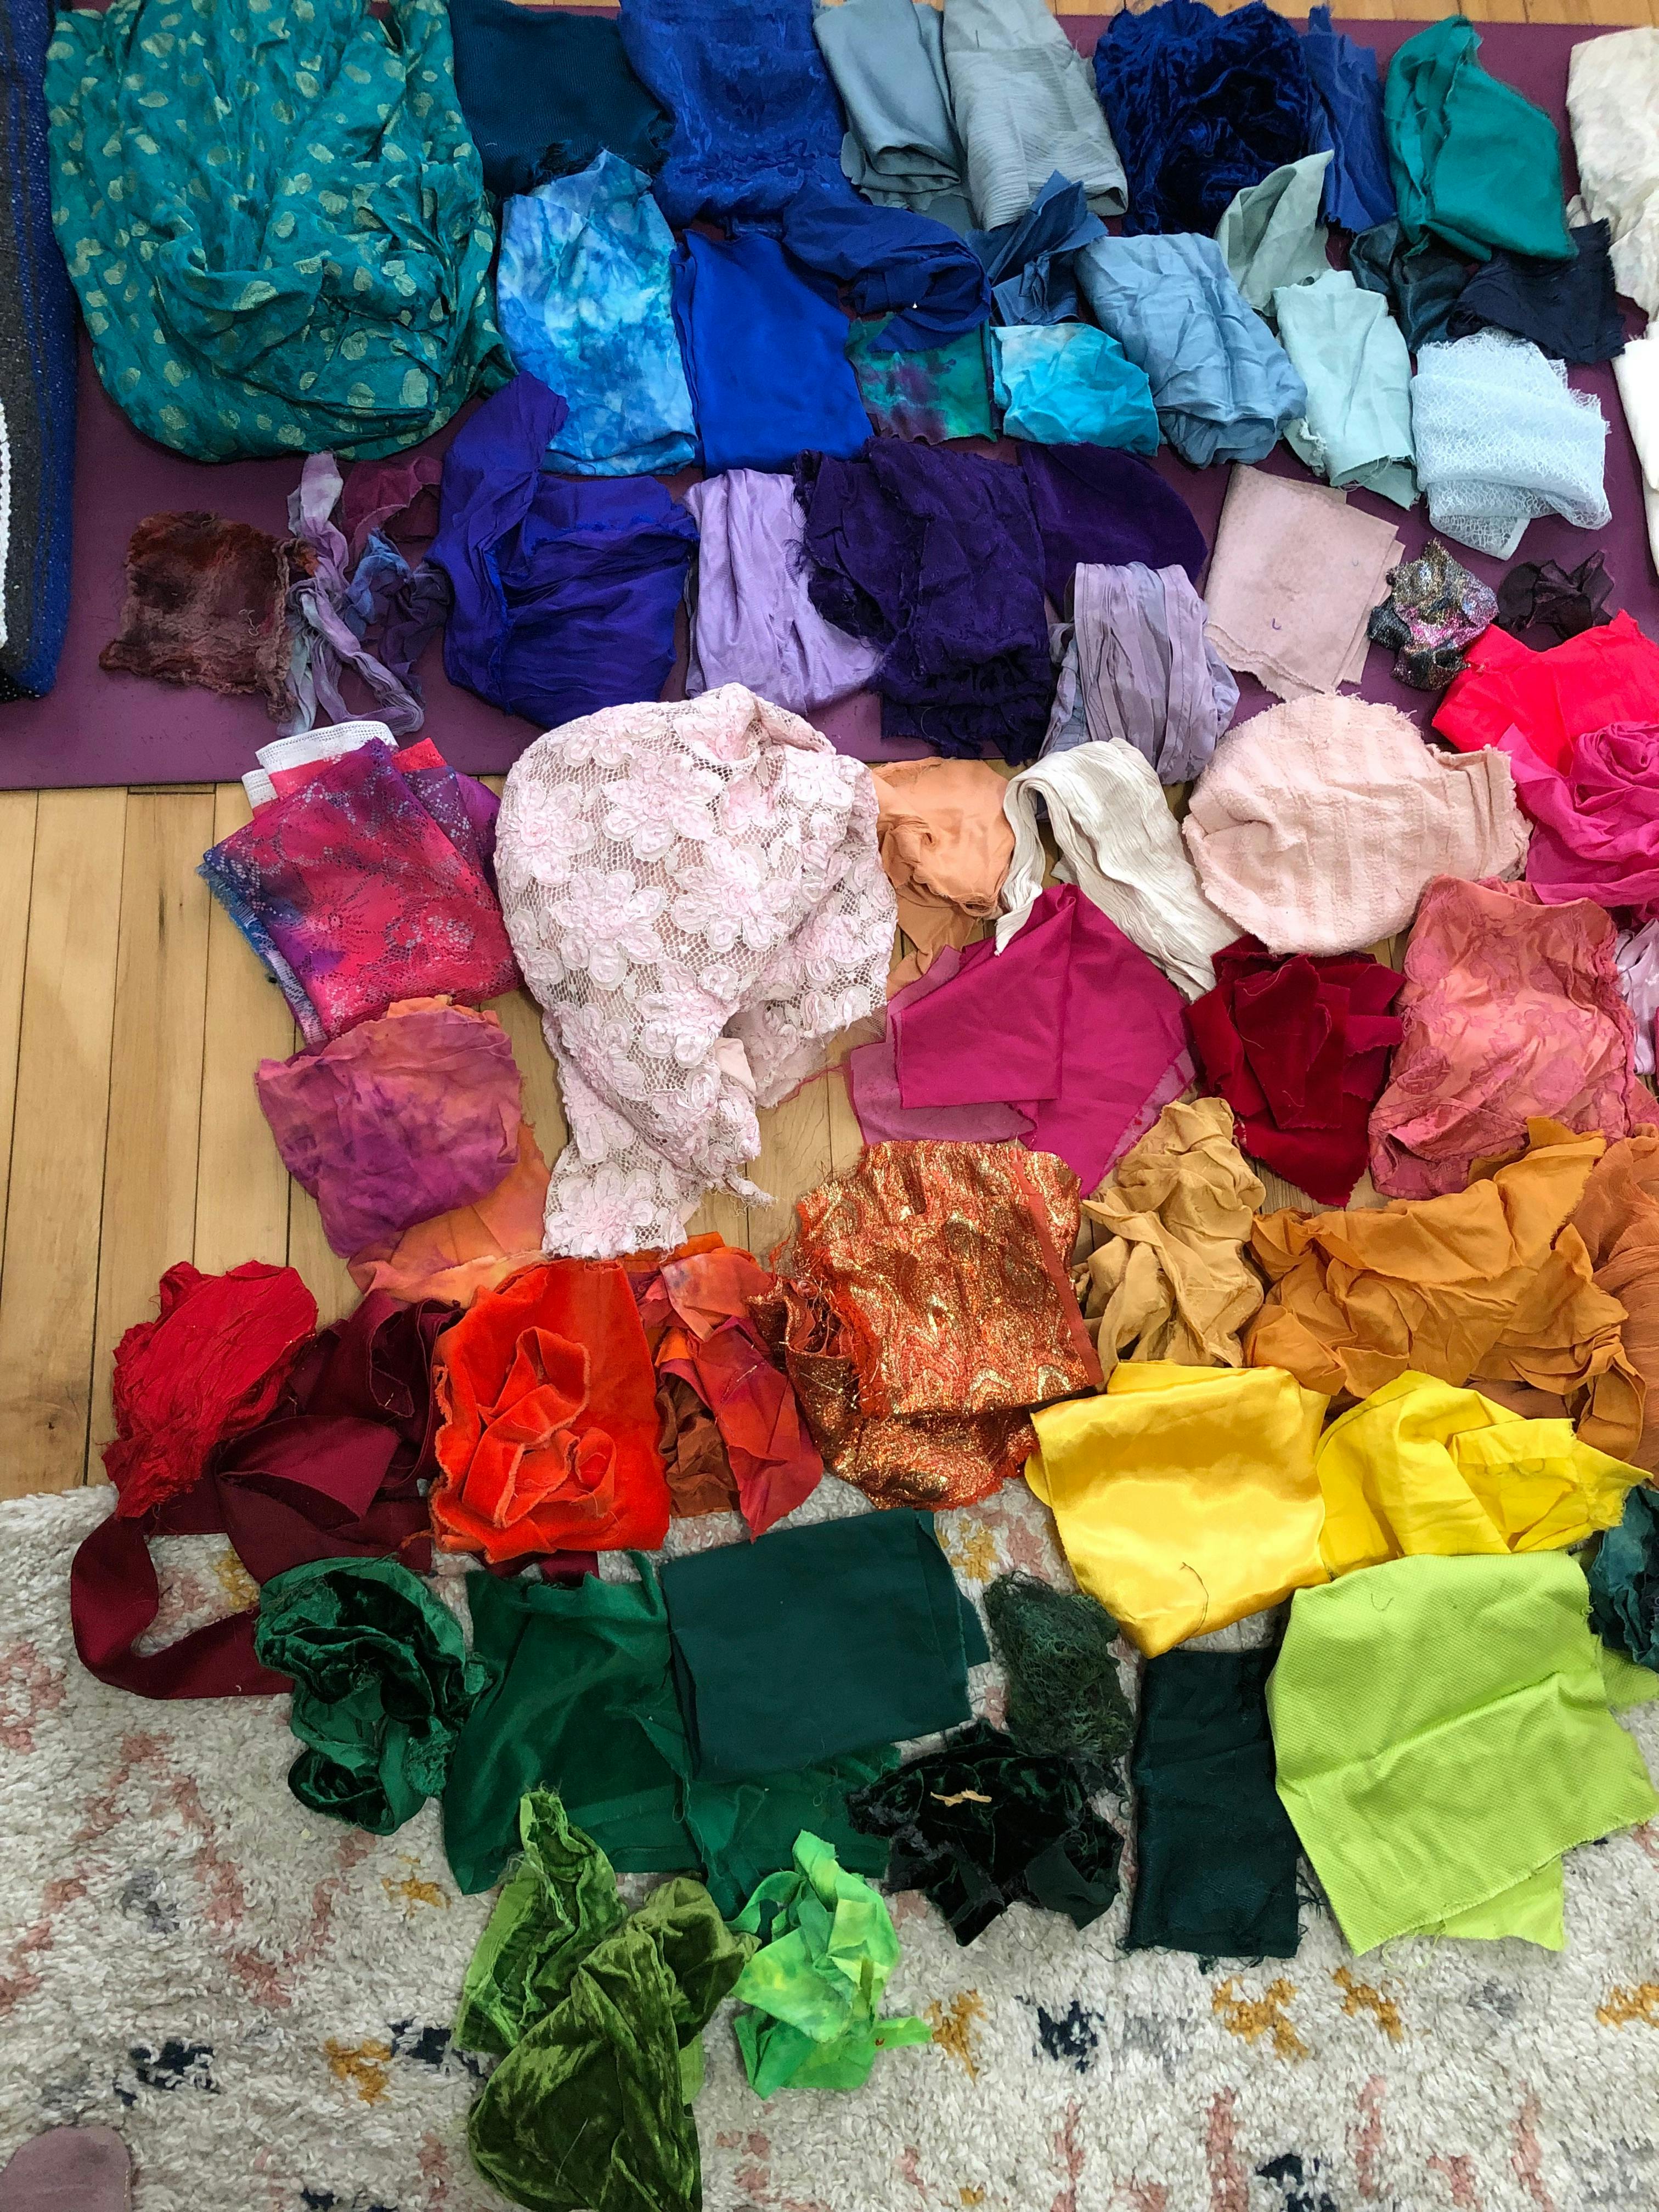
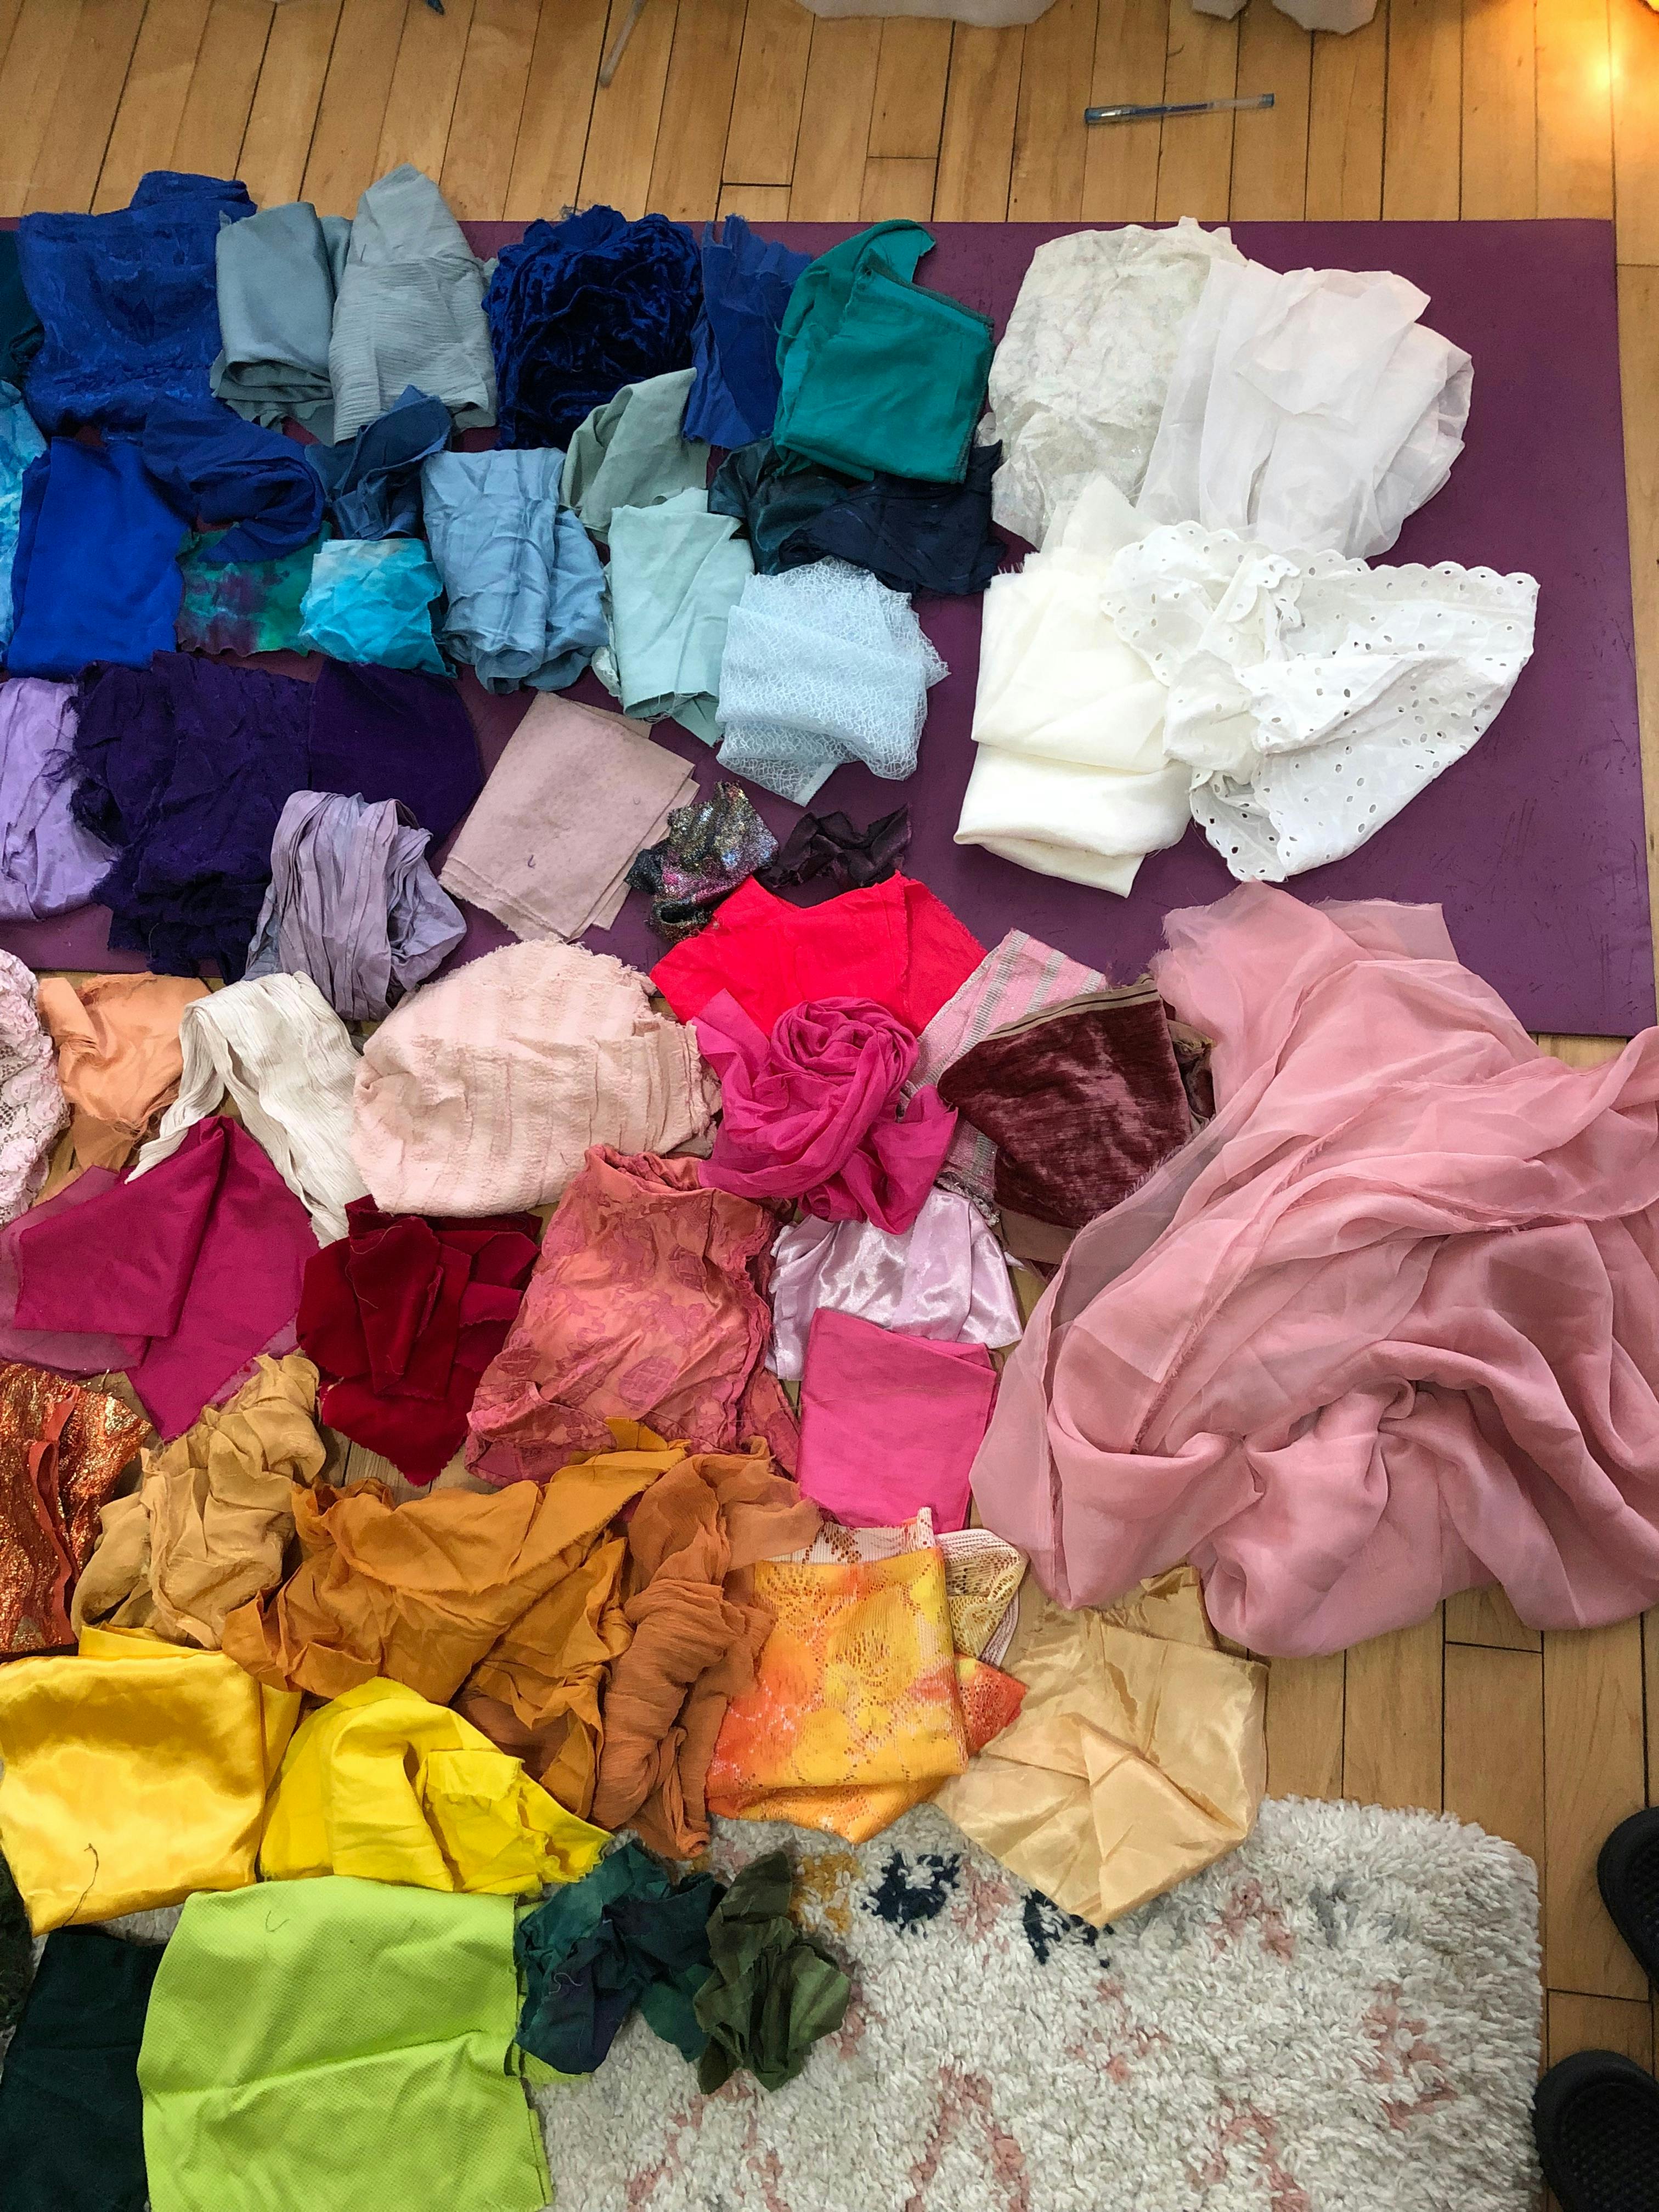
Lauren wanted a rich variety of fabric textures, so I started out by “shopping” in my mom’s fabric room. She is a fiber professional with an incredible amount of fabric that she is always happy to share with me (she makes art quilts and repairs antiques! Check out her blog here!). Thanks, Ma! I collected fabrics from her in a variety of textures in the colors Lauren wanted, and laid them out to see how they all worked together. I took pictures and sent them to Lauren to make sure she was on board with what I picked, and she liked everything! So it was onto the next piece of the puzzle...
And puzzled I was…
The tutorials for fabric flowers I had found on TikTok were all meant to be done with felt. How was I supposed to turn the velvets, brocades, silks, and polyesters into fabric that would behave like felt? I had three issues to tackle with the fabrics I had:
- They were likely to fray on the edges
- Many clearly had a right side and wrong side (fabric terms for front and back)
- Almost none of the fabrics had any body or structure to them
So I did some research and came across a few products that I wanted to try to treat the fabrics so I could work with them as if they were felt.
Fabric Treatments
The first product I wanted to try was a fusible web (I tried both Fuse-a-web and Wonder-Under). It is basically a sheet of heat-activated glue that is stuck to a large piece of parchment paper. You cut it to size, place it on a piece of fabric glue side down, iron it on the paper side, peel off the paper, sandwich another piece of fabric down, and iron again. This bonded the fabric together so that both sides were the pretty side of the fabric, and in many cases it prevented fraying.
The second product was a craft spray called Stiffen Stuff. It is kind of like hairspray for fabric. I thought it would be good to stabilize the fabrics so that the petals and leaves didn’t look sloppy and floppy.

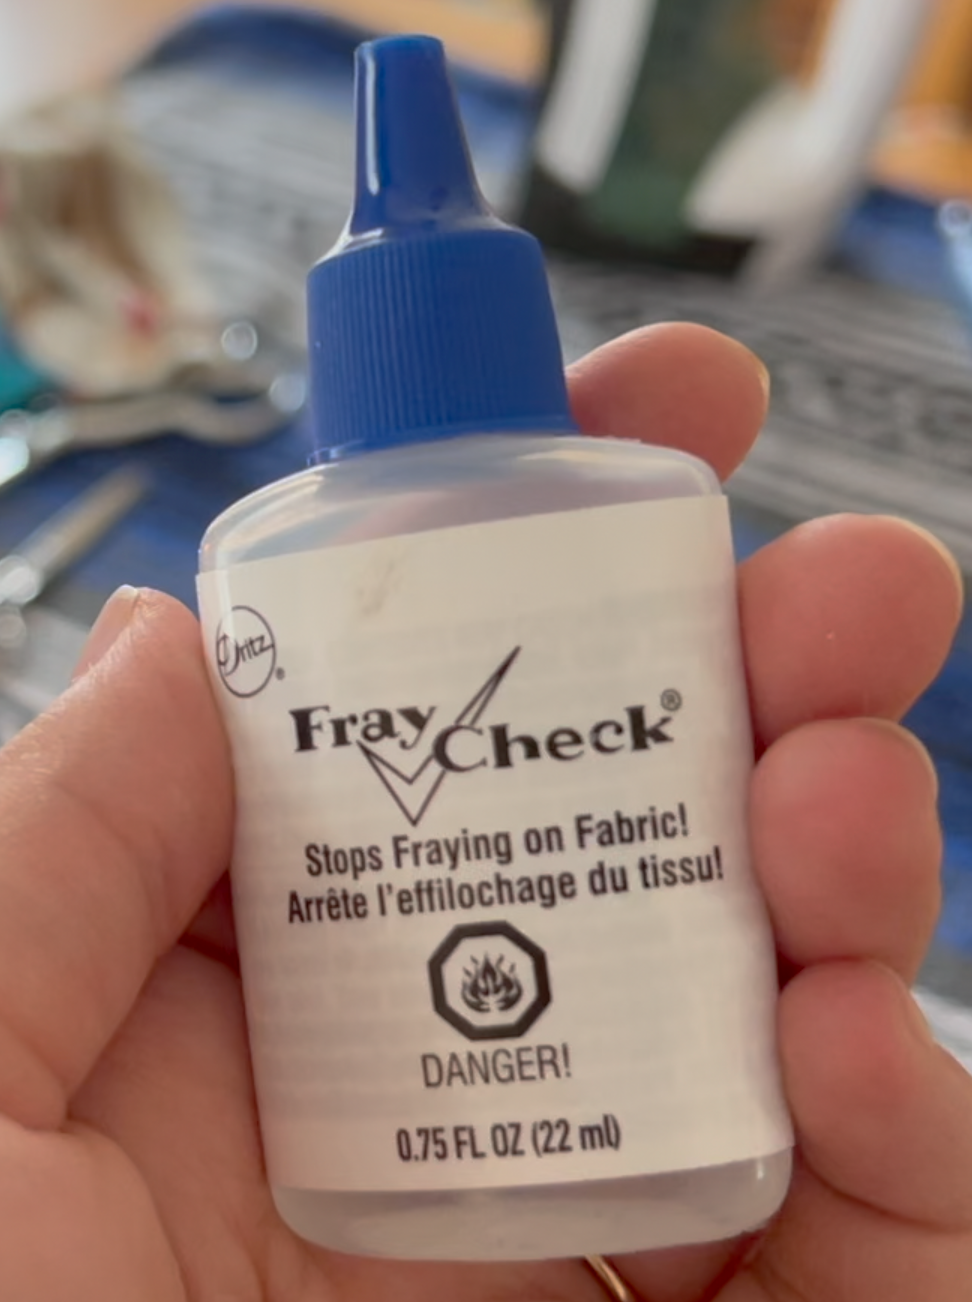
The third product was a tried and true favorite - Fray Check. I learned about this from my mom who always has some on hand. This stuff is almost like a type of glue, but it is specifically designed to prevent fraying on raw fabric edges, as the name suggests. It dries very clear and very flexible, unlike a regular glue that would dry hard and/or cloudy. On most fabrics it’s invisible, but I did notice that it left a darker edge on some of the lighter fabrics. Watch out for that if you use Fray Check, and always do a patch test, just like with skin care products. :)
Other Miscellaneous Supplies
I purchased a few other things:
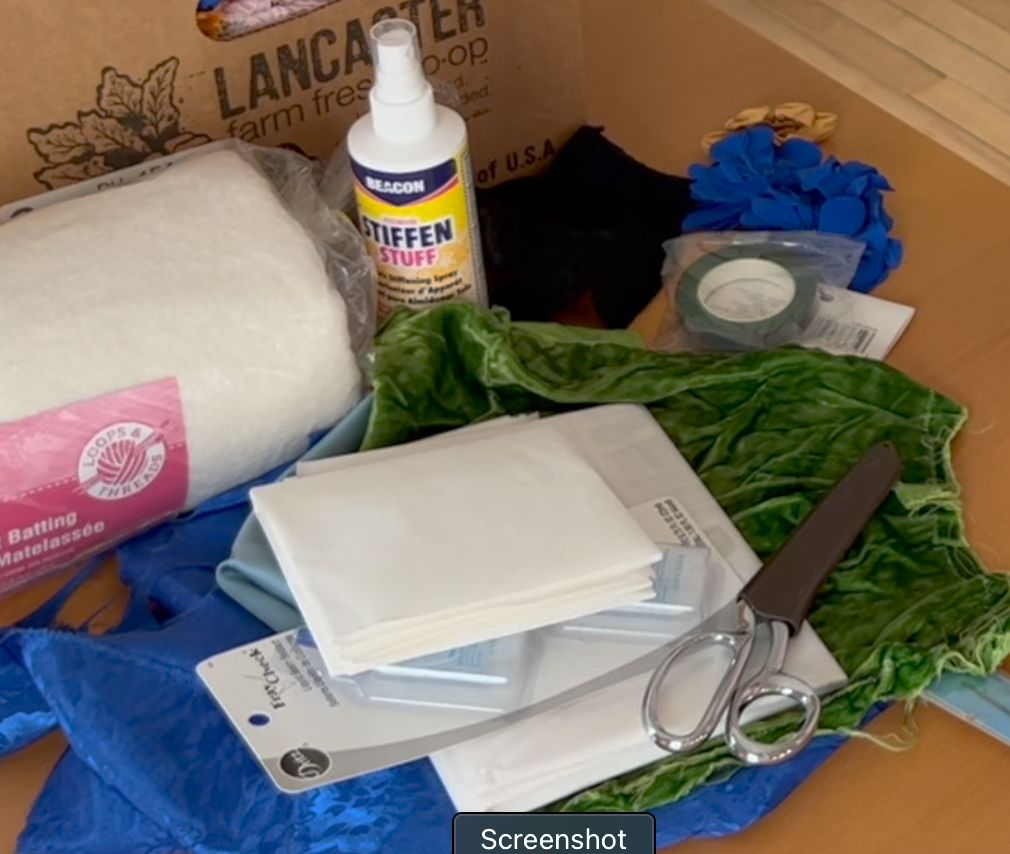
And gathered some things together that I already had:
- Fabric scissors
- Paper scissors
- Hot glue gun
- Iron
- Curling iron
- Heat-proof glove
- Sheet trays lined with parchment paper/foil
Step 3: Testing
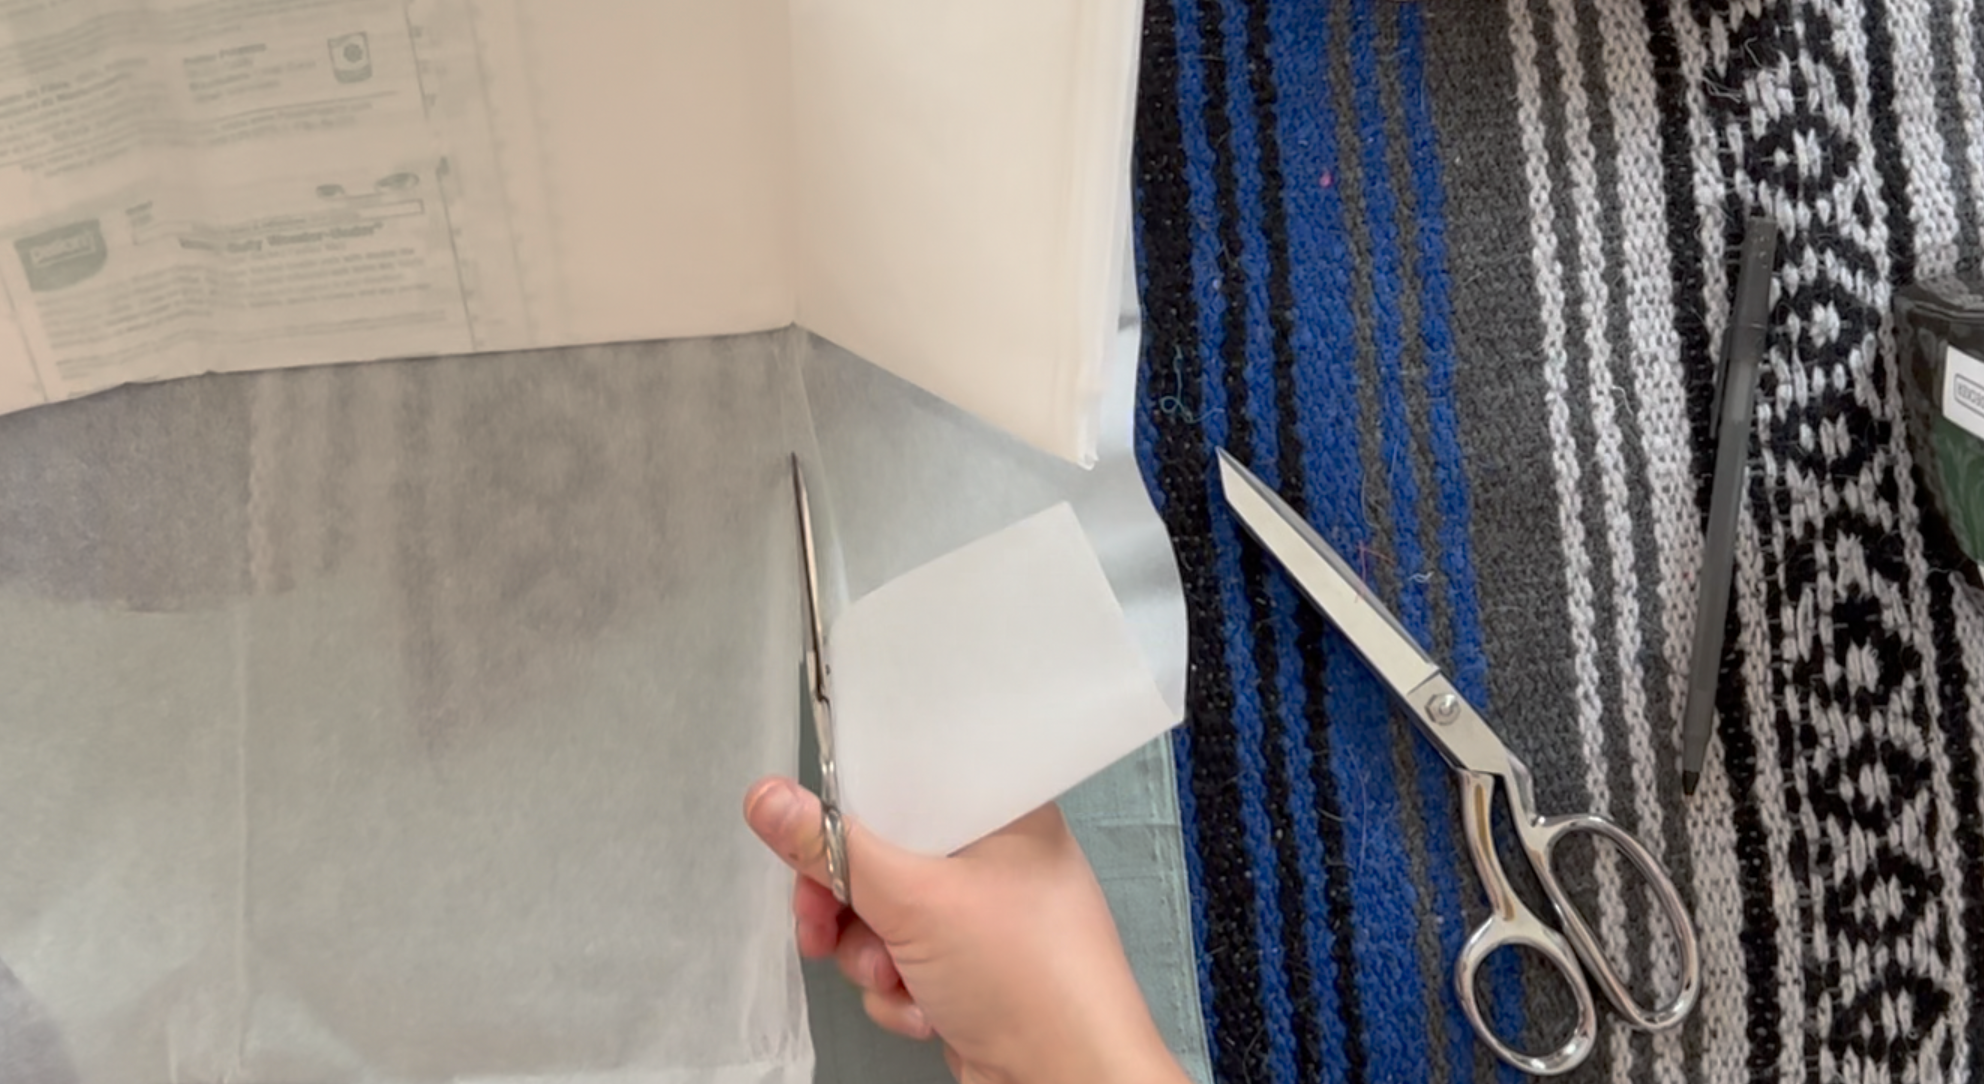
Once I had corralled all of my supplies into the same space, I started by testing my theories about how to prep the fabric. I was pretty nervous that this wasn’t going to work out the way that I wanted to, so I wanted to be very thorough. I chose three very differently textured fabrics to see how they handled the treatments: an orange velvet, a hand dyed 100% cotton, and a light blue thin fabric that was either a synthetic of some kind, or silk. (It didn’t really matter for my purposes, but it IS possible to test fabric at home to see what kind of fiber they are made of!)

Bonding the Fabric
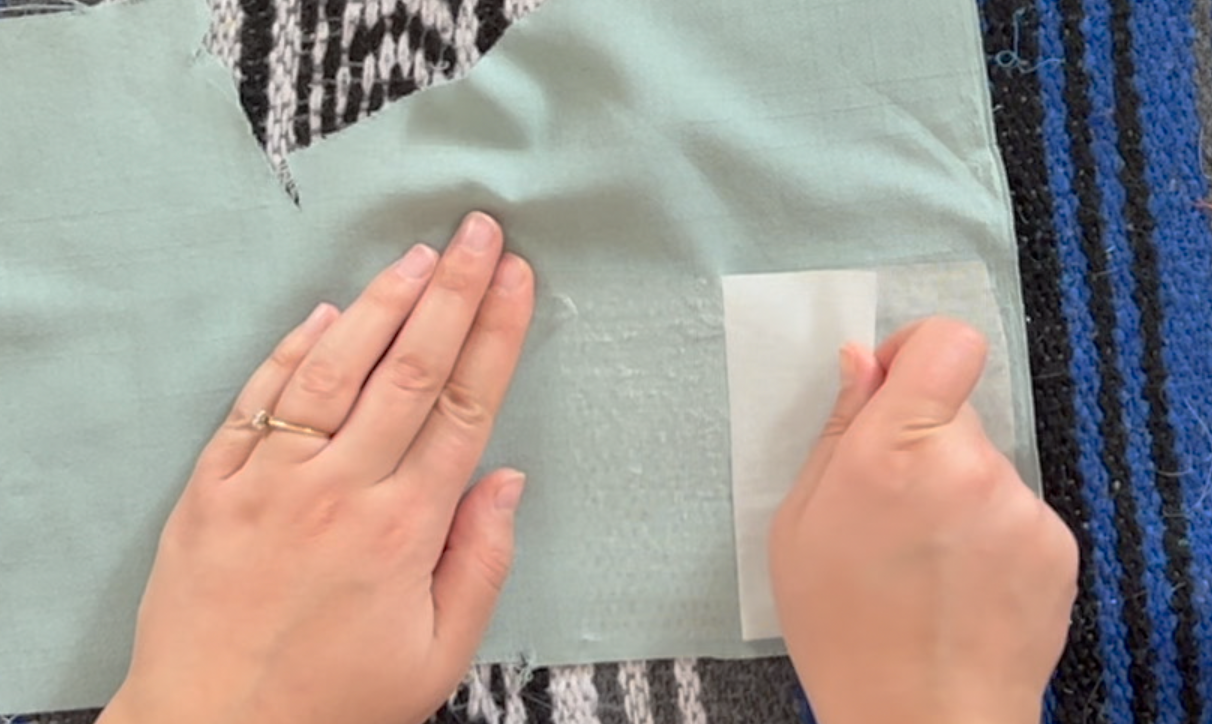
The first part of the test was just making sure that the fusible web worked the way I wanted it to. I tested both brands, and they both worked very well. I also thought that I could try using iron-on interfacing on one side and then hot glue another piece of fabric down on top, but that went HORRIBLY. The hot glue was immediately lumpy and awful so I ripped it off before it dried to save the fabric!
Stabilizing the Fabric
I realized that the bonded fabric still had the capacity to fray, so I knew that testing the Fray Check would still be important. I laid out my samples on a parchment lined baking sheet, and did a few pieces each of just the Fray Check, just the Stiffen Stuff, both, and then I left a few alone as a control. The Stiffen Stuff took an hour to dry, so once the time was up I inspected the results.
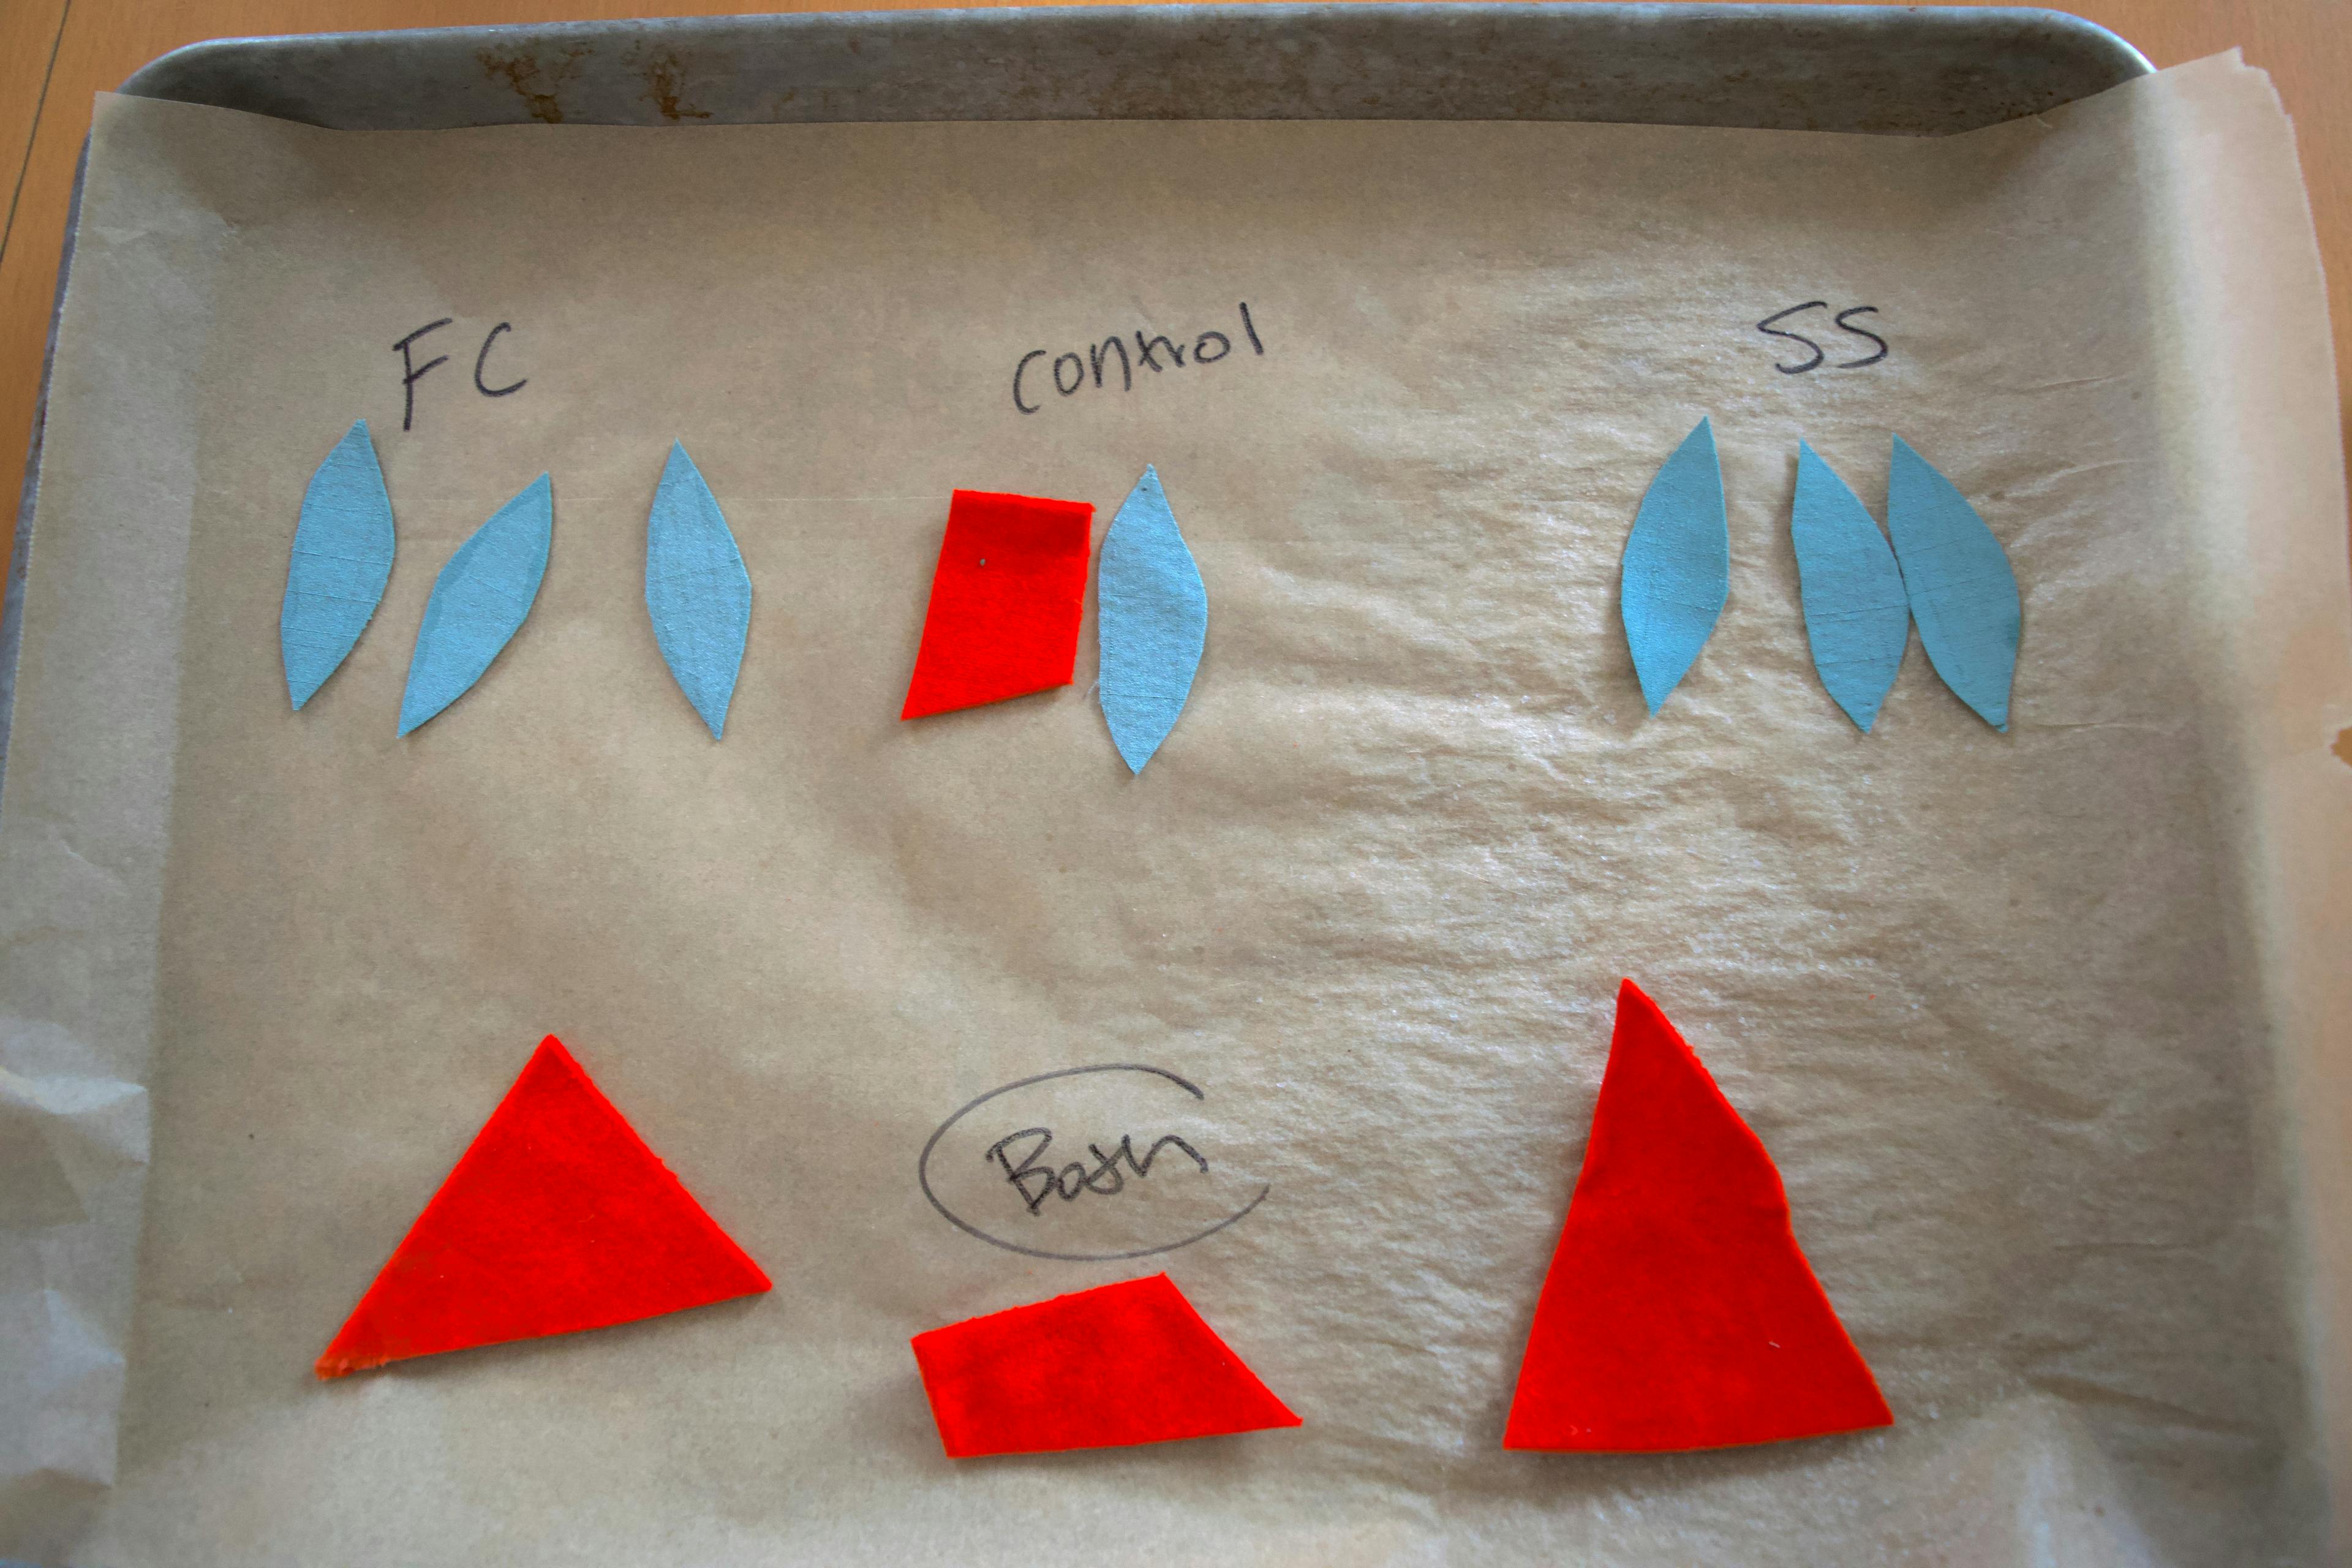
Long story short, the Stiffen Stuff worked GREAT. It delivered on its name and definitely made the fabric much sturdier, but it also prevented fraying on all of the fabrics.
It was at this point that I started to calm down and realize that this was actually going to work!!!
Step 4: The Templates
While the testers were drying, I turned my attention to making cardboard templates for the petals and leaves. Old cereal boxes are great for making templates like this! I looked back at @resacurbocreative and chose a few of her designs to recreate.
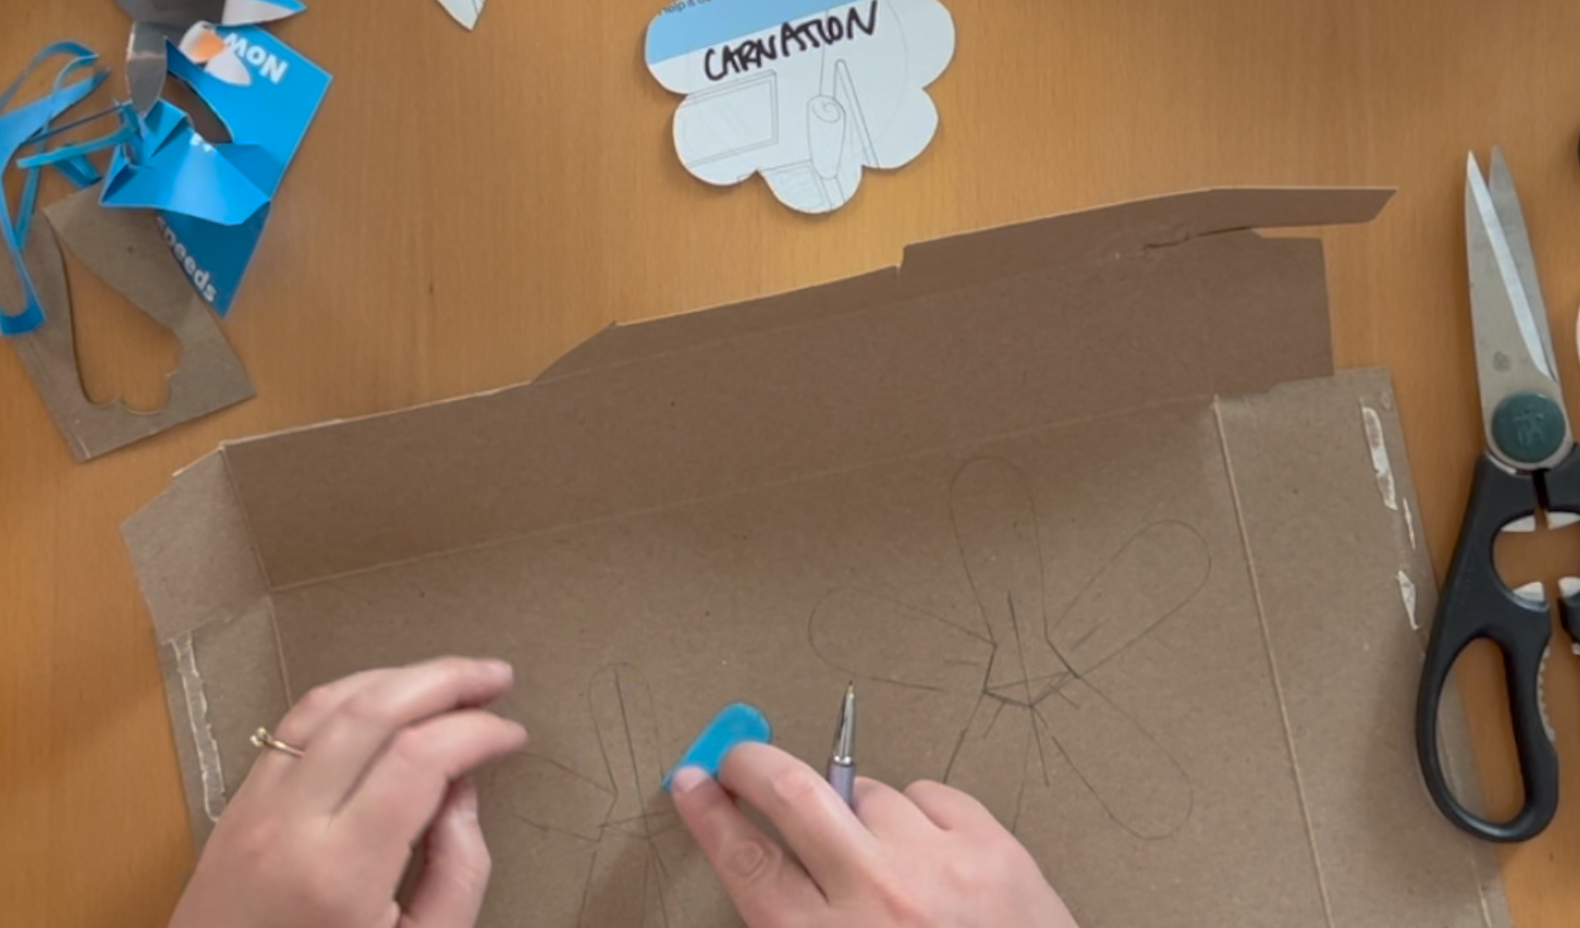
I used a combo of jar lids and a small ruler to make sure that everything was uniform and nice. After labeling the templates (which actually wasn’t really necessary, but it was cute though!) I stuck them in a jar, and that part of the project was also ready to go.

To Sum Up
Because I didn’t have much to go on from my own experience or really from anything I could find online, I’m glad that I took my time and allowed ample time for planning, prepping, and testing things out. Check out part 2 (here!) and part 3 (here!) where I share from start to finish how I:
- made each of the flowers
- made the decorative ribbon,
- arranged the bouquet
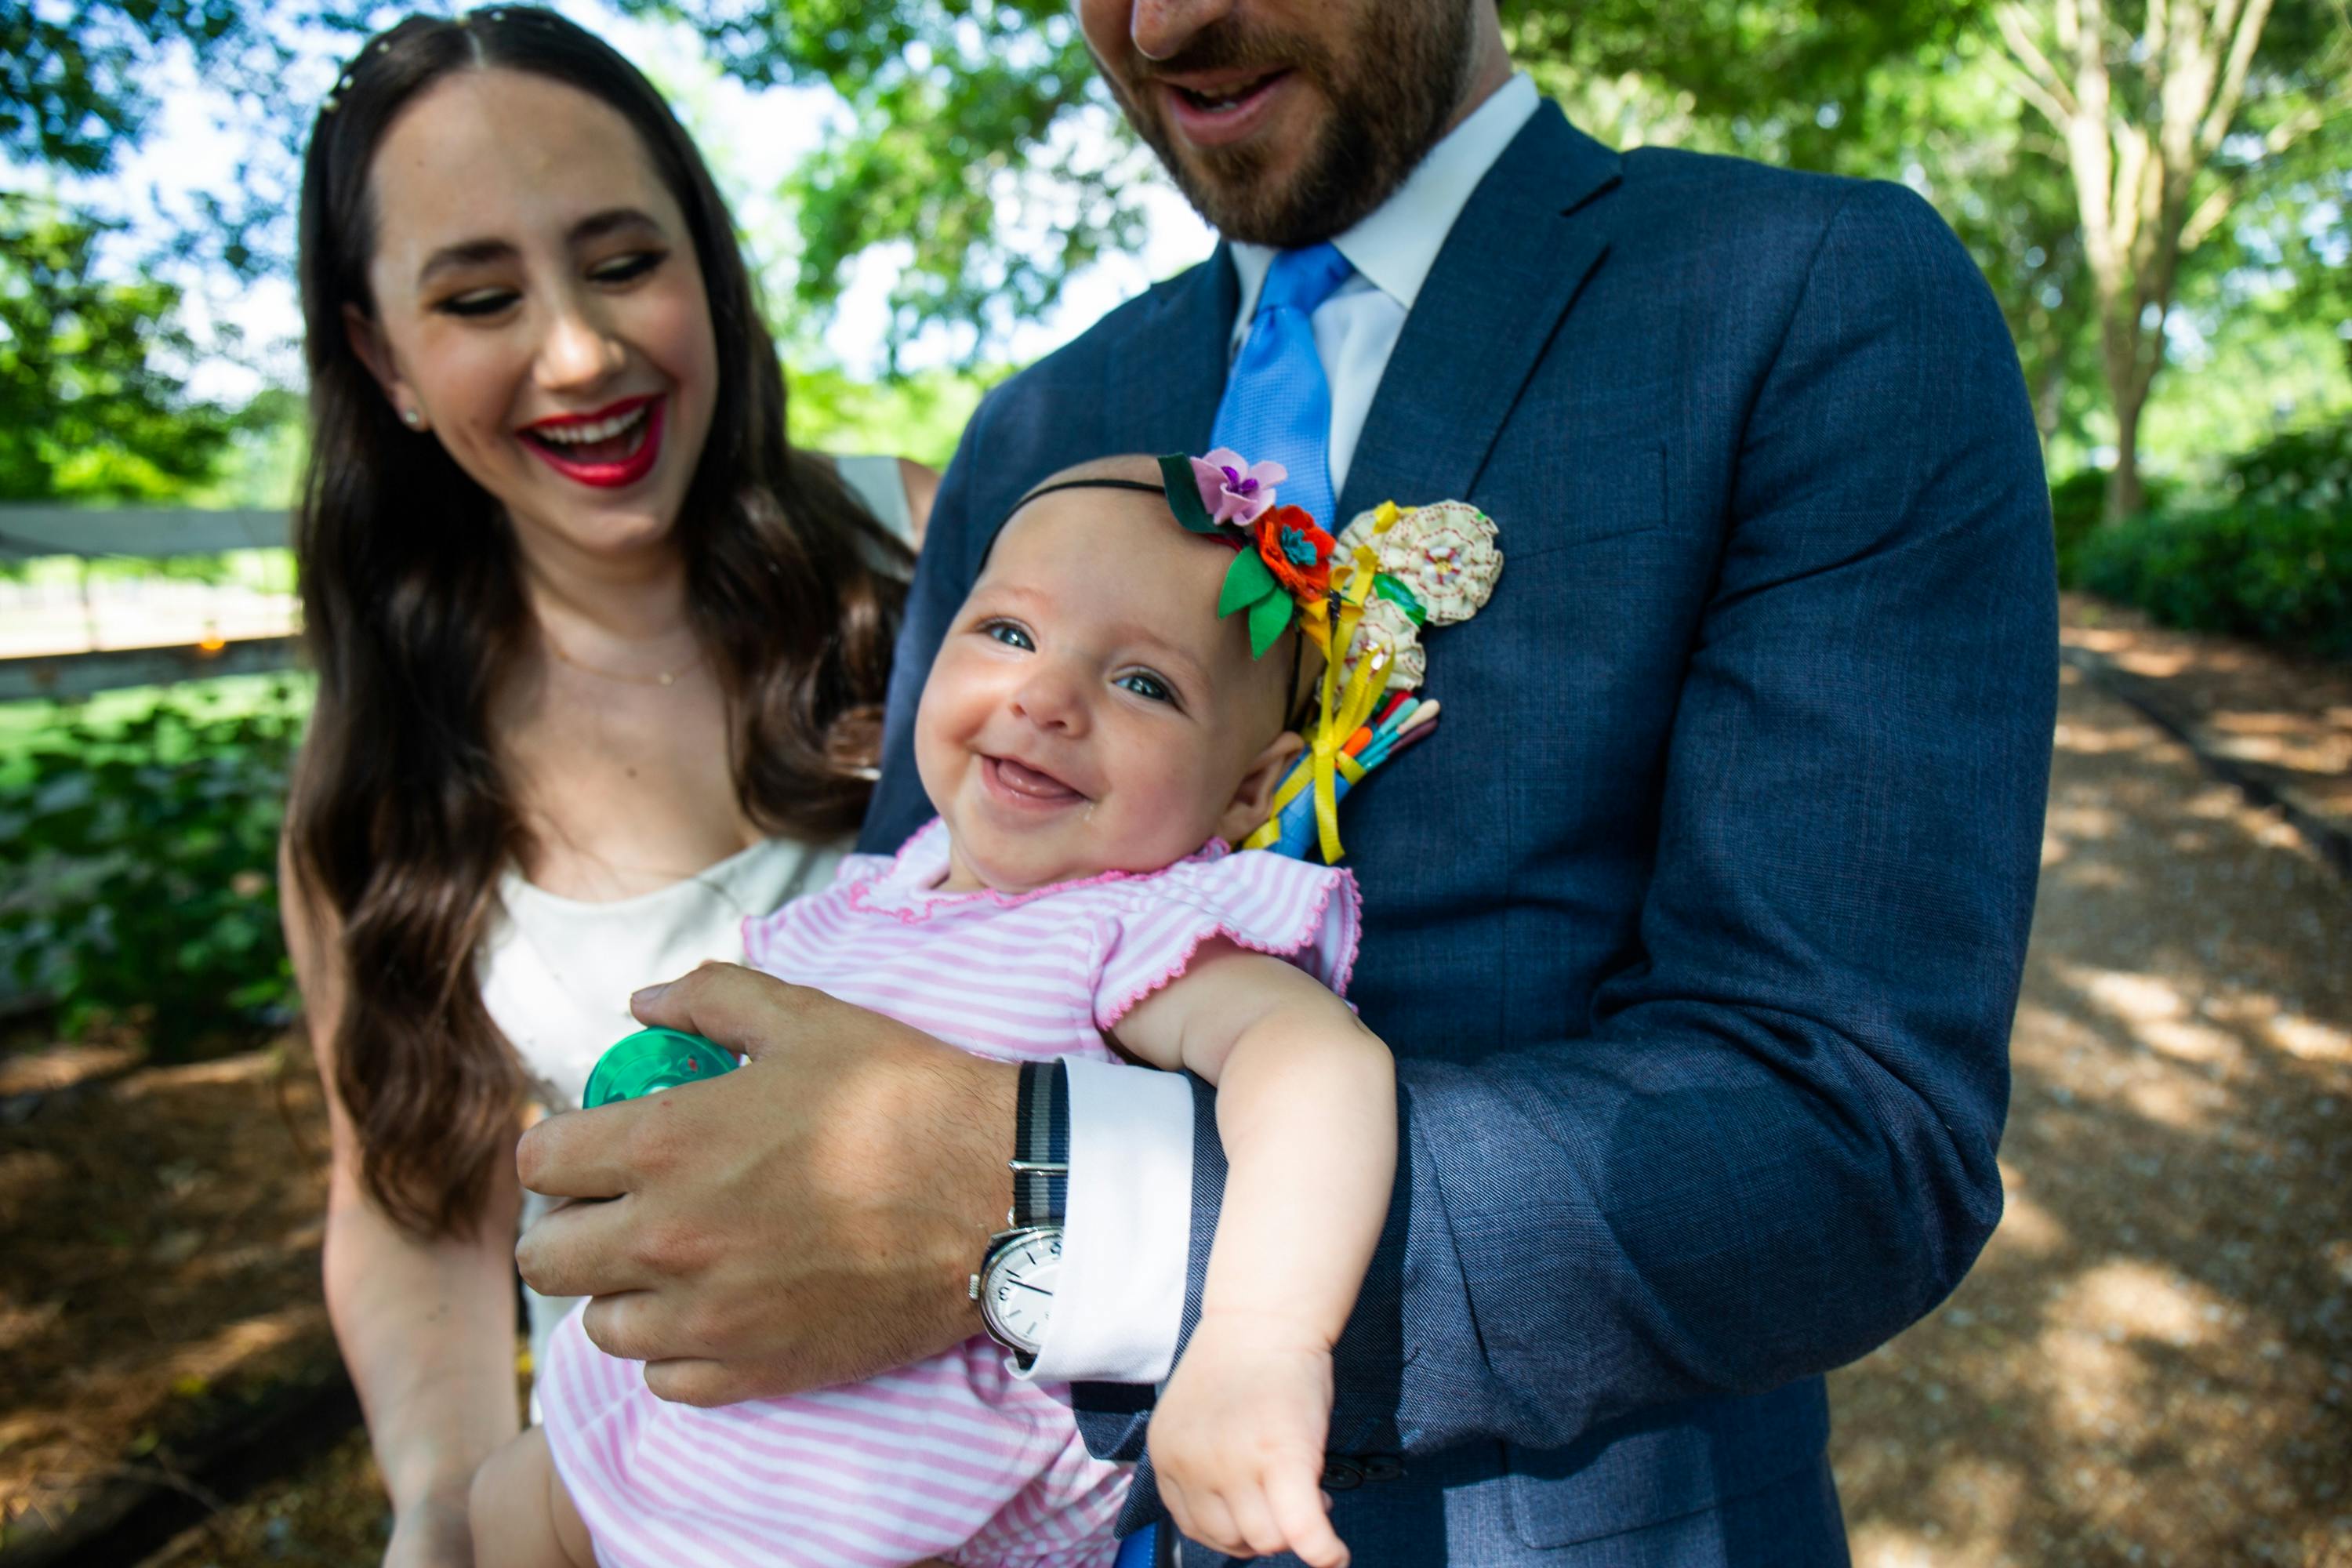
- plus! how I made a matching floral headband for Lauren’s 3 month old Rhea to wear during the ceremony!
I hope you have a beautiful rest of your day and thank you so much for being here!
💖, Katrina
Professional wedding photos by Andrea Behrends
Comments: